
I grew up watching my mom make this dirt pudding recipe for every family gathering, and it never failed to make kids squeal with delight. The combination of crushed Oreos, creamy pudding, and gummy worms is pure magic.
Fast forward to today, and I’m making this same dessert for my own kids’ birthday parties. It’s one of those recipes that looks impressive but comes together in about 15 minutes of actual work.
The best part? You don’t need any fancy equipment or baking skills to pull this off. Just a few simple ingredients and you’ve got a dessert that’ll have everyone asking for seconds.
Why You’ll Love This Dirt Pudding Recipe
This dessert is ridiculously easy to throw together, even on your busiest days. I’ve made it countless times when I’ve needed a last-minute treat for school events or potlucks.
Kids go absolutely wild for the gummy worms peeking out of the “dirt,” and adults love the nostalgic flavor combination. It’s one of those rare desserts that genuinely appeals to every age group.
Here’s what makes this dirt pudding recipe so fantastic:
- No baking required – everything comes together in a bowl
- Make-ahead friendly – tastes even better after sitting in the fridge overnight
- Budget-friendly – uses simple, inexpensive ingredients
- Customizable – swap flavors and toppings to suit your taste
- Kid-approved – my picky eaters devour this every single time
- Perfect for crowds – easily doubles or triples for larger gatherings
You might also enjoy: Chocolate Pudding Recipe
Ingredients
This dirt pudding recipe relies on just a handful of ingredients that you might already have in your pantry. The combination creates that perfect balance of creamy and crunchy textures.
- 1 package (14.3 oz) Oreo cookies, crushed
- 8 oz cream cheese, softened
- 1/4 cup butter, softened
- 1 cup powdered sugar
- 2 packages (3.4 oz each) instant vanilla pudding mix
- 3 1/2 cups cold milk
- 12 oz Cool Whip, thawed
- Gummy worms for decoration
Kitchen Equipment Needed
Having the right tools makes this recipe even easier to prepare. Most of these items are probably already in your kitchen.
- Large mixing bowl
- Electric mixer
- Medium mixing bowl
- Food processor or rolling pin
- 9×13 inch serving dish
- Rubber spatula
- Measuring cups and spoons
Read Also: Vanilla Pudding Recipe
Recommended Products for This Recipe
After making this dirt pudding recipe dozens of times, I’ve discovered a few products that really elevate the final result and make the process smoother.
1. KitchenAid Hand Mixer
A quality hand mixer makes beating the cream cheese mixture completely smooth without any lumps. I’ve used cheaper mixers that struggled with cold cream cheese, but this one powers through effortlessly and gives you that perfectly creamy base layer.
2. Cuisinart Food Processor
Crushing Oreos by hand in a bag works, but a food processor gives you the perfect “dirt” consistency in seconds. You get evenly crushed cookies without any large chunks, and cleanup is incredibly easy.
3. Anchor Hocking Glass Baking Dish
This glass dish showcases the beautiful layers of your dirt pudding perfectly. The clear sides let everyone see the “dirt” layers, and it’s sturdy enough to transport to parties without worrying about spills.
4. Albanese Gummy Worms
These gummy worms are softer and more flavorful than generic brands. They don’t get hard in the refrigerator, which means your dirt pudding stays perfectly enjoyable even after a day or two.
Step-by-Step Instructions
Follow these detailed instructions to create the perfect dirt pudding. I’ve broken down each step so even first-time dessert makers can nail this recipe.
1. Prepare the Oreo “Dirt”
- Remove the Oreos from the package and place them in a food processor
- Pulse until the cookies are finely crushed into a texture that resembles dirt
- If you don’t have a food processor, place the cookies in a sealed plastic bag and crush them with a rolling pin
- Set aside about 1/3 of the crushed Oreos for the top layer
- The remaining 2/3 will be used for layering throughout the dessert
2. Make the Cream Cheese Layer
- In a large mixing bowl, combine the softened cream cheese and butter
- Beat with an electric mixer on medium speed until the mixture is completely smooth and fluffy, about 2-3 minutes
- Add the powdered sugar and continue beating until fully incorporated
- Scrape down the sides of the bowl to ensure everything is evenly mixed
- This layer should be light and airy with no lumps of cream cheese visible
3. Prepare the Pudding Mixture
- In a separate medium bowl, whisk together the instant pudding mix and cold milk
- Beat for about 2 minutes until the pudding starts to thicken
- Let the pudding sit for 5 minutes to fully set up
- The pudding should be thick enough to coat the back of a spoon
4. Combine the Creamy Layers
- Gently fold the Cool Whip into the cream cheese mixture using a rubber spatula
- Use a folding motion rather than stirring to keep the mixture light and airy
- Once combined, fold in the prepared pudding mixture
- Continue folding until everything is fully incorporated and you have a uniform, creamy consistency
- The mixture should be smooth with no streaks of white
Another favorite: Banana Pudding Recipe
5. Layer the Dirt Pudding
- Spread half of the crushed Oreos (the 2/3 portion you set aside) evenly across the bottom of your 9×13 inch dish
- Spoon the cream cheese pudding mixture over the Oreo layer
- Use a spatula to spread it evenly, making sure it reaches all corners of the dish
- Sprinkle the remaining crushed Oreos over the top, covering the entire surface
- Press down gently so the “dirt” adheres to the pudding layer
6. Decorate and Chill
- Arrange gummy worms across the top of the dessert, letting some peek out as if they’re crawling through dirt
- You can even push some worms partially into the pudding for a more realistic effect
- Cover the dish with plastic wrap, making sure it doesn’t touch the top layer
- Refrigerate for at least 4 hours, but preferably overnight for the best texture
- The pudding needs time to set properly and for all the flavors to meld together
Tips for Success
These tips come from years of making this dirt pudding recipe for various occasions. They’ll help you avoid common pitfalls and create the best possible dessert.
- Soften your cream cheese properly – leave it at room temperature for at least 30 minutes to avoid lumps
- Use cold milk for the pudding – this helps it set up faster and creates a better texture
- Don’t overmix – once you add the Cool Whip, fold gently to maintain that light, airy texture
- Crush Oreos finely – larger chunks don’t create the authentic “dirt” appearance
- Let it chill completely – rushing the refrigeration time results in a runny dessert
- Make it ahead – this dessert actually tastes better the next day after the flavors have blended
- Keep gummy worms separate – add them right before serving if you want them to stay soft and chewy
Serving Suggestions
I love getting creative with how I serve this dirt pudding recipe. The presentation can really make this dessert stand out at any gathering.
Here are my favorite ways to serve dirt pudding:
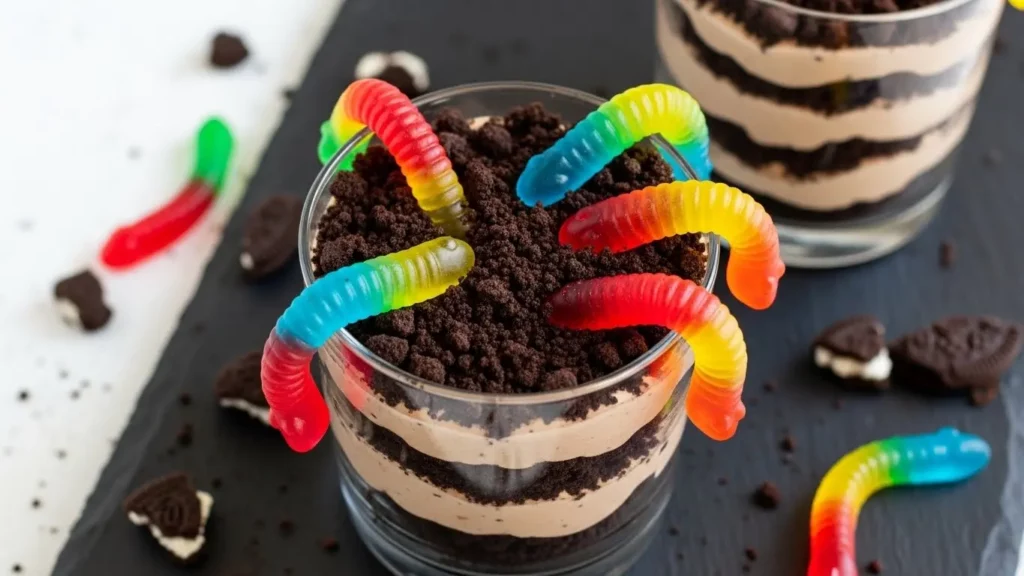
- Individual cups – layer the ingredients in clear plastic cups for personal portions
- Flower pot style – serve in clean terracotta pots with silk flowers for a garden party theme
- Beach theme – add crushed graham crackers on top and use Swedish Fish instead of gummy worms
- Halloween special – add chocolate pudding to make it darker and top with candy pumpkins
- Spring celebration – garnish with fresh mint leaves and colorful fruit salad on the side
- Birthday parties – serve alongside cake pops for a dessert table
- Picnic perfect – keep it chilled in a cooler and pair with potato salad
Variations to Try
Once you’ve mastered the basic dirt pudding recipe, these variations will keep things interesting. I rotate through these versions depending on the season and occasion.
- Chocolate lovers – use chocolate pudding instead of vanilla and chocolate Cool Whip
- Peanut butter twist – add 1/2 cup peanut butter to the cream cheese layer
- Mint chocolate – use mint Oreos and add a few drops of peppermint extract
- Cookie butter version – swirl in 1/3 cup cookie butter with the cream cheese
- Cookies and cream – leave some larger Oreo chunks for extra texture
- Birthday cake flavor – use birthday cake Oreos and add rainbow sprinkles
- S’mores style – layer with graham cracker crumbs and mini marshmallows
Read Also: Brownie Pudding Recipe
Storage and Reheating
Proper storage keeps your dirt pudding fresh and delicious for several days. Here’s how I handle leftovers, though they rarely last long in my house.
- Refrigerator storage – cover tightly with plastic wrap or aluminum foil and store for up to 4 days
- Individual portions – store in airtight containers if you’ve made single servings
- Freezing option – this dessert can be frozen for up to 2 months without the gummy worms
- Thawing instructions – move from freezer to refrigerator 4-6 hours before serving
- Gummy worms – always add these fresh right before serving if storing for later
- Best texture – consume within 2-3 days for optimal creaminess and Oreo texture
Nutritional Facts
Here’s the approximate nutritional information per serving (based on 12 servings):
- Calories: 385
- Total Fat: 18g
- Saturated Fat: 11g
- Cholesterol: 35mg
- Sodium: 425mg
- Total Carbohydrates: 52g
- Dietary Fiber: 1g
- Sugars: 39g
- Protein: 4g
Health Benefits of Key Ingredients
While this dirt pudding recipe is definitely an indulgent treat, some of its ingredients do offer nutritional value. I always believe in understanding what we’re eating.
Dairy products like milk and cream cheese provide calcium and protein that support bone health. The milk in the pudding also contains vitamin D, which helps your body absorb that calcium effectively.
Cocoa in Oreos contains small amounts of antioxidants that can support heart health. Dark chocolate varieties have even more benefits, though traditional Oreos use processed cocoa.
The main nutritional benefits include:
- Calcium – essential for strong bones and teeth
- Protein – helps with muscle repair and growth
- Vitamin A – supports eye health and immune function
- Phosphorus – works with calcium to build healthy bones
- Vitamin D – crucial for calcium absorption and immune health
This pairs beautifully with my rice pudding for a complete dessert spread.
Frequently Asked Questions
1. Can I make dirt pudding without Cool Whip?
Yes, you can substitute homemade whipped cream for Cool Whip in this dirt pudding recipe. Beat 1 1/2 cups of heavy whipping cream with 3 tablespoons of powdered sugar until stiff peaks form, then fold it into the cream cheese mixture just as you would with Cool Whip.
2. How far in advance can I make this dessert?
You can prepare this dirt pudding recipe up to 2 days before serving. In fact, I find it tastes even better when made the night before because the flavors have more time to develop and the Oreos soften slightly into the creamy layers.
3. Can I use different cookies instead of Oreos?
Absolutely! While Oreos are traditional, you can experiment with other chocolate sandwich cookies, chocolate graham crackers, or even chocolate wafer cookies. Each variation will give you a slightly different flavor profile but maintain that signature “dirt” appearance.
4. Why is my cream cheese layer lumpy?
Lumpy cream cheese happens when it’s too cold when you start mixing. Always let your cream cheese sit at room temperature for 30-45 minutes before beginning, and beat it thoroughly with the butter before adding any other ingredients.
5. Can I make individual servings instead of a large pan?
Yes, individual servings work beautifully for this dirt pudding recipe! Layer the ingredients in clear plastic cups, mason jars, or small flower pots. This presentation is perfect for parties and makes portion control much easier.
Final Thoughts
This dirt pudding recipe has been a staple in my dessert rotation for years, and I can’t imagine a birthday party or family gathering without it. The simplicity of preparation combined with the impressive presentation makes it my go-to when I need something special without spending hours in the kitchen.
I hope you’ll give this recipe a try and experience the same joy I see on my kids’ faces every time I serve it. Don’t forget to add those gummy worms for the full effect!
Drop a comment below and let me know how your dirt pudding turned out, or share your favorite variation. I’d love to hear about your experience making this fun dessert!
Recommended:
- Chia Seed Pudding Recipe
- Corn Pudding Recipe
- Yorkshire Pudding Recipe
- Hot Fudge Cake Recipe
- Fudge Brownie Recipe
- Sugar Cookies Recipe
- Peanut Butter Blossom Cookies Recipe
- No Bake Cookie Recipe
- Oatmeal Cookie Recipe
- Snickerdoodle Cookie Recipe


