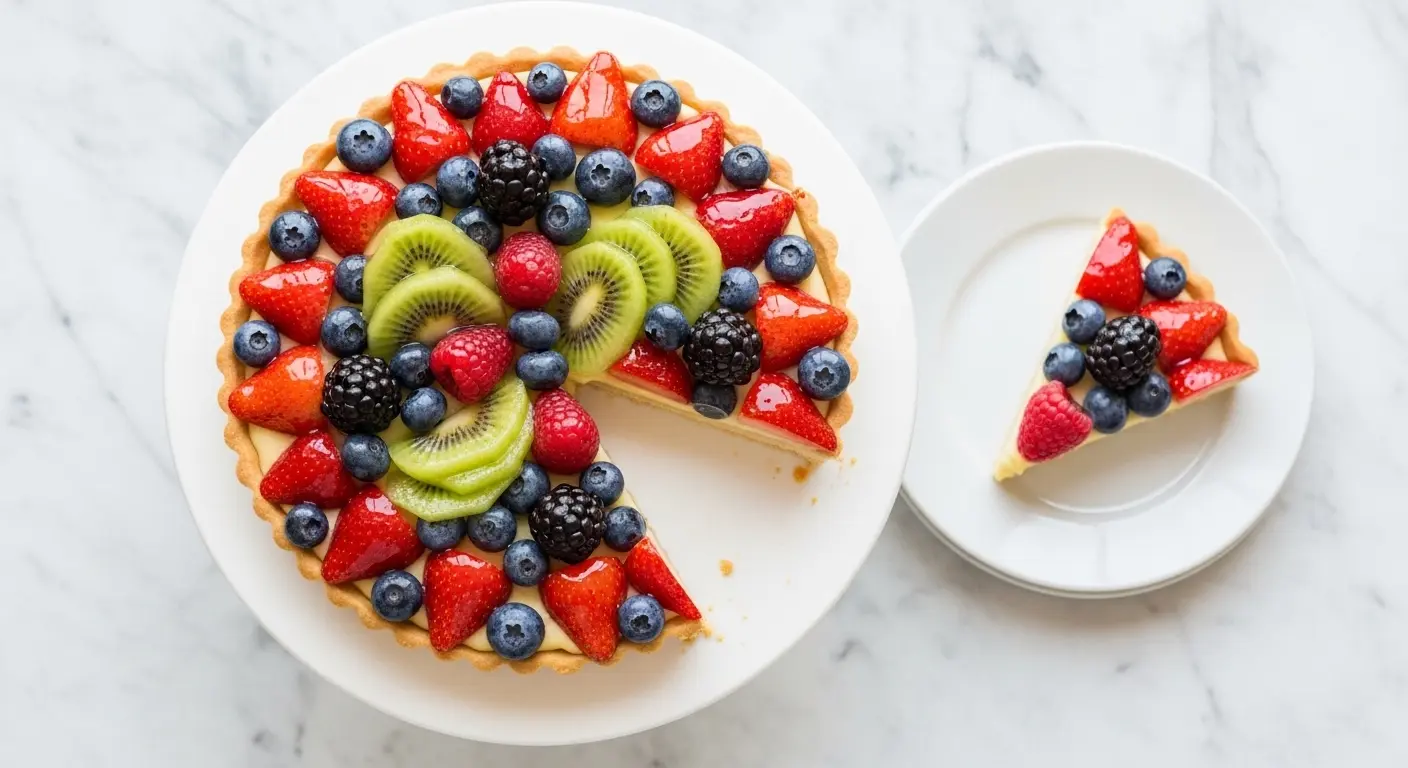
A good fruit tart recipe is the kind of dessert that earns you gasps before anyone even takes a bite. It’s the crown jewel of any dessert table, with its golden, buttery crust, silky vanilla pastry cream, and a mosaic of jewel-toned fresh fruit shimmering under a glossy apricot glaze. And the best part? It’s far more approachable than it looks.
This classic French-style fruit tart comes together with three core components: a crisp pâte sucrée (sweet shortcrust pastry), a rich crème pâtissière (vanilla pastry cream), and an arrangement of fresh fruit finished with a simple fruit glaze. Each layer has a specific job — the shell holds its shape and stays crisp, the pastry cream provides a lush, creamy base, and the fruit adds brightness, color, and a burst of fresh flavor.
What makes this particular recipe so reliable is the technique behind each step. The crust uses cold butter and an egg to create a shortbread-like dough that holds up beautifully even after refrigeration. The pastry cream uses egg yolks and cornstarch as a thickener, which gives it a smooth, sliceable texture without turning rubbery. And the apricot glaze does double duty: it makes everything look gorgeous, and it also seals in the fruit’s freshness so your tart stays beautiful longer.
You might be tempted to skip a step here or there, but trust the process. Every element matters, and once you’ve made this from scratch, you’ll understand exactly why this dessert has been a staple of French patisseries for centuries.
For another stunning dessert that’s just as eye-catching, you might also enjoy making Boston Cream Pie, which also features a gorgeous vanilla custard filling paired with a glossy topping.
Why You’ll Love This Fruit Tart Recipe
This is genuinely one of those show-stopping desserts that looks like it came from a fancy bakery but was made right in your kitchen.
The combination of textures is what makes this tart so irresistible. You get the delicate crunch of the buttery pastry shell, the cool creaminess of the vanilla custard, and the juicy pop of fresh berries all in one bite.
It’s also incredibly customizable. Use whatever fresh fruit is in season, and the tart transforms with the calendar year.
The individual components can all be made in advance, which takes the pressure off when you’re hosting. You can bake the shell a day ahead and make the pastry cream the night before, leaving only the fun part of assembling and decorating for the day of.
It’s naturally a crowd-pleaser for all ages. Kids love the colorful fruit, and adults appreciate the refined flavors of real vanilla custard and buttery shortcrust.
It also photographs beautifully, making it a perfect dessert for celebrations, birthdays, baby showers, and dinner parties.
Here’s a quick summary of what makes this recipe a keeper:
- Buttery, crisp crust that stays firm even after chilling
- Silky vanilla pastry cream made from scratch with egg yolks and real vanilla
- Fresh, colorful fruit that you can mix and match by season
- Shiny apricot glaze that keeps everything looking polished and fresh
- Make-ahead friendly for stress-free entertaining
- No special pastry skills required — just a few simple techniques
Read Also: Easy Creme Brulee Recipe
Ingredients
This recipe makes one 9-inch (23 cm) tart, serving approximately 8 people. The ingredients are divided into three sections for the crust, the pastry cream, and the topping.
Here’s everything you’ll need:
For the Pâte Sucrée (Sweet Tart Crust):
- 1 ½ cups (190g) all-purpose flour
- ¼ cup (30g) powdered (confectioners’) sugar
- ¼ teaspoon fine salt
- ½ cup (115g) unsalted butter, cold and cut into small cubes
- 1 large egg yolk
- 2 tablespoons (30ml) cold heavy cream or ice water
- 1 teaspoon pure vanilla extract
For the Crème Pâtissière (Vanilla Pastry Cream):
- 2 cups (480ml) whole milk
- ½ cup (100g) granulated sugar, divided
- 4 large egg yolks
- 3 tablespoons (24g) cornstarch
- 2 tablespoons (28g) unsalted butter
- 1 ½ teaspoons pure vanilla extract (or 1 vanilla bean, split and scraped)
- Pinch of fine salt
For the Fruit Topping and Glaze:
- 1 cup (150g) fresh strawberries, hulled and sliced
- ½ cup (75g) fresh raspberries
- ½ cup (75g) fresh blueberries
- 1 kiwi, peeled and sliced into half-moons
- ½ cup (75g) fresh blackberries (optional)
- ⅓ cup (100g) apricot jam
- 1 tablespoon (15ml) water
You might also like this Fruit Salad Recipe if you have extra fruit left over from decorating.
Kitchen Equipment Needed
Having the right tools on hand will make the process of making this fruit tart much smoother, especially for the pastry work and the custard.
Here’s what you’ll need:
- 9-inch tart pan with removable bottom — essential for clean removal and presentation
- Food processor or stand mixer — for making the tart dough
- Medium heavy-bottomed saucepan — for cooking the pastry cream
- Heatproof mixing bowls
- Offset spatula — for smoothing the pastry cream evenly
- Pastry brush — for applying the apricot glaze
- Rolling pin
- Plastic wrap
- Fine-mesh sieve or strainer — for straining the pastry cream if needed
- Wire cooling rack
- Sharp paring knife — for slicing the fruit
- Kitchen scale (recommended for accuracy)
- Parchment paper and pie weights or dried beans (for blind baking)
Read Also: Easy Pie Crust Recipe
Recommended Products for This Recipe
These are products I genuinely recommend based on quality, performance, and how much of a difference they make when preparing this tart.
1. 9-Inch Tart Pan with Removable Bottom
A good tart pan is non-negotiable for this recipe. A removable bottom makes it easy to unmold the tart cleanly without breaking the crust, and the fluted edges give your tart that classic professional look. Look for a heavy-gauge steel option for even heat distribution.
2. Pure Vanilla Bean Paste
For the pastry cream, real vanilla makes an enormous difference in flavor. Vanilla bean paste gives you the richness of a whole vanilla bean (complete with those beautiful specks) without the hassle of splitting and scraping pods. It’s a worthwhile upgrade over extract.
3. Premium Apricot Jam (Bonne Maman or Similar)
The apricot glaze is what gives a professional fruit tart its signature shine. A high-quality, fruit-forward apricot jam with minimal additives melts down to a beautiful, clear glaze that doesn’t muddy the colors of your fruit. The flavor is much cleaner and more refined than bargain-brand versions.
4. Pastry Weights (Ceramic Baking Beans)
Proper pie weights ensure your tart shell bakes flat without puffing or shrinking. Ceramic baking weights distribute heat more evenly than dried beans and last indefinitely, making them a smart investment for any home baker.
5. Offset Spatula Set
An offset spatula is hands-down the best tool for spreading pastry cream smoothly into the tart shell. The angled blade lets you work close to the surface without your knuckles getting in the way, giving you a perfectly even, professional finish.
Another elegant dessert to add to your repertoire is this Classic Tiramisu Recipe — rich, refined, and perfect for dinner parties.
Step-by-Step Instructions
1. Make the Pastry Dough (Pâte Sucrée)
- Add the flour, powdered sugar, and salt to the bowl of a food processor. Pulse two or three times just to combine the dry ingredients evenly.
- Add the cold, cubed unsalted butter all at once. Pulse the processor in short bursts — about 8 to 10 pulses — until the mixture resembles coarse breadcrumbs with some pea-sized butter pieces remaining. You’re not looking for a smooth mixture here; those uneven butter pieces are what create the flaky layers.
- In a small bowl, whisk together the egg yolk, cold heavy cream (or ice water), and vanilla extract until combined.
- With the food processor running on low, slowly pour the egg mixture through the feed tube. Continue pulsing just until the dough begins to clump together and pulls away from the sides. Do not over-mix — the dough should look shaggy, not smooth.
- Turn the dough out onto a lightly floured surface and bring it together with your hands. Flatten it into a round disc about 1 inch (2.5 cm) thick. Wrap it tightly in plastic wrap.
- Refrigerate the dough for at least 1 hour, or up to 24 hours. This rest period allows the gluten to relax, making the dough much easier to roll out and preventing it from shrinking in the oven.
2. Roll Out and Shape the Tart Shell
- Remove the chilled dough from the refrigerator and let it sit at room temperature for 5 minutes so it’s pliable enough to roll without cracking.
- On a lightly floured surface, roll the dough into a circle approximately 12 inches (30 cm) in diameter and about ⅛ inch (3mm) thick. Work from the center outward, rotating the dough a quarter turn after each roll to keep it even.
- Gently fold the rolled dough in half, then in half again to make a quarter. Carefully lift it and position it over the center of your 9-inch tart pan. Unfold the dough over the pan.
- Gently press the dough into the bottom and up the sides of the pan, making sure it fits snugly into the fluted edges. Do not stretch the dough — if you stretch it, it will shrink back during baking.
- Use your rolling pin to roll over the top of the pan to trim away any excess dough. The edges should be flush and even.
- Prick the bottom of the dough all over with a fork — this is called “docking” and it prevents air pockets from forming during baking.
- Place the lined tart pan in the freezer for 20 minutes. Freezing it again before baking helps it hold its shape perfectly.
3. Blind Bake the Tart Shell
- While the tart shell is chilling in the freezer, preheat your oven to 375°F (190°C). Position the rack in the center of the oven.
- Remove the frozen tart shell from the freezer. Line the inside of the dough with a piece of parchment paper, making sure it covers the sides too.
- Fill the parchment-lined shell with pie weights, ceramic baking beans, or dried beans. Make sure the weights press up against the sides to keep them upright.
- Bake for 15 minutes. Then carefully remove the parchment paper and weights by lifting the corners of the paper.
- Return the tart shell to the oven (without the weights) and bake for an additional 10 to 12 minutes, until the bottom is golden and no longer looks raw. The edges may deepen slightly in color — that’s fine.
- Transfer the tart pan to a wire rack and allow the shell to cool completely before filling. A warm crust will melt the pastry cream and make the tart soggy.
4. Make the Vanilla Pastry Cream (Crème Pâtissière)
- Pour the whole milk into a medium heavy-bottomed saucepan. Add half of the granulated sugar (¼ cup / 50g) and the pinch of salt. Stir to combine. Place the pan over medium heat and warm until the milk just barely begins to simmer — small bubbles should appear around the edges. Do not let it boil vigorously.
- While the milk is warming, whisk the egg yolks and the remaining ¼ cup (50g) of granulated sugar together in a medium heatproof bowl. Whisk vigorously for about 1 minute until the mixture lightens in color and becomes slightly creamy.
- Add the cornstarch to the egg yolk mixture and whisk until fully combined and there are no lumps. The mixture will become quite thick and pale yellow.
- Now you need to temper the eggs to prevent scrambling. Very slowly pour about ½ cup (120ml) of the hot milk into the egg mixture in a thin, steady stream while whisking constantly. This gradually raises the temperature of the eggs without cooking them.
- Pour the tempered egg mixture back into the saucepan with the remaining hot milk. Whisk everything together to combine.
- Return the saucepan to medium heat and cook the pastry cream, whisking constantly and vigorously. Pay special attention to the bottom and corners of the pan — this is where the cream is most likely to catch and burn. Cook until the mixture thickens noticeably and begins to bubble, about 2 to 3 minutes.
- Once the cream comes to a full boil with large, slow bubbles, cook for exactly 1 minute more while still whisking. This extra minute ensures the cornstarch is fully cooked out and the cream won’t taste starchy.
- Remove the pan from the heat. Add the butter and vanilla extract (or vanilla bean paste). Stir until the butter is fully melted and incorporated.
- For an ultra-smooth pastry cream, strain it through a fine-mesh sieve into a clean bowl, pressing it through with a spatula.
- Press a sheet of plastic wrap directly onto the surface of the pastry cream — this prevents a skin from forming. Refrigerate for at least 2 hours, or until completely cold and set.
5. Prepare the Fresh Fruit
- Wash all fruit gently under cold water (except raspberries and blackberries, which should be kept as dry as possible to prevent bleeding and sogginess). Pat dry thoroughly with paper towels. Any excess moisture on the fruit can make the tart shell soggy.
- Hull the strawberries and slice them vertically into uniform pieces, about ¼ inch (6mm) thick.
- Peel the kiwi and slice into thin half-moon shapes, about ¼ inch (6mm) thick.
- Leave the raspberries, blueberries, and blackberries whole.
- Set the prepared fruit aside at room temperature while you assemble the tart.
6. Assemble the Tart
- Remove the cold pastry cream from the refrigerator. Whisk it vigorously for about 30 seconds to loosen it up and restore its smooth, creamy texture.
- Spoon the pastry cream into the fully cooled tart shell. Use the offset spatula to spread it evenly across the bottom, filling it to about ½ inch (1.2 cm) from the top edge of the crust.
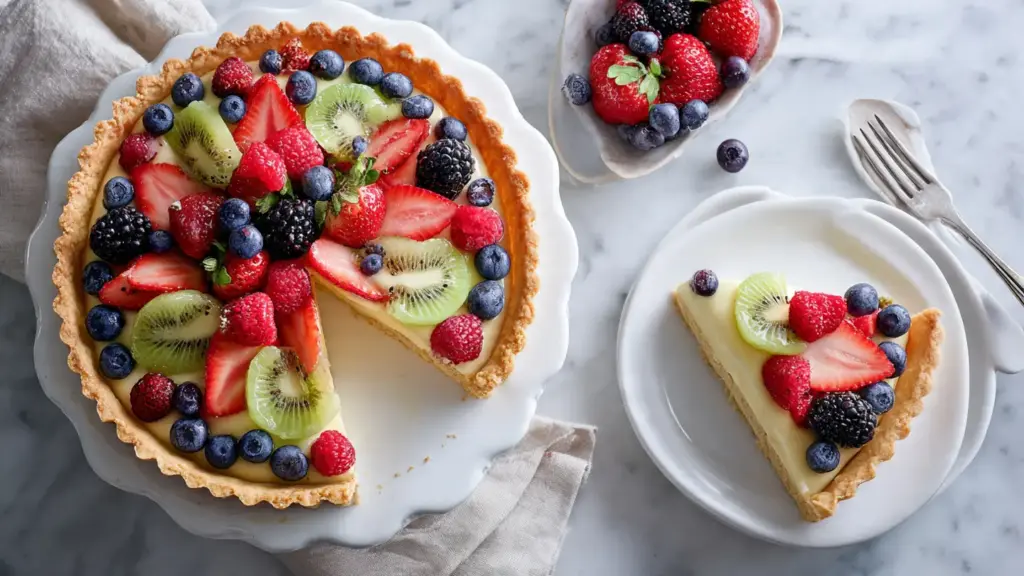
- Now begin arranging the fruit. For a classic look, start from the outer edge and work in concentric circles toward the center. Place sliced strawberries around the outer ring first, then fill in with blueberries, raspberries, kiwi slices, and blackberries. Leave a small gap between different fruit varieties for a clean, structured look.
- For a more relaxed, abundance-style arrangement, pile the fruit generously across the entire surface in a scattered, colorful pattern. Either approach looks stunning.
- Make sure the pastry cream is completely covered with fruit — no bare custard should be visible.
7. Make and Apply the Apricot Glaze
- In a small saucepan, combine the apricot jam and 1 tablespoon (15ml) of water. Heat over medium-low heat, stirring frequently, until the jam is fully melted and fluid. If the glaze is too thick, add another teaspoon of water.
- Remove from heat. If there are any large fruit pieces in the jam, strain it through a fine-mesh sieve for a smooth glaze.
- Using a pastry brush, gently dab and brush the warm glaze over the fruit topping. Use a light touch — you don’t want to displace the fruit. The goal is a thin, even coating that makes everything look shiny and polished.
- Work quickly, as the glaze will begin to set as it cools.
8. Chill and Serve
- Once glazed, place the assembled tart in the refrigerator for at least 30 minutes to allow everything to set before slicing.
- To unmold, place the tart pan on top of a wide can or small bowl. The outer ring will slide down, revealing the clean edges of the tart. Slide the tart onto a serving platter using a thin metal spatula.
- Slice with a sharp knife and serve chilled. The tart is best eaten within a few hours of assembly for the crispest shell.
This pairs wonderfully alongside a scoop of vanilla bean ice cream. You might also enjoy serving it with a freshly baked Classic Apple Pie for a dessert spread at your next gathering.
Tips for Success
Small adjustments make a big difference when it comes to both the texture of the crust and the smoothness of the pastry cream. Keep these tips in mind:
- Keep the dough cold at every stage. Warm butter creates a tough, dense crust instead of a flaky, crumbly one. If the dough softens too much while rolling, pop it back in the freezer for 10 minutes before continuing.
- Don’t skip blind baking. Baking the shell without filling first is what ensures the bottom is fully cooked and crisp. A soggy base is the most common fruit tart problem, and this step prevents it completely.
- Temper the eggs slowly. Adding hot milk to egg yolks too quickly will scramble them. Pour the hot milk in a thin stream while whisking constantly — patience here is everything.
- Stir the pastry cream constantly. Once the cream goes on the heat, never stop whisking. Put the whisk down for even a minute and you risk burning the bottom.
- Chill the pastry cream completely before filling. Warm pastry cream will soften the tart shell and create a soggy tart. Full chilling also helps the cream set to a sliceable, firm texture.
- Choose fruit that holds up well. Berries, kiwi, grapes, and mango are all great choices. Avoid cut bananas and apples, which brown quickly, and watermelon or citrus, which release too much juice and make the shell soggy.
- Assemble as close to serving as possible. For the crispest shell, fill and top the tart no more than 2 to 3 hours before serving.
For a similarly elegant baked dessert that also benefits from careful technique, check out this Baklava Recipe.
Serving Suggestions
This fruit tart is beautiful on its own, but pairing it thoughtfully can turn a simple dessert into a truly memorable spread.
A dusting of powdered sugar just before serving adds a delicate, café-style finish without overwhelming the visual. For a richer dessert experience, serve each slice with a small scoop of vanilla ice cream or a dollop of lightly sweetened whipped cream on the side.
This tart works beautifully as a centerpiece for:
- Afternoon tea — serve with Earl Grey or herbal tea and dainty sandwiches
- Bridal and baby showers — its colorful presentation makes it the ideal celebratory dessert
- Summer dinner parties — light, refreshing, and impressive after a heavy main
- Easter and spring gatherings — the bright colors mirror the season beautifully
- Birthdays — top with numbered candles and fresh flowers for a stunning alternative to cake
- Potlucks and celebrations — it travels well and always draws compliments
You might also enjoy: Easy Scone Recipe as part of an elegant afternoon tea spread alongside this tart.
Variations to Try
The classic version of this recipe is the one most people know and love, but there are plenty of ways to personalize it once you’ve mastered the base.
Here are some delicious variations:
- Mascarpone Cream Filling: Replace the pastry cream with a whipped mascarpone cream made from mascarpone cheese, heavy cream, powdered sugar, and vanilla. It’s quicker to make (no cooking required) and gives you a lighter, less dense filling.
- Lemon Pastry Cream: Add 2 teaspoons of fresh lemon zest and 1 tablespoon of lemon juice to the pastry cream for a bright, citrusy twist that pairs especially well with berries.
- Chocolate-Lined Crust: Before filling with pastry cream, brush the inside of the baked, cooled crust with a thin layer of melted dark chocolate. Let it set in the refrigerator for 10 minutes. This adds a layer of protection against sogginess and a rich chocolate flavor.
- Mini Individual Tarts: Use a mini tart pan or muffin tin to make individual-sized tarts, perfect for parties where you want a no-slice-needed serving option.
- Tropical Fruit Tart: Swap the berries for a tropical arrangement of mango slices, papaya, kiwi, and passion fruit. Use a coconut-infused pastry cream by substituting half the milk with coconut milk.
- Stone Fruit Tart: In summer, top the tart with thin slices of peaches, nectarines, and plums for a stunning seasonal version.
- No-Bake Cream Cheese Filling: For a simplified version, blend softened cream cheese with powdered sugar and vanilla extract for a quick, no-cook filling that still pairs beautifully with fresh fruit.
Read Also: Lemon Cheesecake Recipe
Storage and Reheating
Fruit tarts are at their absolute best eaten within a few hours of assembly, but here’s how to properly store any leftovers:
Follow these storage guidelines:
- Assembled tart (refrigerator): Cover loosely with plastic wrap or store in an airtight container. The assembled tart will keep in the refrigerator for up to 2 days, though the crust will begin to soften after the first day from the moisture of the pastry cream and fruit.
- Tart shell only (room temperature): If you’ve baked the crust but haven’t filled it yet, store it in an airtight container at room temperature for up to 3 days. It also freezes well for up to 1 month, tightly wrapped in plastic and foil.
- Pastry cream only (refrigerator): Cover with plastic wrap pressed directly to the surface and refrigerate for up to 3 days. Whisk vigorously before using to restore its smooth texture.
- Do not freeze an assembled tart. Freezing will cause the fruit to become mushy and release excess liquid, ruining the texture of both the crust and the custard.
- Reheating: This dessert is served cold, not warm, so there’s nothing to reheat. Simply remove it from the refrigerator about 10 to 15 minutes before serving to take the chill off slightly.
For a similarly make-ahead friendly dessert, you’ll love this No Bake Cheesecake Recipe.
Nutritional Facts
The following nutritional information is an approximate estimate per slice, based on dividing the tart into 8 equal servings. Exact values will vary depending on the specific fruit used and the exact quantities of ingredients.
| Nutrient | Per Slice (1/8 of tart) |
|---|---|
| Calories | ~340 kcal |
| Total Fat | 18g |
| Saturated Fat | 10g |
| Cholesterol | 165mg |
| Sodium | 100mg |
| Total Carbohydrates | 39g |
| Dietary Fiber | 2g |
| Total Sugars | 20g |
| Protein | 6g |
| Calcium | 120mg |
| Iron | 1.5mg |
| Vitamin C | 18mg |
These values are estimates only. For precise nutritional data, input your specific brands and quantities into a nutrition calculator.
Another dessert worth the splurge is this Best Carrot Cake Recipe — equally impressive for celebrations.
Health Benefits of Key Ingredients
While this is definitely a treat, some of its core ingredients bring real nutritional value to the table.
Fresh Berries are among the most nutrient-dense foods you can eat. Strawberries, raspberries, and blueberries are all rich in vitamin C, manganese, and fiber. They’re also high in anthocyanins — the compounds responsible for their deep colors — which function as powerful antioxidants that help fight inflammation and oxidative stress.
Kiwi is an unexpected nutritional standout. A single kiwi contains more vitamin C than an orange, making it a fantastic immune-supporting ingredient. It also provides vitamin K, vitamin E, potassium, and folate.
Here’s a closer look at the key nutritional contributors in this tart:
- Egg yolks: A rich source of fat-soluble vitamins including vitamins A, D, E, and K, as well as choline, which supports brain and liver health
- Whole milk: Provides calcium, phosphorus, and riboflavin (vitamin B2) that support bone strength and energy metabolism
- Strawberries: One of the best plant sources of vitamin C, with a single cup providing over 100% of the daily recommended intake
- Blueberries: Known for their exceptional antioxidant content, particularly pterostilbene and anthocyanins, which have been linked to improved cognitive function
- Raspberries: High in dietary fiber (8g per cup), which supports digestive health and helps maintain steady blood sugar levels
- Butter: Provides small amounts of fat-soluble vitamins and the short-chain fatty acid butyrate, which supports gut health when consumed in moderation
For more nourishing recipes with fresh fruit, check out this Easy Acai Bowl Recipe.
Frequently Asked Questions
1. Can I make the fruit tart the night before?
You can absolutely prepare the components the night before — in fact, it’s encouraged. Make the tart shell and pastry cream a day ahead and store them separately in the refrigerator. However, it’s best to assemble the tart (fill the shell and top with fruit) no more than 2 to 3 hours before serving. This keeps the crust crisp and prevents the fruit from releasing juice into the cream.
2. What fruit works best for a fruit tart?
The best fruits for a tart are ones that hold their shape, stay fresh-looking, and don’t release excessive moisture. Berries (strawberries, raspberries, blueberries, blackberries), kiwi, grapes, and mango are all excellent options. Avoid sliced bananas and apples (they brown quickly) and melon or citrus (too much moisture).
3. Why did my tart shell shrink in the oven?
Shrinkage happens when the dough is stretched during rolling or shaping rather than gently pressed into the pan. It also happens when the dough hasn’t been chilled long enough before baking. Make sure to let the dough rest in the refrigerator for at least 1 hour, then freeze the shaped tart shell for at least 20 minutes before blind baking. Never pull or stretch the dough into the pan.
4. How do I prevent a soggy tart crust?
There are a few key strategies for a crust that stays crisp. First, blind bake the shell fully until it’s golden — don’t underbake it. Second, chill the pastry cream completely before filling the shell. Third, don’t fill the tart more than 2 to 3 hours before serving. As an extra precaution, you can brush the inside of the baked shell with a thin layer of melted dark chocolate before filling — this acts as a moisture barrier between the cream and the crust.
5. Can I use a store-bought tart shell?
Yes, you can use a pre-made store-bought tart shell or shortbread crust as a time-saving shortcut. The result won’t be quite as buttery and refined as a homemade pâte sucrée, but it will still taste delicious with the homemade pastry cream and fresh fruit topping. Look for a plain, unflavored sweet tart shell at a well-stocked grocery store or baking supply shop.
For more French-inspired desserts to explore, try this Classic Tiramisu — another make-ahead elegant dessert that’s always a hit.
Final Thoughts
A homemade fruit tart is one of those desserts that genuinely never gets old. Every time it comes to the table, people stop what they’re doing and just stare for a moment — and then immediately ask for the recipe.
The magic is in the balance: the crisp, buttery shell, the cool silk of the vanilla cream, and the brightness of fresh, seasonal fruit all coming together in a single perfect slice.
It does take a little planning, but nothing about it is technically difficult. Break it into two or three stages and it becomes a genuinely enjoyable baking project.
Give this fruit tart recipe a try and see how it transforms your next gathering. Once you’ve made it from scratch, you’ll understand why it’s been a beloved classic for centuries.
If you make this recipe, we’d love to hear how it turned out! Leave a comment below, share a photo, or tag us on social media. Your variations and tips always inspire others in the community.
Recommended:
- Fruit Cocktail Cake Recipe
- Easy Crepe Recipe
- Basic Crepe Recipe
- Blueberry Cheesecake Recipe
- Strawberry Cheesecake Recipe
- Dutch Apple Pie Recipe
- Easy Pecan Pie Recipe
- Key Lime Pie Recipe
- Banana Cream Pie Recipe
- Lemon Meringue Pie Recipe


