If you grew up grabbing handfuls of Keebler Fudge Stripes from the cookie jar, this fudge stripe cookies recipe is about to bring all those nostalgic feelings rushing back in the best possible way.
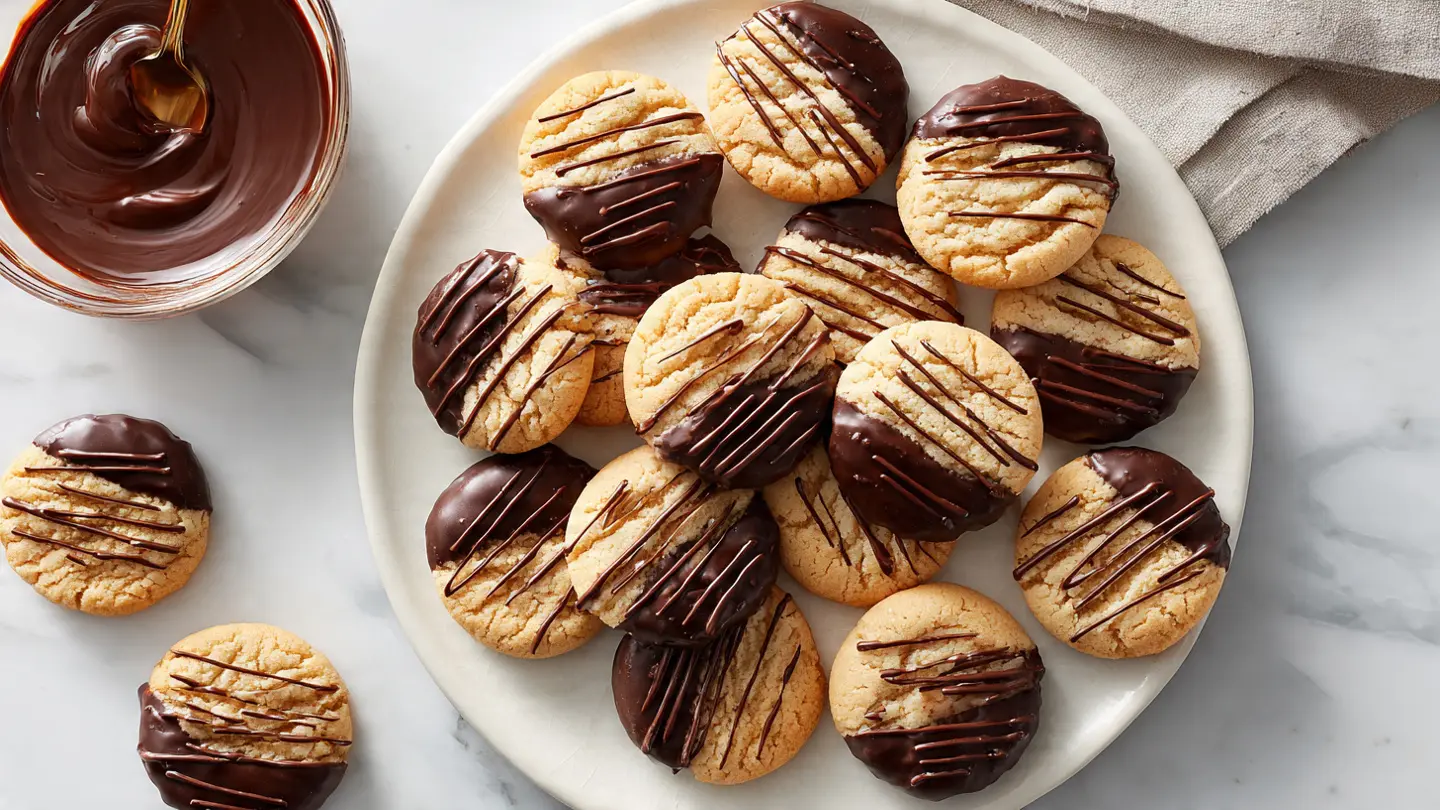
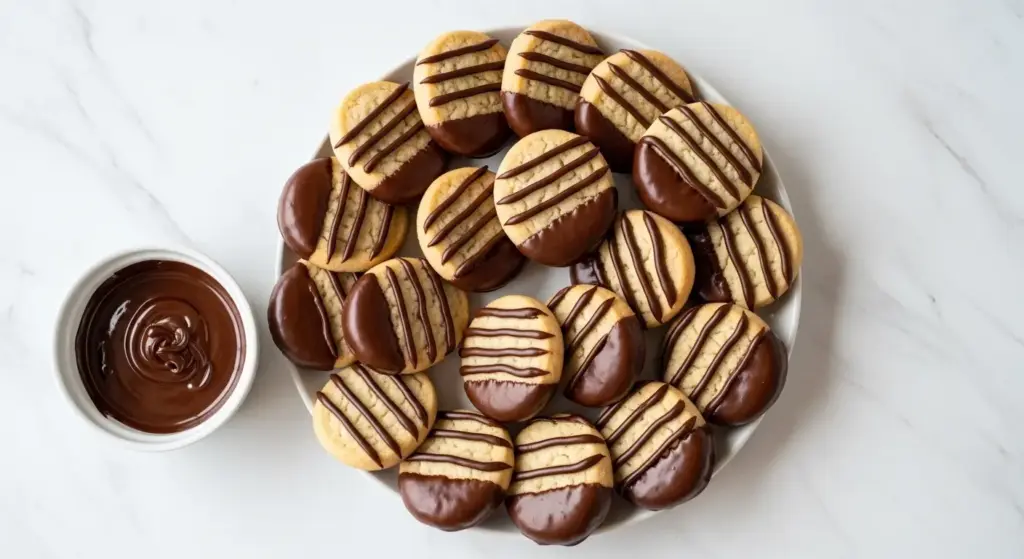
These homemade versions feature crisp, buttery shortbread rounds with a hole punched in the center, chocolate-dipped bottoms, and rich fudge stripes piped across the top. They look bakery-level impressive, but the process is totally approachable even for beginner bakers.
What makes these cookies so irresistible is the balance between the lightly sweet, slightly vanilla-forward shortbread base and the deep, bittersweet chocolate coating.
Cold butter is the secret here. Unlike many cookie recipes that call for softened butter, keeping your butter chilled prevents the dough from spreading too much, maintaining those clean, round edges that make fudge stripe cookies so recognizable.
Whether you’re making these for a cookie exchange, a bake sale, or just because you want something spectacular with your afternoon coffee, this recipe delivers every single time.
You might also enjoy: Fig Cookie Recipe
Why You’ll Love This Fudge Stripe Cookies Recipe
These cookies check every box that a great homemade treat should.
They taste far better than any store-bought version because you control the quality of every single ingredient.
The shortbread base is genuinely buttery and crisp, not chalky or bland like some cookie-aisle knockoffs tend to be.
The chocolate dip on the bottom creates a satisfying snap when you bite in, while the drizzled stripes on top add a second hit of chocolatey richness.
They’re also incredibly fun to make. Rolling the dough, cutting the rings, and piping the stripes feels like a proper baking project without being overwhelming.
- Buttery shortbread base made with simple pantry staples
- Rich chocolate coating on the bottom for that signature snap
- Classic fudge stripes piped across the top for that nostalgic look
- No chilling overnight required — just 30 minutes in the fridge
- Great for gifting, cookie swaps, or holiday trays
- Customizable with dark, milk, or semi-sweet chocolate
For another crispy, butter-forward cookie worth making from scratch, check out this Shortbread Cookie Recipe.
Ingredients
You only need a handful of pantry essentials to pull off these gorgeous cookies. The quality of your butter and chocolate matters most here, since those are the two dominant flavors.
- 1 cup (225g) unsalted butter, cold and cut into cubes — cold butter is key to keeping the dough firm and helping the cookies hold their ring shape
- 1/2 cup (100g) granulated white sugar
- 1 large egg, room temperature
- 1 teaspoon pure vanilla extract
- 1/2 teaspoon baking powder
- 1/4 teaspoon fine salt
- 2 1/4 cups (280g) all-purpose flour, plus more for dusting
- 2 cups (340g) semi-sweet chocolate chips or chopped semi-sweet chocolate — divided, for dipping the bottoms and piping the stripes
- 1 tablespoon vegetable shortening (optional, but helps the chocolate set with a shinier finish and slightly fudgier texture)
- 1 teaspoon light corn syrup (optional, adds the classic “fudge coating” quality you remember from the original)
Read Also: Peanut Butter Blossom Cookies Recipe
Kitchen Equipment Needed
Having the right tools makes the ring-cutting and chocolate-dipping process much smoother. You don’t need anything fancy, but a few key items will make your life easier.
- Stand mixer or hand mixer — for creaming cold butter and sugar efficiently
- Rolling pin — for rolling the dough to an even 1/4-inch thickness
- 3-inch round cookie cutter — for cutting the outer circle of each cookie
- Large piping tip or small round cutter (about 1-inch diameter) — for punching out the center hole
- Parchment paper — essential for rolling, lining baking sheets, and setting the chocolate
- 2-3 rimmed baking sheets — you’ll need multiple sheets for dipping and setting the chocolate at different stages
- Wire cooling rack — for cooling cookies completely before dipping
- Double boiler or microwave-safe bowl — for melting chocolate gently without seizing
- Piping bag or zip-lock bag — for piping the fudge stripes on top
- Offset spatula — helpful for transferring delicate cut-out cookies without distorting their shape
- Kitchen scale — optional but highly recommended for accurate flour measurement
Another favorite: Oatmeal Cookie Recipe
Recommended Products for This Recipe
These are products chosen for quality and performance that genuinely make a difference when baking these cookies.
1. Semi-Sweet Chocolate Baking Bars
High-quality chocolate bars melt more smoothly than chips, which contain stabilizers that can make the chocolate seize or look dull. A good semi-sweet baking bar produces a glossy, snappy chocolate coating that clings beautifully to the bottom of each cookie. The flavor is noticeably richer and more complex than generic chips.
2. OXO Good Grips 3-Piece Cookie Cutter Set
Consistent, sharp-edged cutters are what give fudge stripe cookies their clean, professional look. Dull or flimsy cutters drag the dough and leave ragged edges that show up even more prominently after the chocolate sets. A solid stainless steel set with multiple sizes lets you cut both the outer circle and the center hole with confidence.
3. Nordic Ware Natural Aluminum Baker’s Half Sheet
Thin, dark, or warped baking pans can lead to uneven browning on shortbread cookies. A heavy-gauge aluminum half sheet distributes heat evenly across the pan, which is especially important for a cookie this thin. It also resists warping at high temperatures, so your cookies bake flat and consistent.
4. Piping Bag and Tips Set
Getting those signature fudge stripes requires a steady, controlled flow of melted chocolate. A proper piping bag with a small round tip gives you far more control than a zip-lock bag, especially when the chocolate starts to cool slightly and thicken. Thin, evenly-spaced stripes are what make these cookies look bakery-quality.
5. Parchment Paper Baking Sheets (Pre-Cut)
Pre-cut parchment sheets save time and reduce mess at every stage of this recipe — from rolling the dough between sheets to lining the pans for dipping and setting the chocolate. They also prevent the cookies from sticking and make cleanup dramatically easier.
Read Also: Sugar Cookies Recipe
Step-by-Step Instructions
1. Prepare Your Workspace and Preheat the Oven
- Preheat your oven to 375°F (190°C). This slightly higher temperature helps the cookies develop a light golden color on the bottom while keeping the tops pale, which is exactly what you want for a crisp shortbread-style cookie.
- Line two or three large rimmed baking sheets with parchment paper and set them aside.
- Cut your cold butter into 1/2-inch cubes and place them back in the refrigerator until you are ready to use them. Cold butter is the single most important factor in keeping these cookies from spreading flat and losing their shape.
2. Cream the Butter and Sugar
- Add the cold cubed butter and granulated sugar to the bowl of a stand mixer fitted with the paddle attachment. If using a hand mixer, use a large mixing bowl.
- Beat on medium speed for 2 to 3 minutes, stopping once or twice to scrape down the sides of the bowl. The mixture should come together and look pale and slightly fluffy. Because the butter is cold, it won’t become as light and airy as a traditional creamed butter, and that’s perfectly fine — you want a firmer, more structured dough.
- Do not over-mix at this stage. You are not trying to incorporate air; you are just bringing the fat and sugar together evenly.
3. Add the Wet Ingredients
- Add the egg, vanilla extract, baking powder, and salt to the butter-sugar mixture.
- Beat on medium speed for about 1 minute until everything is fully incorporated. Scrape down the sides and bottom of the bowl to make sure no streaks of butter remain.
- The baking powder is added here rather than with the flour because it distributes more evenly when it goes in with a liquid ingredient. It gives the cookies just a slight lift without making them puffy.
4. Add the Flour
- Turn the mixer to low speed and add the flour in two additions, mixing just until the dough comes together and no dry streaks remain.
- Do not over-mix at this point. Over-working the dough develops gluten, which will make your shortbread cookies tough instead of tender and crisp.
- The dough should be soft but not sticky. If it feels too sticky to handle, add 1 to 2 tablespoons of flour, one at a time, until you reach a workable consistency.
5. Roll and Chill the Dough
- Divide the dough into two equal portions. This makes it easier to roll on a lightly floured surface without the dough becoming too warm.
- Roll each portion between two sheets of parchment paper or on a lightly floured surface to an even 1/4-inch (6mm) thickness. Using parchment paper for rolling prevents sticking and keeps the dough from tearing.
- Slide each sheet of rolled dough onto a flat baking sheet or cutting board and refrigerate for at least 30 minutes. Chilling the rolled-out dough is essential — it firms up the butter again so the cookies cut cleanly and hold their round shape in the oven.
6. Cut Out the Cookies
- Remove one sheet of chilled dough from the refrigerator at a time. Working quickly keeps the dough cold and manageable.
- Using a 3-inch (7.5cm) round cookie cutter, cut out as many circles as possible from the dough, pressing straight down without twisting the cutter. Press the rounds close together to minimize scraps.
- Using the wide end of a large round piping tip (approximately 1 inch / 2.5cm in diameter) or a small round cutter, press straight down into the center of each round to cut out the hole. Remove the small circle of dough from the center. These small circles can be baked separately as mini cookies — they are delicious and a great snack while you wait.
- Carefully transfer the ring-shaped cookies to your prepared baking sheets using an offset spatula, spacing them about 1.5 inches apart. Re-roll the dough scraps once to cut additional cookies.
7. Bake the Cookies
- Bake the cookies in the preheated oven for 10 to 12 minutes, or until the bottoms are just barely turning a light golden color and the tops look set and dry. The cookies will still look slightly underdone in the center when you pull them — that is exactly right. They will firm up as they cool.
- Do not overbake. An overbaked shortbread cookie becomes too hard and loses that delicate melt-in-your-mouth quality that makes fudge stripe cookies so good.
- Let the cookies cool on the baking sheet for 3 to 4 minutes, then transfer them to a wire cooling rack and allow them to cool completely, at least 30 minutes, before adding the chocolate. Any warmth in the cookies will cause the chocolate to melt and slide off.
8. Melt the Chocolate for Dipping
- Reserve about 1/3 of the chocolate for piping the stripes on top. Place the remaining 2/3 of the chocolate in a heatproof bowl.
- Add the shortening (if using) and corn syrup (if using) to the bowl of chocolate. These two ingredients are optional, but they produce a shinier, slightly fudgier coating that is closer to the original Keebler version. Without them, the chocolate will still taste great but may look a little more matte when it sets.
- To melt using a double boiler, set the bowl over a saucepan of barely simmering water (make sure the bottom of the bowl does not touch the water) and stir gently until fully melted and smooth. To melt in the microwave, heat in 30-second intervals at 50% power, stirring between each interval, until smooth. Take your time — overheating chocolate causes it to seize and become grainy.
- Let the melted chocolate cool slightly for 3 to 4 minutes before dipping. Chocolate that is too hot will run off the cookies rather than coating them properly.
9. Dip the Cookie Bottoms
- Line a clean baking sheet with parchment paper and place a wire rack on top of it.
- Hold a cookie by the edges and gently press the flat bottom into the bowl of melted chocolate. Lift it straight up and let any excess chocolate drip off for 5 seconds.
- Place the cookie chocolate-side-up on the prepared wire rack. The parchment paper underneath catches any drips.
- Repeat with all the remaining cookies. If the chocolate starts to thicken and become difficult to dip into, reheat it briefly in 10-second microwave bursts, stirring between each, until it loosens again.
- Transfer the dipped cookies (still on the rack) to the refrigerator and chill for 10 to 15 minutes until the chocolate is fully set.
10. Pipe the Fudge Stripes
- Melt the reserved 1/3 of the chocolate using the same method as before. Let it cool slightly until it is smooth and just barely fluid.
- Transfer the melted chocolate to a piping bag fitted with a small round tip, or to a zip-lock bag with a tiny corner snipped off. The smaller the opening, the thinner and more precise your stripes will be.
- Remove the chilled cookies from the refrigerator. Working with one cookie at a time, pipe 4 to 5 evenly-spaced parallel lines of chocolate across the top of the cookie, moving your hand in a steady, fluid motion.
- Return the striped cookies to the refrigerator for 10 more minutes to allow the stripes to fully set.
- Once the chocolate is completely firm and no longer tacky to the touch, the cookies are ready to serve.
This recipe gives results similar to what you’d find using the method in this Snickerdoodle Cookie Recipe — careful technique produces noticeably better results.
Tips for Success
A few key adjustments will make a significant difference in how these cookies look and taste.
- Keep the butter cold throughout. If your kitchen is warm, pop the dough back into the fridge for 10 minutes if it starts to soften while you are working. Soft dough spreads, sticks, and loses its shape.
- Measure flour accurately. Spoon the flour into your measuring cup and level it off with a flat edge rather than scooping directly from the bag. Scooping compacts the flour and leads to a dry, crumbly dough that cracks when rolled.
- Roll to an even thickness. Uneven dough means some cookies will overbake while others underbake. Use rolling pin guide rings or place two equal-height wooden dowels on either side of the dough to ensure a consistent 1/4-inch thickness across the whole sheet.
- Cool completely before dipping. Even a slightly warm cookie will melt the chocolate on contact and produce a thin, streaky coating instead of a clean, set layer.
- Work fast with the chocolate. Melted chocolate sets quickly, especially in a cool kitchen. Keep a second bowl of warm water nearby to place under your chocolate bowl and slow the setting process if needed.
- Chill between each chocolate step. The refrigerator is your best friend in this recipe. After dipping the bottoms and again after piping the stripes, a quick chill ensures each layer sets fully before the next one goes on.
- Don’t skip the center hole. Beyond the look, the hole serves a practical function: it reduces the total cookie surface area, which helps the cookie bake more evenly and prevents the center from being soft while the edges are crisp.
Read Also: Chewy Oatmeal Chocolate Chip Cookie Recipe
Serving Suggestions
These cookies shine as part of any dessert spread and are just as welcome on a casual snack plate as they are on a holiday cookie tray.
They pair beautifully with a cold glass of whole milk — the bittersweet chocolate dip and creamy milk is a timeless combination that never gets old.
For a simple but elevated dessert, serve them alongside a scoop of vanilla ice cream and a drizzle of warm hot fudge sauce.
- Cookie gift boxes: Layer them between parchment in a festive tin for a homemade gift that feels truly special
- Holiday dessert trays: They look stunning next to other cut-out and chocolate-dipped cookies
- Ice cream sandwiches: Sandwich a small scoop of vanilla or coffee ice cream between two cookies for a dreamy frozen treat
- Cookie dipping platter: Arrange them on a platter alongside a small bowl of warm ganache for an interactive dessert table option
- Hot chocolate pairing: Serve alongside a mug of hot chocolate for the ultimate cozy snack
Variations to Try
Once you’ve mastered the classic version, these fun twists are worth exploring.
- Dark chocolate version: Swap the semi-sweet chocolate for 60-70% dark chocolate for a more intense, less sweet flavor that works beautifully with the buttery base.
- White chocolate fudge stripes: Use white chocolate for the dip and stripes. Add a pinch of sea salt on top while the chocolate is still wet for a sweet-and-salty upgrade.
- Mint chocolate: Stir 1/2 teaspoon of peppermint extract into the melted chocolate before dipping. The mint-chocolate combination with vanilla shortbread is genuinely addictive.
- Espresso chocolate: Add 1 teaspoon of instant espresso powder to the melted dipping chocolate. The coffee deepens the chocolate flavor without making the cookies taste overtly like coffee.
- Sandwich cookies: Fill two cookies with a spoonful of thick chocolate ganache (made from a 2:1 ratio of chocolate to cream) to create an indulgent sandwich cookie version, similar to what you’d find in Sally’s Baking Addiction copycat version.
- Almond flour version: For a gluten-free adaptation, use 2 1/2 cups of fine blanched almond flour in place of the all-purpose flour. The dough will be slightly more delicate but produces a wonderfully nutty, rich shortbread with a slightly different crumb.
- Orange zest dough: Add 1 teaspoon of fresh orange zest to the butter and sugar during the creaming stage. The citrus brightens the vanilla cookie and pairs especially well with dark chocolate.
Another classic cookie to try next: Gingerbread Cookie Recipe
Storage and Reheating
These cookies store well and actually improve slightly after the first day as the shortbread softens just a touch and the chocolate fully sets.
Proper storage keeps them tasting fresh for much longer than you might expect.
- Room temperature: Store in an airtight container at room temperature for up to 4 days. Layer cookies between sheets of parchment paper to prevent the chocolate from scratching or sticking.
- Refrigerator: Store in an airtight container in the fridge for up to 7 to 10 days. The chocolate stays firmer and has a satisfying snap straight from the fridge.
- Freezer: These cookies freeze beautifully. Layer them in a freezer-safe container between sheets of parchment paper and freeze for up to 2 months. Thaw at room temperature for 20 to 30 minutes before serving.
- Reheating: These cookies are not meant to be reheated and are best enjoyed at room temperature or straight from the fridge. If they have been frozen, avoid placing them in a warm oven as the chocolate coating will melt.
- Cookie dough storage: The raw dough (rolled out between parchment sheets) can be refrigerated for up to 2 days or frozen for up to 1 month. Thaw overnight in the fridge before cutting and baking.
Read Also: No Bake Cookie Recipe
Nutritional Facts
Based on approximately 24 cookies per batch. Values are estimates.
| Nutrient | Per Cookie |
|---|---|
| Calories | 175 kcal |
| Total Fat | 10g |
| Saturated Fat | 6g |
| Cholesterol | 25mg |
| Sodium | 55mg |
| Total Carbohydrates | 20g |
| Dietary Fiber | 1g |
| Sugars | 11g |
| Protein | 2g |
Nutritional values will vary depending on the specific brands of chocolate and butter used, as well as the exact size of each cookie.
This recipe pairs well with other indulgent baked treats like this Fudge Brownie Recipe.
Health Benefits of Key Ingredients
While these are undeniably an indulgent treat, several of the key ingredients bring some genuine nutritional value to the table.
Enjoying them as part of a balanced diet means you don’t have to feel guilty about savoring a couple of cookies.
- Dark chocolate / semi-sweet chocolate: Rich in flavonoids, which are plant-based antioxidants that have been linked to improved heart health and reduced inflammation. Dark chocolate also contains iron, magnesium, and zinc.
- Butter: A source of fat-soluble vitamins A, D, E, and K2. When made from grass-fed cows, butter contains conjugated linoleic acid (CLA), a fatty acid associated with metabolic health. Used in moderation, butter adds richness and contributes to the satisfying, sustained energy that fat provides.
- Eggs: One of the most nutrient-dense whole foods available. Eggs provide complete protein, choline (important for brain health), vitamin B12, and selenium.
- Vanilla extract: Pure vanilla extract contains small amounts of B vitamins and antioxidants. Beyond nutrition, vanilla has been associated with mild mood-enhancing properties and is used in aromatherapy for its calming effect.
- All-purpose flour: A source of carbohydrates for energy and a small amount of iron and B vitamins, particularly when enriched.
For another treat that balances indulgence with quality ingredients, try this Chocolate Pudding Recipe.
Frequently Asked Questions
1. Can I use salted butter instead of unsalted butter?
You can, but it is better to use unsalted butter so you can control the total salt content in the recipe. If salted butter is all you have, simply omit the added 1/4 teaspoon of salt from the recipe. The flavor difference is subtle but noticeable — unsalted butter lets the vanilla and chocolate flavors take center stage without any competing saltiness.
2. Why do my cookies spread and lose their ring shape in the oven?
The most likely culprit is butter that was too warm when you made the dough, or dough that was not chilled thoroughly before cutting and baking. Cold butter melts slowly in the oven, giving the structure time to set before the fat fully renders out. Make sure your butter is cold going into the mixer, and always chill the rolled-out dough for at least 30 minutes before cutting.
3. Can I make the dough ahead of time?
Absolutely. The dough can be made, rolled between parchment sheets, and refrigerated for up to 2 days before cutting and baking. You can also freeze the rolled-out dough for up to 1 month — thaw it overnight in the refrigerator before cutting. Alternatively, you can bake and fully cool the cookies (without the chocolate) up to 3 days in advance and add the chocolate coating the day you plan to serve them.
4. What type of chocolate works best for dipping?
Semi-sweet chocolate is the closest match to the original Keebler flavor and produces a coating that is rich without being overly bitter or cloyingly sweet. Chocolate baking bars (rather than chips) melt more smoothly and produce a glossier coating because they don’t contain the stabilizers found in most chocolate chips. If you want to get even closer to the original “fudge” coating texture, add a teaspoon of vegetable shortening and a teaspoon of corn syrup to the melted chocolate before dipping.
5. My chocolate stripes are uneven or bleeding into each other. What went wrong?
A few things can cause this. The chocolate may be too thin and fluid when you pipe it — let the melted chocolate cool for an additional minute or two before loading it into the piping bag. The hole in the piping bag or tip may also be too large. Snip the very tip of a zip-lock bag as small as possible, or use a dedicated small round piping tip (a #2 or #3 tip works perfectly). Finally, make sure the dipped chocolate bottom has fully set in the refrigerator before you pipe the stripes on top, otherwise the weight of the stripes can cause them to slide.
Read Also: Cherry Chip Cookie Recipe
Final Thoughts
This fudge stripe cookies recipe is the kind of baking project that looks impressive on the cookie tray but is genuinely manageable for anyone willing to take it one step at a time.
The shortbread base is simple, the chocolate dipping is fun, and the finished result is something you will be genuinely proud of.
Once you make these at home, it’s hard to go back to the store-bought version — there’s no comparison when it comes to flavor, texture, or the satisfaction of knowing you made them yourself.
Give this recipe a try, and don’t be afraid to experiment with the chocolate type or add a pinch of sea salt on top while the coating is still wet.
If you make these, leave a comment below and let me know how they turned out! Feel free to share a photo — there is nothing better than seeing your beautiful homemade fudge stripe cookies.
Recommended:
- Best Chocolate Chip Cookies Recipe
- Peanut Butter Cookie Recipe
- Monster Cookie Recipe
- Eggnog Cookies Recipe
- Cranberry Shortbread Cookies Recipe
- Almond Shortbread Cookies Recipe
- Lemon Shortbread Cookies Recipe
- Pecan Shortbread Cookies Recipe
- Old Fashioned Chocolate Chip Cookie Recipe
- Cut Out Sugar Cookie Recipe


