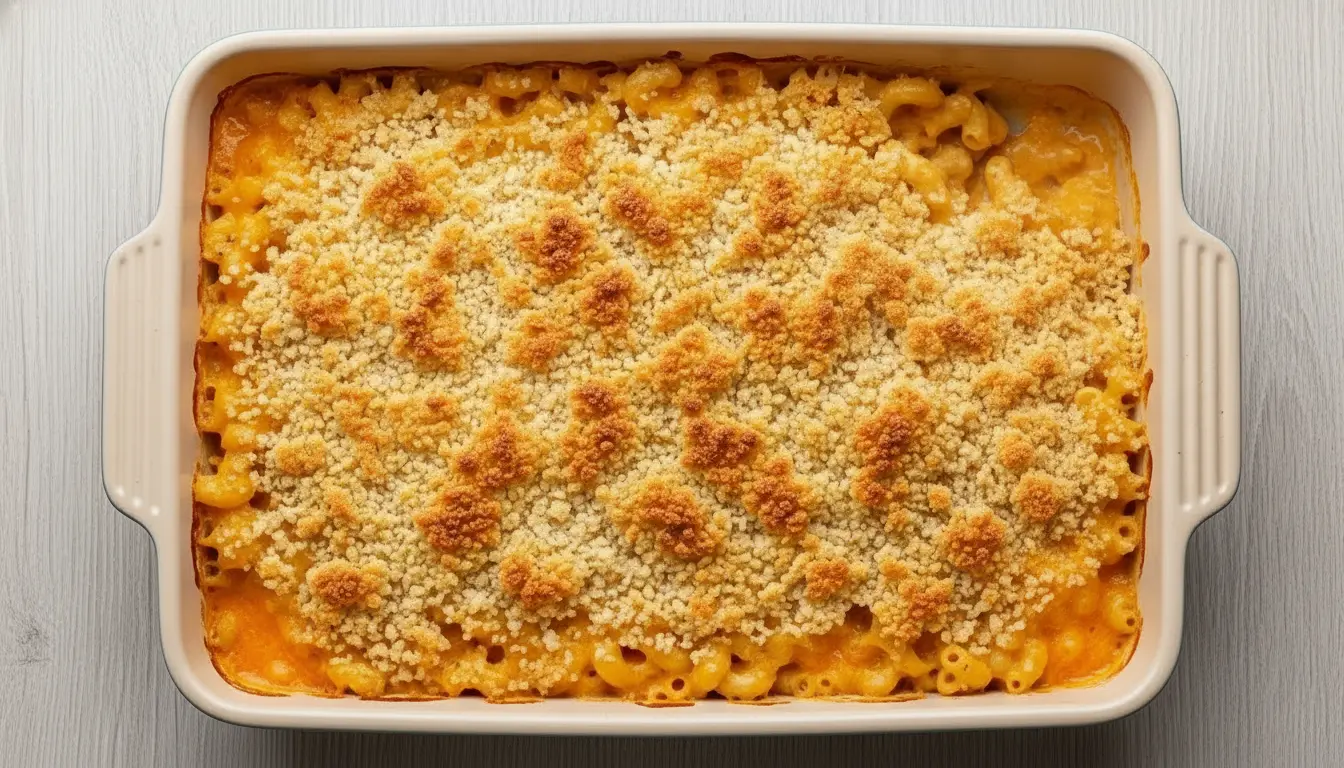
Nothing quite compares to homemade baked mac and cheese recipe fresh from the oven. This classic comfort food combines tender elbow macaroni with a rich, creamy cheese sauce made from scratch, then bakes to golden perfection with a crispy, buttery topping that makes every bite utterly irresistible.
I’ve spent years perfecting this recipe, and the secret is all in the technique. Creating a proper roux ensures your cheese sauce stays silky smooth without any graininess, while undercooking the pasta slightly before baking prevents it from turning mushy in the oven.
The combination of sharp cheddar and Gruyere gives this dish incredible depth of flavor, though you can certainly adjust the cheese blend to suit your preferences. What makes this version truly special is the panko breadcrumb topping mixed with butter and Parmesan, which bakes into a beautiful golden crust that contrasts perfectly with the creamy pasta beneath.
This recipe has become my go-to for family dinners, potlucks, and holiday gatherings. It’s hearty enough to serve as a main dish, though it also works wonderfully as a side alongside roasted meats or grilled vegetables.
The beauty of this baked version is that it stays creamy even after sitting for a while, making it perfect for parties where food needs to hold up on a buffet table. Plus, you can assemble it ahead of time and pop it in the oven just before serving, which takes so much stress out of entertaining.
You might also enjoy: Creamy Mac and Cheese Recipe

Why You’ll Love This Baked Mac and Cheese Recipe
This isn’t just another mac and cheese recipe. The homemade cheese sauce is incredibly smooth and velvety, far superior to anything from a box, and the flavor is so rich and satisfying that both kids and adults request it constantly.
The crispy panko topping adds texture and a slight nuttiness that elevates the entire dish from everyday comfort food to something truly special. Here’s what makes this recipe stand out:
- Restaurant-quality cheese sauce that stays creamy and never separates or turns grainy
- Perfect pasta texture that’s tender but never mushy, even after baking
- Golden, crispy topping made with panko, butter, and Parmesan for incredible crunch
- Customizable cheese blend so you can use your favorite combinations
- Make-ahead friendly for stress-free entertaining and busy weeknights
- Feeds a crowd with generous portions that everyone will love
- Reheats beautifully without drying out or losing that creamy texture
Another favorite: Baked Ziti Recipe
Ingredients
The ingredient list is surprisingly simple for such an impressive dish. You’ll need basic pantry staples combined with quality cheese for the best flavor and texture. Here’s what goes into this incredible baked mac and cheese:
- 1 pound (450g) elbow macaroni
- 6 tablespoons (85g) unsalted butter, divided
- 1/2 cup (60g) all-purpose flour
- 4 cups (960ml) whole milk, at room temperature
- 1 cup (240ml) heavy cream, at room temperature
- 1 teaspoon Dijon mustard
- 1/2 teaspoon garlic powder
- 1/2 teaspoon onion powder
- 1/4 teaspoon cayenne pepper (optional, for a subtle kick)
- 1 teaspoon salt, plus more for pasta water
- 1/2 teaspoon black pepper
- 3 cups (340g) sharp cheddar cheese, freshly shredded
- 2 cups (225g) Gruyere cheese, freshly shredded
- 1 cup (115g) mild cheddar cheese, freshly shredded (for topping)
- 1 1/2 cups (90g) panko breadcrumbs
- 1/2 cup (50g) grated Parmesan cheese
- 1/2 teaspoon paprika
Read Also: Cheesy Potatoes Recipe
Kitchen Equipment Needed
Having the right tools makes preparing this dish so much easier and ensures the best results. Most of these items are kitchen staples you likely already own. Here’s what you’ll need:
- Large pot for boiling pasta
- 9×13-inch baking dish
- Medium saucepan for cheese sauce
- Wire whisk
- Box grater or food processor with shredding attachment
- Measuring cups and spoons
- Wooden spoon or silicone spatula
- Colander for draining pasta
- Small mixing bowl for topping
- Aluminum foil
Recommended Products for This Recipe
These carefully selected products will help you achieve the best possible results with this mac and cheese recipe. Each recommendation is based on performance, quality, and genuine value for home cooks.
1. Le Creuset Enameled Cast Iron Baking Dish
This baking dish distributes heat evenly throughout the cooking process, ensuring your mac and cheese develops that perfect golden crust without any burnt edges. The enameled interior makes cleanup incredibly simple, even with baked-on cheese, and the beautiful design means you can take it straight from oven to table. It’s a worthwhile investment that will serve you well for decades.
2. Premium Gruyere Cheese
Using high-quality Gruyere makes a tremendous difference in the final flavor of this dish. This Swiss cheese melts beautifully and adds a nutty, slightly sweet complexity that elevates the sauce beyond what cheddar alone can achieve. Look for authentic Swiss or French Gruyere for the best results.
3. OXO Good Grips Box Grater
Freshly grated cheese melts so much better than pre-shredded varieties, which contain anti-caking agents that can make your sauce grainy. This sturdy box grater features multiple grating sizes and a non-slip base that keeps it stable while you work. The container catches all the cheese, making the process neat and efficient.
4. Kikkoman Panko Breadcrumbs
Japanese-style panko creates a lighter, crispier topping than regular breadcrumbs. These stay crunchy even after baking and provide that satisfying textural contrast against the creamy pasta. Keep a box in your pantry for breading chicken, topping casseroles, and adding crunch to countless dishes.
5. All-Clad Stainless Steel Saucepan
A quality saucepan with even heat distribution is crucial for making a smooth cheese sauce without scorching. This professional-grade saucepan heats evenly across the bottom and up the sides, preventing hot spots that can cause your roux to burn or your sauce to develop lumps. The heavy bottom and responsive temperature control make it perfect for delicate sauces.
This pairs beautifully with Au Gratin Potatoes for an indulgent meal.
Step-by-Step Instructions
These detailed instructions will walk you through every stage of making perfect baked mac and cheese. Take your time with each step, especially when making the cheese sauce, as rushing can lead to a grainy or separated result.
1. Prepare the Pasta
- Preheat your oven to 350°F (175°C) and position a rack in the center.
- Bring a large pot of water to a rolling boil over high heat.
- Add 2 tablespoons of salt to the boiling water for proper seasoning.
- Add the elbow macaroni and stir immediately to prevent sticking.
- Cook the pasta for 2 minutes less than the package directions recommend (usually about 5-6 minutes total).
- The pasta should be just shy of al dente since it will continue cooking in the oven.
- Drain the pasta thoroughly in a colander and shake out excess water.
- Do not rinse the pasta as the starch helps the sauce adhere better.
- Set the drained pasta aside while you prepare the cheese sauce.
2. Make the Roux
- In a medium saucepan, melt 4 tablespoons of butter over medium heat.
- Let the butter foam and bubble slightly but watch carefully to prevent browning.
- Once the butter is completely melted, add the flour all at once.
- Whisk constantly for 2-3 minutes until the mixture forms a smooth paste.
- The roux should turn a light golden color and have a nutty aroma.
- Continue whisking to cook out the raw flour taste, which is essential for a smooth sauce.
- You’ll see small bubbles forming around the edges, which indicates it’s ready for the milk.
3. Create the Cheese Sauce
- Gradually pour in the whole milk, adding about 1/2 cup at a time while whisking constantly.
- The mixture will thicken immediately as you add the first bit of milk, then gradually thin out.
- Once all the milk is incorporated, add the heavy cream and continue whisking.
- Bring the sauce to a gentle simmer over medium heat, whisking frequently.
- Cook for 5-7 minutes, stirring often, until the sauce thickens enough to coat the back of a spoon.
- Add the Dijon mustard, garlic powder, onion powder, cayenne pepper (if using), salt, and black pepper.
- Stir well to distribute all the seasonings evenly throughout the sauce.
- Reduce the heat to low before adding the cheese to prevent it from becoming grainy.
4. Add the Cheese
- Remove the saucepan from direct heat but keep it on the warm burner.
- Add the shredded sharp cheddar cheese in three batches, stirring until each addition melts completely before adding more.
- Add the Gruyere cheese in the same manner, stirring patiently until smooth.
- The sauce should be glossy and coat the spoon thickly without any visible cheese lumps.
- Taste the sauce and adjust the seasoning if needed, adding more salt or pepper to your preference.
- If the sauce seems too thick, add a splash of milk and stir until you reach the desired consistency.
- Remember the sauce will thicken slightly as it bakes, so it should be a bit looser than you want the final product.
For a lighter option, try: Healthy Broccoli Soup Recipe
5. Combine Pasta and Sauce
- Add the drained pasta to the cheese sauce and stir gently but thoroughly.
- Use a wooden spoon or silicone spatula to fold the pasta into the sauce.
- Make sure every piece of pasta is completely coated with the creamy cheese sauce.
- Work carefully to avoid breaking the pasta pieces as you stir.
- The mixture should look very creamy and slightly loose at this stage.
- Grease your 9×13-inch baking dish with butter or cooking spray to prevent sticking.
- Pour the mac and cheese mixture into the prepared baking dish.
- Use your spatula to spread it evenly, pressing down gently to eliminate air pockets.
- Sprinkle the reserved 1 cup of shredded mild cheddar cheese evenly over the top.
6. Prepare the Topping
- In a small bowl, combine the panko breadcrumbs, grated Parmesan cheese, and paprika.
- Melt the remaining 2 tablespoons of butter in the microwave or on the stovetop.
- Pour the melted butter over the breadcrumb mixture and stir with a fork until evenly distributed.
- The breadcrumbs should look slightly damp and clump together when pressed.
- Sprinkle this mixture evenly over the cheese layer, creating a uniform coating.
- Make sure to spread the topping all the way to the edges for maximum crunch in every serving.
7. Bake to Golden Perfection
- Place the baking dish on the center rack of your preheated oven.
- Bake uncovered for 25-30 minutes, until the sauce is bubbling around the edges.
- The topping should turn golden brown and crispy during this time.
- If the topping browns too quickly, tent the dish loosely with aluminum foil.
- For an extra-crispy top, turn on the broiler for the last 2-3 minutes, watching constantly.
- Remove the dish from the oven when the top is deeply golden and the edges are bubbling vigorously.
- Let the mac and cheese rest for 10 minutes before serving to allow the sauce to set slightly.
- This resting time makes it easier to serve neat portions that hold their shape.
Read Also: Funeral Potatoes Recipe
Tips for Success
These expert tips will help you avoid common pitfalls and create the creamiest, most delicious baked mac and cheese every single time. I’ve learned these through years of making this recipe and testing different techniques.
Here are my most important recommendations:
- Grate your own cheese instead of buying pre-shredded varieties, which contain anti-caking agents that prevent smooth melting and can make your sauce grainy or even gritty.
- Use room temperature dairy by setting your milk and cream out 30 minutes before cooking, as cold liquids take longer to incorporate into the roux and can cause lumps.
- Don’t skip the roux-cooking step because cooking the flour and butter mixture for the full 2-3 minutes eliminates the raw flour taste and ensures a silky sauce.
- Add cheese off the heat to prevent the proteins from seizing up and creating a grainy, separated sauce instead of the smooth texture you want.
- Undercook the pasta by 2 minutes from the package directions since it will continue cooking in the oven and absorbing liquid from the sauce.
- Layer cheese in the middle by adding half the mac and cheese to the dish, sprinkling with extra cheese, then adding the remaining pasta for pockets of melted cheese throughout.
- Let it rest before serving for at least 10 minutes so the sauce thickens slightly and portions hold their shape instead of running all over the plate.
- Use real butter rather than margarine or oil substitutes, as butter contributes essential flavor and helps create the proper sauce consistency.
This technique works wonderfully in Potato Casserole Recipe as well.
Serving Suggestions
This baked mac and cheese is incredibly versatile and pairs beautifully with so many different dishes. The creamy, cheesy flavors complement both simple weeknight meals and elegant holiday spreads.
Serve it as a hearty main course with a simple green salad and crusty bread for a satisfying vegetarian meal. It also shines as a side dish alongside roasted or grilled meats, where the rich cheese sauce balances smoky, savory flavors perfectly.
Here are some of my favorite pairings:
- Air Fryer Chicken Breast for a quick and easy weeknight dinner
- BBQ Pulled Pork Sandwich for the ultimate comfort food feast
- Fried Cabbage to add a lighter vegetable side
- Simple green salad with vinaigrette to cut through the richness
- Garlic Mashed Potatoes for an indulgent carb-loaded spread
- Roasted Brussels sprouts or broccoli for color and nutrition
- Classic Deviled Eggs as an appetizer before the main event
- Cornbread or dinner rolls to soak up every bit of that creamy sauce
For a special occasion, try pairing with Lobster Bisque as an elegant starter.
Variations to Try
Once you’ve mastered the classic recipe, these variations offer exciting ways to change up the flavors and create entirely new dishes from the same basic technique. Each one brings something unique to the table.
Try these delicious twists:
- Bacon Mac and Cheese: Crumble 8 ounces of cooked, crispy bacon and fold it into the cheese sauce before baking for smoky, savory goodness in every bite.
- Buffalo Chicken Mac: Add 2 cups of shredded rotisserie chicken and 1/4 cup buffalo sauce to the cheese mixture, then drizzle with ranch dressing before serving.
- Lobster Mac and Cheese: Fold in 1 pound of cooked lobster meat chunks just before baking for an upscale seafood version perfect for special occasions.
- Jalapeño Popper Mac: Mix in 4 ounces of softened cream cheese, 1/2 cup diced pickled jalapeños, and 6 strips of crumbled bacon for a spicy, tangy twist.
- Four Cheese Mac: Replace the Gruyere with equal parts fontina, mozzarella, and Gouda for a different cheese flavor profile that’s equally delicious.
- Truffle Mac and Cheese: Drizzle 1-2 teaspoons of white truffle oil over the finished dish and top with shaved Parmesan for elegant luxury.
- BBQ Pulled Pork Mac: Layer in 2 cups of leftover pulled pork for a hearty main dish that combines two comfort food classics.
- Veggie-Loaded Mac: Stir in steamed broccoli florets, roasted butternut squash, or sautéed mushrooms to add vegetables and extra nutrition.
Read Also: Cowboy Casserole Recipe
Storage and Reheating
Proper storage ensures your leftover mac and cheese tastes almost as good as when it first came out of the oven. The good news is this recipe holds up better than most thanks to the creamy sauce.
Follow these guidelines for the best results:
- Refrigerate leftovers in an airtight container within 2 hours of cooking to maintain food safety and quality.
- Store for up to 4 days in the refrigerator, though the texture is best within the first 2-3 days.
- Freeze individual portions in freezer-safe containers or bags for up to 3 months, labeling with the date for easy tracking.
- Thaw overnight in the refrigerator rather than at room temperature to prevent bacterial growth.
- Reheat in the oven at 350°F (175°C) for 20-25 minutes covered with foil, adding a splash of milk if it seems dry.
- Microwave single servings on medium power for 1-2 minutes, stirring halfway through and adding a teaspoon of milk if needed.
- Add extra cheese when reheating to refresh the creaminess and bring back that just-baked flavor.
- Avoid reheating multiple times as this can break down the sauce and make the pasta mushy.
This storage method also works perfectly for Tuna Noodle Casserole and similar baked pasta dishes.
Nutritional Facts
Per serving (based on 12 servings):
- Calories: 485
- Total Fat: 28g
- Saturated Fat: 17g
- Cholesterol: 85mg
- Sodium: 520mg
- Total Carbohydrates: 38g
- Dietary Fiber: 2g
- Sugars: 5g
- Protein: 20g
- Calcium: 450mg
- Iron: 1.5mg
Read Also: Breakfast Casserole Recipe
Health Benefits of Key Ingredients
While baked mac and cheese is definitely an indulgent comfort food, several of the main ingredients actually provide important nutrients that contribute to a balanced diet when enjoyed in moderation.
The dairy products in this recipe deliver substantial nutritional value beyond just great taste:
- Cheese provides calcium for strong bones and teeth, with each serving delivering about 40% of your daily calcium needs.
- Milk adds vitamin D which helps your body absorb calcium and supports immune system function.
- Protein-rich ingredients like cheese and milk provide the building blocks your body needs for muscle maintenance and repair.
- Whole milk contains vitamin A which supports eye health and immune function.
- Cheese offers vitamin B12 which is essential for nerve function and red blood cell formation.
- Dairy products provide phosphorus which works alongside calcium to build strong bones and teeth.
- Parmesan cheese is lower in lactose than many other cheeses, making it easier to digest for those with mild lactose sensitivity.
For a vegetable-forward option, try Roasted Cauliflower Soup as a lighter course.
Frequently Asked Questions
1. Can I make this mac and cheese ahead of time?
Absolutely! Assemble the entire dish up to 24 hours in advance, cover tightly with plastic wrap and refrigerate.
Remove it from the fridge 30 minutes before baking to take the chill off, then bake as directed, adding an extra 10-15 minutes to the cooking time since it’s starting cold. This make-ahead method is perfect for holiday gatherings and dinner parties when oven space and time are at a premium.
2. Why is my cheese sauce grainy or separated?
Grainy sauce usually happens when the cheese is added to liquid that’s too hot, causing the proteins to seize and clump. Always remove the pan from heat before adding cheese and add it gradually while stirring constantly.
Using pre-shredded cheese can also cause graininess because of the anti-caking agents. Freshly grating your own cheese ensures the smoothest, creamiest sauce every single time.
3. Can I use different types of pasta?
Yes, though shapes with ridges and curves work best because they grab and hold the cheese sauce. Cavatappi, shells, penne, or campanelle are all excellent choices that provide lots of surface area for the sauce to cling to.
Avoid very small pasta like ditalini or very large pasta like rigatoni, as they don’t create the ideal pasta-to-sauce ratio. Whatever you choose, remember to undercook it slightly since it will continue cooking in the oven.
4. How do I prevent the top from burning?
If your topping is browning too quickly, tent the baking dish loosely with aluminum foil for the remainder of the baking time. You can also position the oven rack one level lower than center to reduce the direct heat on top.
Some ovens run hot, so check on your mac and cheese around the 20-minute mark to gauge how quickly it’s browning. The goal is a deep golden color without any black or burnt spots.
5. Can I freeze unbaked mac and cheese?
Yes, freezing before baking actually works better than freezing after. Assemble the dish completely in a freezer-safe baking dish, cover tightly with plastic wrap and then aluminum foil, and freeze for up to 3 months.
Thaw completely in the refrigerator overnight before baking. Bake as directed, adding 15-20 minutes to the original cooking time to ensure it’s heated through completely.
Read Also: French Toast Casserole Recipe
Homemade Baked Mac and Cheese
Equipment
- Large pot - For boiling pasta
- 9×13-inch baking dish
- Medium saucepan - For cheese sauce
- Wire whisk
- Box grater - Or food processor with shredding attachment
- Measuring cups and spoons
- Wooden spoon or silicone spatula
- Colander - For draining pasta
- Small mixing bowl - For breadcrumb topping
- Aluminum foil - To tent if topping browns too quickly
Ingredients
Pasta
- 1 lb elbow macaroni - 450g
Cheese Sauce
- 4 tbsp unsalted butter - 60g, for the roux
- 1/2 cup all-purpose flour - 60g
- 4 cups whole milk - 960ml, at room temperature
- 1 cup heavy cream - 240ml, at room temperature
- 1 tsp Dijon mustard
- 1/2 tsp garlic powder
- 1/2 tsp onion powder
- 1/4 tsp cayenne pepper - Optional, for a subtle kick
- 1 tsp salt - Plus more for pasta water
- 1/2 tsp black pepper
- 3 cups sharp cheddar cheese - 340g, freshly shredded
- 2 cups Gruyere cheese - 225g, freshly shredded
Topping
- 2 tbsp unsalted butter - 25g, melted
- 1 cup mild cheddar cheese - 115g, freshly shredded
- 1 1/2 cups panko breadcrumbs - 90g
- 1/2 cup Parmesan cheese - 50g, grated
- 1/2 tsp paprika
Instructions
- Preheat oven to 350°F (175°C) and position rack in the center. Bring a large pot of salted water to a boil, add elbow macaroni, and cook for 2 minutes less than package directions (about 5–6 minutes). Drain thoroughly without rinsing and set aside.
- Melt 4 tbsp butter in a medium saucepan over medium heat. Add flour all at once and whisk constantly for 2–3 minutes until the mixture is golden, smooth, and smells nutty.
- Gradually pour in the whole milk, about ½ cup at a time, whisking constantly to prevent lumps. Add the heavy cream, bring to a gentle simmer, and cook 5–7 minutes until the sauce coats the back of a spoon.
- Stir in the Dijon mustard, garlic powder, onion powder, cayenne (if using), salt, and black pepper until evenly combined.
- Reduce heat to low and remove pan from direct heat. Add sharp cheddar and Gruyere in batches, stirring after each addition until completely melted and the sauce is glossy and smooth.
- Fold the drained pasta into the cheese sauce until every piece is fully coated. Pour into a greased 9×13-inch baking dish and spread evenly. Sprinkle the shredded mild cheddar over the top.
- Combine panko, Parmesan, and paprika in a small bowl. Drizzle with 2 tbsp melted butter and stir until the breadcrumbs are evenly coated and slightly clumped. Spread evenly over the cheese layer.
- Bake uncovered for 25–30 minutes until the sauce is bubbling at the edges and the topping is deep golden brown. For extra crunch, broil for the final 2–3 minutes, watching carefully.
- Let the mac and cheese rest for 10 minutes before serving to allow the sauce to set slightly, making it easier to portion cleanly.
Notes
- Grate your own cheese: Pre-shredded cheese contains anti-caking agents that prevent smooth melting and can make the sauce grainy or gritty.
- Room temperature dairy: Set milk and cream out 30 minutes before cooking — cold liquids cause lumps when added to the roux.
- Don’t skip cooking the roux: Whisking for the full 2–3 minutes eliminates the raw flour taste and is key to a silky sauce.
- Add cheese off the heat: High heat causes cheese proteins to seize, resulting in a grainy, separated sauce.
- Undercook the pasta: Cook 2 minutes less than package directions since it continues cooking in the oven and absorbing sauce.
- Cheese layer trick: Add half the pasta to the dish, sprinkle with extra shredded cheese, then add the rest for pockets of melted cheese throughout.
- Topping browning too fast: Tent loosely with aluminum foil and/or move the rack one level lower to reduce direct top heat.
- Make-ahead: Assemble up to 24 hours ahead, refrigerate covered, then bake from cold adding 10–15 extra minutes to bake time.
- Storage: Refrigerate leftovers in an airtight container for up to 4 days, or freeze individual portions for up to 3 months.
- Reheating: Warm in a 350°F oven covered with foil for 20–25 minutes, adding a splash of milk to revive creaminess.
Final Thoughts
This baked mac and cheese recipe has earned its place as a family favorite in my kitchen, and I’m confident it will become one of yours too. The combination of creamy, rich cheese sauce with that irresistibly crispy topping creates the perfect balance of textures and flavors.
I hope you’ll give this recipe a try for your next family dinner, potluck, or holiday gathering. Don’t forget to leave a comment below and let me know how it turned out for you!
Recommended:
- Chicken Casserole Recipe
- Tuna Casserole Recipe
- Lasagna Soup Recipe
- Easy Lasagna Recipe
- Squash Casserole Recipe
- Corn Casserole Recipe
- Classic Chicken Pot Pie Recipe
- Chicken Alfredo Recipe with Jar Sauce
- Homemade Alfredo Sauce Recipe
- Olive Garden Alfredo Sauce Recipe


