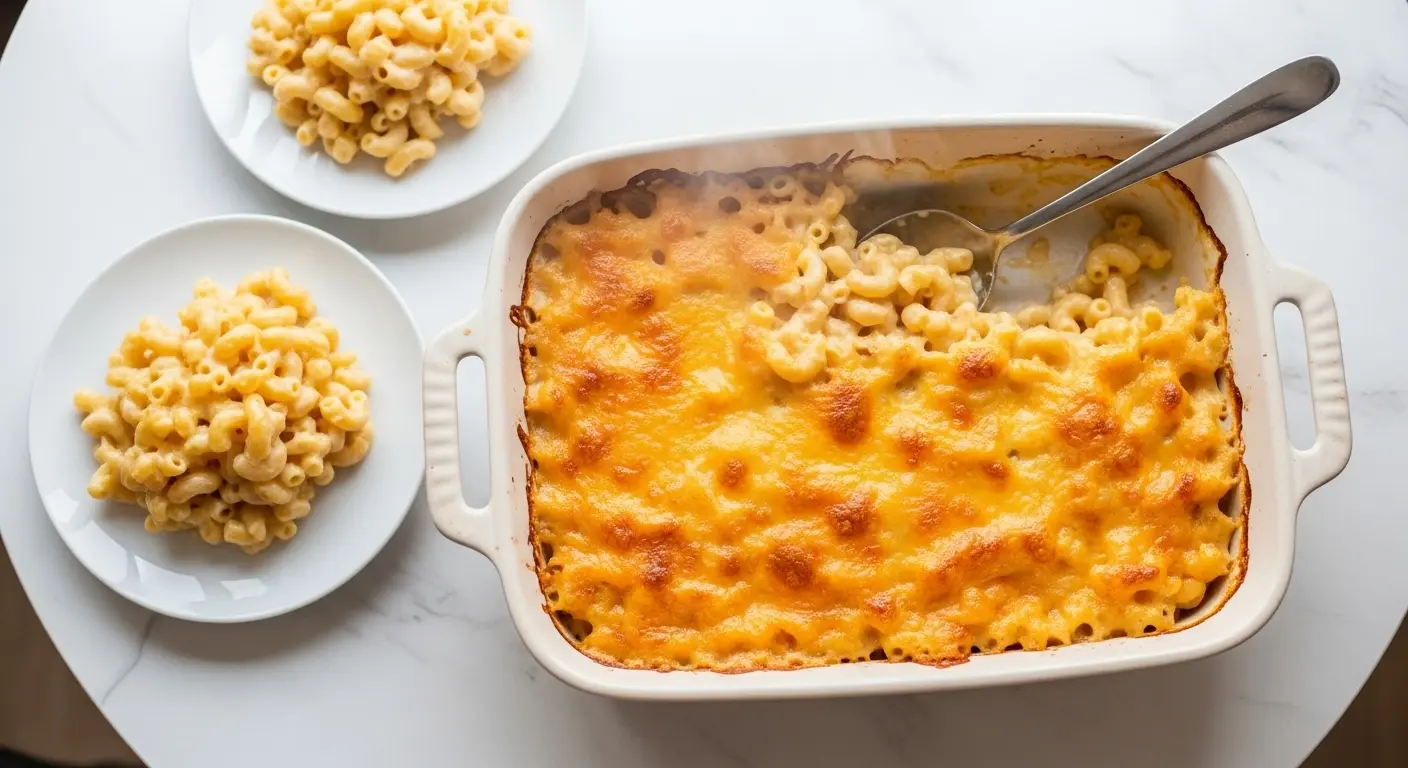
When comfort food calls, nothing answers quite like a bowl of rich, velvety creamy mac and cheese recipe. This isn’t just any pasta dish.
It’s the kind that makes you close your eyes after the first bite, the kind that turns a regular Tuesday into something special. I’ve spent years perfecting this recipe, testing different cheeses, adjusting ratios, and finding that sweet spot between incredibly creamy and perfectly cheesy.
The secret lies in building a proper cheese sauce from scratch using a classic roux method, then enhancing it with a blend of sharp cheddar and cream cheese for that luxurious texture. Unlike boxed versions that can taste artificial, this homemade approach gives you control over every element.
You’ll taste the difference in each forkful. The sauce clings beautifully to every noodle, creating that ideal cheese-to-pasta ratio we all crave.
This recipe works beautifully as a main course for busy weeknights or as a crowd-pleasing side dish for gatherings. The best part is that it comes together in about 30 minutes with simple, accessible ingredients.
No fancy techniques required, just good quality cheese and a little patience while the sauce thickens. Once you master this base recipe, you’ll find yourself making it again and again, maybe adding your own twists along the way.
For another comforting pasta dish, you might enjoy baked ziti with its layers of cheese and sauce.

Why You’ll Love This Creamy Mac and Cheese Recipe
This recipe solves every mac and cheese problem you’ve ever encountered. The sauce stays silky smooth without becoming grainy or separated, thanks to the proper roux technique and the addition of cream cheese.
Unlike some recipes that turn dry after sitting for a few minutes, this one maintains its creamy consistency. The combination of sharp cheddar and cream cheese creates depth of flavor while keeping everything luxuriously smooth.
- Foolproof technique: The roux method ensures your sauce thickens perfectly every time without lumps or graininess
- Restaurant-quality results: Tastes like something you’d order at a upscale comfort food restaurant, but costs a fraction of the price
- Customizable base: Works as a foundation for endless variations, from adding bacon to incorporating different vegetables
- Kid-approved: Even picky eaters devour this version, making it perfect for family dinners
- Make-ahead friendly: You can prepare components in advance and finish right before serving
- Scales easily: Double or triple the recipe for potlucks and gatherings without any issues
Another favorite comfort food option is classic chicken parmesan.
Ingredients
The magic of this recipe starts with choosing high-quality ingredients that work together to create that signature creaminess. Freshly shredded cheese melts far better than pre-shredded varieties because it doesn’t contain anti-caking agents that can make your sauce grainy.
For the Pasta:
- 1 pound (450g) elbow macaroni or other short pasta
- 1 tablespoon salt for pasta water
For the Cheese Sauce:
- 4 tablespoons (56g) unsalted butter
- 1/4 cup (30g) all-purpose flour
- 2 cups (480ml) whole milk, warmed
- 1 cup (240ml) heavy cream
- 4 cups (450g) sharp cheddar cheese, freshly shredded
- 4 ounces (115g) cream cheese, softened and cut into cubes
- 1/2 cup (50g) Parmesan cheese, freshly grated
- 1 teaspoon Dijon mustard
- 1/2 teaspoon garlic powder
- 1/2 teaspoon onion powder
- 1/2 teaspoon salt (adjust to taste)
- 1/4 teaspoon black pepper
- Pinch of nutmeg (optional but recommended)
If you enjoy creamy dishes, try homemade alfredo sauce for another indulgent pasta option.
Kitchen Equipment Needed
Having the right tools makes this recipe come together smoothly and helps you achieve professional results. A heavy-bottomed pot distributes heat evenly, preventing hot spots that can cause your sauce to burn or stick.
- Large pot (at least 6 quarts) for boiling pasta
- Heavy-bottomed saucepan or Dutch oven (4 quarts) for the sauce
- Whisk for creating smooth sauce
- Box grater for shredding cheese
- Colander for draining pasta
- Wooden spoon for mixing
- Measuring cups and spoons
- 9×13 inch baking dish (if baking)
You might also enjoy: Easy Lasagna Recipe
Recommended Products for This Recipe
These carefully selected products will help you achieve the best possible results with this creamy mac and cheese. Quality equipment and ingredients make a noticeable difference in the final texture and flavor.
1. Le Creuset Enameled Cast Iron Dutch Oven
This Dutch oven distributes heat evenly throughout the cooking process, ensuring your cheese sauce develops properly without any scorching on the bottom. The enameled surface makes cleanup effortless, even with baked-on cheese. It’s an investment piece that will serve you well for decades of mac and cheese making.
2. Tillamook Sharp Cheddar Cheese
This cheese melts beautifully and provides the perfect balance of sharp flavor without being overwhelming. The quality makes a significant difference in achieving that smooth, creamy sauce. It’s consistently reliable for creating mac and cheese that tastes like you spent hours perfecting it.
3. OXO Good Grips Box Grater
Freshly grated cheese is essential for the smoothest sauce possible. This grater makes quick work of shredding cheese while the non-slip base keeps it stable on your counter. The different grating sizes also come in handy for the Parmesan topping.
4. Premium Heavy Cream
Using high-quality heavy cream creates that luxurious, velvety texture that defines truly exceptional mac and cheese. The extra fat content ensures your sauce stays smooth and creamy even after reheating. It’s worth choosing organic or grass-fed cream if available.
This pairs wonderfully with garlic mashed potatoes for a comforting meal.
Step-by-Step Instructions
These detailed instructions will guide you through creating perfectly creamy mac and cheese every single time. Take your time with the sauce-making process for the best results.
1. Prepare the Pasta
- Fill your large pot with water and add 1 tablespoon of salt
- Bring the water to a rolling boil over high heat
- Add the elbow macaroni and stir immediately to prevent sticking
- Cook the pasta for 1-2 minutes less than the package directions suggest (it should be slightly firm when you bite it)
- Reserve 1 cup of the starchy pasta water before draining (this can help adjust sauce consistency later if needed)
- Drain the pasta in a colander and rinse very briefly with cool water to stop the cooking process
- Set the drained pasta aside while you prepare the cheese sauce
2. Create the Roux
- In your heavy-bottomed saucepan, melt the butter over medium heat until it’s completely liquified and just starting to foam
- Sprinkle the flour evenly over the melted butter
- Whisk the mixture continuously for 2-3 minutes until it forms a smooth paste and turns a light golden color (this is your roux)
- The mixture should smell slightly nutty but not burned (if it starts to brown too quickly, reduce your heat slightly)
- Continue whisking to cook out the raw flour taste, which is essential for a smooth-tasting sauce
3. Add the Liquids
- Warm your milk in the microwave for about 1 minute (this prevents the sauce from seizing when you add it to the hot roux)
- Pour the warm milk into the roux in a slow, steady stream while whisking constantly
- Continue whisking vigorously to prevent any lumps from forming
- Add the heavy cream and keep whisking until everything is fully incorporated
- Increase the heat to medium-high and bring the mixture to a gentle simmer while stirring frequently
- Cook for 5-7 minutes, whisking every 30 seconds, until the sauce thickens enough to coat the back of a spoon
- The sauce should have a consistency similar to thick gravy at this point
4. Incorporate the Cheeses
- Reduce the heat to low (this is crucial because high heat can cause the cheese to become grainy or oily)
- Add the cubed cream cheese to the sauce and whisk until completely melted and smooth
- Add the shredded cheddar cheese one handful at a time, whisking after each addition until fully melted before adding more
- Stir in the grated Parmesan cheese and whisk until incorporated
- Add the Dijon mustard, garlic powder, onion powder, salt, pepper, and nutmeg
- Taste the sauce and adjust the seasonings as needed (remember that the pasta will dilute the flavor slightly)
- The sauce should be glossy, smooth, and luxuriously creamy with no visible cheese chunks
5. Combine Pasta and Sauce
- Add the drained pasta to the cheese sauce
- Using a wooden spoon or spatula, fold the pasta into the sauce gently but thoroughly
- Make sure every piece of pasta is coated with the creamy cheese sauce
- If the sauce seems too thick, add a splash of the reserved pasta water and stir until you reach your desired consistency
- Let the mixture sit for 2-3 minutes off the heat to allow the pasta to absorb some of the sauce
- The mac and cheese is now ready to serve immediately, or you can proceed to the optional baking step
6. Optional Baking Step
- Preheat your oven to 350°F (175°C)
- Pour the mac and cheese into a greased 9×13 inch baking dish
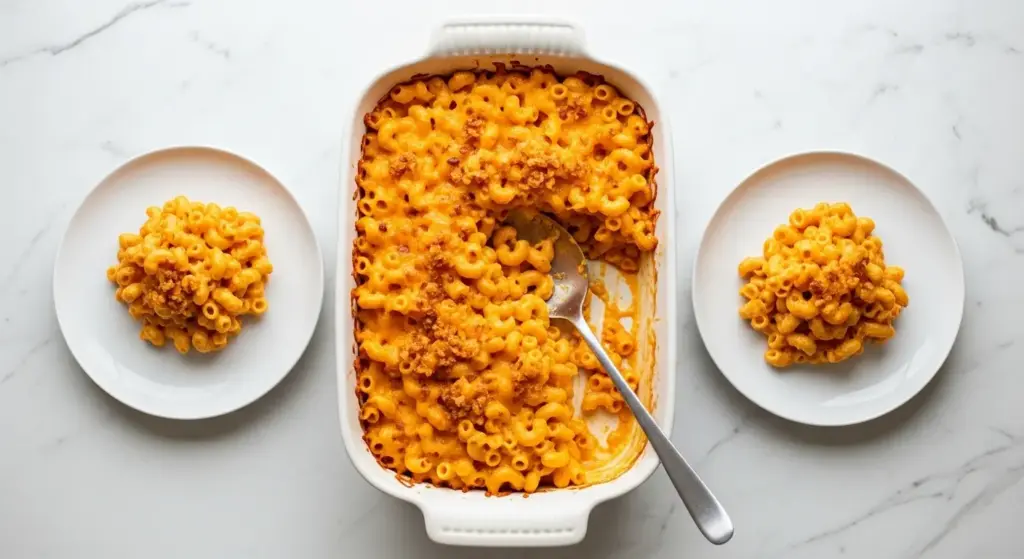
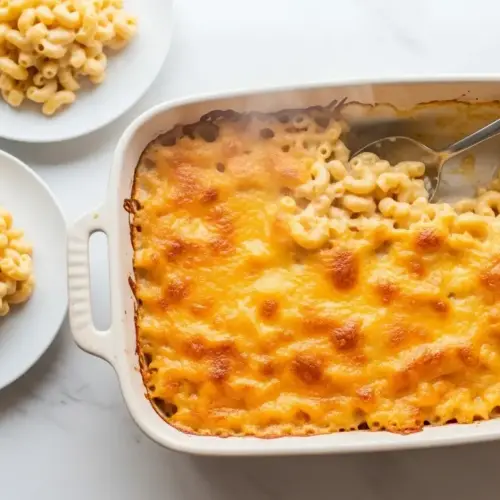
- Sprinkle an additional 1 cup of shredded cheddar cheese over the top for a golden, bubbly crust
- For extra texture, you can mix 1/2 cup of panko breadcrumbs with 2 tablespoons of melted butter and sprinkle over the cheese
- Bake uncovered for 20-25 minutes until the top is golden brown and the edges are bubbling
- Let it rest for 5 minutes before serving to allow the sauce to set slightly
For a complete comfort food menu, serve alongside classic chicken pot pie.
Tips for Success
These professional tips will help you avoid common pitfalls and achieve restaurant-quality results every time. Small details make a big difference in the final outcome.
- Shred your own cheese: Pre-shredded cheese contains cellulose to prevent clumping, which interferes with melting and creates a grainy texture instead of smooth creaminess
- Control your heat: Always melt cheese over low heat to prevent it from breaking and becoming greasy or grainy
- Warm the milk: Adding cold milk to a hot roux can cause lumps and uneven thickening, so always warm it first
- Don’t overcook the pasta: Slightly undercooked pasta will continue cooking in the hot cheese sauce and finish perfectly
- Use quality cheese: The cheese is the star of this dish, so choose a good sharp cheddar that melts well and has rich flavor
- Add mustard: A teaspoon of Dijon mustard helps emulsify the cheese and adds subtle depth without making the dish taste like mustard
- Adjust consistency: If your sauce is too thick, thin it with reserved pasta water; if it’s too thin, let it simmer a bit longer
- Taste and season: Always taste your sauce before combining it with the pasta and adjust the salt and pepper to your preference
Read Also: Olive Garden Alfredo Sauce Recipe
Serving Suggestions
This creamy mac and cheese shines on its own, but it also pairs beautifully with a variety of dishes to create a complete meal. The rich, cheesy flavors complement both lighter and heartier options.
Consider serving it alongside crispy air fryer chicken wings for a casual dinner that everyone will love. The combination of creamy pasta and crispy chicken creates a satisfying contrast in textures.
- Serve with air fryer bacon crumbled on top for added smoky flavor and crispy texture
- Pair with roasted carrot soup as a starter for a complete comfort meal
- Add air fryer chicken breast sliced on top for extra protein
- Serve alongside creamy coleslaw to cut through the richness
- Pair with fried cabbage for a Southern-inspired dinner
- Top with air fryer bacon wrapped jalapeño poppers for a spicy kick
Another great pairing: Classic Sloppy Joe
Variations to Try
Once you’ve mastered the classic version, these creative variations will keep your mac and cheese exciting and allow you to customize it for different preferences and occasions. Each variation builds on the base recipe with just a few simple additions.
- Lobster mac and cheese: Fold in 1 pound of cooked lobster meat, cut into chunks, and add a tablespoon of Old Bay seasoning to the sauce
- Buffalo chicken mac and cheese: Stir in 2 cups of shredded rotisserie chicken and 1/2 cup of buffalo sauce, then top with blue cheese crumbles
- Bacon and jalapeño: Add 8 strips of crumbled cooked bacon and 2 diced jalapeños to the finished mac and cheese
- Four cheese: Use a combination of cheddar, Gruyere, fontina, and Parmesan for complex, sophisticated flavor
- Truffle mac and cheese: Drizzle with 1-2 teaspoons of truffle oil just before serving and top with crispy prosciutto
- Vegetable-loaded: Fold in steamed broccoli florets, peas, or roasted cauliflower for added nutrition
- Smoky chipotle: Add 1-2 tablespoons of adobo sauce from canned chipotles and use smoked cheddar instead of regular cheddar
For another cheesy favorite, try baked mac and cheese.
Storage and Reheating
Proper storage and reheating techniques ensure your leftover mac and cheese tastes almost as good as when you first made it. The key is maintaining moisture and preventing the sauce from separating.
- Refrigerator storage: Transfer cooled mac and cheese to an airtight container and refrigerate for up to 4 days
- Freezer storage: Portion into freezer-safe containers, leaving 1/2 inch of space at the top for expansion, and freeze for up to 3 months
- Microwave reheating: Add 1-2 tablespoons of milk per serving, cover loosely, and microwave on 50% power in 30-second intervals, stirring between each, until heated through
- Stovetop reheating: Place in a saucepan over low heat with a splash of milk or cream, stirring frequently until warmed and creamy
- Oven reheating: Transfer to an oven-safe dish, add a few tablespoons of milk, cover with foil, and bake at 350°F for 20-25 minutes
- Prevent dryness: Always add extra liquid when reheating to restore the creamy texture that thickens in the refrigerator
- Thawing frozen: Thaw overnight in the refrigerator before reheating for best results
You might also like: Lasagna Recipe with Ricotta
Nutritional Facts
Per serving (based on 8 servings):
- Calories: 485
- Total Fat: 29g
- Saturated Fat: 18g
- Cholesterol: 88mg
- Sodium: 642mg
- Total Carbohydrates: 35g
- Dietary Fiber: 1g
- Sugars: 5g
- Protein: 20g
- Calcium: 468mg
- Iron: 2mg
Nutritional information is approximate and may vary based on specific ingredients used and portion sizes.
For a lighter option, consider healthy chicken salad.
Health Benefits of Key Ingredients
While mac and cheese is undeniably a comfort food indulgence, it does provide some nutritional benefits from its core ingredients. Understanding what each component contributes can help you appreciate this dish beyond just its delicious taste.
Cheese is an excellent source of calcium, which supports bone health and muscle function. Sharp cheddar specifically provides protein, vitamin A, and phosphorus, all essential nutrients for overall wellness.
- Calcium from dairy: Each serving provides a significant portion of your daily calcium needs, supporting strong bones and teeth
- Protein for satiety: The combination of cheese and pasta offers protein that helps keep you satisfied and full longer
- Vitamin A from cheddar: Supports eye health, immune function, and skin health
- Phosphorus for energy: Works with calcium to build strong bones and helps your body produce energy
- B vitamins from dairy: Supports metabolism, brain function, and red blood cell formation
- Complex carbohydrates: The pasta provides sustained energy throughout your day
Another comforting classic: Creamy Mashed Potatoes
Frequently Asked Questions
1. Why is my mac and cheese sauce grainy instead of smooth?
Grainy sauce typically happens when cheese is added to sauce that’s too hot or when you use pre-shredded cheese. Always reduce heat to low before adding cheese and use freshly shredded cheese from a block. The anti-caking agents in pre-shredded cheese prevent smooth melting.
Adding a teaspoon of Dijon mustard or a pinch of cream of tartar can help emulsify the sauce if it starts to separate.
2. Can I make this mac and cheese ahead of time?
Absolutely, and it’s perfect for meal prep or entertaining. Prepare the recipe through step 5, then refrigerate in an airtight container for up to 24 hours.
When ready to serve, add a splash of milk and reheat gently on the stovetop or in the oven. The sauce will thicken in the refrigerator, so the extra liquid helps restore the creamy texture.
3. What’s the best cheese to use for the creamiest mac and cheese?
Sharp cheddar provides the classic mac and cheese flavor while melting beautifully. For extra creaminess, the combination of cheddar with cream cheese is ideal because cream cheese adds silky smoothness.
Gruyere, fontina, and white cheddar are excellent alternatives that melt well. Avoid cheeses like fresh mozzarella or feta that don’t melt smoothly.
4. How do I prevent my mac and cheese from drying out when baking?
The key is not overbaking and adding enough sauce initially. Cover the dish with foil for the first 15 minutes of baking to trap moisture, then remove it for the last 5-10 minutes to brown the top.
Make sure your mac and cheese is saucy before it goes in the oven since the pasta will continue absorbing liquid. You can also add an extra 1/4 cup of cream before baking.
5. Can I use different types of pasta for this recipe?
Absolutely, and sometimes variety is fun. Shells, cavatappi, penne, and rotini all work wonderfully because their shapes hold onto the cheese sauce.
Just maintain the same pasta-to-sauce ratio regardless of the shape you choose. Larger pasta shapes may need an extra minute or two of cooking time, while smaller shapes might need less.
Read Also: Chicken Fried Rice Recipe
Creamy Mac and Cheese
Equipment
- Large pot - At least 6 quarts, for boiling pasta
- Heavy-bottomed saucepan or Dutch oven - 4 quarts, for the cheese sauce
- Whisk - For creating a smooth, lump-free sauce
- Box grater - For freshly shredding cheese
- Colander - For draining pasta
- Wooden spoon - For folding pasta into sauce
- Measuring cups and spoons
- 9×13-inch baking dish - (optional) Only needed for the optional baked version
Ingredients
For the Pasta
- 1 lb elbow macaroni - 450g; or other short pasta such as shells, cavatappi, or penne
- 1 tbsp salt - For the pasta water
For the Cheese Sauce
- 4 tbsp unsalted butter - 56g
- 1/4 cup all-purpose flour - 30g
- 2 cups whole milk - 480ml, warmed
- 1 cup heavy cream - 240ml
- 4 cups sharp cheddar cheese - 450g, freshly shredded from a block — do not use pre-shredded
- 4 oz cream cheese - 115g, softened and cut into cubes
- 1/2 cup Parmesan cheese - 50g, freshly grated
- 1 tsp Dijon mustard - Helps emulsify the sauce and adds subtle depth
- 1/2 tsp garlic powder
- 1/2 tsp onion powder
- 1/2 tsp salt - Adjust to taste
- 1/4 tsp black pepper
- nutmeg - Pinch; optional but recommended
For the Optional Baked Topping
- 1 cup sharp cheddar cheese - Shredded, for topping before baking
- 1/2 cup panko breadcrumbs - (optional) Mix with 2 tbsp melted butter and sprinkle over cheese for extra crunch
- 2 tbsp unsalted butter - Melted, for mixing with panko breadcrumbs if using
Instructions
- Bring a large pot of salted water to a boil, add the macaroni, and cook 1–2 minutes less than package directions until just slightly firm. Reserve 1 cup of pasta water, then drain and set aside.
- In a heavy-bottomed saucepan, melt butter over medium heat, then whisk in flour and cook for 2–3 minutes until the mixture is smooth, lightly golden, and smells faintly nutty.
- Pour the warmed milk into the roux in a slow, steady stream while whisking constantly, then add the heavy cream and bring to a gentle simmer over medium-high heat, whisking frequently for 5–7 minutes until thickened to a gravy-like consistency.
- Reduce heat to low, add the cream cheese and whisk until smooth, then add the cheddar one handful at a time, whisking after each addition, followed by the Parmesan, Dijon mustard, garlic powder, onion powder, salt, pepper, and nutmeg.
- Fold the drained pasta into the cheese sauce until every piece is fully coated, adjusting consistency with reserved pasta water if needed, then let rest 2–3 minutes off the heat before serving.
- Preheat oven to 350°F (175°C), pour the mac and cheese into a greased 9×13-inch baking dish, top with shredded cheddar and optional buttered panko, and bake uncovered for 20–25 minutes until golden and bubbling. Rest 5 minutes before serving.
Notes
- Shred your own cheese: Pre-shredded cheese contains anti-caking agents (cellulose) that prevent smooth melting and cause a grainy sauce. Always start from a block.
- Control heat when adding cheese: Always reduce to low before incorporating cheese. High heat causes the fat to separate and the sauce to turn greasy or grainy.
- Warm the milk first: Adding cold milk to a hot roux can cause lumps. Microwave it for about 1 minute before adding.
- Undercook the pasta slightly: Pull the pasta 1–2 minutes early — it will finish cooking in the hot cheese sauce and absorb flavor without becoming mushy.
- Dijon mustard is key: It acts as an emulsifier to keep the sauce smooth and adds subtle depth without a mustardy taste.
- Adjust consistency easily: If the sauce is too thick, stir in reserved pasta water a tablespoon at a time. If too thin, simmer a few minutes longer.
- Make-ahead tip: Prepare through step 5, refrigerate up to 24 hours, then reheat gently with a splash of milk to restore creaminess.
- Storage: Refrigerate leftovers in an airtight container for up to 4 days, or freeze in portions for up to 3 months.
- Reheating: Add 1–2 tbsp milk per serving and reheat on the stovetop over low heat or microwave at 50% power in 30-second intervals, stirring between each.
- Cheese variations: Swap or supplement the cheddar with Gruyere, fontina, smoked cheddar, or white cheddar. Avoid fresh mozzarella or feta, which don’t melt smoothly.
Final Thoughts
This creamy mac and cheese recipe has become my go-to comfort food for good reason. It delivers on every level with rich, velvety sauce that clings to each noodle, sharp cheddar flavor that satisfies, and a texture that stays creamy from the first bite to the last.
The beauty of this recipe lies in its versatility and reliability. You can serve it as a simple weeknight dinner, dress it up for holidays, or customize it with your favorite add-ins. Once you nail the basic technique, you’ll find yourself returning to this recipe again and again.
I’d love to hear how your mac and cheese turns out. Did you stick with the classic version or try one of the variations? Share your experience in the comments below, and don’t forget to snap a photo if you’re proud of your creation.
Recommended:
- Funeral Potatoes Recipe
- Cheesy Potatoes Recipe
- Au Gratin Potatoes Recipe
- Potato Casserole Recipe
- Corn Casserole Recipe
- Chicken Casserole Recipe
- Tuna Noodle Casserole Recipe
- Breakfast Casserole Recipe
- White Chicken Chili Recipe
- Texas Chili Recipe


