If you have a sourdough starter, you already know the guilt that comes with throwing away that discard after every feeding. This sourdough discard crackers recipe is the solution you’ve been waiting for. Instead of tossing that tangy, fermented starter, you can transform it into the crispiest, most flavorful homemade crackers you’ve ever tasted.
The magic here is in the discard itself. Sourdough discard is essentially a partially fermented mixture of flour and water, packed with wild yeast and beneficial bacteria. That fermentation is what gives these crackers their distinctive tang, a flavor that no store-bought cracker can replicate.
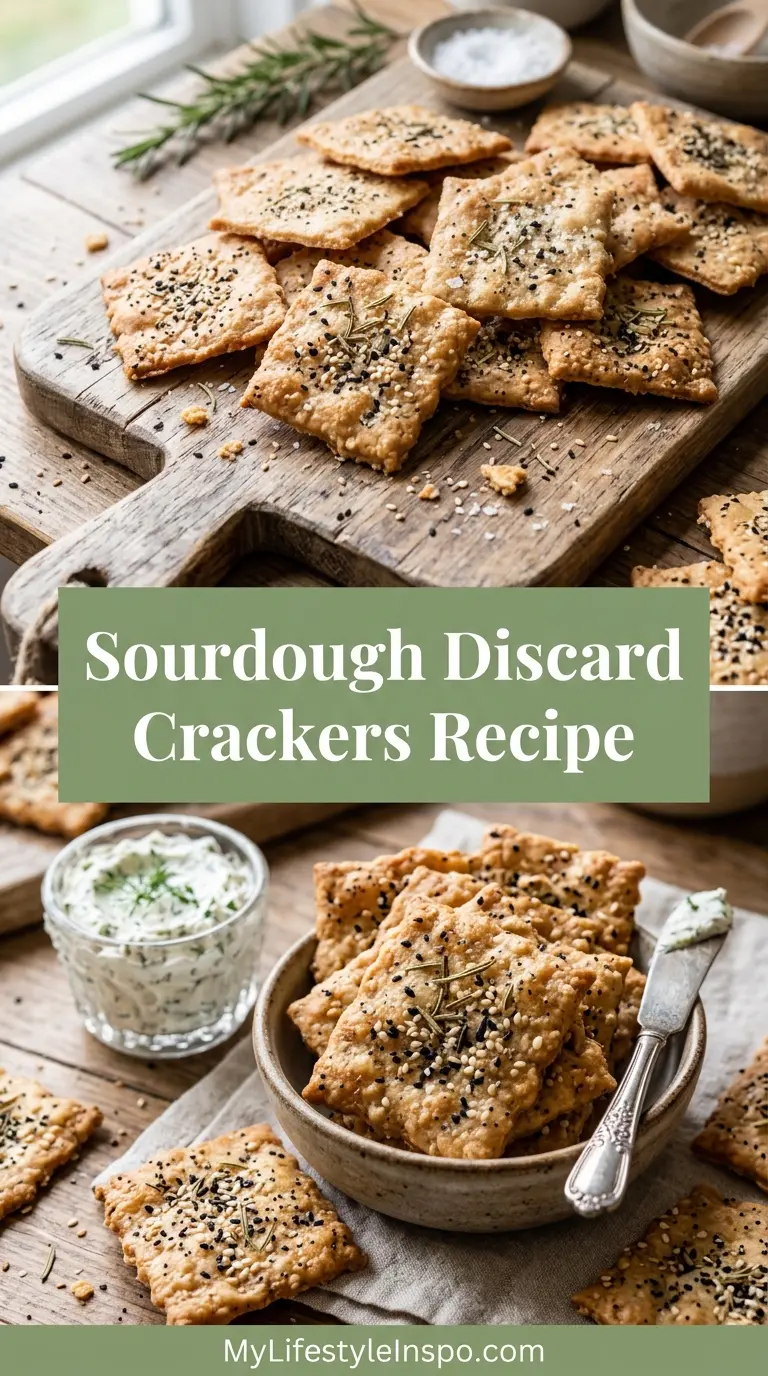
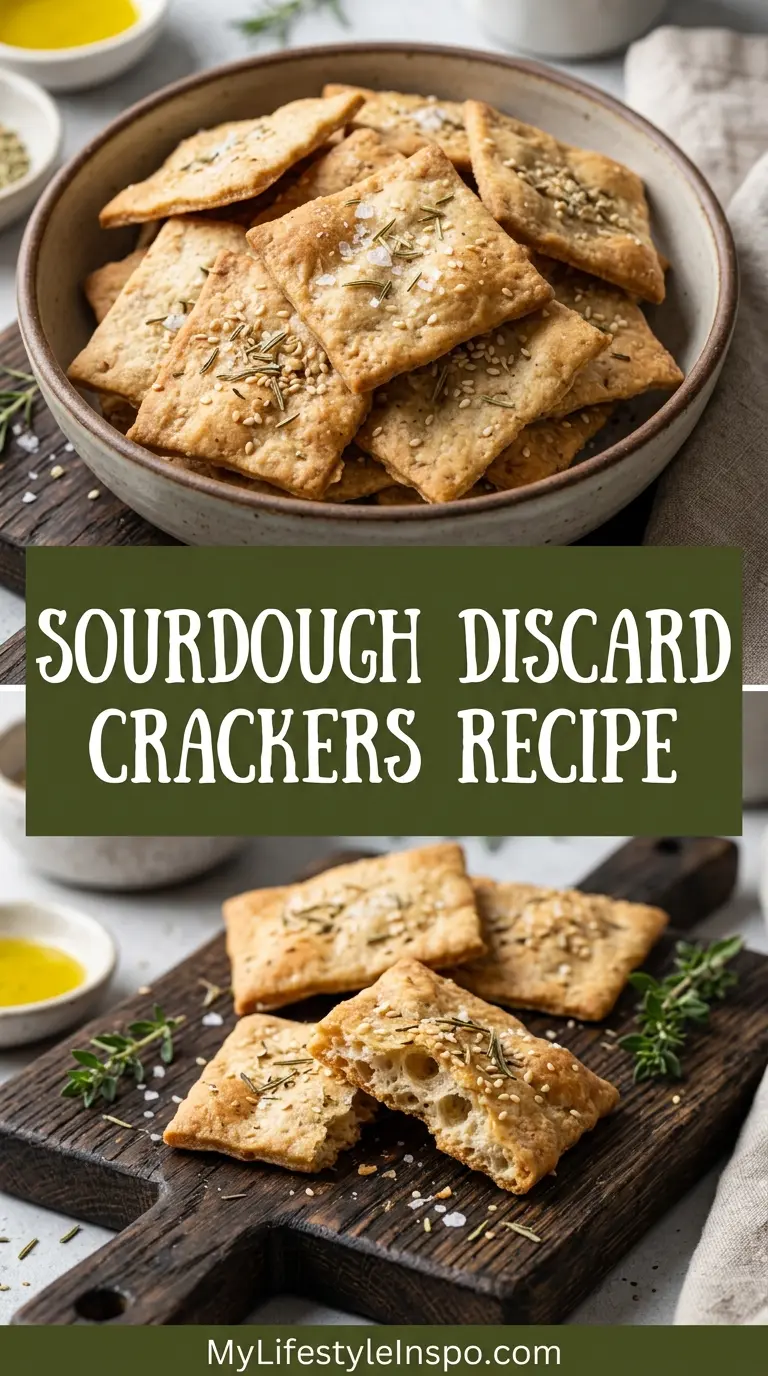
The basic formula is beautifully simple: sourdough discard, all-purpose flour, butter or olive oil, and salt. From there, you can keep things plain or dress them up with herbs, cheese, seeds, or spices. The dough is rolled thin and baked low and slow until golden and shatteringly crisp.
Once you make these once, you’ll find yourself feeding your starter just so you can bake another batch.
This recipe uses the classic roll-and-cut method, which gives you more control over thickness and cracker shape. It’s the approach you’ll find in established cookbooks and popular food blogs, and it consistently delivers the best texture.
You’ll want to keep a batch of these on your counter at all times for snacking, cheese boards, and everything in between.
[Make your starter from scratch first with this easy guide: Sourdough Starter Recipe]
Why You’ll Love This Sourdough Discard Crackers Recipe
Making these crackers is one of those genuinely satisfying kitchen experiences where a “leftover” ingredient becomes the star of the show.
Here’s exactly why this recipe works so well:
- Zero waste baking. Every bit of your sourdough discard gets put to good use. No more guilt when you open that jar.
- Incredible flavor. The natural tang from the fermented starter gives the crackers a complex, almost cheesy flavor that’s completely unlike anything from a box.
- Simple ingredients. You likely have everything you need in your kitchen right now. No specialty items required.
- Endlessly customizable. Herbs, seeds, cheese, spices. This base recipe is a canvas for whatever flavors you love.
- Long shelf life. When stored properly, these crackers stay crispy for up to two weeks, making them a great make-ahead snack.
- Beginner-friendly. If you can roll out dough and use an oven, you can make these. No sourdough baking experience necessary.
- Perfect for entertaining. These crackers look and taste impressive enough to serve on a charcuterie board for guests.
The combination of a buttery, flaky texture with that signature sourdough tang makes these one of the most craveable snacks you’ll ever make at home.
Another favorite sourdough discard recipe to try: Sourdough Pancake Recipe
Ingredients
This recipe uses a short, approachable ingredient list that lets the sourdough flavor shine. Here’s what you’ll need for a standard batch that makes about 40 to 50 crackers.
- 1 cup (240g) sourdough starter discard (unfed, at any hydration)
- 1 cup (120g) all-purpose flour, plus extra for dusting
- 4 tablespoons (57g) unsalted butter, cold and cubed (or substitute olive oil)
- 1/2 teaspoon fine sea salt, plus extra for topping
- 1 teaspoon dried rosemary or other dried herbs (optional but recommended)
- 1 tablespoon everything bagel seasoning or sesame seeds, for topping (optional)
- 1/4 teaspoon garlic powder (optional, for extra flavor)
A quick note on the butter: cold, cubed butter creates a slightly flakier, more tender cracker. If you prefer a crispier, thinner result, olive oil works beautifully and is actually easier to mix. Both produce excellent crackers.
The hydration level of your sourdough discard will affect the dough slightly. If your discard is on the runnier side (higher hydration), you may need a touch more flour to bring the dough together.
Read Also: Everything Bagel Recipe
Kitchen Equipment Needed
You don’t need any special tools to make these crackers, but having a few key pieces of equipment makes the process much easier. Here’s what to gather before you start.
- Large mixing bowl
- Fork or pastry cutter (for cutting in the butter)
- Rolling pin (a standard rolling pin works well; a French-style tapered pin gives you more control for thin crackers)
- Two large baking sheets (half-sheet pans work best)
- Parchment paper (essential for preventing sticking)
- Pastry wheel or pizza cutter (for scoring or cutting crackers)
- Bench scraper (helpful for managing the dough)
- Plastic wrap or reusable wrap (for chilling the dough)
- Kitchen scale (highly recommended for measuring the discard by weight)
- Wire cooling rack
- Offset spatula (optional, but useful for spreading if using a no-roll method)
You might also enjoy: Sourdough Focaccia Recipe
Recommended Products for This Recipe
These are products I genuinely recommend based on quality and performance for this specific recipe.
1. KitchenAid Gourmet Rolling Pin with Storage Rings
A good rolling pin is the single most important tool for thin, even crackers. This rolling pin includes thickness rings that help you roll the dough to a consistent 1/16-inch thickness, which is exactly what you want for perfectly crispy crackers. Inconsistent thickness means some crackers burn while others stay soft.
2. Nordic Ware Natural Aluminum Baker’s Half Sheet (2-Pack)
These pans are the gold standard for home bakers. The natural aluminum promotes even heat distribution, which means your crackers bake evenly without hot spots. Having two pans lets you bake both batches at the same time, cutting your total baking time in half.
3. OXO Good Grips Multi-Purpose Pastry Scraper/Chopper
This tool is incredibly helpful for cutting crackers into even squares and for managing the dough on your work surface. The measurement guide on the blade helps you score uniform crackers, and the flexible edge makes it easy to lift the rolled dough off the counter.
4. Bob’s Red Mill Artisan Bread Flour
While all-purpose flour works perfectly in this recipe, using a higher-protein artisan bread flour gives the crackers a slightly heartier texture and a more complex flavor. It also makes the dough easier to roll thin without tearing.
5. Maldon Sea Salt Flakes
Finishing your crackers with a sprinkle of Maldon flakes just before baking adds a beautiful crunch and a burst of seasoning in every bite. The flaky texture makes a noticeable difference compared to regular table salt sprinkled on top.
Read Also: Easy Sourdough Bread Recipe
Step-by-Step Instructions
1. Bring Your Discard to Room Temperature
- Remove your sourdough discard from the refrigerator about 30 minutes before starting. Cold discard is harder to mix and results in a stiff, crumbly dough.
- Give the discard a quick stir with a fork or spoon. It should be pourable and smooth, not chunky or separated. If there is visible liquid (called “hooch”) on top, just stir it back in.
- Measure out 1 cup (240g) of discard and transfer it to your large mixing bowl. Set aside.
2. Combine the Dry Ingredients
- Measure 1 cup (120g) of all-purpose flour into a separate small bowl.
- Add 1/2 teaspoon of fine sea salt to the flour and whisk to combine.
- If using dried herbs, such as rosemary, thyme, or oregano, add 1 teaspoon to the flour mixture now and stir to distribute evenly. This ensures the herbs are spread throughout the dough rather than clumping in one spot.
- If using garlic powder, add it to the flour mixture at this stage as well.
3. Cut in the Butter (or Add the Oil)
- If using cold butter, add the 4 tablespoons of cold, cubed butter directly into the flour mixture. Using your fingertips or a pastry cutter, work the butter into the flour until the mixture resembles coarse, sandy crumbs with some pea-sized pieces of butter remaining. These butter pieces create layers and a slightly flaky texture in the finished cracker.
- If using olive oil instead of butter, simply measure out 3 tablespoons (45ml) of olive oil and set aside. You’ll add it directly to the discard in the next step. Olive oil produces a crisper, thinner cracker with a different flavor profile.
4. Mix the Dough
- Pour the flour and butter mixture into the bowl with your sourdough discard. If using olive oil, drizzle it over the discard now.
- Use a fork to begin mixing everything together, working from the outside in. The dough will start to look shaggy and rough at first.
- Once the fork becomes difficult to use, switch to using your hands. Press and fold the dough until it comes together into a smooth, cohesive ball. It should not be sticky. If the dough is sticking to your hands, add flour one tablespoon at a time until it is workable.
- The dough is ready when it holds together cleanly and feels pliable, similar to pie crust dough.
5. Rest and Chill the Dough
- Divide the dough in half and flatten each piece into a small rectangular disc, roughly 1/2 inch (1.25cm) thick.
- Wrap each disc tightly in plastic wrap or a reusable beeswax wrap.
- Refrigerate the dough for at least 30 minutes. This step is important because it firms up the butter, making the dough much easier to roll thin. You can refrigerate the dough for up to 24 hours at this stage.
- While the dough chills, preheat your oven to 350°F (175°C) and line two baking sheets with parchment paper.
6. Roll the Dough Very Thin
- Remove one disc of dough from the refrigerator. Lightly flour your work surface and your rolling pin.
- Place the dough disc on the floured surface and begin rolling it out. Work from the center outward, rotating the dough a quarter turn every few strokes to keep it even.
- Roll the dough as thin as possible, ideally to about 1/16 inch (1.5mm) thick. When you hold it up to a light, you should almost be able to see your hand through it. Thin dough means crispy crackers. Thick dough means chewy, soft crackers.
- If the dough tears, simply press it back together and keep rolling. Cracks at the edges are perfectly normal.
7. Transfer to Baking Sheet
- Carefully roll the thin dough sheet loosely around your rolling pin, then unroll it onto the parchment-lined baking sheet. This is the easiest way to move large, thin sheets of dough without tearing.
- Alternatively, roll the dough directly on a piece of parchment paper, then slide the parchment onto the baking sheet.
- Lightly brush the surface with a tiny amount of water or olive oil if you want the toppings to stick better.
8. Add Toppings and Score the Crackers
- Sprinkle the top of the dough lightly with additional sea salt or flaky salt, such as Maldon. Press the salt gently into the dough with your palm.
- Add any additional toppings now, such as everything bagel seasoning, sesame seeds, poppy seeds, or finely grated parmesan.
- Using your pastry wheel, pizza cutter, or a sharp knife and ruler, score the dough into desired shapes. Squares (about 1.5 x 1.5 inches / 4 x 4cm) are the most classic shape. Rectangles, triangles, or free-form pieces all work beautifully too.
- Do not separate the pieces at this stage. Scoring the dough and baking it as one sheet, then breaking it apart after baking, results in cleaner edges and more even baking.
9. Bake to Golden, Crispy Perfection
- Place the baking sheet in the preheated oven on the center rack.
- Bake for 20 to 25 minutes, rotating the pan halfway through, until the crackers are light golden brown and dry-looking. The edges will darken slightly faster than the center, which is fine.
- Keep a close eye on the crackers during the last 5 minutes. They can go from golden to burnt quickly, especially the thinner edges.
- Repeat with the second disc of dough while the first batch bakes.
10. Cool and Break
- Remove the baking sheet from the oven and allow the crackers to cool completely on the pan for at least 10 minutes. They will continue to crisp up as they cool.
- Once cooled, gently break the scored crackers apart along the score lines. Some pieces will be more irregular, especially around the edges, and those are arguably the best ones to snack on while you wait.
- Transfer to a wire rack to cool completely before storing.
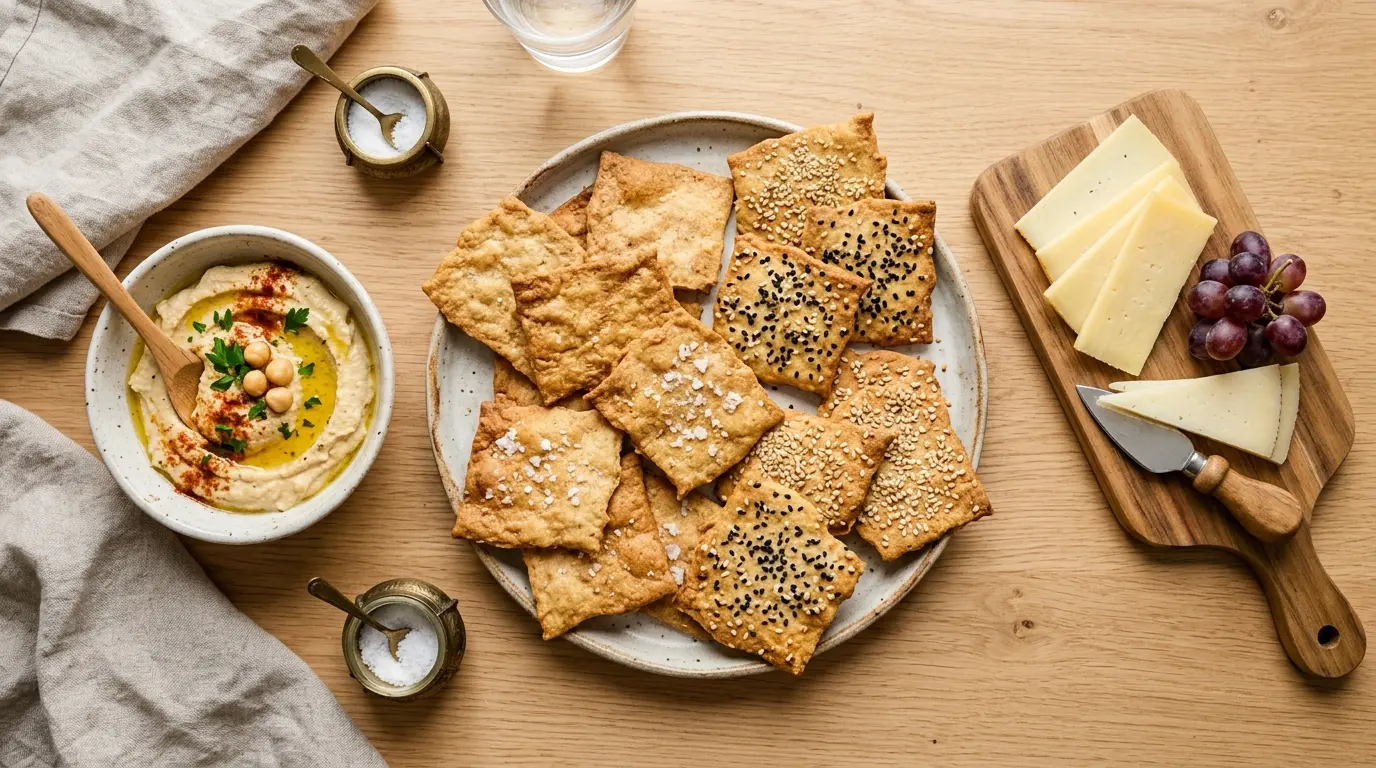
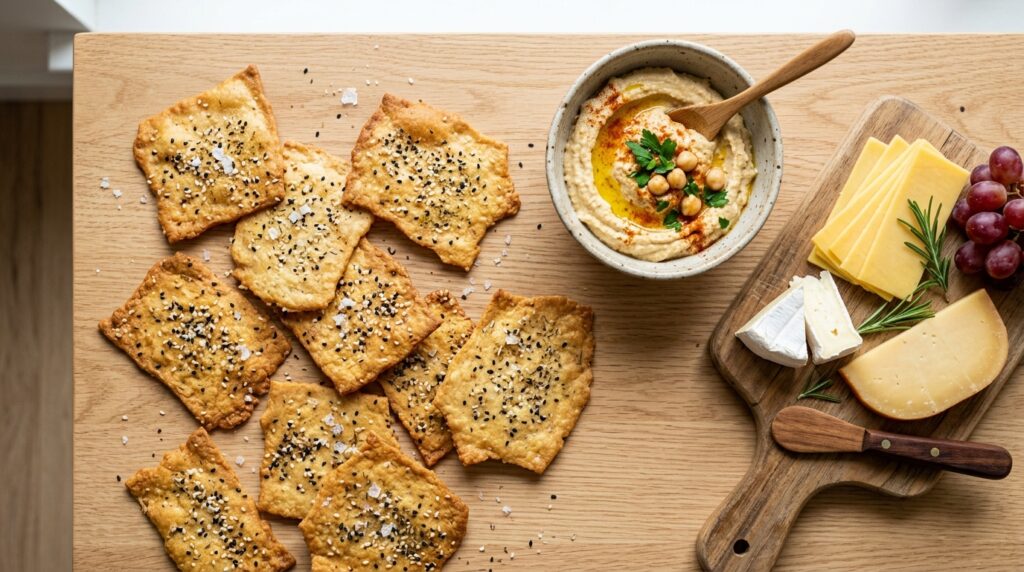
These sourdough discard crackers pair wonderfully alongside a classic hummus recipe for an effortless and impressive snack spread.
Tips for Success
Getting the crackers right is mostly about thickness and oven time. Here are the details that make the biggest difference.
- Roll as thin as you possibly can. This is the single most important tip. Crackers that are too thick come out dense and soft rather than crispy and light. Take your time with this step, and don’t be afraid to keep rolling.
- Keep the butter cold. Room-temperature or melted butter will create a greasier dough that is harder to roll thin. Cold butter gives you a flaky, tender result.
- Chill the dough before rolling. If the dough feels too soft or sticky when you try to roll it, it needs more time in the refrigerator. Even 15 extra minutes of chilling makes a significant difference.
- Don’t skip the parchment paper. This is not a step you want to skip. The crackers will stick to an unlined pan, and they are too thin and delicate to scrape off cleanly.
- Rotate the pan halfway through baking. Most ovens have hot spots. Rotating ensures even browning.
- Let them cool fully before eating. Freshly baked crackers may feel slightly soft straight from the oven. They firm up considerably as they cool, so give them at least 10 full minutes before you judge the texture.
- Use a discard that smells pleasant. Very old, neglected discard can develop an overly acidic or even unpleasant smell. If your discard smells strongly of acetone or alcohol, it may be past its prime. Fresh-to-moderately-aged discard (stored in the fridge for up to 2 weeks) works best.
For a similarly simple, crispy homemade snack, try these Homemade Tortilla Chips next.
Serving Suggestions
These crackers are endlessly versatile and work beautifully as a base for toppings, alongside dips, or as a standalone snack.
Here’s how to serve them for maximum impact:
- On a charcuterie board. Pair with sliced prosciutto, salami, aged cheddar, brie, and a small pot of honey or jam. The tang of the crackers complements cured meats and bold cheeses perfectly.
- With dips. Serve alongside creamy hummus, Easy Pesto, or Seven Layer Dip. The sturdy texture holds up well to thick dips without breaking.
- Topped with avocado. Spread a thin layer of mashed avocado on each cracker and finish with a pinch of flaky salt and red pepper flakes for a quick, elegant appetizer.
- As a soup accompaniment. Float a few crackers in a bowl of creamy soup or serve them on the side. They add a satisfying crunch to every bite.
- With cheese spreads. Smear with cream cheese, goat cheese, or ricotta and top with a slice of cucumber or a drizzle of honey.
- Straight from the container. Honestly, the most common way these get eaten. They’re that good on their own.
You might also love pairing these with a freshly made Cheese Ball as part of a party spread.
Variations to Try
The base recipe is just a starting point. Here are some of the most popular and delicious ways to customize your sourdough discard crackers.
- Seeded crackers: Add 2 tablespoons each of sesame seeds and poppy seeds to the dough. Sprinkle the tops with everything bagel seasoning before baking for an extra crunchy, intensely flavorful cracker.
- Herb and parmesan: Fold 1/4 cup (25g) of finely grated parmesan cheese and 1 teaspoon each of dried rosemary and thyme into the dough. The cheese melts into the cracker as it bakes and creates incredible, savory depth.
- Spicy crackers: Add 1/2 teaspoon of smoked paprika and 1/4 teaspoon of cayenne pepper to the flour mixture. These are especially good alongside sharp cheddar or a cold beer.
- Whole wheat version: Replace half the all-purpose flour with whole wheat flour. The crackers will be nuttier and slightly denser, with a more rustic flavor.
- Olive oil and sea salt: Skip the butter entirely and use a generous drizzle of good-quality extra virgin olive oil. Finish with flaky sea salt and cracked black pepper for a Mediterranean-inspired cracker.
- Garlic and herb: Add 1/2 teaspoon each of garlic powder and onion powder to the flour, along with 1 teaspoon of Italian seasoning. These taste like a gourmet, crispy version of garlic bread.
- Sweet crackers: Add 1 tablespoon of sugar and 1/2 teaspoon of cinnamon to the dough. Sprinkle with a little turbinado sugar before baking for a cracker that bridges savory and sweet.
Read Also: Sourdough Sandwich Bread Recipe
Storage and Reheating
One of the best things about this sourdough discard crackers recipe is how well the crackers keep once baked.
- Store the cooled crackers in an airtight container or zip-top bag at room temperature for up to 10 to 14 days.
- Make sure the crackers are completely cooled before sealing them in a container. Any residual warmth creates steam and will make the crackers soft.
- If your crackers have lost some of their crispness after a few days, spread them in a single layer on a baking sheet and bake at 325°F (165°C) for 5 to 8 minutes to re-crisp them.
- To freeze unbaked dough, wrap the chilled dough discs tightly in plastic wrap and place in a freezer-safe bag. Freeze for up to 3 months. Thaw overnight in the refrigerator before rolling and baking.
- You can also freeze baked crackers for up to 1 month. Thaw at room temperature and refresh in the oven for 5 minutes.
This Same Day Sourdough Bread Recipe is another great way to use your sourdough starter right away.
Nutritional Facts
The following values are approximate and based on a serving size of 10 crackers (roughly 1 oz / 28g) made with the standard butter version of this recipe.
| Nutrient | Amount Per Serving |
|---|---|
| Calories | 110 |
| Total Fat | 5g |
| Saturated Fat | 3g |
| Cholesterol | 12mg |
| Sodium | 150mg |
| Total Carbohydrates | 14g |
| Dietary Fiber | 0.5g |
| Sugars | 0g |
| Protein | 2g |
| Iron | 6% DV |
Note that these values will vary depending on the hydration of your sourdough discard, the type of flour used, and any additional toppings or mix-ins.
If you enjoy making your own baked snacks at home, you might also love this Easy Granola Recipe for another wholesome, customizable option.
Health Benefits of Key Ingredients
Sourdough discard crackers offer some nutritional advantages over conventional store-bought options, particularly because of the fermentation involved in the starter.
Here’s a closer look at the key ingredients:
- Sourdough discard (fermented flour and water): The wild yeast and bacteria in sourdough starter partially break down the gluten and phytic acid in the flour during fermentation. Phytic acid is an anti-nutrient that can inhibit mineral absorption, so its reduction makes the minerals in the flour more bioavailable. Many people who experience difficulty digesting conventional wheat products find fermented sourdough products easier to tolerate.
- All-purpose flour: While not a superfood, flour provides a steady source of complex carbohydrates and a small amount of protein. Using whole wheat or spelt flour increases the fiber content significantly.
- Butter: Butter is a source of fat-soluble vitamins A, D, E, and K. In reasonable amounts, it contributes to satiety and helps the body absorb fat-soluble nutrients.
- Olive oil (if used in place of butter): Extra virgin olive oil is rich in monounsaturated fats and contains powerful antioxidants, including oleocanthal, which has anti-inflammatory properties.
- Sea salt: Unrefined sea salt contains trace minerals not found in standard iodized salt. Used in small amounts, it enhances flavor without contributing excessive sodium.
- Fresh or dried herbs (optional): Rosemary, thyme, and oregano are all rich in antioxidants and have been associated with anti-inflammatory effects. Adding herbs to your crackers gives you a modest boost of beneficial plant compounds.
These crackers are a genuinely wholesome homemade alternative to processed snack crackers.
Another wholesome snack worth exploring: Cottage Cheese Chips Recipe
Frequently Asked Questions
1. What is sourdough discard and can I use active starter instead?
Sourdough discard is the portion of starter that is removed before feeding. It is typically unfed and has a stronger, more pronounced sour flavor than a freshly fed, active starter. You can absolutely use active, bubbly starter in this recipe. The crackers will have a slightly milder flavor and may spread a bit differently, but the result will still be delicious.
2. My crackers are soft in the middle after baking. What went wrong?
The most common reason for soft crackers is that the dough was not rolled thin enough. Even a slight increase in thickness makes a dramatic difference in the final texture. Return soft crackers to the oven at 325°F (165°C) for an additional 5 to 10 minutes. Keep a close eye on them. They will crisp up.
3. Can I make these crackers gluten-free?
You can experiment with a 1:1 gluten-free flour blend, but the texture will be different. Since there is no gluten to hold the dough together, gluten-free versions tend to be more crumbly and can be harder to roll thin. Using a gluten-free sourdough discard (made with rice flour or oat flour) alongside a gluten-free flour blend will give the best results.
4. How do I know if my sourdough discard is still good to use?
Sourdough discard stored in the refrigerator is generally good for up to 2 weeks. It should smell pleasantly tangy and sour, similar to plain yogurt or a mild vinegar. If it smells like nail polish remover (acetone), has visible mold, or has a very strong, off-putting odor, it is past its prime and should be discarded. A slight pink or orange tinge is also a sign to throw it out.
5. Do I need to add flour to the recipe if my discard is very runny?
Yes. The consistency of sourdough discard varies widely depending on the flour-to-water ratio used when feeding the starter. If your discard is very runny (like a thin pancake batter), you will likely need to add 2 to 4 additional tablespoons of flour to bring the dough to the right consistency. Add flour one tablespoon at a time and mix between additions until the dough holds together and is no longer sticky.
These crackers also pair wonderfully alongside Avocado Toast for a satisfying, wholesome snack plate.
Final Thoughts
If you’ve been letting your sourdough discard go to waste, this sourdough discard crackers recipe is about to change that completely.
There is something deeply satisfying about turning what was destined for the compost bin into a snack you’ll actually crave. The process is simple, the ingredients are humble, and the result is genuinely impressive.
Once you master the basic recipe, the variations are endless. Herb and parmesan, spicy chipotle, seeded, whole wheat, even sweet cinnamon. Every batch is an opportunity to experiment.
Give this recipe a try this weekend and let us know how it went in the comments below. And if you love this recipe, share it with a friend who bakes sourdough. They’ll thank you for it.
Recommended:
- Sweet Sourdough Bread Recipe
- Homemade Bagel Recipe
- New York Style Bagel Recipe
- Classic Bruschetta Recipe
- Basil Pesto Recipe
- Easy Hummus Recipe
- Fried Pickles Recipe
- Baked Oatmeal Recipe
- Classic Scone Recipe
- Easy Scone Recipe
