If you haven’t heard about Tini’s Mac and Cheese Recipe, you’ve been living under a very cheese-free rock.
This dish took the internet completely by storm when social media chef Tineke “Tini” Younger posted her now-iconic tutorial, which has since racked up over 100 million views on TikTok.
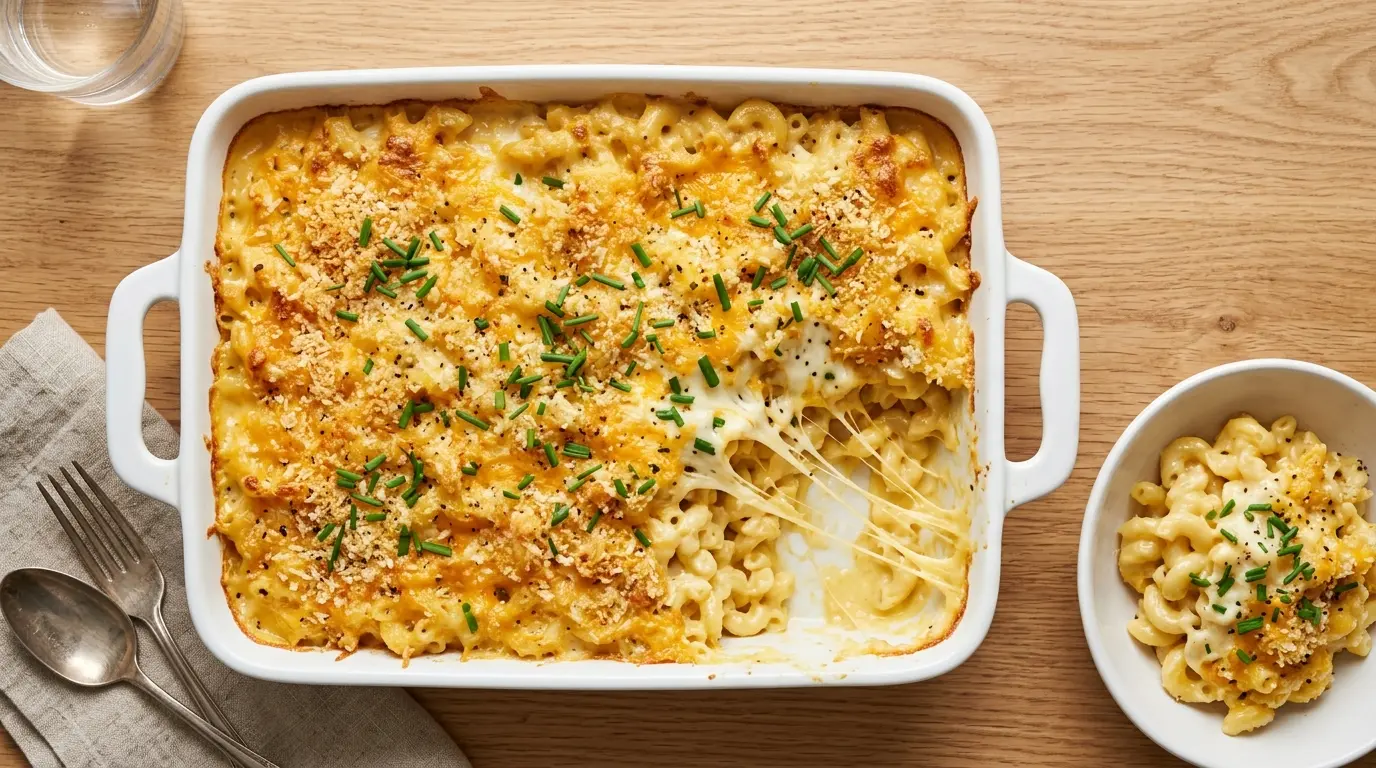
It’s easy to see why. Three kinds of freshly shredded cheese, a silky roux-based sauce, cavatappi pasta, and a golden, bubbly baked top make this one of the most indulgent and crowd-pleasing mac and cheese recipes ever to grace a casserole dish.
What makes this version stand out from the crowd isn’t just the sheer quantity of cheese (though two and a half pounds of it certainly helps). It’s the technique: layering the pasta like lasagna so you get pockets of melted cheese throughout, adding Dijon mustard for balance, and finishing under the broiler for that perfectly browned crust.
This recipe is the real deal. It’s rich, stretchy, deeply flavorful, and absolutely perfect for holidays, potlucks, Sunday dinners, or honestly any day that calls for serious comfort food.
You might also enjoy: Baked Mac and Cheese
Why You’ll Love This Tini’s Mac and Cheese Recipe
This isn’t your average box mac. Every single element of this dish has been designed to deliver maximum flavor, creaminess, and that showstopping cheese pull.
Here’s why this recipe is so special:
- Three-cheese blend — mozzarella, Colby Jack, and sharp cheddar work together for stretch, creaminess, and bold flavor in every bite
- Roux-based cheese sauce — starting with a butter-flour roux creates a stable, silky sauce that doesn’t break or go grainy
- Evaporated milk and heavy cream — this combination gives the sauce an incredibly luscious body that regular milk just can’t match
- Dijon mustard — just one tablespoon cuts through the richness and brings everything into balance without making it taste like mustard
- Smoked paprika and garlic powder — these seasonings add warmth and depth that make you wonder what the secret ingredient is
- The lasagna-style layering method — layering pasta and cheese creates pockets of gooey melted cheese all the way through the dish, not just on top
- The broiled finish — two minutes under the broiler gives the top that golden, slightly crisp crust that makes every serving irresistible
- Feeds a crowd — this recipe easily serves 8 to 10 people, making it ideal for family gatherings and holiday tables
Read Also: Creamy Mac and Cheese Recipe
Ingredients
You’ll need a few specialty items here, but all of them are widely available at most grocery stores. The most important thing to remember: do not use pre-shredded cheese. Packaged shredded cheese contains anti-caking agents that prevent smooth melting and make your sauce grainy. Shredding from the block is non-negotiable for this recipe.
Here’s everything you’ll need:
- 1 lb (450g) cavatappi pasta (or any corkscrew or small tubular pasta)
- 1 lb (450g) block mozzarella cheese, shredded from the block
- 1 lb (450g) block Colby Jack cheese, shredded from the block
- 8 oz (225g) block sharp cheddar cheese, shredded from the block
- 3 tablespoons (42g) unsalted butter
- 3 tablespoons (24g) all-purpose flour
- 1 can (12 oz / 354ml) evaporated milk
- 2 cups (480ml) heavy whipping cream
- 1 tablespoon Dijon mustard
- 1 teaspoon smoked paprika
- 1 teaspoon garlic powder
- 1/2 teaspoon black pepper
- 1/2 teaspoon salt (plus more for pasta water)
- Cooking spray or butter for greasing the baking dish
- Fresh chives for garnish (optional)
Read Also: Classic Baked Mac and Cheese Recipe
Kitchen Equipment Needed
Having the right tools makes this recipe significantly easier, especially when making the cheese sauce. A heavy-bottomed pan is essential for building a smooth roux without burning it.
Here’s what you’ll need:
- Large pot for boiling pasta
- Large heavy-bottomed saucepan or enameled cast iron pot for the cheese sauce
- 9×13-inch baking dish for baking the mac and cheese
- Box grater or rotary cheese grater for shredding block cheese
- Large mixing bowl for combining cheeses
- Whisk for the roux and sauce
- Wooden spoon or silicone spatula
- Colander for draining pasta
- Measuring cups and spoons
This pairs beautifully with the Easy Crockpot Mac and Cheese technique if you want a hands-off version for another occasion.
Recommended Products for This Recipe
These products are recommended based on quality and performance, and they genuinely make a difference when preparing this recipe.
1. Le Creuset Enameled Cast Iron Dutch Oven
An enameled cast iron pot distributes heat evenly, which is crucial for making a smooth roux and cheese sauce without hot spots that can cause scorching or clumping. The wide, heavy base gives you full control over the temperature as you add cheese gradually. It’s an investment that will serve you for decades.
2. Cuisinart Food Processor with Shredding Disc
Shredding two and a half pounds of cheese by hand is one of the most time-consuming parts of this recipe. A food processor with a shredding attachment cuts that time down dramatically and produces consistent shreds that melt evenly in the sauce. It’s the single biggest time-saver for this dish.
3. Staub Ceramic Rectangular Baking Dish
A high-quality ceramic baking dish retains heat evenly and goes from oven to table beautifully. This helps the mac and cheese maintain its creamy texture all the way through baking, rather than drying out around the edges while the center is still cold. Ceramic also makes for cleaner serving and cleanup.
4. Maille Old Style Grainy Dijon Mustard
Tini’s recipe calls for Dijon mustard, and the quality of the mustard matters more than you’d expect. A whole-grain Dijon adds subtle tang and a mild heat that elevates the entire cheese sauce without overpowering it. A good-quality Dijon is the secret weapon in this recipe.
5. Smoked Paprika (Spanish Style)
Spanish smoked paprika has a deeper, more complex smokiness than generic paprika, and it’s one of the flavor notes that makes people wonder what’s in this mac and cheese. Using a quality smoked paprika here makes a noticeable difference in the final dish.
Read Also: Cheese Sauce Recipe
Step-by-Step Instructions
Step 1: Prep and Shred Your Cheeses
- Begin by removing all three blocks of cheese from the refrigerator about 20 minutes before you start — slightly warmer cheese is much easier to shred and also melts more smoothly into the sauce.
- Using a box grater on the large-hole side (or a food processor with a shredding disc), shred all of the mozzarella (1 lb / 450g), all of the Colby Jack (1 lb / 450g), and all of the sharp cheddar (8 oz / 225g).
- Place all three shredded cheeses into a large mixing bowl and toss them together until evenly combined. This ensures you get a consistent blend throughout both the sauce and the layers.
- Divide the combined cheese blend into two equal portions. Set both aside. One half will go into the cheese sauce, and the other half will be used for layering the baked dish.
Step 2: Cook the Cavatappi Pasta
- Fill a large pot with water and bring it to a rolling boil over high heat. Add a generous pinch of salt to the water — it should taste pleasantly salty, like the sea. Salting the pasta water is the only opportunity to season the pasta itself from the inside out.
- Add the 1 lb (450g) of cavatappi pasta and cook it according to the package directions, but aim for al dente — meaning it should still have a slight firmness when you bite into it. Typically this is about 7 to 9 minutes, but check your package for the exact time.
- Cooking al dente is important here because the pasta will continue to cook in the oven. If you fully cook it now, it will be mushy by the time the dish comes out.
- Drain the pasta well in a colander and set it aside. Do not rinse the pasta — the starch on the surface helps the cheese sauce cling to it.
Step 3: Preheat the Oven and Prepare the Baking Dish
- Preheat your oven to 350°F (175°C). Allow it to fully preheat before placing your dish inside.
- Grease a 9×13-inch (23x33cm) baking dish generously with butter or cooking spray. Make sure to coat the sides and corners as well so nothing sticks during baking.
- Set the dish aside on the counter and have it ready before you start the sauce so you can move quickly once everything is cooked.
Step 4: Build the Roux
- In a large heavy-bottomed saucepan or enameled cast iron pot, melt 3 tablespoons (42g) of unsalted butter over medium heat. Let it melt fully and begin to foam slightly, but do not let it brown.
- Once the butter is melted, add half of your seasonings at this stage: 1/2 teaspoon smoked paprika, 1/2 teaspoon garlic powder, 1/4 teaspoon black pepper, and 1/4 teaspoon salt. Stir for about 30 seconds to bloom the spices in the butter — this releases their aromatics and builds a deeper flavor base.
- Add the 3 tablespoons (24g) of all-purpose flour to the butter-spice mixture all at once. Whisk vigorously and continuously to combine the flour with the butter into a smooth paste. This paste is your roux.
- Continue to cook and stir the roux for 2 to 3 minutes. This step is crucial — it cooks out the raw flour taste. The roux should turn slightly golden and have a faint nutty aroma. Do not let it darken beyond pale gold or it will affect the flavor.
Step 5: Build the Cheese Sauce
- With the heat still on medium, slowly pour in the can of evaporated milk (12 oz / 354ml) in a steady stream while whisking constantly. Do not dump it in all at once — adding it gradually while whisking prevents lumps from forming.
- Keep whisking until the mixture is smooth and begins to thicken and bubble gently, about 2 to 3 minutes. You’ll see it go from thin and lumpy to creamy and cohesive.
- Add the 1 tablespoon of Dijon mustard and whisk it in until completely incorporated. The mustard will emulsify into the sauce and add a subtle tang that balances the richness of the cheese.
- Reduce the heat to medium-low, then slowly pour in the 2 cups (480ml) of heavy whipping cream while stirring. Add the remaining seasonings now: 1/2 teaspoon smoked paprika, 1/2 teaspoon garlic powder, 1/4 teaspoon black pepper, and 1/4 teaspoon salt. Stir gently to combine and let the sauce warm through for about 1 to 2 minutes.
Step 6: Melt in the Cheese
- Reduce the heat to low. This step requires patience — adding cheese over high heat causes it to seize up and turn grainy.
- Take the first half of your cheese blend and begin adding it to the sauce one small handful at a time. After each addition, stir and wait for the cheese to fully melt and incorporate before adding the next handful. Rushing this step is the most common mistake people make.
- Continue adding cheese gradually until the first half of the cheese blend is fully melted into the sauce. The sauce should be smooth, thick, velvety, and deeply golden-orange.
- Taste the sauce at this point and adjust seasoning if needed. Add a pinch more salt or a little more paprika if you’d like a bolder flavor.
Step 7: Combine Pasta with Cheese Sauce
- Add the drained cavatappi pasta to the cheese sauce and stir until every piece of pasta is fully coated and submerged in the sauce.
- Use a spatula or wooden spoon to fold gently so you don’t break the pasta. Make sure you get into the bottom and corners of the pot — sauce pools there and you want everything evenly coated.
- Let the pasta and sauce sit together off the heat for about 1 minute. This allows the pasta to absorb a little of the sauce and ensures the flavors start melding before baking.
Step 8: Layer the Dish Like Lasagna
- Spoon approximately half of the pasta and cheese sauce mixture into the greased 9×13-inch baking dish. Spread it into an even layer using a spatula.
- Take half of the remaining shredded cheese (that second portion you set aside) and sprinkle it evenly over the first layer of pasta. This is what creates those incredible melty pockets of cheese inside the dish.
- Add the remaining pasta on top of the cheese layer, spreading it out evenly.
- Finish by topping the dish with the rest of the reserved shredded cheese, covering the surface completely. Make sure the cheese goes all the way to the edges so every scoop has that golden top.
Step 9: Bake and Broil to Golden Perfection
- Place the baking dish in the preheated oven and bake uncovered for 25 to 30 minutes, or until the cheese on top is melted, bubbling, and beginning to turn golden brown around the edges.
- Once the baking time is complete, switch your oven to broil on high. Move the rack up to the top position if it isn’t already there.
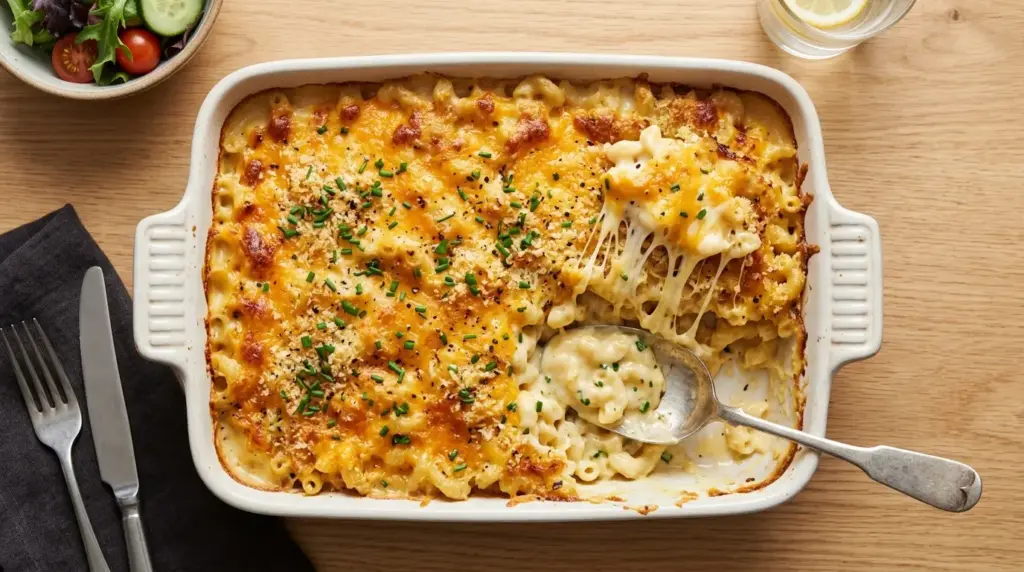
- Broil the mac and cheese for 2 to 3 minutes, watching very carefully the entire time. The cheese can go from golden to burnt very quickly under the broiler. You’re looking for a deeply browned, slightly crisp, bubbly crust on top.
- Remove from the oven and let it rest for 5 minutes before serving. This brief resting time allows the sauce to settle and makes scooping much cleaner.
- Garnish with freshly chopped chives if desired and serve immediately.
This technique is similar to the approach used in a classic Baked Ziti — layering is everything.
Tips for Success
Getting Tini’s mac and cheese right comes down to a few key techniques. These tips will help you avoid the most common mistakes.
- Always shred your own cheese from the block. Pre-shredded cheese contains cellulose and other anti-caking agents that prevent smooth melting and create a grainy sauce. This is the number one rule.
- Cook the roux for the full 2 to 3 minutes. If you skip this step, your finished sauce will have a raw flour taste that no amount of cheese can mask.
- Add the evaporated milk slowly while whisking. Pouring it in gradually while whisking constantly is what keeps the sauce smooth and lump-free.
- Add cheese one handful at a time over low heat. Patience here pays off. Rushing the cheese addition over high heat causes the proteins in the cheese to seize and turn grainy.
- Cook pasta to al dente, not fully soft. It continues cooking in the oven, so starting al dente ensures it finishes with the perfect tender bite.
- Watch the broiler closely. Two minutes can make the difference between a gorgeous golden crust and a burnt mess. Never walk away from a broiling dish.
- Don’t skip the Dijon mustard. It doesn’t make the dish taste like mustard. It adds a subtle acid that balances the fat and enhances all the cheesy flavors.
- Season in stages. Adding half the seasonings to the roux and the other half after the cream helps build layered flavor throughout the sauce.
For more creamy pasta inspiration, check out the Homemade Alfredo Sauce Recipe — the sauce-building technique is similar.
Serving Suggestions
Tini’s mac and cheese is rich, filling, and deeply satisfying on its own, but it also shines as part of a larger spread.
This is the kind of dish that anchors a holiday table or cookout feast. Here are some favorite ways to serve it:
- With Baked Beans — the smoky sweetness of baked beans is a classic pairing with cheesy pasta
- Alongside Southern Fried Chicken — the crispy, savory chicken and creamy mac are a match made in comfort food heaven
- With Corn on the Cob — fresh, sweet corn cuts right through the richness of the cheese sauce
- Next to Roasted Broccoli — the slight bitterness and char from roasted broccoli pairs beautifully with all that cheese
- With a crisp Broccoli Salad — a cool, crunchy salad provides great contrast to the warm, creamy pasta
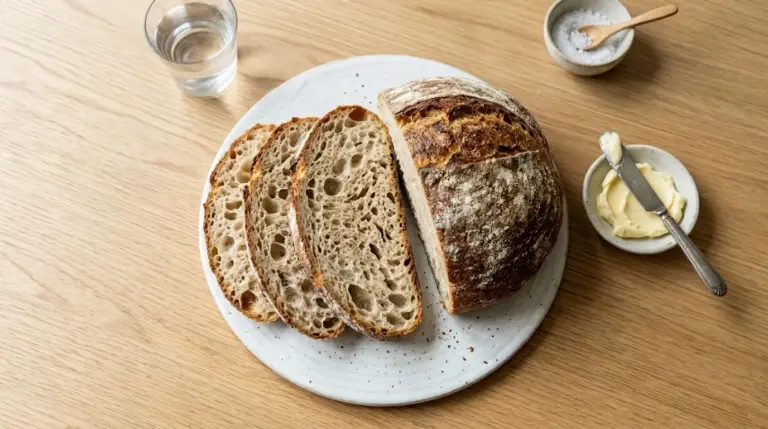
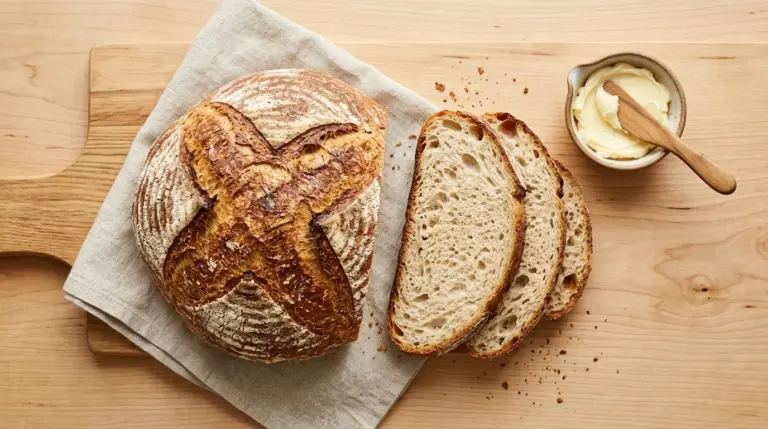
- Alongside Dinner Rolls — soft, fluffy rolls for scooping up every last bit of cheese sauce
- At a holiday table with Prime Rib — if you’re going all out, this is the side dish that completes a showstopping feast
Another great option: Green Beans
Variations to Try
Once you’ve mastered the classic version, there’s plenty of room to get creative. Here are some crowd-pleasing twists on the original:
- Smoked Gouda addition — swap 8 oz of the mozzarella for smoked gouda for a nuttier, more complex sauce with a hint of smokiness
- Spicy version — add 1/4 teaspoon of cayenne pepper and a few dashes of hot sauce to the cheese sauce for a kick of heat
- Bacon mac and cheese — fold crispy crumbled bacon into the pasta before layering for a smoky, savory upgrade
- Jalapeño mac and cheese — stir in 2 to 3 diced pickled jalapeños for tang and heat that cuts through the richness
- Stovetop-only version — skip the baking step entirely and serve straight from the pot for a saucier, creamier texture and a shorter cook time
- Different pasta shapes — cavatappi is Tini’s preferred shape, but elbows, rotini, penne, or mini shells all work beautifully and hold the sauce well
- White cheddar version — swap the sharp cheddar for an aged white cheddar to create a slightly more refined flavor profile with the same amount of punch
- Truffle upgrade — drizzle a small amount of truffle oil over the top before baking for an elevated, restaurant-worthy twist
Read Also: Easy Lasagna Recipe
Storage and Reheating
This mac and cheese keeps beautifully and may be even better the next day as the flavors meld and the sauce tightens up slightly.
Here’s how to store and reheat it:
- Refrigerator storage: Transfer leftovers to an airtight container or cover the baking dish tightly with plastic wrap or foil. It will keep in the refrigerator for up to 4 days.
- Freezer storage: Mac and cheese can be frozen, though the texture of the sauce may be slightly less creamy after thawing. Freeze in an airtight container for up to 2 months. Thaw overnight in the refrigerator before reheating.
- Stovetop reheating: Add individual portions to a small saucepan with a splash of whole milk or cream. Reheat over low heat, stirring gently, until warmed through and creamy again. This is the best method for restoring the sauce texture.
- Microwave reheating: Place a portion in a microwave-safe bowl with a splash of milk. Cover loosely with a damp paper towel and heat in 30-second intervals, stirring between each, until warmed through.
- Oven reheating: Cover the dish with foil and reheat at 325°F (165°C) for 20 to 25 minutes, then remove the foil for the last 5 minutes to re-crisp the top. Add a splash of cream to the top before covering to help restore moisture.
- Make ahead tip: You can assemble the entire dish through the layering step, cover it tightly, and refrigerate for up to 3 days before baking. Add about 10 extra minutes to the bake time if going straight from the fridge.
Read Also: Stuffed Shells Recipe
Nutritional Facts
The following nutritional information is an estimate per serving, based on 10 servings from this recipe. Actual values may vary based on specific brands used.
| Nutrient | Per Serving (Approx.) |
|---|---|
| Calories | 640 kcal |
| Total Fat | 44g |
| Saturated Fat | 27g |
| Cholesterol | 135mg |
| Sodium | 820mg |
| Total Carbohydrates | 33g |
| Dietary Fiber | 1g |
| Total Sugars | 3g |
| Protein | 28g |
| Calcium | 620mg |
| Iron | 1mg |
This is a rich, indulgent dish intended for special occasions and sharing. The generous protein and calcium content come from the large quantity of dairy and cheese used throughout.
Read Also: Corn Casserole Recipe
Health Benefits of Key Ingredients
While this is certainly a comfort food dish meant to be enjoyed in moderation, several key ingredients do offer real nutritional value.
This recipe brings together dairy-rich ingredients that provide meaningful nutrients worth noting:
- Cheese (mozzarella, Colby Jack, sharp cheddar) — all three cheeses are excellent sources of calcium, which is essential for strong bones and teeth, and protein, which supports muscle repair and satiety. Sharp cheddar also contains fat-soluble vitamins A, D, and K.
- Evaporated milk — a more concentrated source of calcium and protein than regular milk, evaporated milk adds nutrients along with its signature creamy body.
- Heavy cream — while high in fat, heavy cream provides fat-soluble vitamins including A and D, and the fat itself helps with the absorption of these nutrients.
- Garlic powder — garlic contains allicin, a compound with well-documented antimicrobial and anti-inflammatory properties. Even in small amounts, it contributes to the dish’s overall nutritional profile.
- Smoked paprika — paprika is a source of capsaicin and antioxidants including vitamin C and carotenoids, which support immune function and may help reduce oxidative stress.
- Dijon mustard — mustard seeds contain glucosinolates and selenium, and mustard as a condiment is naturally low in calories while adding complex flavor without extra fat.
- Pasta (cavatappi) — pasta is a good source of complex carbohydrates for sustained energy, and when cooked al dente, it has a lower glycemic index than fully softened pasta.
You might also enjoy the nutritional goodness found in the Panera Broccoli Cheddar Soup, which shares several of these same key ingredients.
Frequently Asked Questions
1. What pasta does Tini use in her mac and cheese?
Tini uses cavatappi pasta, which is a corkscrew-shaped pasta that holds onto the cheese sauce beautifully because of its ridges and spiraling shape.
You can substitute any similarly shaped short pasta including rotini, fusilli, elbow macaroni, or small shells. All will work well, though cavatappi gives you the best sauce-to-pasta ratio.
2. Can I make Tini’s mac and cheese ahead of time?
Yes, this recipe is great for making ahead. Assemble the dish fully through the layering step, cover it tightly with foil, and refrigerate for up to 3 days before baking.
When you’re ready to bake, add about 10 extra minutes to the bake time to account for the cold dish going into the oven.
3. Why is my cheese sauce grainy or lumpy?
The most common cause is using pre-shredded cheese, which contains anti-caking agents that prevent smooth melting. Always shred from the block for a silky sauce.
Adding cheese over too-high heat can also cause the sauce to break. Keep the heat on low when adding the cheese and add it one small handful at a time.
4. Can I use different cheeses in this recipe?
Absolutely. While mozzarella, Colby Jack, and sharp cheddar are Tini’s signature blend, you can substitute or add other melting cheeses.
Smoked gouda, Gruyère, fontina, Monterey Jack, and white cheddar are all excellent options. Just make sure to shred them fresh from the block for the smoothest results.
5. How many people does this recipe serve?
This recipe comfortably serves 8 to 10 people as a side dish, or 6 to 8 people as a main course.
It’s designed to be a crowd-pleasing dish for holidays, potlucks, and family gatherings. If you’re cooking for a smaller group, the recipe can be halved and baked in an 8×8-inch (20x20cm) dish.
This recipe is a natural companion to the Classic Baked Mac and Cheese for anyone exploring the world of homemade baked mac recipes.
Final Thoughts
Tini’s Mac and Cheese Recipe earned its viral status for a very good reason: it’s genuinely one of the best baked mac and cheese recipes out there.
From the triple-cheese blend to the roux-based sauce and the lasagna-style layering, every element of this dish has been thought through to deliver maximum comfort and flavor.
It’s the kind of recipe that makes people stop mid-bite and ask who made it. Whether you’re bringing it to a Thanksgiving table, a summer cookout, or just making it on a rainy Tuesday because you deserve it, this dish delivers every single time.
Give it a try and let us know how it turns out in the comments below. We’d love to hear your cheese blend choices, your variations, and any tips you picked up along the way — sharing is caring, especially when mac and cheese is involved.
Recommended:
- Easy Crockpot Mac and Cheese
- Chicken and Broccoli
- Bechamel Sauce
- Funeral Potatoes
- Au Gratin Potatoes
- Lasagna Soup
- Scalloped Potatoes
- Tuna Noodle Casserole
- Potato Casserole
- Chicken Casserole
