
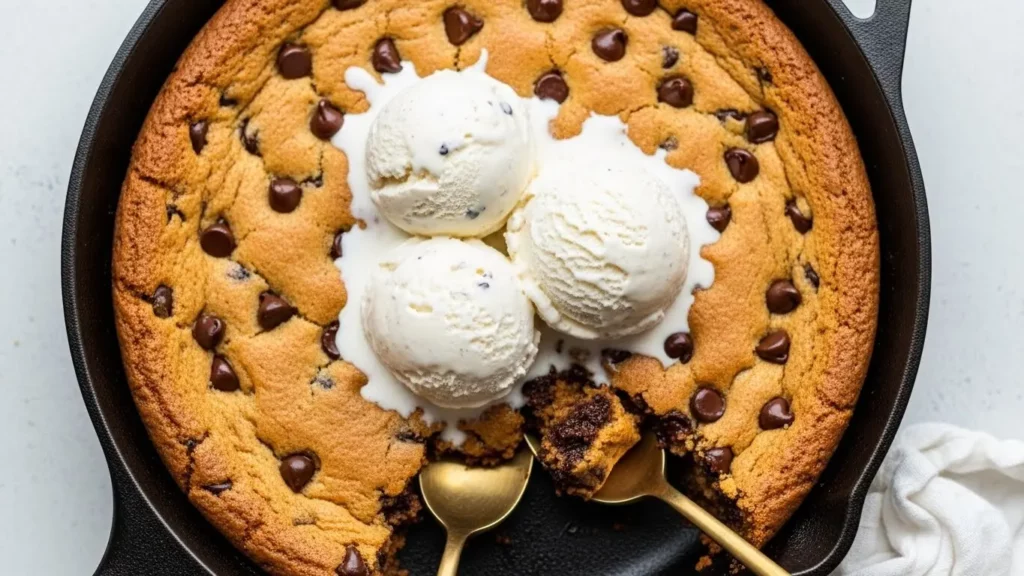
Warm, gooey, and straight from the oven—this cookie skillet recipe is about to become your new favorite dessert. Imagine a giant chocolate chip cookie with crispy edges and a soft, melty center that’s perfect for sharing (or not).
I stumbled upon this recipe during a particularly cold winter evening when I wanted something comforting but didn’t feel like making a whole batch of individual cookies. The beauty of a cookie skillet is that you get all the deliciousness of freshly baked cookies without the hassle of scooping and baking multiple batches.
This dessert is incredibly versatile too. You can customize it with your favorite mix-ins, serve it warm with ice cream, or even eat it straight from the skillet with a spoon. It’s become my go-to when friends come over because it looks impressive but requires minimal effort.
The best part? You can have this ready in under 30 minutes from start to finish. It’s that simple.
Why You’ll Love This Cookie Skillet Recipe
This cookie skillet recipe delivers everything you want in a dessert without any of the fuss. It’s one of those recipes that looks and tastes like you spent hours in the kitchen, but the reality is much simpler.
The texture alone makes this worth trying—you get those coveted crispy edges while the center stays wonderfully soft and almost molten. Every bite is different, which keeps things interesting from the first forkful to the last.
Here’s what makes this recipe special:
- Quick and easy: Ready in under 30 minutes with minimal prep work
- Perfect for sharing: Serves 6-8 people, making it ideal for gatherings or family dessert nights
- Customizable: Swap in different chocolate chips, nuts, or candies based on your preferences
- Impressive presentation: Looks like a restaurant-quality dessert but costs a fraction of the price
- Minimal cleanup: Everything happens in one skillet, so you’re not left with a sink full of dishes
- Warm and comforting: Best served straight from the oven when the chocolate is still melty
- Crowd-pleaser: I’ve never met anyone who didn’t love this dessert
This pairs beautifully with my vanilla pudding recipe for an extra indulgent dessert spread.
Ingredients
You probably have most of these ingredients in your pantry already. That’s one of the reasons I love this recipe—it doesn’t require a special trip to the store.
- 1 cup (2 sticks) unsalted butter, softened
- 3/4 cup granulated sugar
- 3/4 cup packed brown sugar
- 2 large eggs
- 2 teaspoons vanilla extract
- 2 1/4 cups all-purpose flour
- 1 teaspoon baking soda
- 1 teaspoon salt
- 2 cups semi-sweet chocolate chips
- 1/2 cup chopped walnuts or pecans (optional)
- Flaky sea salt for topping (optional but highly recommended)
Kitchen Equipment Needed
You won’t need any fancy equipment for this recipe. Just grab these basics and you’re ready to go.
- 10-inch or 12-inch cast iron skillet: This is essential for that perfect texture
- Large mixing bowl: For combining your ingredients
- Medium mixing bowl: For the dry ingredients
- Electric mixer or wooden spoon: Either works fine for mixing the dough
- Measuring cups and spoons: For accurate measurements
- Spatula: For scraping down the bowl and spreading the dough
- Oven mitts: The skillet handle gets extremely hot
Recommended Products for This Recipe
I’ve tested this recipe with various tools and ingredients over the years, and these are the products that consistently deliver the best results.
1. Lodge Cast Iron Skillet
A quality cast iron skillet is non-negotiable for this recipe. The even heat distribution creates those perfect crispy edges while keeping the center soft and gooey. I’ve been using my Lodge skillet for years, and it only gets better with age.
2. Ghirardelli Semi-Sweet Chocolate Chips
Not all chocolate chips are created equal. Ghirardelli chocolate chips have a higher cocoa content than most store brands, which means they taste richer and melt more smoothly throughout the cookie. The difference is noticeable in every bite.
3. Nielsen-Massey Madagascar Bourbon Vanilla Extract
Quality vanilla makes a huge difference in baked goods. This pure vanilla extract has a complex, sweet flavor that enhances the entire cookie without overpowering the chocolate. A little goes a long way.
4. Maldon Sea Salt Flakes
Finishing your cookie skillet with flaky sea salt takes it from good to absolutely incredible. The salt crystals provide little bursts of flavor that balance the sweetness and make the chocolate taste even more intense. This is the secret ingredient that makes people ask for the recipe.
Step-by-Step Instructions
Follow these detailed instructions and you’ll have a perfect cookie skillet every time. I’ve included all the little tips I’ve learned from making this dozens of times.
1. Preheat Your Oven and Prepare the Skillet
- Set your oven to 350°F (175°C) and let it fully preheat—this usually takes about 15 minutes
- Place your cast iron skillet in the oven while it preheats to get it nice and hot
- Once the oven reaches temperature, carefully remove the hot skillet using oven mitts
- Add about 1 tablespoon of butter to the hot skillet and swirl it around to coat the bottom and sides completely
- Set the greased skillet aside to cool slightly while you prepare the dough
2. Mix the Wet Ingredients
- In a large mixing bowl, add the softened butter (it should be at room temperature and give slightly when pressed)
- Add both the granulated sugar and brown sugar to the butter
- Using an electric mixer on medium speed, beat the butter and sugars together for 2-3 minutes until the mixture becomes light and fluffy
- Stop the mixer and scrape down the sides of the bowl with a spatula to ensure everything is well incorporated
- Add the eggs one at a time, beating well after each addition until fully combined
- Pour in the vanilla extract and mix for another 30 seconds until evenly distributed throughout the mixture
3. Combine the Dry Ingredients
- In a separate medium bowl, whisk together the all-purpose flour, baking soda, and salt
- Make sure there are no lumps in the flour and that the baking soda and salt are evenly distributed
- This step ensures your cookie will have an even texture throughout
4. Bring the Dough Together
- With the mixer on low speed (or using a wooden spoon), gradually add the flour mixture to the wet ingredients in three separate additions
- Mix only until you no longer see streaks of flour—overmixing will result in a tough cookie
- Fold in the chocolate chips using a spatula, distributing them evenly throughout the dough
- If you’re using nuts, fold those in now as well
- The dough should be thick and slightly sticky
Another favorite: No Bake Cookie Recipe for when you don’t want to turn on the oven.
5. Transfer Dough to the Skillet
- Scoop all of the cookie dough into your prepared cast iron skillet
- Using a spatula or your hands (lightly greased if needed), press the dough evenly into the skillet
- Make sure the dough reaches all the way to the edges and is relatively flat across the top
- Don’t worry if it’s not perfectly smooth—some texture is fine and adds character
- Press a few extra chocolate chips on top for visual appeal
6. Bake to Perfection
- Place the skillet in the preheated oven on the center rack
- Bake for 20-25 minutes, depending on how gooey you like the center
- At the 20-minute mark, check the cookie—the edges should be golden brown and set, while the center should still look slightly underdone
- Remember that the cookie will continue cooking in the hot skillet after you remove it from the oven
- For a gooier center, pull it out at 20 minutes; for a more fully cooked center, leave it in for the full 25 minutes
- The top should be golden and no longer look raw or shiny
7. Add Finishing Touches and Serve
- Remove the skillet from the oven using oven mitts (the handle will be extremely hot)
- Immediately sprinkle flaky sea salt over the top while the chocolate is still melty
- Let the cookie skillet cool for about 5-10 minutes before serving—this allows it to set slightly
- Serve directly from the skillet with spoons, or slice it into wedges
- Top with vanilla ice cream or whipped cream while it’s still warm for the ultimate dessert experience
Tips for Success
These tips come from trial and error, so learn from my mistakes and you’ll nail this recipe on the first try.
- Room temperature ingredients: Make sure your butter and eggs are at room temperature before starting—this helps everything blend together smoothly and creates a better texture
- Don’t overmix: Once you add the flour, mix only until combined to keep the cookie tender
- Check your oven temperature: Oven temperatures can vary significantly, so consider using an oven thermometer if you notice your cookies browning too quickly or taking much longer than expected
- Skillet size matters: A 10-inch skillet will give you a thicker cookie with a gooier center, while a 12-inch skillet creates a thinner cookie with more crispy edges
- The toothpick test isn’t reliable: Unlike cakes, you want the center to still look slightly underdone when you pull it out
- Use quality chocolate: The chocolate is a major flavor component here, so spring for good quality chips or chunks
- Let it cool slightly: I know it’s tempting to dig in immediately, but giving it 5-10 minutes to set makes it easier to serve and prevents burned mouths
- Reheat leftovers properly: Pop individual portions in the microwave for 15-20 seconds to restore that fresh-baked texture
You might also enjoy: Sugar Cookies Recipe
Serving Suggestions
A cookie skillet is versatile enough to serve many different ways depending on the occasion and your preferences.
The classic approach is to serve it warm with a generous scoop of vanilla ice cream on top—the contrast between hot cookie and cold ice cream is unbeatable. But don’t stop there.
Here are some delicious serving ideas:
- With ice cream: Vanilla is classic, but try salted caramel, chocolate, or coffee ice cream for variety
- Whipped cream: A dollop of freshly whipped cream adds a lighter touch than ice cream
- Chocolate or caramel sauce: Drizzle your favorite sauce over the top for extra decadence
- Fresh berries: Strawberries or raspberries add a bright, fresh note that cuts through the richness
- With coffee or milk: Sometimes simple is best—enjoy a slice with your favorite hot or cold beverage
- As a breakfast treat: I won’t judge if you eat leftover cookie skillet for breakfast with your morning coffee
- Party presentation: Serve it family-style in the center of the table with multiple spoons so everyone can dig in together
Variations to Try
Once you’ve mastered the basic recipe, these variations will keep things interesting. I’ve tested all of these and they’re all winners.
- Double chocolate: Replace 1/4 cup of flour with cocoa powder and use a mix of semi-sweet and white chocolate chips
- Peanut butter chocolate: Swirl 1/4 cup of peanut butter into the dough before baking and top with peanut butter chips
- S’mores style: Add graham cracker pieces to the dough and top with mini marshmallows during the last 5 minutes of baking
- Salted caramel: Fold in caramel bits and drizzle with extra caramel sauce before serving
- Triple chip: Use a combination of semi-sweet, milk, and dark chocolate chips for complex chocolate flavor
- Oatmeal raisin: Replace 1/2 cup flour with oats, swap chocolate chips for raisins, and add 1 teaspoon cinnamon
- Mint chocolate: Add 1/2 teaspoon peppermint extract and use Andes mints or chopped mint chocolate
- Nutty: Add 1 cup of mixed nuts like pecans, walnuts, and almonds for extra crunch and flavor
Read Also: Oatmeal Cookie Recipe
Storage and Reheating
Proper storage keeps your cookie skillet fresh for days, though it rarely lasts that long in my house.
Store any leftovers covered tightly with plastic wrap or aluminum foil at room temperature for up to 3 days. You can also transfer it to an airtight container if you prefer.
- Room temperature: Cover the skillet with plastic wrap or transfer to an airtight container for up to 3 days
- Refrigerator: Store covered in the fridge for up to 5 days if you want it to last longer
- Freezer: Wrap individual portions in plastic wrap, then place in a freezer bag for up to 3 months
- Reheating in microwave: Heat individual portions for 15-20 seconds until warm
- Reheating in oven: Warm the entire skillet at 300°F for 10-15 minutes
- Air fryer: Reheat portions at 300°F for 3-5 minutes for crispy edges
- Avoid: Don’t leave it uncovered as it will dry out quickly
Nutritional Facts
Here’s the approximate nutritional information per serving (based on 8 servings).
- Calories: 485
- Total Fat: 24g
- Saturated Fat: 14g
- Cholesterol: 85mg
- Sodium: 380mg
- Total Carbohydrates: 64g
- Dietary Fiber: 2g
- Sugars: 42g
- Protein: 5g
Note that these values are estimates and will vary based on specific ingredients used and portion sizes. Add-ins like nuts, extra chocolate, or ice cream will change the nutritional profile.
Read Also: Peanut Butter Cookie Recipe
Health Benefits of Key Ingredients
While this is definitely an indulgent dessert, some of the ingredients do offer nutritional benefits worth noting.
Dark chocolate contains flavonoids that support heart health and may improve brain function. Eggs provide high-quality protein and essential vitamins like B12 and choline.
Here are some benefits from the main ingredients:
- Eggs: Excellent source of protein, vitamin D, and choline which supports brain health
- Butter: Contains fat-soluble vitamins A, E, and K2, plus conjugated linoleic acid
- Chocolate chips: Dark chocolate varieties contain antioxidants and may improve mood
- Nuts (if using): Provide healthy fats, protein, fiber, and minerals like magnesium and zinc
- Vanilla extract: Contains small amounts of antioxidants and may have anti-inflammatory properties
- Sea salt: Provides trace minerals and helps balance blood sugar when combined with carbohydrates
Of course, this is still a dessert meant to be enjoyed in moderation as a treat rather than a health food!
Frequently Asked Questions
1. Can I make this cookie skillet without a cast iron pan?
Yes, you can use other oven-safe pans like a cake pan or pie dish. However, cast iron gives you the best texture because it distributes heat evenly and creates those perfect crispy edges. If using a different pan, you may need to adjust the baking time slightly and the results won’t be quite the same.
2. Why is my cookie skillet burning on the edges but raw in the middle?
This usually means your oven temperature is too high. Check with an oven thermometer to make sure it’s accurate. You can also tent the skillet with foil during the last 10 minutes of baking to prevent the edges from over-browning while the center finishes cooking.
3. Can I prepare the dough ahead of time?
Absolutely! You can make the dough up to 3 days in advance and store it covered in the refrigerator. Let it sit at room temperature for about 20 minutes before pressing it into the skillet and baking. You can also freeze the dough for up to 3 months—just thaw it overnight in the fridge before using.
4. How do I know when the cookie skillet is done?
The edges should be golden brown and set, while the center should still look slightly underdone and soft when you gently press it. Remember that it continues cooking in the hot skillet after you remove it from the oven. It’s better to slightly underbake than overbake for that gooey center.
5. Can I make individual cookie skillets instead of one large one?
Yes! Use small 6-inch cast iron skillets or oven-safe ramekins. Divide the dough among 4-6 individual skillets and reduce the baking time to 12-15 minutes. This is perfect for dinner parties where everyone gets their own personal dessert.
Read Also: Fudge Brownie Recipe
Final Thoughts
This cookie skillet recipe has become one of my most-loved desserts for good reason. It’s simple enough for a weeknight treat but impressive enough for entertaining guests.
The combination of crispy edges and that gooey, melty center makes every bite satisfying. Plus, there’s something special about serving dessert straight from a cast iron skillet—it just feels warm and inviting.
I hope you give this cookie skillet recipe a try soon. Trust me, once you make it, you’ll understand why it’s on regular rotation in my kitchen. Share your results in the comments below—I’d love to hear how it turns out for you and any creative variations you try!
Recommended:
- Loaded Breakfast Skillet Recipe
- Breakfast Skillet Recipe
- Monster Cookie Recipe
- Monster Cookie Bars Recipe
- Peanut Butter Blossom Cookies Recipe
- Oatmeal Raisin Cookie Recipe
- Dinner Rolls Recipe
- Hot Fudge Sauce Recipe
- Caramel Sauce Recipe
- Buttermilk Biscuit Recipe


