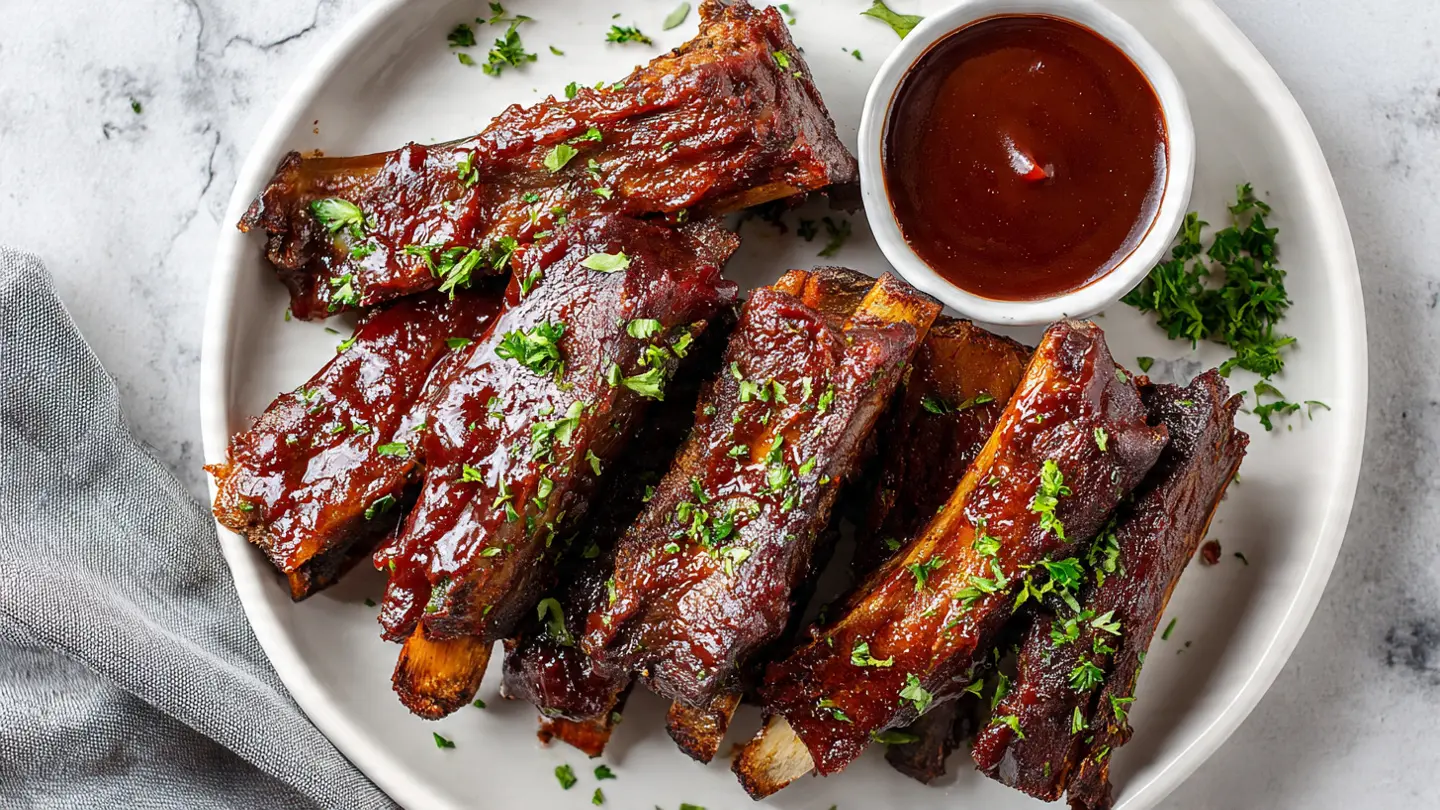
If you’ve been craving smoky, fall-off-the-bone ribs without firing up a grill or spending all day tending a smoker, this air fryer beef ribs recipe is exactly what you need. Beef back ribs cooked in the air fryer come out beautifully tender, deeply flavored, and glazed with sticky BBQ sauce in a fraction of the time of traditional methods. The secret is a two-phase cook: first, the ribs steam inside aluminum foil to lock in moisture and break down the connective tissue, then they go back in unwrapped to caramelize the BBQ sauce into that gorgeous, lacquered finish. Whether you’re cooking for a weeknight dinner or hosting a casual get-together, this is a recipe that delivers every single time.
Beef back ribs are cut from the upper rib section, right next to the spine, after the prime rib roast is removed. Because the prime rib fetches a premium price, there’s often not a mountain of meat on them, but what’s there is incredibly rich and flavorful, especially the meat that sits between the bones. That interbone meat is the real prize, and the air fryer’s circulating hot air reaches it perfectly. The key to maximizing that flavor is a bold, balanced dry rub and a quality BBQ sauce applied right at the end.
You’ll also want to remove the silver membrane from the back of the rack before seasoning. This thin, papery skin prevents the rub from penetrating the meat and can turn chewy and unpleasant when cooked. Peeling it off takes about 30 seconds and makes a noticeable difference in texture.
If you love air fryer beef, you might also enjoy this Air Fryer Beef Tenderloin for another impressive, hands-off main course.
Why You’ll Love This Air Fryer Beef Ribs Recipe
This recipe checks every box for a satisfying, low-effort meal that tastes like you spent all day on it.
The air fryer cuts your total cook time down to about 45 minutes, compared to 3 or more hours in a conventional oven or an entire day on a smoker.
You get a genuinely crispy, caramelized exterior on those ribs, something that’s hard to achieve with braising alone.
The foil-wrapping technique during the first phase of cooking acts like a mini steam oven, keeping the meat incredibly juicy while still tenderizing it thoroughly.
Cleanup is minimal since there’s no roasting pan to scrub, and the foil catches most of the drippings.
This recipe uses pantry staples for the dry rub, so you probably already have everything you need on hand.
- No grill, smoker, or outdoor setup required
- Works year-round regardless of weather
- Perfectly portioned for 2-4 people without massive leftovers
- Customizable with your favorite BBQ sauce or dry rub blend
- Beginner-friendly with clear, step-by-step instructions
For another crowd-pleasing beef recipe, check out: Air Fryer Beef and Broccoli
Ingredients
You need a straightforward lineup of bold, complementary ingredients. The dry rub is built around smoked paprika, which adds a hint of smokiness that mimics the flavor you’d get from a proper BBQ pit. Garlic powder and onion powder add savory depth, while brown sugar helps the rub caramelize beautifully during the final, unwrapped cook phase.
- 2 lbs (900g) beef back ribs (1 rack, cut in half to fit air fryer)
- 2 tablespoons olive oil
- 1 tablespoon smoked paprika
- 1 teaspoon garlic powder
- 1 teaspoon onion powder
- 1 teaspoon brown sugar
- 1 teaspoon kosher salt
- 1/2 teaspoon black pepper
- 1/2 teaspoon chili powder
- 1/2 teaspoon dried oregano
- 1/4 teaspoon cayenne pepper (optional, for heat)
- 1/2 cup (120ml) BBQ sauce (your favorite brand or homemade)
- 2 tablespoons water (for the bottom of the air fryer basket)
Read Also: Baked Beef Short Ribs Recipe
Kitchen Equipment Needed
The right tools make this recipe even smoother. An instant-read thermometer is especially important here since you want to hit that sweet spot of 190-195°F (88-90°C), the temperature where the collagen in beef ribs fully converts to gelatin for that tender, pull-away texture.
- Air fryer (basket-style or oven-style, at least 5-6 quart capacity recommended)
- Aluminum foil
- Instant-read meat thermometer
- Sharp knife or boning knife (for membrane removal)
- Paper towels
- Small mixing bowl
- Pastry brush or silicone basting brush
- Tongs
- Cutting board
Another favorite: Air Fryer Beef Roast
Recommended Products for This Recipe
These are products I recommend based on quality, performance, and how much they genuinely improve the final result. Using the right tools and quality ingredients makes a real difference with a recipe like this.
1. Large Capacity Air Fryer (6-Quart or Larger)
A larger air fryer basket gives you enough room to fit a half-rack of beef ribs in a single layer, which is important for even cooking. Overcrowding an air fryer is one of the most common reasons food comes out unevenly cooked. A 6-quart or larger model also gives you the flexibility to cook other large cuts like chicken thighs or pork tenderloin without constantly cooking in batches.
2. Smoked Paprika (High-Quality Spanish Variety)
Not all smoked paprikas are created equal. A high-quality Spanish smoked paprika, especially one labeled “Pimentón de la Vera,” has a rich, deep smokiness that transforms the dry rub in this recipe. It’s what gives these ribs that almost-off-the-smoker flavor without any actual smoke involved. A good tin lasts a long time and elevates everything from stews to roasted vegetables.
3. Instant-Read Digital Meat Thermometer
Taking beef ribs to the right internal temperature is the most important variable in this recipe. Too low and the collagen hasn’t broken down, leaving the meat tough. Too high and it dries out. A fast, accurate digital thermometer takes out all the guesswork and pays for itself the first time you use it. Look for one with a 2-3 second read time and a probe that’s at least 4 inches long.
4. Silicone Basting Brush Set
Applying BBQ sauce evenly and without leaving bristles behind is much easier with a quality silicone basting brush. Silicone brushes are heat-resistant, dishwasher safe, and don’t harbor bacteria the way natural bristle brushes can. Getting a good, even layer of sauce on the ribs before the final cook phase is what creates that gorgeous, sticky glaze.
5. Heavy-Duty Aluminum Foil
Standard household foil can tear when you’re wrapping meaty ribs. Heavy-duty foil creates a tighter, more secure seal around the ribs, which is key for the steam-trapping first cook phase. A better seal means juicier ribs. It’s a small upgrade that makes a practical difference.
This technique also works beautifully for other cuts. For a different take on beef, try this Air Fryer Beef Tips Recipe.
Step-by-Step Instructions
1. Remove the Membrane from the Ribs
- Place the rack of beef ribs bone-side up on a clean cutting board.
- Look for the thin, silvery membrane stretched across the bones. It looks like a semi-transparent film and runs the entire length of the rack.
- Slide the tip of a sharp knife or a butter knife under the membrane at one end of the rack, near the first bone, to loosen it.
- Use a paper towel to grip the loosened edge firmly. The paper towel gives you traction since the membrane is slippery.
- Peel the membrane back in one slow, steady pull across the entire rack. It may come off in pieces, so check the whole rack and remove any remaining bits.
- This step is important because the membrane acts as a barrier, preventing your dry rub from penetrating the meat and turning rubbery when cooked.
2. Prepare and Season the Ribs
- Pat the ribs completely dry on all sides using paper towels. Removing surface moisture is critical because it helps the rub adhere properly and allows the exterior to crisp rather than steam during cooking.
- In a small bowl, combine the smoked paprika, garlic powder, onion powder, brown sugar, kosher salt, black pepper, chili powder, dried oregano, and cayenne pepper (if using). Mix until fully combined.
- Drizzle the olive oil evenly over both sides of the ribs, using your hands to coat the entire surface. The oil acts as a binder, helping the spice rub stick and adding a layer of richness.
- Generously apply the dry rub to all sides of the ribs, including the edges. Press the rub firmly into the meat with your hands so it adheres well and doesn’t fall off during cooking.
- For the best flavor, allow the seasoned ribs to rest at room temperature for 20-30 minutes before cooking. If time allows, wrap them and refrigerate overnight and bring them to room temperature before air frying.
3. Cut the Ribs to Fit and Wrap in Foil
- If using a basket-style air fryer, cut the rack in half using a sharp knife so both pieces fit comfortably in the basket. Even with an oven-style air fryer, cutting the rack makes handling easier and improves air circulation around the meat.
- Tear two large sheets of heavy-duty aluminum foil, each large enough to fully enclose a half rack of ribs with plenty of overhang.
- Place one piece of rib onto the center of each foil sheet, bone-side down.
- Add 1 tablespoon of water onto each foil-wrapped packet before sealing. The water creates a small amount of steam inside the packet that helps tenderize the meat from the inside.
- Wrap the foil tightly around each piece of ribs, folding and crimping the edges firmly to create a sealed packet with no loose ends. This is very important: loose foil can blow into the heating element and create a safety hazard. Ensure a snug, secure seal on all sides.
4. Preheat the Air Fryer and Add Water to the Basket
- Preheat your air fryer to 380°F (193°C) for 3-5 minutes.
- Pour 2 tablespoons of water into the bottom of the air fryer drawer or drip tray (the pan beneath the basket, not inside the basket itself). This water disperses the rendered fat as it drips, helps prevent smoking, and adds a small steaming effect that keeps the meat moist.
- Spray the inside of the air fryer basket lightly with cooking spray to prevent any drippings from sticking.
5. Air Fry the Wrapped Ribs (Phase One)
- Place the foil-wrapped rib packets in the air fryer basket in a single layer, bone-side down. Make sure the seam of the foil is facing up and the packets are positioned so they won’t tip over. Leave space between packets for air to circulate.
- Air fry at 380°F (193°C) for 25 minutes. Do not open the air fryer during this phase. The steam building up inside the foil packets is actively tenderizing the meat, and interrupting this process by opening the foil too soon will let that steam escape.
- This phase is all about cooking the ribs through and breaking down the tough connective tissue in the meat. The result should be ribs that are cooked through but not yet caramelized on the outside.
6. Unwrap, Check Temperature, and Apply BBQ Sauce
- After 25 minutes, carefully remove the foil packets from the air fryer using tongs. Place them on a heat-safe surface or cutting board.
- Carefully open the foil packets, being very cautious of the hot steam that will escape. Use tongs or a towel to protect your hands.
- Using your instant-read thermometer, check the internal temperature of the thickest part of the meat, away from any bones. You’re looking for a temperature between 185°F and 195°F (85-90°C) at this stage. If the ribs haven’t reached at least 185°F, rewrap and cook for another 5 minutes.
- Using a pastry brush or silicone basting brush, generously apply BBQ sauce to the top and sides of both rib pieces. Be thorough but don’t flood them. You want a good coating that will caramelize, not pool and burn.
- Leave the ribs unwrapped for the next phase.
7. Air Fry Unwrapped to Caramelize (Phase Two)
- Place the unwrapped, sauced ribs back in the air fryer basket, bone-side down.
- Air fry at 380°F (193°C) for an additional 8-10 minutes. Keep a close eye on them during the last few minutes, as the sugars in the BBQ sauce can brown quickly.
- After 8-10 minutes, check the internal temperature again. The ribs are done when they reach an internal temperature of 190-195°F (88-90°C). At this temperature, the collagen has fully converted and the meat will be tender and juicy.
- If you’d like a deeper char on the sauce, brush on a second layer of BBQ sauce and cook for an additional 2-3 minutes.
8. Rest and Serve
- Remove the ribs from the air fryer and transfer them to a cutting board.
- Allow the ribs to rest for 5 full minutes before cutting or serving. This resting period lets the juices redistribute throughout the meat. Cutting into them immediately will cause those juices to run out onto the board, leaving you with drier ribs.
- After resting, cut between the bones to separate individual ribs.
- Serve with additional BBQ sauce on the side, and your chosen side dishes.
This method is very similar to how these Smoked Beef Short Ribs develop their deep flavor, minus the hours at the smoker.
Tips for Success
Follow these practical tips and you’ll get consistently excellent results every single time you make this recipe.
- Remove the membrane. This is the single most important prep step. Don’t skip it.
- Don’t skip the foil phase. The wrapped cook is what tenderizes the ribs. Going straight to unwrapped cooking will give you ribs that are firmer on the outside but potentially tough inside.
- Use a thermometer, not just time. Air fryer models vary significantly in actual cooking temperature and power output. Your ribs are done when the thermometer reads 190-195°F, not necessarily at the exact minute mark listed in the recipe.
- Don’t overcrowd the basket. Ribs need airflow around them for even cooking. If your air fryer is smaller, cook in two separate batches.
- Apply sauce at the end only. BBQ sauce has sugar in it, which burns quickly at high heat. Adding it too early will result in a charred, bitter crust rather than a caramelized glaze.
- Season generously. Beef ribs are a bold, fatty cut. They can handle more seasoning than you might think. A heavy hand with the dry rub is not a mistake.
- Let them rest. Five minutes of resting time makes a significant difference in juiciness.
You might also enjoy: Braised Short Ribs Recipe
Serving Suggestions
These air fryer beef ribs are a full-flavored, satisfying main course that pairs beautifully with classic comfort food sides.
Rich, saucy ribs love to be alongside creamy, starchy sides that balance out their bold, smoky flavor. A cool, crunchy element like coleslaw also cuts through the richness and adds freshness to the plate.
- Serve alongside Creamy Mashed Potatoes for a hearty, comforting plate
- Pair with Creamy Coleslaw for a classic BBQ combination
- Add Air Fryer French Fries for a crowd-pleasing side
- Serve with Baked Potato loaded with sour cream and chives
- Round out the meal with Mexican Street Corn for a sweet, charred contrast
- A slice of Skillet Cornbread on the side is always a crowd-pleaser
Read Also: Crock Pot Beef Short Ribs Recipe
Variations to Try
Once you’ve mastered the base recipe, these variations keep things exciting and let you tailor the flavor profile to your preferences or whatever’s in your pantry.
The core technique (foil-wrapped first cook, then unwrapped to caramelize) stays the same across all variations. Only the seasoning and sauce components change.
- Korean-Inspired: Swap the dry rub for a marinade of soy sauce, sesame oil, brown sugar, grated ginger, and minced garlic. Marinate overnight, then proceed with the foil-wrap technique.
- Honey Garlic Glaze: Replace the BBQ sauce with a mixture of 3 tablespoons honey, 2 tablespoons soy sauce, and 1 teaspoon minced garlic. Apply during the final unwrapped phase.
- Coffee Rub: Add 1 tablespoon finely ground dark roast coffee and 1 teaspoon cocoa powder to the dry rub for a bold, complex crust.
- Spicy Chipotle: Add 1 teaspoon chipotle powder and 1/2 teaspoon cumin to the dry rub. Finish with a chipotle-based BBQ sauce.
- Boneless Short Ribs Version: Use English-cut boneless short ribs and reduce the foil-wrapped cook time to 18-20 minutes. Adjust the final unwrapped cook to 6-8 minutes.
- Low-Sodium Version: Reduce the salt to 1/2 teaspoon and use a low-sodium BBQ sauce. This variation is also great for anyone watching sodium intake.
Another favorite: Instant Pot Beef Short Ribs
Storage and Reheating
Proper storage keeps your leftover ribs just as delicious the next day, and there are a few reheating methods that work far better than others for maintaining moisture.
Leftover ribs store very well and are arguably even better the next day after the flavors have had time to meld.
- Refrigerator: Store cooled ribs in an airtight container or tightly wrapped in foil for up to 4 days.
- Freezer: Allow ribs to cool completely, then wrap tightly in foil and place in a freezer bag. Freeze for up to 3 months. Thaw overnight in the refrigerator before reheating.
- Reheating in the oven: Wrap ribs in foil with a splash of water (about 2 tablespoons) and heat at 275°F (135°C) for 20-25 minutes until warmed through. This is the best method for maintaining tenderness and moisture.
- Reheating in a skillet: Add ribs to a skillet over medium-low heat with a small splash of water and cover with a lid. Heat for 5-8 minutes, turning occasionally. Good for a few ribs without turning on the oven.
- Avoid reheating in the air fryer with BBQ sauce. The sauce tends to burn at the high temperatures needed to warm the meat through. If you do use the air fryer, do so at a lower temperature (300°F / 150°C) and watch carefully.
Read Also: Beef Short Ribs Flanken Style Recipe
Nutritional Facts
The following nutritional information is an estimate based on one serving (approximately 2-3 ribs), calculated per serving with 4 servings from this recipe. Exact values will vary depending on the specific BBQ sauce used and the size of the rib rack.
| Nutrient | Per Serving |
|---|---|
| Calories | ~480 kcal |
| Protein | ~32g |
| Total Fat | ~34g |
| Saturated Fat | ~13g |
| Carbohydrates | ~10g |
| Sugar | ~8g |
| Sodium | ~700mg |
| Fiber | ~1g |
| Cholesterol | ~110mg |
These values are estimates and not intended as medical dietary advice. For precise nutritional information, input your specific ingredients into a nutrition tracking tool.
For another hearty beef option, check out: Air Fryer Beef Patties Recipe
Health Benefits of Key Ingredients
Beyond being delicious, this recipe contains several ingredients that offer meaningful nutritional benefits worth knowing about.
Beef back ribs are a significant source of complete protein, providing all essential amino acids needed for muscle repair and maintenance. They’re also rich in zinc, iron, and B vitamins like B12, which are critical for immune function, red blood cell production, and neurological health.
- Beef ribs: High in protein, zinc, iron, and B12. The fat content includes oleic acid, the same heart-healthy monounsaturated fat found in olive oil.
- Olive oil: Contains anti-inflammatory polyphenols and monounsaturated fats. Using it as a binder adds beneficial fats without significantly impacting the overall fat profile of the dish.
- Smoked paprika: Rich in antioxidants, particularly capsanthin and zeaxanthin, which support eye health and reduce oxidative stress in the body.
- Garlic powder: Contains allicin, a compound shown in studies to have antimicrobial and immune-supporting properties.
- Chili powder: A source of capsaicin, which has been associated with metabolism support and anti-inflammatory effects.
- Oregano: One of the highest antioxidant herbs available. Even in dried form, it contributes meaningful amounts of vitamins K and E.
Read Also: Slow Cooker Short Ribs Recipe
Frequently Asked Questions
1. What type of beef ribs work best in the air fryer?
Beef back ribs are the most popular choice for this recipe because they fit well in a standard air fryer when cut in half, and they cook up beautifully using the foil-wrap method described above. Boneless short ribs also work well and actually cook a little faster since there’s no bone to conduct heat. Bone-in short ribs (English-cut) can be used too, but they require the same foil-wrap technique and a slightly longer cook time to ensure tenderness.
2. Do I have to wrap the ribs in foil?
You don’t have to, but the foil-wrapping step makes a significant difference in the final texture. Without it, the exterior of the ribs will crisp up quickly under the air fryer’s intense heat while the interior remains tougher. The foil creates a steaming environment that breaks down the tough collagen and connective tissue, giving you genuinely tender results. Skipping the foil will produce ribs that are more chewy and less juicy.
3. My ribs are smoking up the air fryer. What should I do?
Smoking usually happens when the fat dripping from the ribs hits the hot bottom of the air fryer basket and burns. Adding 2 tablespoons of water to the drip tray beneath the basket before cooking helps significantly, as it cools the dripping fat before it burns. If your air fryer doesn’t have a drip tray, try placing a slice of bread beneath the basket, which absorbs the dripping fat. Cleaning the basket and drawer between uses also helps prevent this issue.
4. How do I know when the ribs are done?
The most reliable indicator is internal temperature. Use an instant-read thermometer and look for a reading of 190-195°F (88-90°C) in the thickest part of the meat, making sure you’re not touching a bone. At this temperature, the collagen has broken down fully and the meat will be tender. If you go significantly above 200°F (93°C), the ribs can start to dry out, so pulling them off right in that 190-195°F window is the goal.
5. Can I use store-bought BBQ sauce, or should I make my own?
Store-bought BBQ sauce works perfectly well in this recipe, and there’s no need to make your own unless you prefer to. Choose one that matches your flavor preference: sweeter sauces like Sweet Baby Ray’s caramelize beautifully and create a glossy finish, while smokier or spicier sauces add more complexity. If you’re looking to control ingredients (especially sugar and sodium), homemade gives you that control. Either way, apply it only during the final unwrapped phase so it doesn’t burn.
Read Also: French Onion Beef Short Rib Soup Recipe
Final Thoughts
This air fryer beef ribs recipe is one of those recipes that genuinely surprises people. Most folks expect ribs to be an all-day project, so when you pull something this tender and flavorful out of an air fryer in under an hour, it tends to raise eyebrows.
The foil-wrap technique is the real star here. It’s a simple trick that solves the biggest challenge of air frying a tough cut, which is getting enough moisture and heat into the meat without drying it out. Paired with a well-seasoned dry rub and your favorite BBQ sauce, you get ribs that hold their own against any method.
Give this recipe a try this week, and let us know how it went! Drop a comment below with your experience, any substitutions you made, or your favorite BBQ sauce pairing. And if you loved it, share it with a friend who thinks they need a smoker to make great ribs.
Recommended:
- Air Fryer Beef Jerky Recipe
- Beef Bourguignon Recipe
- Beef Stroganoff Recipe
- Beef Wellington Recipe
- Beef and Barley Soup Recipe
- Crockpot Beef Stew Recipe
- Filet Mignon Recipe
- Prime Rib Recipe
- Air Fryer Zucchini Boats Recipe
- Beef Short Rib Taco Recipe


