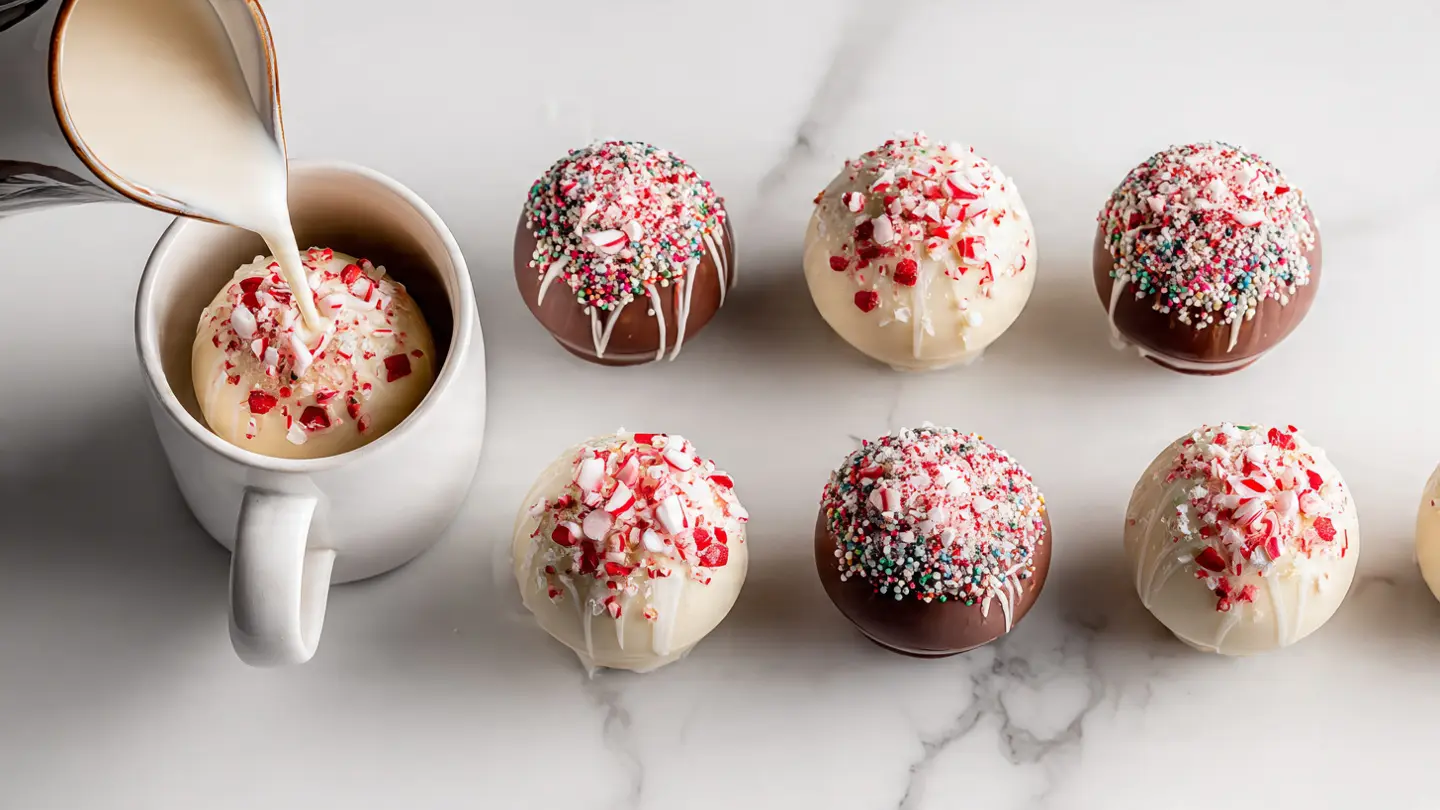
This hot chocolate bombs recipe is everything you want on a cold winter day — a glossy chocolate sphere filled with cocoa mix and marshmallows that magically melts open the moment hot milk hits it. The result? A rich, creamy, deeply chocolatey cup of cocoa that tastes like it came from a specialty shop.
What makes these so special is the theater of it all. You set one in a mug, pour in steaming milk, and watch the whole thing slowly crack and release a little flurry of marshmallows. It’s the kind of moment that makes anyone at the table stop and stare.
The recipe itself is more approachable than it looks. You don’t need a pastry degree or a professional kitchen. You just need good chocolate, a silicone sphere mold, and about an hour of hands-on time. Once you get the hang of it after your first batch, the process becomes genuinely fun.
These also make one of the best homemade edible gifts you can put together, especially around the holidays. Package them in a cellophane bag with a tag and a small carton of milk, and you’ve got something thoughtful that people will actually be excited to receive.
If you love warm chocolatey drinks, you’ll also want to check out this Hot Chocolate Recipe for the perfect base drink to compare.
Why You’ll Love This Hot Chocolate Bombs Recipe
Making these at home means you control every element — the chocolate quality, the sweetness level, and all the little extras inside.
Unlike a store-bought packet of cocoa mix, these deliver an incredibly rich drinking chocolate experience.
You get to customize each bomb with different fillings, toppings, and flavors, which makes the process endlessly creative.
They hold up well for gifting, making them a practical and impressive edible project.
Here’s a quick summary of why this recipe is worth your time:
- The chocolate shell creates a smooth, glossy sphere that feels professional even at home
- Silicone molds make it beginner-friendly — no tempering required if you work carefully
- You can batch-make 6 bombs at a time, which is perfect for gift sets
- The filling is endlessly customizable with different cocoas, candies, and spices
- Each bomb keeps for up to 2 weeks at room temperature, making them ideal for advance prep
- Both kids and adults love the explosion effect — it never gets old
- They come together with minimal specialty ingredients
Read Also: Champurrado Recipe
Ingredients
Good-quality chocolate is the single most important ingredient here. Semi-sweet chocolate with cocoa butter listed in the ingredients will melt more cleanly and taste far better than candy melts or cheap chocolate chips, though those work in a pinch. For the shells, you want something with a cocoa percentage in the 50–70% range for balanced flavor without too much bitterness.
Here’s everything you’ll need to make 6 hot chocolate bombs:
For the Chocolate Shells:
- 12 oz (340g) semi-sweet chocolate wafers or high-quality chocolate bars (Ghirardelli, Guittard, or Callebaut recommended)
For the Filling (per bomb):
- 1 tablespoon hot cocoa mix (store-bought or homemade)
- 2 tablespoons mini marshmallows
- Pinch of sea salt (optional, but deepens flavor)
For Decoration (optional):
- 2 oz (55g) white chocolate, melted, for drizzling
- Holiday sprinkles, crushed candy cane, or sanding sugar
To Serve (per bomb):
- 1½ cups (360ml) whole milk, heated until steaming (not boiling)
Homemade Hot Cocoa Mix (optional, makes enough for 6 bombs):
- 3 tablespoons unsweetened Dutch-process cocoa powder
- 3 tablespoons granulated sugar
- Pinch of salt
You might also love this Muddy Buddy Recipe if you’re on a chocolate kick today.
Kitchen Equipment Needed
Most of what you need for this recipe you likely already own. The one piece you’ll need to purchase if you don’t have it is the silicone sphere mold — and it’s a very inexpensive item widely available online and at craft stores.
Here’s your full equipment list:
- Silicone half-sphere mold (2-inch / 5cm diameter cavities — this size fits perfectly in a standard mug)
- Microwave-safe glass bowl (for melting chocolate)
- Small spoon or pastry brush (for coating the molds)
- Candy thermometer or instant-read thermometer (helpful for monitoring chocolate temperature)
- Flat baking sheet lined with parchment paper
- Small flat skillet or plate (for heating the edges of the shells to seal them)
- Parchment paper
- Refrigerator or freezer (for setting the shells)
- Heatproof mixing bowls
- Piping bag or zip-lock bag (for drizzling white chocolate decoration)
Read Also: Cake Pop Recipe
Recommended Products for This Recipe
These are products that genuinely make a difference in how your hot chocolate bombs turn out, based on quality and performance.
1. Ghirardelli Semi-Sweet Chocolate Baking Chips
Ghirardelli uses real cocoa butter in their formulation, which means the chocolate melts smoothly, sets up with a nice sheen, and tastes noticeably better than generic chips. For hot chocolate bombs, the quality of the shell is everything — using a premium chocolate like this means your bombs will hold their shape, look glossy, and release beautifully in hot milk.
2. Wilton Non-Stick Silicone Half-Sphere Mold
This is the most beginner-friendly mold for making hot chocolate bombs. The 2-inch cavities are the right size for a standard mug, the flexible silicone makes it easy to pop out the shells without cracking, and the non-stick surface keeps cleanup simple. It typically comes in a 12-cavity tray, letting you make 6 complete bombs per batch.
3. Guittard Cocoa Rouge Dutch-Process Cocoa Powder
Dutch-process cocoa has a deeper, less acidic flavor than natural cocoa, which makes the hot cocoa mix inside your bombs taste richer and more balanced. Guittard’s version is widely loved by bakers and home cooks for its consistently dark color and complex chocolate flavor.
4. OXO Good Grips Instant-Read Thermometer
Keeping track of your chocolate temperature prevents bloom (those dull, streaky patches) and ensures your shells set up with a proper snap and shine. This thermometer reads quickly and accurately, and it’s easy to clean between uses.
5. Ateco Disposable Piping Bags
Once your bombs are assembled, a piping bag filled with melted white or dark chocolate makes it easy to add decorative drizzles across the surface. These disposable bags are inexpensive, sturdy enough for chocolate work, and eliminate cleanup.
You might also enjoy these Bourbon Balls as another fun chocolate-based treat to gift alongside your bombs.
Step-by-Step Instructions
Step 1: Prepare Your Molds and Workspace
- Make sure your silicone mold is completely clean and dry before you begin. Even a tiny drop of water will cause chocolate to seize up and turn grainy, so wipe the cavities thoroughly with a dry paper towel or clean kitchen cloth.
- Set the silicone mold on a flat baking sheet. This makes it much easier to transfer to the refrigerator without wobbling or spilling.
- Lay a piece of parchment paper on your counter or work surface nearby. You’ll use this to rest the finished shells while you work.
- Have your filling ingredients (hot cocoa mix and mini marshmallows) measured and ready to go before you start working with the chocolate. Once the chocolate is melted, you’ll want to move at a reasonable pace.
Step 2: Melt the Chocolate
- Place 12 oz (340g) of your semi-sweet chocolate in a microwave-safe glass bowl.
- Microwave on 50% power for 30 seconds. Remove and stir with a dry spoon.
- Microwave again on 50% power for another 30 seconds. Stir.
- Continue microwaving in 15-second bursts at 50% power, stirring thoroughly after each interval, until the chocolate is about 75% melted.
- Stop microwaving and continue stirring. The residual heat will melt the remaining chunks — this prevents overheating, which causes the chocolate to lose its shine.
- The chocolate should look smooth, glossy, and fluid. It should feel just barely warm to the touch, not hot. If you have a thermometer, it should read around 88–90°F (31–32°C) for semi-sweet chocolate.
- If the chocolate cools down too much before you finish coating all the molds, give it another 10-second burst at 50% power and stir again.
Step 3: Coat the Molds (First Layer)
- Spoon about 1½ to 2 teaspoons of melted chocolate into one cavity of the silicone mold.
- Use the back of the spoon or a small pastry brush to push the chocolate up the sides of the cavity, making sure the entire inner surface is coated including the rim. The layer should be even and not too thin — you’re aiming for about ⅛ inch (3mm) thickness.
- Repeat for all 12 cavities, working steadily. If the chocolate starts to thicken, give it another short microwave burst to loosen it.
- Transfer the mold on its baking sheet to the refrigerator. Chill for 8–10 minutes, or until the chocolate is fully set and opaque.
Step 4: Apply a Second Layer of Chocolate
- Once the first layer is set, remove the mold from the refrigerator. You should see a thin, slightly translucent shell — this is normal and exactly why a second coat is necessary.
- Coat each cavity with a second layer of chocolate, again using the spoon or pastry brush to ensure even coverage. Pay special attention to the rim and any thin spots from the first layer.
- Return the mold to the refrigerator for another 8–10 minutes until fully firm.
- After chilling, gently flex the silicone mold to release the shells. They should pop out cleanly with no cracking. If any edges feel soft, refrigerate for 5 more minutes before removing.
- Set the 12 chocolate half-shells on your parchment-lined surface. Handle them as little as possible — the warmth from your hands will leave fingerprints and can soften the edges.
Step 5: Fill Six of the Shells
- Take 6 of the 12 shells and set them upright in the silicone mold cavities (the mold acts as a cradle to keep them stable while you fill them).
- Add 1 tablespoon of hot cocoa mix into each shell, spreading it evenly.
- Add 2 tablespoons of mini marshmallows on top of the cocoa mix, pressing them down gently so they fit inside.
- You can also add a pinch of sea salt at this stage — it amplifies the chocolate flavor in a subtle, lovely way.
- Do not overfill the shells. Leave a small gap at the rim so the two halves can seal together properly.
Step 6: Seal the Two Halves Together
- Place a small, flat skillet or microwave-safe plate and heat it briefly — just enough so it’s warm to the touch, not scorching hot. You can also microwave the plate for 20–30 seconds.
- Take one of the empty (unfilled) chocolate shells and gently press its rim flat side down onto the warm skillet for about 3–5 seconds. This slightly melts the rim, creating a thin layer of tacky chocolate that acts as a natural glue.
- Immediately press this warm-rimmed shell on top of one of the filled shells, aligning the edges carefully. Hold in place for 10–15 seconds with gentle, even pressure.
- If the seam isn’t perfectly smooth, dab a tiny amount of melted chocolate along the join with your fingertip and smooth it over.
- Repeat for all 6 bombs. Set them on the parchment-lined tray.
- Refrigerate the assembled bombs for 10 minutes to fully firm up the seams.
Step 7: Decorate the Hot Chocolate Bombs
- Melt 2 oz (55g) of white chocolate in a small bowl using the same microwave method from Step 2.
- Transfer the melted white chocolate to a piping bag or a small zip-lock bag with one corner snipped off.
- Drizzle the white chocolate back and forth over the surface of each bomb in a zigzag pattern.
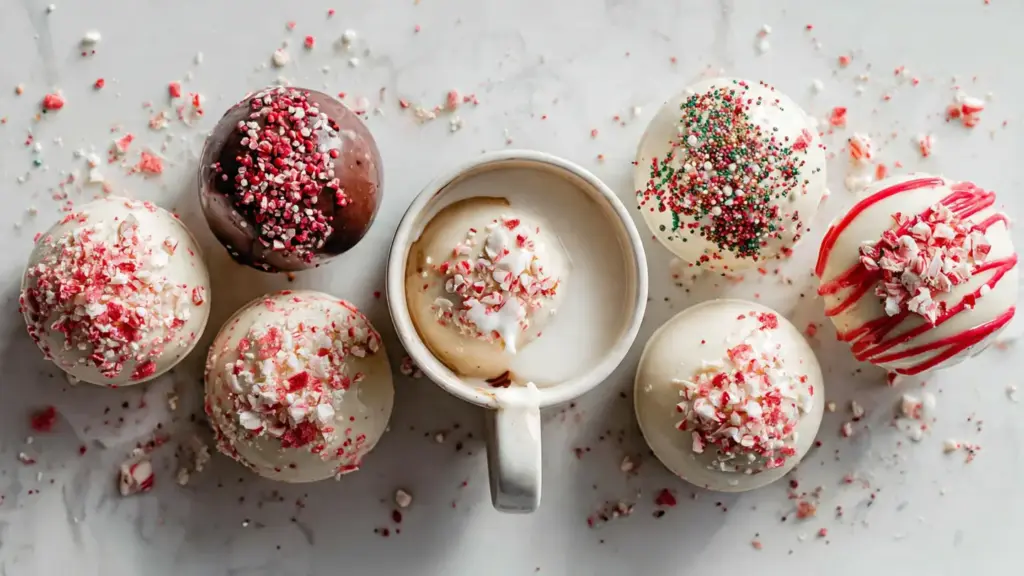
- Immediately scatter sprinkles, crushed candy cane, or sanding sugar over the wet drizzle before it sets.
- Allow the decoration to set at room temperature for about 15 minutes, or pop them in the refrigerator for 5 minutes.
- Your hot chocolate bombs are now ready to serve or package as gifts.
Step 8: Serve Your Hot Chocolate Bombs
- Place one hot chocolate bomb in the bottom of a large mug.
- Heat 1½ cups (360ml) of whole milk in a saucepan over medium heat or in the microwave until steaming, about 160–170°F (71–77°C). Do not bring it to a boil or the chocolate can scorch.
- Slowly pour the hot milk directly over the bomb.
- Watch it crack and bloom open, releasing the cocoa mix and marshmallows.
- Stir gently with a spoon until the cocoa is fully dissolved and the hot chocolate is uniform in color and flavor.
- Sip and enjoy immediately.
Read Also: Hot Fudge Sauce Recipe
Tips for Success
Getting hot chocolate bombs right the first time comes down to a few key details — and these tips address the most common issues home bakers run into.
- Don’t rush the chilling time. If the shells aren’t fully set before you try to remove them, they’ll crack or stretch. When in doubt, give them 5 more minutes in the refrigerator.
- Two coats of chocolate are non-negotiable. A single coat is too thin and fragile. Two coats give you a sturdy shell that holds its shape even at room temperature.
- Keep everything bone dry. Water is chocolate’s worst enemy. One drop of moisture in your chocolate will cause it to seize up instantly and become grainy and unusable.
- Use the mold as a cradle when filling. Placing the shells back into the silicone cavities while you fill them keeps them stable and prevents cracking from handling.
- Work quickly but calmly. Chocolate softens from the heat of your hands, so minimize how long you hold the shells. Keep a sheet of parchment paper nearby to rest them on.
- Expect your first batch to be a learning curve. The second batch will always be smoother and faster. Melt a bit of extra chocolate to replace any shells that crack on your first attempt.
- Milk temperature matters. Hot but not boiling milk gives the best melt and the most dramatic explosion effect. Aim for steaming, around 160–170°F (71–77°C).
The same attention to chocolate temperature also pays off in this Chocolate Pudding Recipe.
Serving Suggestions
Hot chocolate bombs are a whole experience, and how you serve them can make that experience even more special.
Setting the bomb in the mug and letting your guests or family pour the milk themselves makes it interactive and memorable — everyone loves watching the explosion happen.
Here are some great serving ideas to elevate the moment:
- Pair with Shortbread Cookies for a simple and elegant tray
- Serve alongside Gingerbread Cookies for a classic holiday spread
- Arrange 3–4 bombs in a cellophane bag tied with a ribbon for a gift set, tucked alongside a cozy mug
- Use them as a fun party activity where guests pick their own bomb from a platter and pour their own milk
- Serve after dinner as an alternative to a chocolate dessert
- Top the finished hot chocolate with a dollop of whipped cream, a sprinkle of cinnamon, or a drizzle of Caramel Sauce for extra indulgence
Variations to Try
Once you’ve made the classic version, the door opens to all kinds of creative variations. The basic technique stays the same — just swap the filling ingredients.
Here are some fun directions to take this recipe:
- Peppermint: Add ¼ teaspoon of peppermint extract to the cocoa mix or crush candy canes finely and mix them into the filling for a festive, refreshing flavor
- Mocha: Stir 1 teaspoon of espresso powder into the cocoa mix for a coffee-chocolate combo that’s excellent for adults
- S’mores: Add finely crushed graham crackers to the cocoa mix and double the marshmallow filling; top the outside with crushed crackers for extra flair
- Salted Caramel: Use milk chocolate for the shell, add a few caramel bits inside alongside the cocoa mix, and sprinkle flaky sea salt on the outside decoration
- White Chocolate: Use white chocolate wafers for the shell and fill with white cocoa mix for a creamy, vanilla-forward version
- Mexican Hot Chocolate: Add a pinch of cinnamon and a tiny pinch of cayenne pepper to the cocoa filling for a warmly spiced, slightly smoky twist
- Boozy Adult Version: Stir 1 teaspoon of Baileys Irish Cream powder or a tiny piece of a Baileys truffle into the filling for a grown-up after-dinner treat
You might also love making Cake Pops as another fun chocolate project for gifting.
Storage and Reheating
These bombs store beautifully and can be made well in advance of any holiday, party, or gifting occasion. The key is keeping them away from heat, humidity, and anything that might scratch or dent the shell.
Follow these storage tips to keep your bombs in perfect condition:
- Room temperature: Store assembled hot chocolate bombs in an airtight container at room temperature for up to 2 weeks. Keep them in a cool, dry spot away from direct sunlight and heat sources.
- Refrigerator: You can refrigerate them in an airtight container for up to 1 month, but allow them to come to room temperature for 15–20 minutes before serving to prevent condensation from forming on the shell.
- Freezer: Hot chocolate bombs can be frozen in a single layer in an airtight container for up to 3 months. Thaw at room temperature before using — do not microwave to thaw.
- Gifting storage: Use cupcake liners to cradle individual bombs inside a gift box or cellophane bag. This prevents them from rolling around, touching each other, and picking up fingerprints.
- Reheating note: There is no reheating for the bombs themselves — simply drop into a mug and pour over freshly steamed milk as directed. Do not microwave the finished bomb directly.
Read Also: Hot Chocolate Recipe
Nutritional Facts
The following is an estimate per one assembled hot chocolate bomb (made with semi-sweet chocolate and standard hot cocoa mix), not including the milk used to serve.
| Nutrient | Amount Per Bomb |
|---|---|
| Calories | 190 kcal |
| Total Fat | 13g |
| Saturated Fat | 7g |
| Cholesterol | 1mg |
| Sodium | 48mg |
| Total Carbohydrates | 17g |
| Dietary Fiber | 3g |
| Total Sugars | 10g |
| Protein | 2g |
| Calcium | 26mg |
| Iron | 3mg |
| Potassium | 203mg |
Note: Nutritional values are estimates and will vary based on the specific chocolate, cocoa mix, and marshmallows used. Adding whole milk to serve contributes additional calories, fat, and calcium.
Another fun chocolate treat worth trying is this Dirt Pudding Recipe — great for all ages.
Health Benefits of Key Ingredients
While hot chocolate bombs are absolutely an indulgent treat, the key ingredients do bring some genuine nutritional value to the table — particularly when you choose high-quality chocolate.
Good-quality dark chocolate is one of the most antioxidant-rich foods you can eat, and it forms the main structural ingredient in every bomb.
Here’s a look at what the key ingredients contribute:
- Dark or semi-sweet chocolate is rich in flavonoids, a class of antioxidants linked to heart health and improved blood flow. Cocoa also contains iron, magnesium, and zinc, along with small amounts of mood-boosting phenylethylamine.
- Cocoa powder used in the hot cocoa mix is one of the most concentrated sources of polyphenols in the diet. Dutch-process cocoa has a milder flavor profile, while natural cocoa retains more of its raw antioxidants.
- Milk (used to serve) provides a complete protein profile, calcium for bone density, vitamin D, and B vitamins that support energy metabolism. Whole milk also helps create a creamier, more indulgent final drink.
- Mini marshmallows are primarily sugar and gelatin and don’t offer significant nutrition, but they contribute to the fun and are used in small quantities per bomb.
- Sea salt in small pinches is used as a flavor enhancer and also provides trace minerals like iodine.
For another warming drink with deep flavor and cultural roots, explore this Champurrado Recipe.
Frequently Asked Questions
1. Do I need to temper the chocolate to make hot chocolate bombs?
Tempering — the process of heating and cooling chocolate to specific temperatures — gives you the glossiest, snappiest, most professional-looking shells. That said, it is not strictly required for beginner batches.
If you melt your chocolate carefully at 50% power in short bursts without overheating it, the shells can still turn out shiny and firm. The result may not be as perfectly glossy as tempered chocolate, but they’ll taste just as good and hold their shape well at room temperature.
2. Can I use candy melts instead of real chocolate?
Yes, candy melts (also called compound chocolate) are a popular beginner option because they don’t require tempering. They melt easily and set up predictably.
The tradeoff is flavor and melt performance — candy melts contain vegetable fat instead of cocoa butter, which means they taste noticeably less chocolatey and sometimes don’t melt as cleanly in hot milk. For gifts or occasions where taste matters, real chocolate is worth the small extra effort.
3. Why did my chocolate shells crack when I removed them from the mold?
Cracking usually means the shells weren’t thick enough or weren’t chilled long enough before removal. Make sure you applied two full, even coats of chocolate, and that the second coat was completely firm before you flexed the mold.
The refrigerator is more reliable than the freezer here — freezing can cause the chocolate to contract too quickly, which sometimes leads to hairline cracks. If you freeze them, allow 15 minutes rather than trying to rush it to 5 minutes.
4. My two halves won’t stick together. What am I doing wrong?
The seal works by slightly melting the rim of one shell against a warm surface, then pressing it onto the filled half. If your warm plate has cooled down too much, the rim won’t melt enough to bond.
Reheat the plate or skillet briefly and try again. You can also dip just the rim of the empty shell into a small bowl of freshly melted chocolate, let the excess drip off, then press it directly onto the filled shell — this method is very reliable.
5. How much milk should I use per bomb?
The standard recommendation is 1½ cups (360ml) of hot milk per bomb, which gives you a nicely balanced cup of hot chocolate that isn’t too thin or too thick.
If you prefer a richer, denser cup — more like a European-style drinking chocolate — use 1 cup (240ml) of milk instead. Whole milk gives the creamiest result, but oat milk and almond milk both work well for a dairy-free version.
Read Also: Pumpkin Spice Latte Recipe
Final Thoughts
Hot chocolate bombs are one of those recipes that genuinely delivers more than you expect. They look impressive, they taste incredible, and the moment the shell melts open in a mug of hot milk is something that never gets old — no matter how many times you’ve seen it.
What makes them especially rewarding is that you don’t need to be an experienced baker to pull them off. The technique is learnable in a single afternoon, and by the second or third bomb, you’ll have the whole thing down.
Whether you’re making them to share, to give as gifts, or just to treat yourself on a slow winter weekend, this recipe will not disappoint.
Give these a try, and drop a comment below to let us know how your bombs turned out — or share your batch photos. We’d love to see your creative decorations and filling combinations!
Recommended:
- Chocolate Pudding Recipe
- Dirt Pudding Recipe
- Brownie Pudding Recipe
- Chocolate Pie Recipe
- Mug Cake Recipe
- Chocolate Souffle Recipe
- Toffee Recipe
- Buckeyes Recipe
- The Original Fantasy Fudge Recipe
- Pumpkin Roll Recipe


