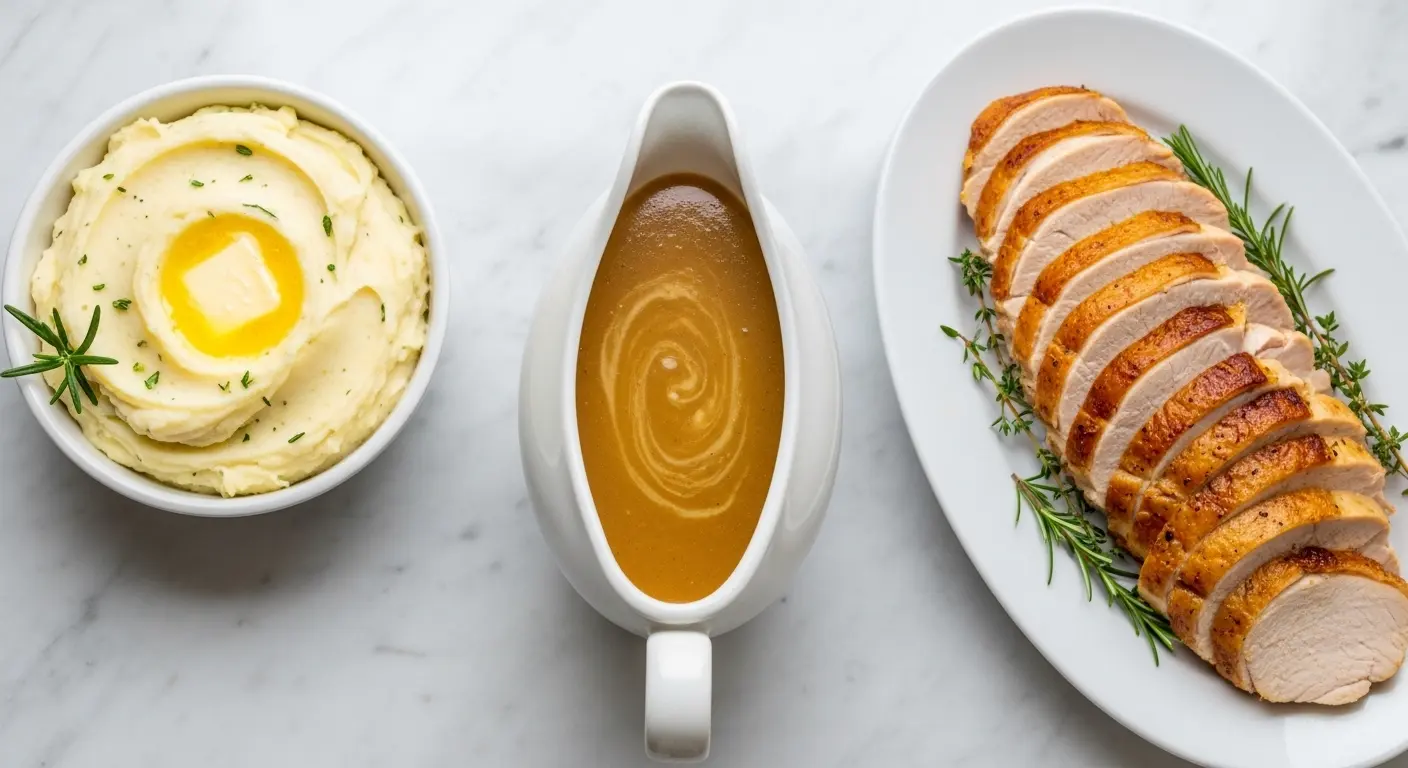
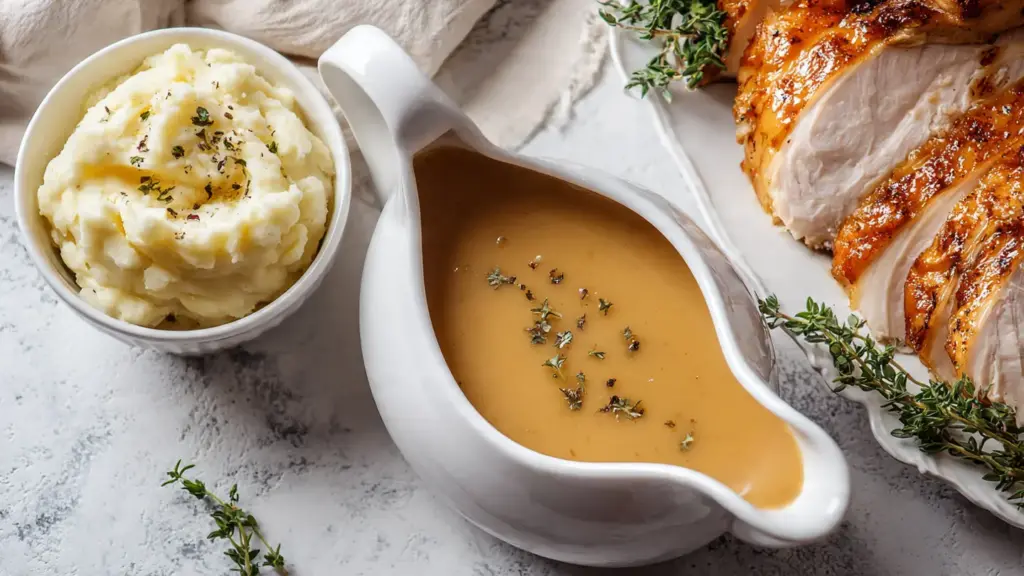
A good turkey gravy recipe can make or break the entire Thanksgiving table. You can have the most beautifully roasted bird, the creamiest mashed potatoes, and the fluffiest dinner rolls — but without a rich, glossy, flavor-packed gravy to tie everything together, something will always feel missing. The great news? Making homemade turkey gravy from scratch is far less intimidating than most people think.
The secret lies entirely in your turkey drippings. Those golden, deeply browned juices pooled at the bottom of your roasting pan are concentrated pure flavor, and all you need is a bit of fat, flour, and stock to turn them into the most luxurious gravy you’ve ever tasted.
This recipe uses a simple roux method — equal parts fat and flour cooked together first — which guarantees a smooth, lump-free result every single time. It comes together in about 15 minutes while your turkey rests, so the timing couldn’t be more perfect.
A few techniques really set this version apart. Skimming the fat properly ensures your gravy won’t separate or feel greasy. Cooking the roux long enough gives it a slightly nutty aroma that adds depth. And adding warm (not cold) stock while whisking keeps things silky smooth.
You’ll also find tips below for making this gravy without drippings, ahead of time, and even gluten-free — so no matter what your situation is, you’ll have a stunning gravy ready to pour.
This pairs beautifully with a perfectly roasted bird from this Thanksgiving Turkey recipe — the two really are made for each other.
Why You’ll Love This Turkey Gravy Recipe
This is the kind of gravy that gets people sneaking into the kitchen for an extra ladle before dinner is even served.
It tastes deeply savory and rich without being heavy, with a silky texture that coats everything beautifully — turkey slices, mashed potatoes, stuffing, and even dinner rolls.
- It comes together in just 15 minutes using mostly pantry staples
- The roux method is foolproof and produces a completely lump-free gravy every time
- You can easily scale it up or down depending on how many guests you’re feeding
- It works with drippings from any roasted bird, not just turkey
- Make-ahead friendly — you can prep it up to 2 days in advance
- Easily customizable with herbs, wine, or Worcestershire sauce
- Far superior in flavor to anything from a packet or can
If you enjoy making your own sauces from scratch, you’ll also love this Sausage Gravy for a completely different but equally comforting occasion.
Ingredients
This recipe makes approximately 2 to 3 cups of gravy, which is enough to serve 8 to 10 people generously. Scale up the fat, flour, and stock in equal ratios if you need more.
- Turkey drippings – about 1/4 cup (60 ml) of fat + 2 cups (480 ml) of the liquid drippings; supplement with turkey or chicken stock if needed
- Unsalted butter – 2 tablespoons (28 g), to supplement the drippings fat if needed
- All-purpose flour – 1/4 cup (30 g)
- Low-sodium chicken or turkey stock – 1 to 2 cups (240 to 480 ml), as needed
- Kosher salt – to taste
- Freshly ground black pepper – to taste
- Fresh thyme – 1 teaspoon, optional for added herbal depth
- Worcestershire sauce – 1 teaspoon, optional for umami richness
- Heavy cream or whole milk – 2 tablespoons (30 ml), optional for a creamier finish
Read Also: Cranberry Sauce Recipe
Kitchen Equipment Needed
You don’t need any specialized equipment for this recipe — just a few reliable kitchen staples that make the process smooth and stress-free.
- A fine mesh strainer – essential for straining the drippings and removing any solids
- A fat separator / gravy separator – makes separating the fat from the liquid drippings much easier
- A large liquid measuring cup – to measure and hold your drippings + stock
- A medium to large heavy-bottomed saucepan – for making the roux and finishing the gravy
- A good quality whisk – critical for a lump-free gravy
- A wooden spoon or heat-resistant spatula
- Ladle – for serving
You might also enjoy: Sausage Stuffing Recipe
Recommended Products for This Recipe
These are products I genuinely recommend based on quality and performance — they make a real difference when it comes to getting perfect gravy.
1. OXO Good Grips Fat Separator
A fat separator is the single most useful tool for making gravy, since it allows you to pour from the bottom of the cup, leaving the fat floating on top behind. This OXO model has a filter built into the top to catch solids as you pour, making it a two-in-one tool.
2. All-Clad Stainless Steel Saucepan
A heavy-bottomed stainless steel saucepan distributes heat evenly, which is essential for cooking a roux without scorching. Thin, lightweight pans create hot spots that can burn your flour and ruin the gravy’s flavor before you’ve even added the liquid.
3. Better Than Bouillon Turkey Base
When you don’t have enough drippings (or no drippings at all), a high-quality turkey base like this one gives you a deeply flavored stock in seconds. It’s also great for boosting the flavor of a gravy that tastes a little flat.
4. Microplane Fine Grater
If you want to add a small amount of fresh nutmeg or lemon zest to your gravy for brightness, a Microplane makes it effortless. Just a whisper of fresh nutmeg adds a subtle warmth that elevates the finished gravy without anyone being able to identify exactly what they’re tasting.
Read Also: Dry Brine Turkey Recipe
Step-by-Step Instructions
1. Collect and Strain the Drippings
- Once your turkey is out of the oven, carefully tilt the roasting pan to pool the drippings in one corner.
- Use a spoon or ladle to scoop all the drippings into a large liquid measuring cup or fat separator — don’t leave anything behind, since those browned bits are pure flavor.
- Pour the drippings through a fine mesh strainer set over the measuring cup to catch any solids, bones, or herb sprigs.
- Let the strained liquid sit for 2 to 3 minutes. The fat will rise to the top and the dark, concentrated turkey juices will settle below.
- If using a fat separator, pour it out slowly from the spout at the bottom — the fat stays behind. If using a measuring cup, skim the fat off the top with a large spoon and transfer it to a small bowl. You’ll need about 1/4 cup (60 ml) of fat for the roux.
- Measure the remaining liquid drippings. You need 2 cups (480 ml) total — if you’re short, pour in low-sodium chicken or turkey stock to make up the difference.
- Keep the drippings liquid warm (not cold) either in the measuring cup placed in a warm spot, or gently heated on the stovetop. Adding cold liquid to a hot roux is a common cause of lumps.
2. Make the Roux
- Place a medium heavy-bottomed saucepan over medium heat.
- Add the 1/4 cup (60 ml) of skimmed turkey fat to the pan. If you don’t have a full 1/4 cup of fat, add enough unsalted butter (about 2 tablespoons / 28 g) to make up the difference.
- Let the fat melt and heat through — it should shimmer but not smoke.
- Add the 1/4 cup (30 g) of all-purpose flour all at once to the fat.
- Immediately begin whisking constantly, scraping the bottom and edges of the pan to incorporate all the flour into the fat.
- Cook the roux for 2 to 3 minutes, whisking constantly, until it smells slightly nutty and looks dry rather than wet and pasty. The color should deepen slightly to a light golden tan — this step is crucial because it cooks off the raw flour taste that gives gravy an unpleasant, starchy flavor.
- Don’t rush this step and don’t let it burn — if it’s going too fast, reduce the heat slightly.
3. Add the Drippings and Stock
- With the pan still over medium heat and the roux bubbling gently, begin adding the warm drippings liquid — slowly at first, about 1/4 cup (60 ml) at a time.
- Whisk vigorously after each addition, making sure the liquid is fully incorporated and smooth before adding more. This is where lumps either form or don’t — steady whisking prevents them entirely.
- Once you’ve added about half the liquid and the mixture is smooth and thick, you can pour the rest in more quickly, whisking all the while.
- If you need more liquid for a thinner gravy, add additional chicken or turkey stock at this point, about 1/4 cup (60 ml) at a time.
4. Simmer and Season
- Bring the gravy to a gentle boil over medium heat, whisking frequently.
- Reduce the heat to medium-low and let it simmer for 5 to 8 minutes, stirring occasionally, until it reaches your desired consistency. Keep in mind that gravy thickens further as it cools, so err on the side of slightly thinner than you think you want.
- Taste the gravy carefully before adding any salt — drippings are already seasoned from the turkey’s rub or brine, so you may need less salt than you expect.
- Add kosher salt and freshly ground black pepper to taste, starting with a small pinch of each.
- If using, stir in 1 teaspoon of fresh thyme leaves for herbal depth, 1 teaspoon of Worcestershire sauce for extra umami, or 2 tablespoons (30 ml) of heavy cream for a creamier, richer finish.
- Give it one final whisk and taste again before serving.
5. Strain and Serve
- For the smoothest, most restaurant-quality result, pour the finished gravy through a fine mesh strainer one final time before transferring it to your gravy boat. This removes any small lumps, thyme leaves, or stray bits and gives you a perfectly silky result.
- Transfer to a warmed gravy boat and serve immediately alongside your turkey, Creamy Mashed Potatoes, and all your favorite sides.
- If the gravy cools and thickens too much before serving, simply reheat gently over low heat while adding a splash of stock and whisking until smooth.
Tips for Success
A few focused techniques make all the difference between a so-so gravy and an unforgettable one.
- Skim the fat carefully — too much fat in the roux leads to a greasy gravy; too little means the roux won’t work. Aim for roughly equal parts fat and flour by volume.
- Cook the roux long enough — at least 2 to 3 minutes over medium heat. You should smell it become slightly nutty. Undercooked roux gives gravy a starchy, raw flour taste.
- Use warm liquid — adding cold drippings or cold stock to a hot roux causes lumps. Keep your liquid warm, or at minimum at room temperature.
- Whisk constantly when adding liquid, especially during the first few additions. A balloon whisk works better than a flat whisk for this.
- Season at the end — the drippings are already seasoned, so always taste before adding salt.
- Thin beats thick — you can always simmer a thin gravy down to concentrate it, but it’s very hard to fix an overly thick gravy without making it taste diluted.
- Strain twice for silk — once when you strain the raw drippings, and once after the gravy is finished. It makes a noticeable difference in texture.
You might also like: Garlic Mashed Potatoes Recipe
Serving Suggestions
This turkey gravy is incredibly versatile — it belongs on far more than just your holiday plate.
It’s obviously perfect drizzled over roasted turkey slices and pooled into a well made in a mound of mashed potatoes, but don’t stop there.
- Creamy Mashed Potatoes — the ultimate classic pairing, no explanation needed
- Dinner Rolls — use them to soak up every last drop in the gravy boat
- Sweet Potato Casserole — a savory drizzle of turkey gravy balances the sweetness beautifully
- Green Bean Casserole — a natural side dish partner on any holiday table
- Roasted turkey slices — both white and dark meat benefit from generous ladles of this gravy
- Open-faced turkey sandwiches — leftover turkey piled on toast and smothered in hot gravy is one of the best post-holiday meals there is
- Scalloped Potatoes — pour a little turkey gravy over the top before baking for extra savory depth
Another favorite: Corn Soufflé Recipe
Variations to Try
Once you’ve mastered the base recipe, here are some easy ways to take your turkey gravy in a new direction depending on the meal or the occasion.
- Giblet Gravy – Simmer the turkey neck and giblets (heart, gizzard, but not the liver) in stock for 1 hour before making your gravy. Use the resulting broth as your stock, and finely chop the cooked giblet meat to stir in at the end for an old-fashioned, deeply flavored gravy.
- Herb Gravy – Add 1 tablespoon of fresh chopped herbs (thyme, rosemary, and sage in equal parts) to the roux and cook for 30 seconds before adding the liquid. The herbs infuse beautifully into the finished gravy.
- White Wine Gravy – Deglaze the roasting pan with 1/2 cup (120 ml) of dry white wine before adding to the drippings. The wine adds brightness and acidity that lifts the rich flavor.
- Gluten-Free Gravy – Substitute the all-purpose flour with a 1:1 gluten-free flour blend, or use 2 tablespoons (16 g) of cornstarch whisked into 2 tablespoons (30 ml) of cold water, then stirred in at the end instead of making a roux.
- Make-Ahead Gravy Without Drippings – Use 1/2 cup (113 g) of butter and 4 cups (960 ml) of good quality turkey or chicken stock. Sauté a small shallot and 1 clove of garlic in the butter first, then proceed with the roux. The finished gravy can be made up to 2 days ahead and reheated with fresh drippings added right before serving.
- Creamy Mushroom Turkey Gravy – Sauté 1 cup (85 g) of sliced cremini mushrooms in the fat before adding the flour. This gives the gravy an earthy, savory depth that is especially good over meatloaf or roast chicken.
Read Also: Turkey Tetrazzini Recipe
Storage and Reheating
Leftover turkey gravy stores and reheats very well, making it a great make-ahead option for busy holiday cooking.
- Store leftover gravy in an airtight container in the refrigerator for up to 3 days.
- For longer storage, freeze the gravy in airtight containers or zip-top freezer bags for up to 3 months. Let it cool completely before freezing.
- To reheat from the fridge: Pour the gravy into a small saucepan over medium-low heat. It will have thickened considerably as it chilled — add a few tablespoons of chicken stock or water and whisk constantly as it warms. Continue adding stock, a splash at a time, until it reaches your desired consistency.
- To reheat from frozen: Thaw overnight in the refrigerator, then reheat as above. You can also reheat directly from frozen over very low heat, stirring frequently and adding stock to loosen.
- Avoid microwaving gravy without covering it — it splatters easily.
- Do not refreeze gravy that has already been frozen and thawed.
Another favorite to pair with your holiday spread: Turkey Soup Recipe
Nutritional Facts
Approximate values per 1/4 cup (60 ml) serving, based on a 2.5-cup batch made with turkey drippings and no added cream.
| Nutrient | Amount Per Serving |
|---|---|
| Calories | 55 kcal |
| Total Fat | 4 g |
| Saturated Fat | 1.5 g |
| Cholesterol | 8 mg |
| Sodium | 180 mg |
| Total Carbohydrates | 3 g |
| Dietary Fiber | 0 g |
| Sugars | 0 g |
| Protein | 1.5 g |
Nutritional values are estimates and will vary based on the fat content of your drippings, the type of stock used, and any optional add-ins.
You might also enjoy: Turkey Pot Pie Recipe
Health Benefits of Key Ingredients
This gravy isn’t just delicious — several of its key components offer genuine nutritional value when consumed in moderation.
Turkey drippings are a source of naturally occurring collagen, gelatin, and fat-soluble vitamins including A, D, E, and K from the turkey’s skin and fat. When made from a well-seasoned, properly roasted bird, they also contain minerals like phosphorus and zinc.
- Turkey drippings and stock – Rich in protein and amino acids. Bone-in turkey parts release collagen and gelatin as they roast, contributing to a more nutritious cooking liquid than plain water or shelf-stable broth.
- All-purpose flour – Provides a small amount of iron, B vitamins, and dietary fiber. For a nutrient boost, swap in whole wheat flour (though it will give the gravy a slightly nuttier, denser flavor and darker color).
- Unsalted butter – Contains fat-soluble vitamins A, D, E, and K, along with short-chain fatty acids that support gut health in moderation.
- Fresh thyme (optional) – A powerful herb that contains thymol, a natural compound with antioxidant and antimicrobial properties. Even a small amount adds meaningful flavor without any calories.
- Worcestershire sauce (optional) – A fermented condiment that provides small amounts of B vitamins, calcium, and iron, along with a deep umami flavor that reduces the need for extra sodium.
- Black pepper – Contains piperine, which has been shown in research to enhance the absorption of other nutrients like curcumin and may have its own antioxidant properties.
Read Also: Turkey Chili Recipe
Frequently Asked Questions
1. What if I don’t have enough turkey drippings?
This is one of the most common gravy challenges, especially if the turkey wasn’t very large or released less liquid than expected.
You have a few good options. Add low-sodium chicken or turkey stock directly to the measuring cup to supplement — the drippings will still be the dominant flavor. Alternatively, use a high-quality turkey base like Better Than Bouillon mixed with hot water. You can also deglaze the roasting pan with 1/2 cup (120 ml) of warm stock and scrape up all the browned bits from the bottom — those bits are incredibly flavorful and shouldn’t be wasted.
2. My gravy turned out lumpy. How do I fix it?
Lumps happen to everyone at some point, and they’re almost always fixable.
The easiest solution is to pour the gravy through a fine mesh strainer into a clean saucepan — press gently with the back of a spoon and almost all lumps will be strained out. Alternatively, use an immersion blender directly in the pot and blend for 30 to 60 seconds, which will break down any lumps and give you a smooth, slightly thicker result.
3. Can I make this gravy ahead of time?
Absolutely, and it’s one of the best ways to reduce stress on Thanksgiving day.
Make the gravy up to 2 days ahead using good quality turkey or chicken stock in place of fresh drippings. Store it covered in the refrigerator. On the day of serving, reheat over medium-low heat and stir in a few tablespoons of the fresh drippings from your roasted turkey right before bringing it to the table. This gives you the convenience of make-ahead cooking with the fresh, roasted flavor of same-day drippings.
4. How do I make gluten-free turkey gravy?
The process is exactly the same, with one substitution.
Replace the all-purpose flour with a 1:1 gluten-free flour blend — Bob’s Red Mill and King Arthur both make excellent options that behave very similarly to regular flour in a roux. Alternatively, skip the roux entirely and use a cornstarch slurry: whisk 2 tablespoons (16 g) of cornstarch with 2 tablespoons (30 ml) of cold water, then stir it slowly into the simmering gravy at the end. The result will be slightly more translucent and glossy rather than opaque, but equally delicious.
5. My gravy tastes too salty. Can it be fixed?
It can, though fixing an over-salted gravy requires some patience.
The most effective approach is to add more unseasoned stock or water to dilute the salt, then re-thicken if needed. Alternatively, peel and slice a raw potato and simmer it in the gravy for 10 to 15 minutes — the potato absorbs some of the excess salt. Remove the potato before serving. A small squeeze of lemon juice or a splash of unseasoned cream can also help balance the saltiness by adding acidity or richness that distracts from it.
You might also enjoy: Turkey Wild Rice Soup Recipe
Final Thoughts
Homemade turkey gravy is one of those recipes that sounds intimidating right up until the moment you actually make it — and then it becomes something you’ll want to make for every roast, not just Thanksgiving.
Once you understand the drippings-to-roux-to-liquid process, it’s completely intuitive and endlessly adaptable.
This recipe is as traditional and reliable as it gets: deeply savory, perfectly silky, and ready in minutes. It’s the kind of gravy that turns an ordinary plate into a meal people remember.
Give it a try this holiday season, and don’t be surprised if it becomes the most requested dish at the table. Drop a comment below and let me know how it turned out — and feel free to share it with anyone who still thinks good gravy has to come from a packet!
Recommended:
- Thanksgiving Turkey Recipe
- Turkey Barley Soup
- Turkey Tetrazzini
- Sweet Potato Casserole
- Green Bean Casserole
- Dinner Rolls
- Prime Rib Recipe
- Meatloaf Recipe
- Roasted Potatoes Recipe
- Bechamel Sauce Recipe


