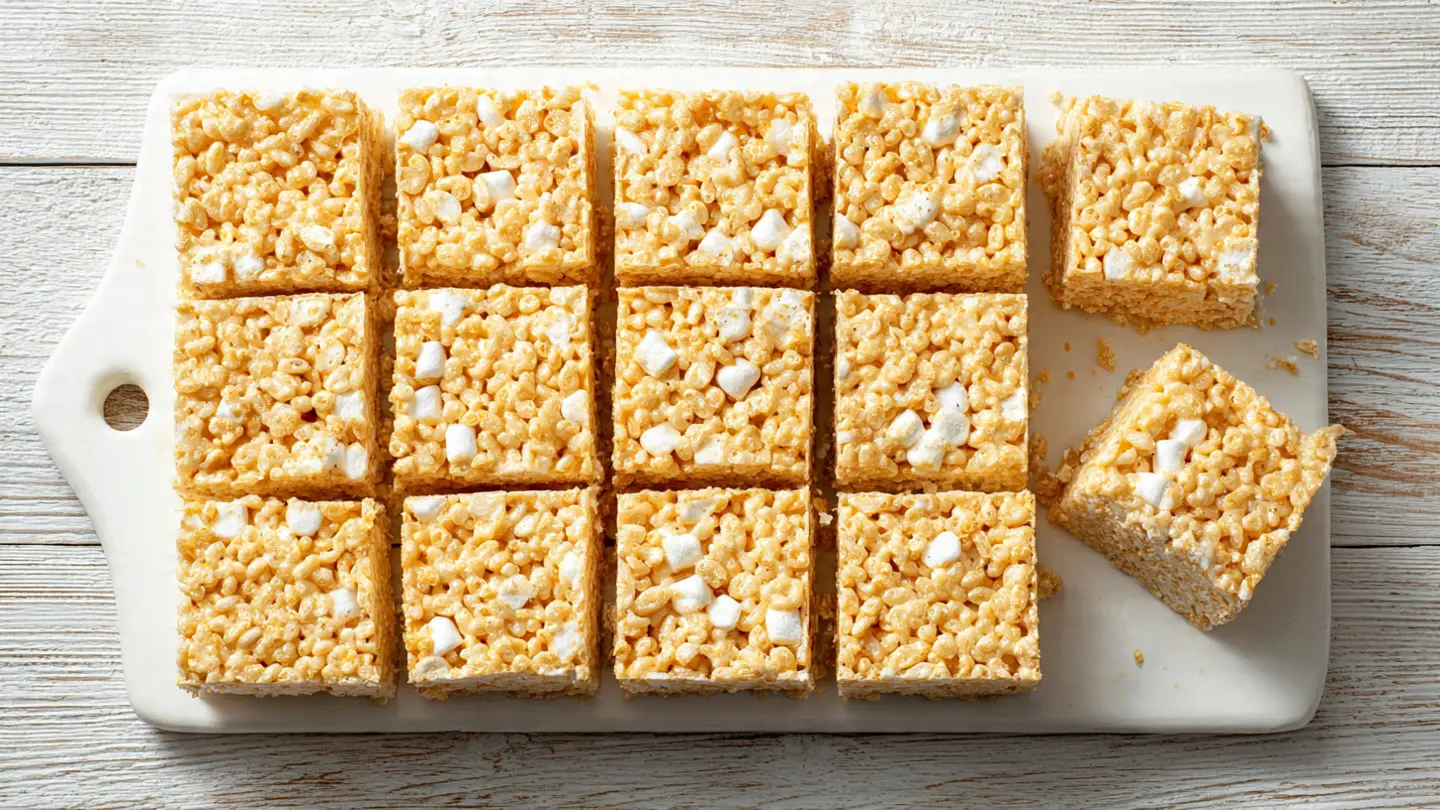
If you’re craving something sweet right now and don’t want to dirty a pot or wait around, this microwave rice krispie treat recipe is exactly what you need.
It takes less than five minutes from start to finish, uses just three ingredients, and delivers that classic chewy, gooey, buttery flavor everyone loves.
No stove, no baking, no fuss. Just a microwave-safe bowl and a pan to press them into.
This is the kind of recipe that’s perfect for last-minute bake sales, late-night cravings, or when you want to make a fun treat with your kids without a huge cleanup.
The microwave method works incredibly well here because it melts the butter and marshmallows together quickly and evenly. The key is using short bursts and stirring frequently so nothing scorches or dries out.
Why You’ll Love This Microwave Rice Krispie Treat Recipe
This recipe is beloved for one very simple reason: it’s almost impossible to mess up.
Even first-time bakers can nail it on the first try, and experienced home cooks love it for how fast it is.
The marshmallows melt into a sticky, glossy coating that hugs every single puff of cereal. That ratio of gooey to crispy is what makes rice krispie treats so satisfying.
Because you’re working in the microwave, you also have a bit more control than you might think. Short intervals let you stop the moment everything looks perfectly melted, before it has a chance to get rubbery.
Here’s why this recipe is a keeper:
- Incredibly fast – Done in under 5 minutes with minimal effort
- Only 3 ingredients – Butter, marshmallows, and Rice Krispies cereal
- No stove required – Ideal for small kitchens, dorms, or hot summer days
- Easy to customize – Swap in add-ins or toppings with almost no extra work
- Kid-friendly – A great activity to make together since there are no open flames
- Perfectly gooey – The microwave method keeps marshmallows moist and stretchy
You might also enjoy: Gooey Rice Krispie Treat Recipe
Ingredients
You only need three core ingredients, plus a pinch of salt to round out the sweetness. Using fresh, soft marshmallows is the single most important ingredient tip for this recipe. Stale marshmallows don’t melt as smoothly and can result in a greasy, uneven texture.
Here’s what you’ll need:
- 3 tablespoons (42 g) unsalted butter – unsalted lets you control the saltiness
- 4 cups (200 g) mini marshmallows (or about 40 large marshmallows) – fresh and soft
- 6 cups (168 g) Rice Krispies cereal – the original brand gives the best crunch
- 1/4 teaspoon fine sea salt – this small addition balances the sweetness beautifully
- Optional: 1/2 teaspoon pure vanilla extract – adds a warm, bakery-style flavor
Read Also: Original Rice Krispie Treat Recipe
Kitchen Equipment Needed
You don’t need anything fancy for this recipe. The beauty of the microwave method is that it keeps the equipment list short and simple.
Here’s what to have ready:
- Large microwave-safe bowl – needs to be big enough to stir all ingredients together
- 9×13 inch (23×33 cm) baking pan – for pressing and setting the treats
- Rubber spatula – for stirring and pressing (silicone works especially well)
- Measuring cups and spoons
- Parchment paper or non-stick cooking spray – to line the pan and prevent sticking
- Wax paper or buttered hands – for pressing the mixture into the pan without it sticking to you
Read Also: Easy Rice Krispie Treat Recipe
Recommended Products for This Recipe
These are products chosen based on quality and real-world performance, specifically for making the best possible rice krispie treats at home.
1. Large Microwave-Safe Glass Mixing Bowl
A large, deep glass bowl is essential for this recipe. It gives you plenty of room to stir in the cereal without losing half of it over the sides, and glass heats evenly in the microwave without developing hot spots that can scorch the marshmallows.
2. Silicone Spatula Set
A good silicone spatula is the best tool for folding the cereal into the melted marshmallow mixture and pressing the finished treats into the pan. Silicone handles the heat without warping and releases the sticky mixture much more easily than a wooden spoon.
3. Parchment Paper Sheets
Pre-cut parchment paper sheets are a real time-saver in this recipe. Lining your pan with parchment means the treats pop out cleanly and cut into perfect squares without tearing.
4. Non-Stick 9×13 Baking Pan
A quality non-stick pan ensures your treats release cleanly every time. A sturdy pan also holds the shape of the treats better as they cool, giving you clean edges when you slice them.
Read Also: Rice Krispie Treat Recipe with Large Marshmallows
Step-by-Step Instructions
Step 1: Prepare Your Pan
- Line your 9×13 inch (23×33 cm) baking pan with parchment paper, letting it hang slightly over the edges for easy removal.
- Lightly spray the parchment paper with non-stick cooking spray, or rub a small amount of softened butter over it using a paper towel.
- Set the prepared pan aside in a spot where you can quickly transfer the mixture once it’s ready. You’ll need to work fast once the marshmallows are melted.
Step 2: Measure Out Your Cereal
- Measure 6 cups (168 g) of Rice Krispies cereal and pour it into a large bowl or directly onto a clean surface nearby.
- Having the cereal measured and ready before you start melting the marshmallows is critical. Once the marshmallow mixture is melted, it starts to set quickly, so you don’t want to be scrambling for the cereal mid-recipe.
Step 3: Melt the Butter
- Place your large microwave-safe bowl in the microwave and add 3 tablespoons (42 g) of unsalted butter to it.
- Microwave on high power for about 30 to 45 seconds, or until the butter is fully melted. You can cover the bowl loosely with a paper towel to prevent splatter.
- Watch the butter closely. It melts fast in the microwave, and you want it melted but not bubbling aggressively, as overheated butter can affect the final texture.
Step 4: Add and Melt the Marshmallows
- Remove the bowl from the microwave and immediately add 4 cups (200 g) of mini marshmallows (or about 40 large marshmallows) to the melted butter.
- Stir briefly to coat the marshmallows in the butter, then return the bowl to the microwave.
- Microwave on high for 1 minute. Remove and stir well. If the marshmallows are not fully melted, return the bowl to the microwave and heat in 20-second intervals, stirring between each interval, until completely smooth and glossy.
- The total microwave time for the marshmallows is typically 1 to 1 minute 30 seconds, depending on your microwave wattage. The mixture is ready when it’s completely smooth with no lumps.
- Add the 1/4 teaspoon of salt and the optional vanilla extract now, stirring them into the melted marshmallow mixture.
Step 5: Add the Cereal
- Working quickly, pour the 6 cups (168 g) of Rice Krispies cereal into the bowl with the marshmallow mixture all at once.
- Use your rubber spatula to gently fold the cereal into the marshmallow mixture, turning from the bottom and working around the sides until every piece of cereal is coated.
- Try not to stir too aggressively or for too long. Overworking the mixture can compact the cereal and make the treats dense rather than light and airy.
Step 6: Press Into the Pan
- Transfer the mixture to your prepared baking pan immediately while it’s still warm and pliable.
- Use a sheet of wax paper or buttered hands to press the mixture into an even layer across the pan.
- Apply gentle, even pressure. Pressing too hard compresses the cereal and creates a dense, brick-like treat instead of a soft, chewy one.
- Once the mixture is evenly distributed and about 1 inch (2.5 cm) thick, smooth the top surface.
Step 7: Let Them Set
- Allow the treats to cool and set at room temperature for at least 30 minutes before cutting.
- Once set, use the overhanging parchment paper to lift the entire slab out of the pan and onto a cutting board.
- Cut into 12 to 16 squares using a sharp knife or a bench scraper.
- Wipe the blade clean between cuts to get crisp, clean edges.
For a fun no-bake treat variation, check out this Peanut Butter Rice Krispie Treat Recipe that uses a similar easy microwave method.
Tips for Success
A few small adjustments make a big difference between treats that are gummy and dense versus ones that are soft, chewy, and perfectly gooey.
Here are the most important tips to keep in mind:
- Use fresh marshmallows. Stale marshmallows contain less moisture, which leads to a greasy and crumbly texture after they melt. If the bag crinkles when you press it and the marshmallows feel firm, they’re too old.
- Don’t overheat the mixture. Microwaving too long or at too high of power can make the marshmallows seize up and become rubbery instead of silky. Short intervals with stirring in between is the key.
- Work fast once the marshmallows are melted. The mixture sets up as it cools, so stir in the cereal and press the mixture into the pan right away.
- Butter your hands or use wax paper. The mixture is incredibly sticky. Buttered hands or a piece of wax paper between your palms and the mixture makes pressing much easier.
- Don’t press too hard. Light pressure keeps the treats soft and chewy. Heavy pressing crushes the cereal puffs and creates a hard, dense texture.
- Add a pinch of salt. This one small step makes the treats taste noticeably more complex and less flat. It balances the sweetness and brings out the butterscotch notes.
- Don’t rush the cooling time. Let them set for the full 30 minutes before cutting. Cutting too early means they’ll pull apart messily and lose their shape.
Another great recipe to try with your kids is this Fruity Pebbles Rice Krispie Treat Recipe that uses the same quick technique.
Serving Suggestions
Rice krispie treats are incredibly versatile. They’re just as good straight from the pan as they are dressed up for a party or a special occasion.
These treats pair wonderfully with a scoop of vanilla ice cream for a simple but seriously satisfying dessert. You can also serve them at kids’ parties alongside Dirt Pudding for a crowd-pleasing dessert table.
Some other great ways to serve them:
- Cut into fun shapes using cookie cutters and drizzle with melted chocolate for a party-ready presentation
- Dipped in chocolate – melt semi-sweet chocolate chips and dip the bottom half of each square for an elevated treat
- Served alongside hot cocoa – Hot Chocolate and rice krispie treats are a classic pairing for cold days
- As an after-school snack with a glass of cold milk
- Crumbled over vanilla ice cream as a crunchy topping
- Packaged in cellophane bags tied with a ribbon as homemade gifts or party favors
- Made into pops by inserting popsicle sticks before they set and dipping in melted chocolate
Variations to Try
The classic recipe is perfect on its own, but it’s also an excellent canvas for creativity. Most of these variations require no extra technique, just a few additional ingredients.
Here are some fun twists to try:
- Peanut Butter – Stir 1/4 cup (65 g) of creamy peanut butter into the marshmallow mixture after it melts for a nutty, rich version
- Chocolate drizzle – Melt 1/2 cup (85 g) of semi-sweet chocolate chips and drizzle over the top once the treats have set
- Sprinkles – Press rainbow sprinkles into the top of the treats immediately after pressing them into the pan
- Fruity Pebbles swap – Replace half or all of the Rice Krispies with Fruity Pebbles cereal for a colorful, fruit-flavored version
- Brown butter – Brown the butter in a skillet before adding it to the bowl for a deeper, nuttier flavor (note: you’d need to use the stovetop for this step only)
- Salted caramel – Drizzle store-bought caramel sauce over the top and finish with a pinch of flaky sea salt
- Marshmallow fluff version – Swap the regular marshmallows for marshmallow fluff using this Rice Krispie Treat Recipe with Marshmallow Fluff technique for an even creamier texture
- S’mores style – Stir in mini chocolate chips and crushed graham crackers before pressing into the pan
Storage and Reheating
These treats store well and taste just as good the next day if stored properly. The biggest enemy is air exposure, which dries out the marshmallow and makes them hard.
Here’s how to store and handle leftovers:
- Room temperature: Store in an airtight container at room temperature for up to 3 days. Place pieces of wax paper between layers to prevent sticking.
- Refrigerator: While you can refrigerate them, it often makes them harder and chewier. Room temperature is actually better for texture.
- Freezer: Wrap individual squares in plastic wrap and place in a freezer-safe bag for up to 6 weeks. Thaw at room temperature for 30 minutes before eating.
- Reheating: If your treats have gotten a little hard, microwave a square for 5 to 10 seconds to soften it back up. Don’t over-microwave or they’ll become sticky and fall apart.
- To prevent sticking: Store each square individually wrapped in plastic wrap if you’re making them in advance.
Read Also: Single Serve Rice Krispie Treat Recipe
Nutritional Facts
The following is an estimate for one square, based on the recipe cut into 12 pieces. Actual values will vary based on exact brands used and serving size.
| Nutrient | Per Serving (1 square) |
|---|---|
| Calories | ~150 kcal |
| Total Fat | 3g |
| Saturated Fat | 2g |
| Cholesterol | 8mg |
| Sodium | 115mg |
| Total Carbohydrates | 30g |
| Sugars | 16g |
| Protein | 1g |
Rice krispie treats are a treat food, and that’s perfectly fine. They’re low in fat and offer a quick source of energy, which is part of why they’ve been beloved for generations.
Another fun no-bake sweet to explore is this No Bake Cookie Recipe that’s just as quick and satisfying.
Health Benefits of Key Ingredients
This is a dessert, so we’re not going to oversell it as a health food. That said, a few of the ingredients do bring some small nutritional contributions worth noting.
The main ingredients here are simple and recognizable, which is actually a benefit in itself when it comes to knowing exactly what you’re eating.
Here’s a quick look at what each ingredient brings:
- Rice cereal (fortified): Most commercial rice cereals are fortified with B vitamins including niacin, riboflavin, and folic acid, as well as iron. These support energy metabolism and red blood cell production.
- Butter (in moderation): Provides fat-soluble vitamins A, D, E, and K. The small amount in this recipe contributes to flavor without adding excessive saturated fat per serving.
- Marshmallows: Primarily sugar and gelatin, marshmallows don’t offer significant nutritional value, but they’re low in fat, which keeps the overall fat content of these treats relatively modest.
- Salt: Helps balance flavors and supports electrolyte balance in small amounts.
- Vanilla extract (optional): Pure vanilla contains trace antioxidants and adds flavor without calories.
This recipe pairs well as an occasional treat alongside more nutrient-dense snacks. For a healthier snacking option to balance things out, try this Easy Granola Recipe that’s just as easy to make.
Frequently Asked Questions
1. Can I make microwave rice krispie treats without butter?
You can skip the butter, but the results won’t be quite as rich or flavorful.
Without butter, the marshmallow tends to be a bit stickier and the treats can feel slightly more rubbery. If you need a dairy-free option, coconut oil is the best substitute and adds a subtle flavor that actually works really well.
2. Why are my rice krispie treats hard?
The most common cause is overheating the marshmallows in the microwave.
When marshmallows get too hot, they lose moisture rapidly and the sugar crystallizes, which results in a hard, almost brittle texture once cooled. Keep microwave intervals short and stir frequently to avoid this.
3. How do I keep the treats from sticking to my hands when pressing them?
Butter your hands generously before pressing, or place a sheet of wax paper between your hands and the cereal mixture.
A lightly oiled silicone spatula also works well for pressing the mixture into the corners and edges of the pan.
4. Can I double the recipe?
Yes, doubling works perfectly well with this method.
You’ll need a larger microwave-safe bowl and likely a few extra seconds of microwave time for the marshmallows. Stir very thoroughly to ensure even melting, and press the mixture into a larger pan or two separate pans.
5. How long do microwave rice krispie treats last?
Stored in an airtight container at room temperature, they’ll stay soft and chewy for up to 3 days.
After that, they begin to dry out and harden. Wrapping them individually in plastic wrap helps extend their freshness by preventing air exposure.
Read Also: Copycat Starbucks Rice Krispie Treat Recipe
Final Thoughts
This microwave rice krispie treat recipe proves that one of the most beloved classic snacks of all time doesn’t require a stovetop, a lot of skill, or much time at all.
Three ingredients, five minutes, and a microwave is genuinely all it takes to get that perfectly gooey, buttery, chewy result everyone craves.
These are the kind of treats that disappear fast, wherever you bring them. Give this recipe a try and let us know how it went in the comments below. Did you add your own twist? We’d love to hear about it!
Recommended:
- Original Rice Krispie Treat Recipe
- Gooey Rice Krispie Treat Recipe
- Vegan Rice Krispie Treat Recipe
- Rice Krispie Treat Recipe with Marshmallow Fluff
- Monster Cookie Bars Recipe
- No Bake Cookie Recipe
- Muddy Buddy Recipe
- Dirt Pudding Recipe
- Mug Cake Recipe
- Hot Fudge Sundae


