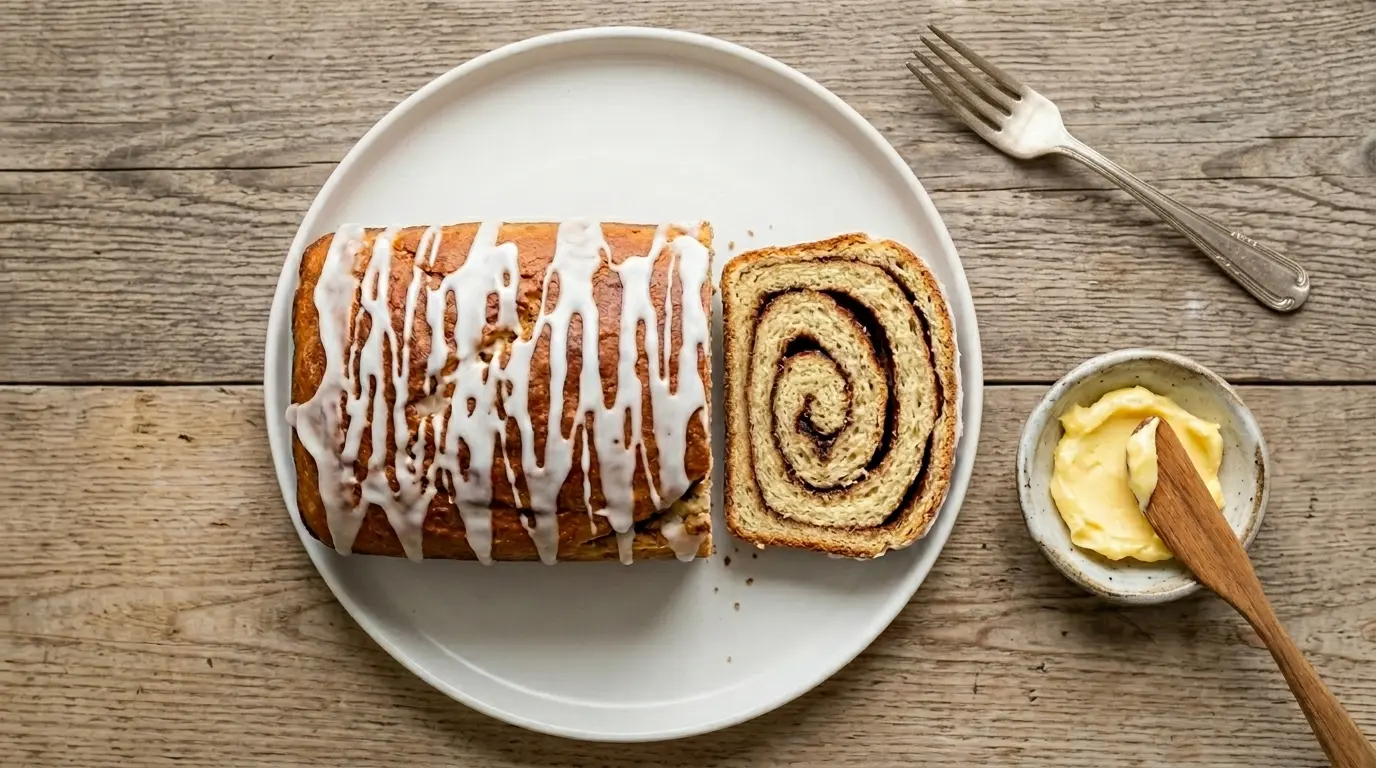
Few baked goods fill a kitchen with as much warmth as a fresh cinnamon swirl bread recipe baking in the oven. The scent alone is enough to bring everyone wandering in from the next room.
This is the classic version: a soft, enriched yeast bread with a generous ribbon of cinnamon-sugar spiraling through every slice. It is exactly what you would find on the counter of a neighborhood bakery on a Saturday morning.
What sets this bread apart from store-bought versions is the texture. The dough is enriched with butter, eggs, and warm milk, which creates a pillowy crumb that stays soft for days.
The filling uses brown sugar rather than white because the molasses in brown sugar adds a deeper, caramel-like flavor that complements cinnamon beautifully. A simple ratio of two tablespoons of cinnamon to half a cup of brown sugar is the sweet spot for bold but balanced flavor.
Finishing the loaf with a light powdered sugar glaze is entirely optional, but it adds a bakery-worthy presentation and a gentle extra sweetness that makes every slice feel a little more special.
If you love the warm spice of cinnamon in baked goods, you will also love this Cinnamon Raisin Bread for a chewy, fruit-studded take on the same cozy flavors.
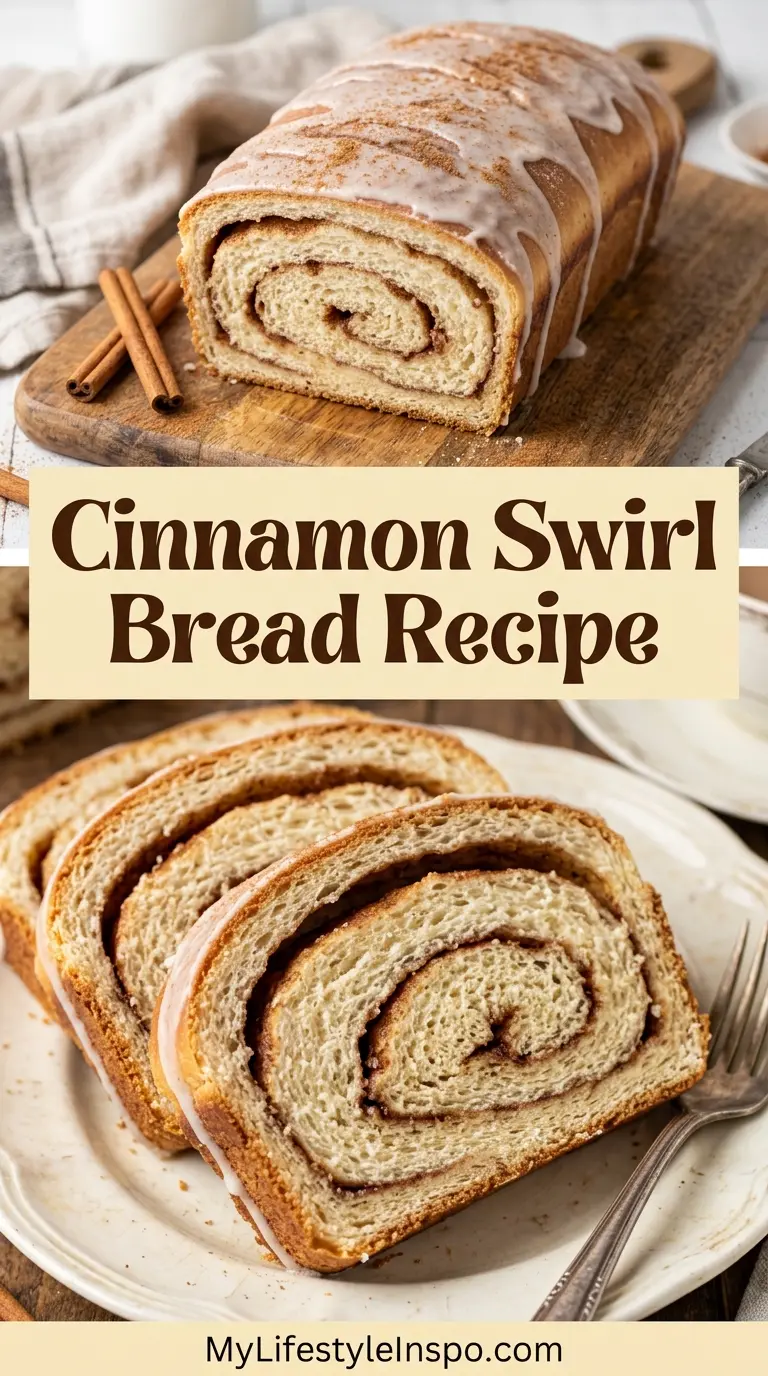
Why You’ll Love This Cinnamon Swirl Bread Recipe
This bread is one of those recipes that always gets a reaction when you pull it out of the oven. The swirl is stunning when sliced, and the aroma while it bakes is absolutely irresistible.
The recipe uses simple, everyday baking ingredients, so you likely already have most of what you need. No special equipment is required beyond a standard loaf pan and a rolling pin.
The dough is forgiving and beginner-friendly. As long as your yeast is fresh and your milk is the right temperature, you will end up with a beautiful loaf.
It also stores well. This bread stays soft and flavorful for several days at room temperature, making it a great make-ahead option for the week.
Here is a quick summary of what makes this recipe worth your time:
- Beautiful swirl: Every slice reveals that signature cinnamon-sugar spiral that looks as impressive as it tastes
- Soft, enriched texture: The eggs, butter, and milk in the dough create a tender, fluffy crumb that is nothing like ordinary sandwich bread
- Simple filling: Just three ingredients create a filling that is rich, warm, and deeply satisfying
- Make-ahead friendly: Bake it on Sunday and enjoy it all week, or freeze individual slices for later
- Versatile: Serve it plain, toasted, as French toast, or with a generous smear of butter and honey
For a similarly spiced sweet bread, try this Apple Cinnamon Bread which uses the same warm spices with the addition of fresh apple for a slightly fruity variation.
Ingredients
This recipe makes one standard 9×5 inch loaf, which yields about 10 to 12 slices. The dough is a classic enriched yeast dough, meaning it includes fat (butter) and protein (eggs) for extra tenderness and richness.
For the Dough:
- 3 cups (360g) bread flour, plus more for dusting (bread flour’s higher protein content creates better gluten structure and a chewier, more defined crumb than all-purpose flour)
- 2¼ tsp (7g / 1 standard packet) active dry yeast
- ¾ cup (180ml) warm whole milk (around 110°F / 43°C)
- ¼ cup (50g) granulated sugar
- 1 tsp fine salt
- 2 large eggs, room temperature
- ¼ cup (57g) unsalted butter, softened
For the Cinnamon Filling:
- 3 tbsp (42g) unsalted butter, melted and cooled slightly
- ½ cup (100g) packed light brown sugar
- 2 tbsp ground cinnamon (Ceylon cinnamon is sweeter and more complex than standard Cassia cinnamon and makes a noticeable difference in the finished flavor)
For the Egg Wash:
- 1 large egg
- 1 tbsp whole milk
For the Optional Glaze:
- 1 cup (120g) powdered sugar
- 2 to 3 tbsp whole milk or heavy cream
- ½ tsp pure vanilla extract
Read Also: Chocolate Chip Bread Recipe
Kitchen Equipment Needed
Having the right tools makes this bread come together smoothly. None of these items are unusual, and most home bakers will already have them on hand.
- 9×5 inch loaf pan (also called a 1-pound loaf pan)
- Stand mixer with dough hook attachment (or a large mixing bowl for kneading by hand)
- Rolling pin
- Instant-read thermometer
- Bench scraper or dough scraper
- Pastry brush
- Large mixing bowl
- Small mixing bowl
- Measuring cups and spoons
- Wire cooling rack
- Plastic wrap or a clean kitchen towel
- Aluminum foil (for tenting, if needed)
This same set of equipment works beautifully for Monkey Bread as well, another crowd-pleasing pull-apart sweet bread that uses a similar enriched dough.
Recommended Products for This Recipe
These are products chosen for genuine performance benefits. Each one addresses a real challenge in bread baking and helps you get consistent, reliable results every time.
1. USA Pan 9×5 Inch Loaf Pan
A quality loaf pan is the single most important piece of equipment for this recipe. The USA Pan features a corrugated surface that promotes even heat distribution and prevents the bread from developing hot spots. The nonstick coating ensures your loaf releases cleanly without sticking or tearing the bottom crust, which is especially important with a sweet enriched bread that can stick.
2. KitchenAid Stand Mixer with Dough Hook
Kneading by hand for 10 minutes is entirely possible, but a stand mixer with a dough hook takes all the effort out of the process. It develops gluten evenly and efficiently, which produces a more uniform, elastic dough. This is especially helpful for beginners who are still learning to read dough texture by feel.
3. Ceylon Cinnamon Ground
Not all cinnamon is the same. The cinnamon found in most grocery stores is Cassia cinnamon, which is bold and slightly sharp. Ceylon cinnamon is often called “true cinnamon” and has a sweeter, more delicate flavor that is noticeably more complex in baked goods. For a recipe where cinnamon is the star ingredient, this upgrade is absolutely worth it.
4. Thermapen Instant-Read Thermometer
Pulling this bread out at the right internal temperature (190 to 200°F / 88 to 93°C) is the difference between a perfectly baked loaf and a gummy, underbaked center. A reliable instant-read thermometer removes all guesswork from the process and pays for itself the first time it saves you from a disappointing result.
5. Silicone Pastry Brush
A good silicone pastry brush applies the egg wash evenly without dragging across the delicate surface of the risen dough. Unlike natural bristle brushes, silicone bristles do not shed, absorb old flavors, or hold bacteria. They are also dishwasher safe and will last for years of regular baking.
Another beautifully enriched bread worth trying once you have this recipe mastered is Brioche, which uses a very similar dough technique with even more butter for an incredibly tender, buttery crumb.
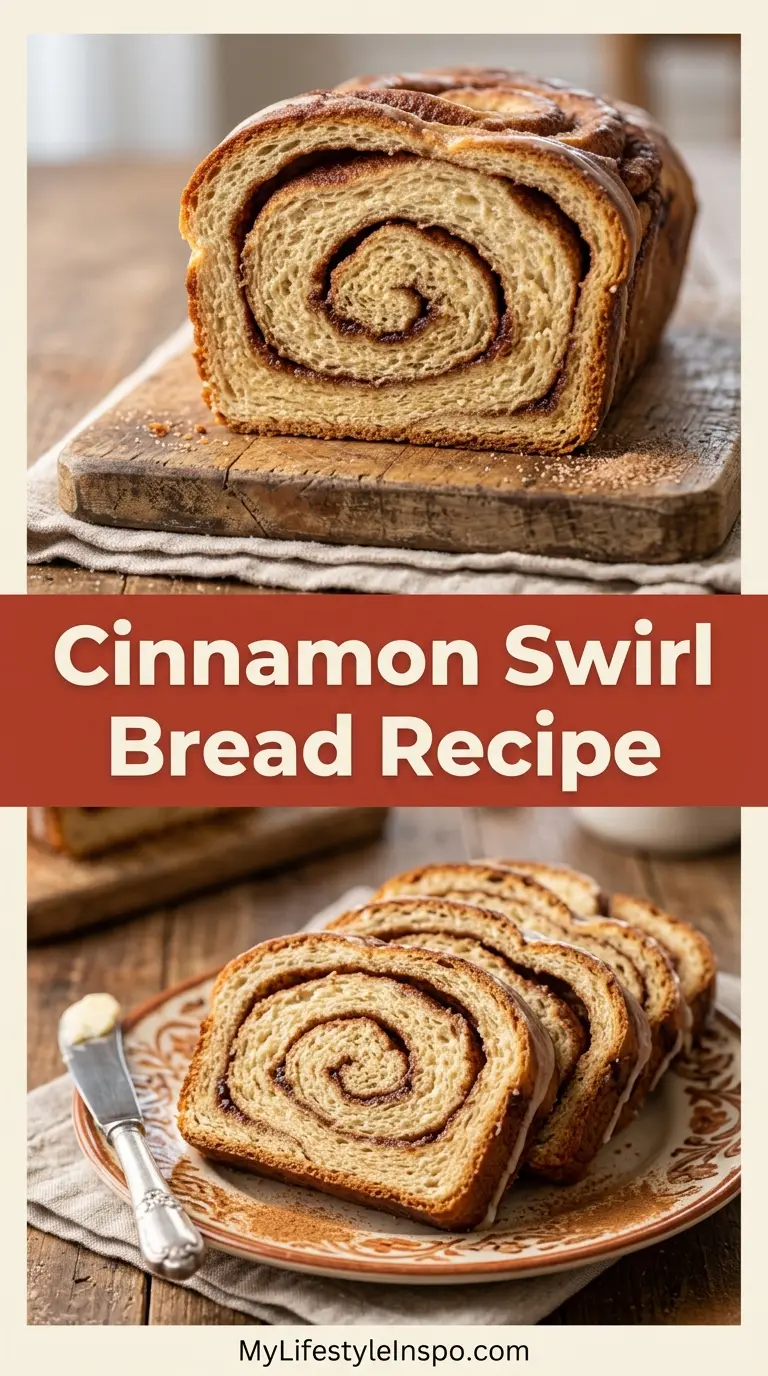
Step-by-Step Instructions
1. Activate the Yeast
- Pour the warm milk into the bowl of your stand mixer or a large mixing bowl.
- Make sure the milk feels warm to the touch but not hot. Aim for around 110°F (43°C). Milk that is too hot (above 115°F / 46°C) will kill the yeast and prevent the bread from rising.
- Add the granulated sugar and the active dry yeast directly to the warm milk.
- Stir gently with a spoon just to combine everything loosely.
- Let the mixture sit completely undisturbed for 5 to 10 minutes.
- After this time, the surface should look foamy and bubbly, which tells you the yeast is alive and active.
- If the mixture shows no foam at all after 10 minutes, your yeast may be expired or the milk temperature was off. Discard the mixture and start over with fresh yeast before continuing.
2. Make the Dough
- Add the two room-temperature eggs and the softened butter to the foamy yeast mixture.
- If using a stand mixer, attach the dough hook and mix on low speed for about 30 seconds to loosely combine everything.
- If mixing by hand, use a fork or whisk to stir the eggs and butter into the yeast mixture until roughly incorporated.
- Add the fine salt to the bowl.
- Add approximately half of the bread flour (about 1½ cups / 180g) to the mixture.
- Mix on low speed (or stir firmly by hand) until the flour is absorbed and a rough, shaggy dough begins to form.
- Add the remaining bread flour about ¼ cup (30g) at a time, mixing between each addition so the flour is incorporated before you add more.
- Once all the flour has been added, increase the stand mixer speed to medium and knead for 8 to 10 minutes.
- If kneading by hand, turn the dough out onto a lightly floured surface and knead for 10 to 12 minutes using a push-fold-turn motion until the dough is smooth and elastic.
- The finished dough should feel soft and slightly tacky to the touch. It should pull away cleanly from the sides of the bowl and should not stick aggressively to your hands.
- If the dough is very sticky, add additional bread flour one tablespoon at a time. Avoid adding too much flour, as this will make the finished bread dense rather than soft.
- A well-kneaded dough will spring back slowly when you press a finger gently into its surface.
3. First Rise
- Lightly coat the inside of a large, clean bowl with softened butter or neutral-flavored oil.
- Shape the dough into a smooth ball by cupping your hands underneath it and turning it toward you a few times on a clean surface.
- Place the dough ball into the greased bowl and turn it once so all sides are lightly coated.
- Cover the bowl tightly with plastic wrap, or drape a clean damp kitchen towel over the top.
- Place the bowl somewhere warm. Good options include inside your oven with only the oven light on, or in a slightly warm location (no hotter than 100°F / 38°C).
- Let the dough rise for 1 to 1½ hours until it has visibly doubled in size.
- To test whether the dough is ready, press two floured fingers about half an inch (1.25cm) into the surface of the dough. If the indentation springs back slowly and only partially fills in, the dough is properly proofed and ready. If it springs back immediately and fully, it needs more rising time.
4. Prepare the Cinnamon Filling
- While the dough is in its first rise, make the filling so it is completely ready when you need it.
- Place the 3 tablespoons of butter for the filling in a small saucepan or microwave-safe bowl and melt it gently.
- Set the melted butter aside and let it cool for 5 to 10 minutes. It should be liquid but not steaming hot when you use it.
- In a separate small bowl, combine the packed light brown sugar and the 2 tablespoons of ground cinnamon.
- Stir the two together thoroughly until fully blended and no lumps of brown sugar remain.
- Set both the melted butter and the cinnamon-sugar mixture aside at room temperature until the dough is ready.
5. Roll and Fill the Dough
- Once the dough has doubled in size, remove it from the bowl and place it on a clean, lightly floured surface.
- Use the heel of your hand or your closed fist to press firmly down into the dough and deflate it. This releases the built-up gas.
- Cover the deflated dough loosely with plastic wrap and let it rest for 5 minutes. This brief rest allows the gluten to relax, which makes the dough much easier to roll out without it snapping back.
- Using a rolling pin, roll the dough out into a rectangle approximately 12 inches (30cm) long and 8 to 9 inches (20 to 23cm) wide. Try to keep the thickness as even as possible throughout.
- Use your pastry brush to spread the cooled melted butter evenly over the entire surface of the dough rectangle. Leave a 1-inch (2.5cm) uncovered border along one of the short edges. This uncovered strip will help seal the roll once you finish.
- Sprinkle the brown sugar and cinnamon mixture evenly over the buttered surface.
- Use the back of a spoon or your hands to press the filling gently but firmly into the dough. This helps it adhere and prevents it from shifting during rolling.
- Starting from the long edge closest to you (not the edge with the uncovered border), begin rolling the dough toward you in a tight, even log shape.
- Roll slowly and firmly, keeping the spiral tight as you go. A loose roll leads to gaps in the finished bread.
- When you reach the uncovered border strip at the far end, press the seam firmly along its length with your fingertips to seal the roll shut.
- Use your bench scraper or your hands to gently tuck and neaten the ends of the log.
- Grease the inside of your 9×5 inch (23x13cm) loaf pan generously with softened butter, including the corners.
- Place the rolled log into the prepared pan with the seam facing down.
6. Second Rise
- Loosely cover the top of the loaf pan with plastic wrap or lay a clean kitchen towel over it.
- Place the pan in the same warm spot you used for the first rise.
- Let the dough rise for 45 to 60 minutes. The loaf is ready when the top has risen to about 1 inch (2.5cm) above the rim of the pan.
- Do not let it over-proof. If the loaf rises too far above the rim, the gluten structure can weaken and collapse during baking.
- Begin preheating your oven during the last 15 to 20 minutes of this second rise.
7. Prepare the Egg Wash and Preheat the Oven
- Set your oven to 350°F (175°C) and allow it to fully preheat. Do not place the bread in a cold oven.
- In a small bowl, whisk together the one egg and the 1 tablespoon of whole milk for the egg wash until completely blended.
- Once the loaf has completed its second rise, use the pastry brush to gently apply the egg wash over the entire top surface of the loaf.
- Brush lightly and evenly, using gentle strokes to avoid deflating the risen dough. A well-applied egg wash gives the crust a deep golden color and a beautiful sheen.
8. Bake the Bread
- Place the loaf pan on the center rack of the fully preheated oven.
- Bake for 30 to 35 minutes until the top is a deep, even golden brown.
- At around the 20-minute mark, check on the loaf through the oven window. If the top is browning faster than expected, loosely lay a piece of aluminum foil over the pan without pressing it down. This tenting prevents the crust from burning before the interior finishes baking.
- To check for doneness, insert the instant-read thermometer into the center of the loaf by inserting it through the side of the bread. The internal temperature should read between 190°F and 200°F (88°C to 93°C).
- Remove the loaf from the oven and set the pan on a wire rack.
- Let the bread rest in the pan for 10 minutes before unmolding. This brief rest allows the structure to set slightly so the loaf holds its shape when you turn it out.
9. Cool and Make the Optional Glaze
- After the 10-minute rest in the pan, carefully invert the loaf pan and tip the bread out onto the wire cooling rack with the top facing up.
- Allow the bread to cool on the rack for at least 1 full hour before slicing. This step is not optional. Slicing into a warm yeast bread compresses the crumb and creates a dense, gummy texture. Patience here makes a significant difference in the final result.
- While the bread cools, make the glaze by combining the powdered sugar, 2 tablespoons of milk or heavy cream, and the pure vanilla extract in a small bowl.
- Whisk until completely smooth. If the glaze is too thick to drizzle, add more milk one teaspoon at a time. If it is too thin, add more powdered sugar one tablespoon at a time.
- Drizzle the glaze generously over the top of the fully cooled or slightly warm bread using a spoon or fork.
- Allow the glaze to set for 5 minutes before slicing and serving.
Once you have this recipe mastered, you might enjoy making a batch of Sourdough Discard Cinnamon Rolls, which use leftover sourdough starter to create a similarly spiced, pillowy treat with a lovely tang.
Tips for Success
A few key techniques will help you get the very best results from this recipe, especially on your first attempt.
- Test your yeast first: Fresh yeast foams vigorously in warm milk within 5 to 10 minutes. If yours does not, do not proceed. Old or inactive yeast is the most common reason cinnamon swirl bread fails to rise.
- Use room-temperature eggs: Cold eggs can cool down the yeast mixture and slow everything down. Take them out of the fridge at least 30 minutes before you start.
- Measure flour by weight when possible: Scooping flour directly from the bag compacts it and can result in up to 20% more flour than intended. Use a kitchen scale or the spoon-and-level method for accuracy.
- Do not skip the rest before rolling: Five minutes of rest after punching down the dough makes it far easier to roll into an even rectangle without it springing back.
- Roll tightly and evenly: A tight roll creates a defined, beautiful swirl. Roll slowly and take your time rather than rushing through this step.
- Stick to the filling amounts: More filling sounds appealing, but too much creates a gap between the bread and the swirl during baking. The recipe quantities are calibrated for the best balance.
- Cover the unsealed edge: The 1-inch border of dough left without filling acts as a glue strip. Press it down firmly to seal the roll and prevent unrolling in the oven.
- Always use a thermometer for doneness: The color of the crust does not reliably indicate whether the inside is baked through. An internal temperature of 190 to 200°F (88 to 93°C) is the most accurate test.
- Cool completely before slicing: This is the hardest part of the whole recipe, but it is essential. Slicing too early results in a gummy, compressed crumb.
Read Also: Sour Cream Coffee Cake Recipe
Serving Suggestions
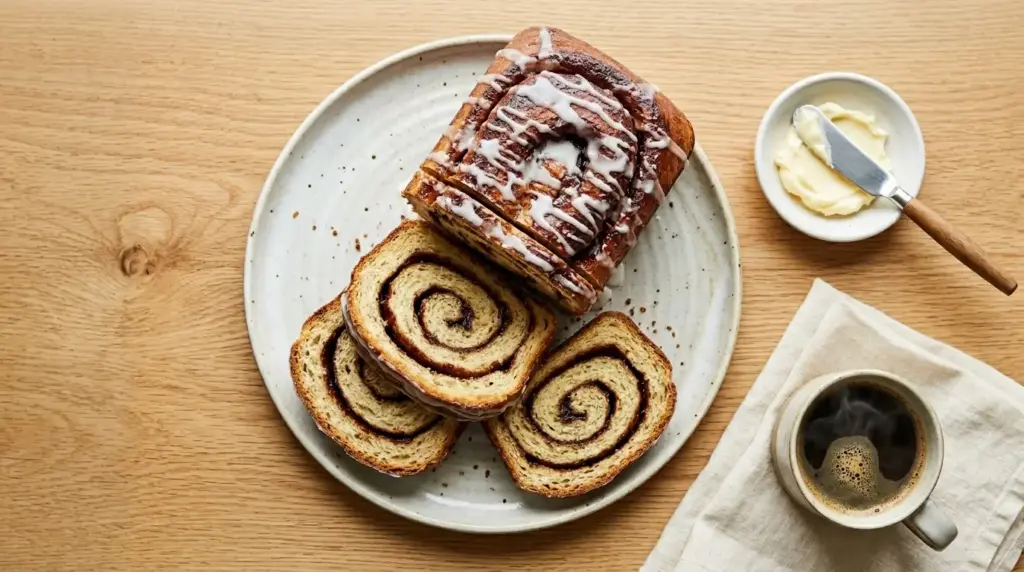
Cinnamon swirl bread is one of those rare baked goods that works beautifully at any time of day. A toasted slice with a pat of cold salted butter pressed into the warm surface is one of the simplest, most satisfying things you can eat on a weekend morning.
Here are some favorite ways to serve it:
- Toasted with butter and honey: Lightly toast a slice and spread it while warm. The heat melts the butter into the cinnamon filling and makes every bite incredible
- French toast: Use thick slices of cinnamon swirl bread to make an extraordinary French toast that barely needs syrup. The filling adds a built-in sweetness to every bite
- With cream cheese: Plain or honey-flavored cream cheese spread on a toasted slice makes a quick, satisfying breakfast that comes together in under two minutes
- Alongside scrambled eggs: The sweet and savory contrast is unexpectedly wonderful
- As a dessert bread: Serve warm slices with a scoop of vanilla ice cream and a drizzle of caramel sauce for a simple but indulgent dessert
- As a homemade gift: Wrap a fully cooled loaf in parchment paper and tie with twine for a thoughtful, homemade food gift that anyone would be happy to receive
For the ultimate topping, homemade Cinnamon Butter smeared generously on each warm, toasted slice takes this bread from delicious to completely unforgettable.
Variations to Try
Once you have the base recipe down, the dough is very flexible and accepts a variety of different fillings and add-ins without requiring any changes to the technique.
These variations use the exact same dough and baking method but give each loaf a distinct personality.
- Raisin swirl bread: Scatter ¼ cup of raisins over the cinnamon-sugar filling before rolling the dough into a log for a chewy, fruit-studded version
- Walnut cinnamon bread: Add ¼ cup of finely chopped walnuts or pecans to the filling for a satisfying crunchy contrast in every slice
- Brown butter filling: Brown the butter in a small saucepan before using it in the filling for a nutty, deeply caramelized layer of flavor
- Cardamom and cinnamon: Add ½ teaspoon of ground cardamom to the filling for a slightly floral, Scandinavian-inspired variation that pairs beautifully with strong coffee
- Chocolate cinnamon swirl: Replace 2 tablespoons of the brown sugar in the filling with 2 tablespoons of unsweetened cocoa powder for a mocha-tinged twist
- Orange zest filling: Add 1 teaspoon of fresh orange zest to the cinnamon-sugar mixture for a bright, citrusy note that cuts through the richness beautifully
- Pumpkin spice swirl: Swap 1 tablespoon of the cinnamon for 1 tablespoon of pumpkin pie spice for a warming, autumn-inspired version
Another great sweet bread worth adding to your baking list is this Apple Fritter Bread, which uses a similar enriched dough with a cinnamon-spiced apple center.
Storage and Reheating
Properly stored cinnamon swirl bread stays soft and fresh for several days. The butter and eggs in the enriched dough help it retain moisture much better than a standard lean yeast bread would.
- At room temperature: Place the completely cooled loaf in an airtight container or resealable bag and store at room temperature for up to 3 days. Avoid refrigerating the whole loaf, as refrigeration causes yeast breads to stale significantly faster.
- In the freezer: Slice the fully cooled loaf and arrange the slices in a single layer on a baking sheet. Freeze for 1 hour until firm, then transfer to a freezer-safe bag with slices separated by small pieces of parchment. Freeze for up to 3 months.
- Reheating individual slices from room temperature: Toast in a toaster or place in a 300°F (150°C) oven for 5 to 8 minutes until warmed through and lightly crisped on the outside.
- Reheating from frozen: Toast frozen slices directly in the toaster, or place on a baking sheet in a 300°F (150°C) oven for 10 to 12 minutes until fully warmed through. No thawing is necessary.
- Reviving a slightly stale loaf: Wrap the whole loaf tightly in aluminum foil and place in a 300°F (150°C) oven for 10 to 15 minutes. The steam trapped inside the foil refreshes the texture and brings back much of the original softness.
Slightly stale slices from this loaf also make the most incredible Brioche French Toast, using the same rich custard-dipping technique that works beautifully with any soft, sweet bread.
Nutritional Facts
The following values are approximate and based on one slice from a loaf cut into 12 equal servings. These numbers include the cinnamon filling but do not include the optional powdered sugar glaze. Adding the glaze contributes an additional 50 to 70 calories per slice, depending on the amount used.
| Nutrient | Per Slice (1 of 12) |
|---|---|
| Calories | 210 |
| Total Fat | 7g |
| Saturated Fat | 4g |
| Cholesterol | 55mg |
| Sodium | 215mg |
| Total Carbohydrates | 33g |
| Dietary Fiber | 1g |
| Total Sugars | 13g |
| Protein | 5g |
Note: These values are estimates calculated using standard ingredient amounts and will vary depending on the specific brands used and the exact size of slices.
For a delicious morning pairing, a warm slice of this bread spread with homemade Honey Butter makes for one of the most satisfying breakfasts you can put together in under two minutes.
Health Benefits of Key Ingredients
This is an enriched sweet bread and is best enjoyed as a treat rather than a health food. That said, several of the core ingredients bring real nutritional value to each slice.
Understanding what each ingredient contributes can help you appreciate what you are eating and make adjustments that suit your needs.
Cinnamon:
Cinnamon is one of the most researched spices in nutrition science. It is loaded with polyphenol antioxidants that help protect cells from oxidative stress. Some research also links regular cinnamon consumption to improved insulin sensitivity and more stable blood sugar levels. Ceylon cinnamon, in particular, is preferred for these benefits since Cassia cinnamon contains higher levels of coumarin, which can be problematic in large daily amounts.
Eggs:
The eggs in this dough contribute far more than structure. Each large egg provides about 6 grams of complete protein, along with a meaningful supply of B vitamins, choline, and fat-soluble vitamins including A, D, and E. Choline is especially important for brain function, liver health, and fetal development during pregnancy.
Whole Milk:
Whole milk provides calcium, phosphorus, vitamin D (when fortified), and protein in every cup used in the dough. These nutrients support bone density and muscle function throughout life. The fat in whole milk also helps tenderize the bread and distribute fat-soluble flavors evenly through the crumb.
Bread Flour:
Bread flour has a higher protein content than all-purpose flour, typically between 12 and 14%. This additional protein develops more gluten structure, which gives the finished bread a better texture and makes it more satisfying to chew. Flour also provides B vitamins and iron, particularly when the flour is enriched.
Here is a quick look at what each key ingredient contributes:
- Cinnamon: Polyphenol antioxidants, possible blood sugar support, anti-inflammatory compounds
- Eggs: Complete protein, choline, B vitamins, vitamins A, D, and E
- Whole Milk: Calcium, phosphorus, potassium, vitamin D
- Unsalted Butter: Fat-soluble vitamins A, D, E, and K2
- Bread Flour: Protein for gluten development, B vitamins, iron
Read Also: Cinnamon Smoothie Recipe
Frequently Asked Questions
1. Can I Use All-Purpose Flour Instead of Bread Flour?
Yes, all-purpose flour works as a substitute in this recipe. The texture of the finished bread will be slightly softer and a little less chewy compared to bread flour, but the loaf will still turn out well.
If you switch to all-purpose flour, you may find the dough feels a bit stickier during kneading. Add extra flour only in small amounts, one tablespoon at a time, to avoid making the crumb too dense.
2. Can I Make the Dough the Night Before?
Absolutely. After completing the first rise, punch the dough down, roll and fill it as directed, then place the shaped loaf in the greased loaf pan.
Cover the pan tightly with plastic wrap and refrigerate overnight. The next morning, remove the pan from the fridge and let the dough come back to room temperature and complete its second rise, which may take 1.5 to 2 hours before it is ready to bake.
3. Why Does My Cinnamon Swirl Bread Have a Gap Between the Swirl and the Bread?
This is a very common issue. The most likely cause is either too much filling, which prevents the dough layers from fusing together during baking, or a roll that was not tight enough when shaping.
Another culprit is air pockets trapped inside the roll. Make sure to press the filling into the dough before rolling, roll firmly without rushing, and press out any air bubbles you notice as you go.
4. How Do I Know When the Bread Is Fully Baked?
The most reliable method is checking the internal temperature with an instant-read thermometer. Insert it into the center of the loaf from the side, aiming for a reading between 190°F and 200°F (88°C to 93°C).
You can also tap the bottom of the unmolded loaf. A fully baked loaf will sound hollow when tapped. Relying on the color of the crust alone is not recommended, as the top can look deeply golden before the inside is finished.
5. Can I Add Raisins or Nuts to the Filling?
Yes, both additions work very well in this recipe. Scatter ¼ cup of raisins or finely chopped walnuts over the buttered dough surface before adding the cinnamon-sugar mixture.
Keep the quantities moderate. Too many add-ins can make it difficult to roll the dough tightly and may cause unrolling when sliced. The Variations to Try section above covers more customization ideas.
For a beautiful finishing touch, this Cream Cheese Frosting drizzled over the cooled loaf is a classic upgrade that takes this bread from everyday homemade to something truly bakery-worthy.
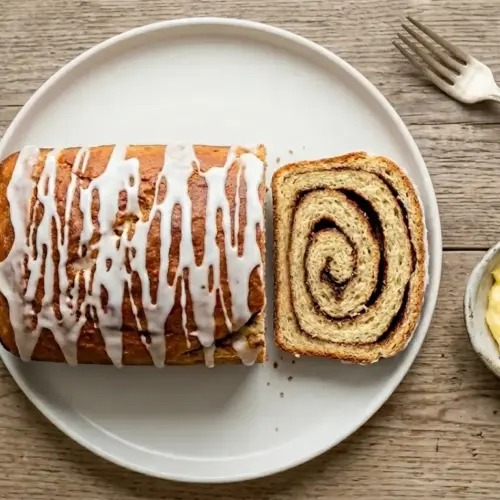
Classic Cinnamon Swirl Bread

Equipment
- 9×5-inch loaf pan - also called a 1-pound loaf pan
- Stand mixer with dough hook attachment - or a large mixing bowl for kneading by hand
- Rolling Pin
- Instant-read thermometer - for checking liquid temperature and doneness
- Bench scraper - or dough scraper
- Pastry brush - silicone recommended
- Large mixing bowl
- Small mixing bowl
- Measuring cups and spoons
- Wire cooling rack
- Plastic wrap - or a clean kitchen towel
- Aluminum foil - for tenting if needed (optional)
Ingredients
- 3 cups bread flour - 360g, plus more for dusting
- 2¼ tsp active dry yeast - 7g / 1 standard packet
- ¾ cup whole milk - 180ml, warmed to around 110°F / 43°C
- ¼ cup granulated sugar - 50g
- 1 tsp fine salt
- 2 large eggs - room temperature
- ¼ cup unsalted butter - 57g, softened for dough
For the Cinnamon Filling
- 3 tbsp unsalted butter - 42g, melted and cooled slightly
- ½ cup light brown sugar - 100g, packed
- 2 tbsp ground cinnamon - Ceylon cinnamon recommended for sweeter flavor
For the Egg Wash
- 1 large egg
- 1 tbsp whole milk
For the Optional Glaze
- 1 cup powdered sugar - 120g
- 2 to 3 tbsp whole milk - or heavy cream
- ½ tsp pure vanilla extract
Instructions
- Activate the yeast by combining warm milk, sugar, and yeast. Let sit 5-10 minutes until foamy.
- Mix in eggs, softened butter, and salt. Gradually add bread flour and knead 8-10 minutes until smooth and elastic.
- Place dough in a greased bowl, cover, and let rise in a warm place for 1-1½ hours until doubled in size.
- Prepare filling by melting butter and mixing brown sugar with cinnamon. Set aside until dough is ready.
- Punch down dough, rest 5 minutes, then roll into a 12×8-9 inch rectangle. Brush with melted butter, sprinkle cinnamon-sugar evenly, leaving a 1-inch border on one short edge.
- Roll tightly from the long edge into a log, seal the edge, and place seam-side down in a greased 9×5 inch loaf pan.
- Cover and let rise for 45-60 minutes until dough rises about 1 inch above the pan rim.
- Preheat oven to 350°F (175°C). Brush the risen loaf with egg wash.
- Bake for 30-35 minutes until golden brown and internal temperature reaches 190-200°F (88-93°C). Tent with foil if browning too quickly.
- Rest in pan for 10 minutes, then transfer to a wire rack to cool completely for at least 1 hour before slicing.
- Optional: whisk powdered sugar, milk, and vanilla for glaze. Drizzle over cooled bread and let set for 5 minutes before serving.
Notes
- Yeast activity: Test your yeast first. If the mixture doesn’t foam within 10 minutes, start over with fresh yeast. Old or inactive yeast is the most common reason this bread fails to rise.
- Temperature matters: Milk should be around 110°F (43°C). Anything above 115°F (46°C) will kill the yeast and prevent rising.
- Room temperature ingredients: Cold eggs can slow down the yeast. Take them out of the fridge at least 30 minutes before starting.
- Measure flour accurately: For best results, weigh your flour. Scooping directly from the bag can add up to 20% more flour, making the bread dense. Use the spoon-and-level method if you don’t have a scale.
- Roll tightly: A tight, even roll creates a beautiful, defined swirl. Take your time with this step—rushing can lead to gaps in the finished bread.
- Don’t over-fill: Too much filling can prevent the dough layers from fusing during baking, creating gaps between the swirl and the bread. Stick to the recipe amounts.
- Check for doneness: Use an instant-read thermometer for the most reliable results. The crust can look golden before the inside is finished baking.
- Cool completely: Slicing into warm yeast bread compresses the crumb and creates a gummy texture. Resist the temptation and wait at least one hour.
- Storage: Store at room temperature in an airtight container for up to 3 days. Refrigeration causes yeast breads to stale faster.
- Freezing: Slice the cooled loaf, freeze slices in a single layer, then transfer to a freezer bag with parchment between slices. Freeze for up to 3 months. Toast frozen slices directly.
Final Thoughts
This cinnamon swirl bread recipe is the kind of bake that earns a permanent spot in your regular rotation. It is impressive enough to feel like a real accomplishment but approachable enough to make on an ordinary weekend morning.
The soft, pillowy crumb and that fragrant cinnamon-sugar spiral make for a loaf that looks beautiful, smells incredible, and tastes better than you expect every single time.
Give it a try this weekend and let me know how it turns out in the comments below. If you share it with someone, tell them you made it from scratch, because you did.
Recommended:
- Challah Recipe
- French Toast Casserole Recipe
- Easy French Toast Recipe
- Pumpkin Roll Recipe
- Rugelach Recipe
- Lemon Blueberry Bread Recipe
- Cranberry Orange Bread Recipe
- Snickerdoodle Cookie Recipe
- Vanilla Buttercream Frosting Recipe
- Date Nut Bread Recipe