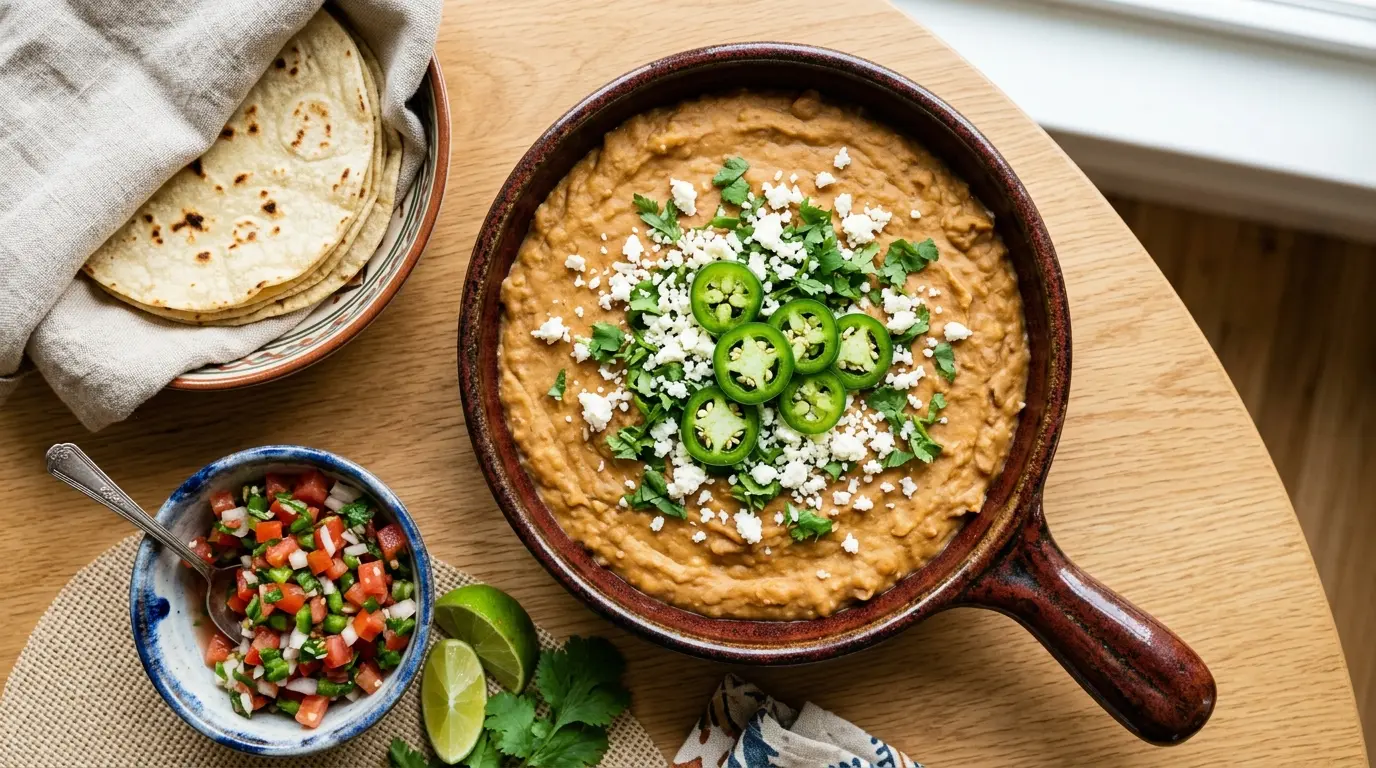
Making a refried beans recipe from scratch is one of those kitchen moments that instantly makes you wonder why you ever relied on the canned version. These beans are rich, deeply savory, and have a silky, creamy texture that simply cannot be replicated from a tin. Built on dried pinto beans, sautéed onion and garlic, and your fat of choice, the result is a staple of Mexican cuisine that works as a side dish, dip, burrito filling, and so much more.
The name “refried beans” is a bit of a misnomer, by the way. In Spanish, they are called frijoles refritos, where refritos translates more closely to “well-fried” rather than “fried twice.” You are not double-frying anything here. You are simply simmering dried beans until tender, then mashing and cooking them in a skillet with aromatics. Simple, intentional, and absolutely delicious.
What makes this version stand out is the use of dried pinto beans rather than canned. Yes, it takes a little more time, but soaking dried beans overnight and simmering them low and slow gives you a depth of flavor and a creamier texture that canned beans just cannot match. The cooking liquid, often called bean broth, becomes its own flavor-packed ingredient that you will use to adjust the final consistency of your beans.
The fat you choose also matters. Lard is the traditional option and delivers that rich, authentic flavor you get at your favorite Mexican restaurant. Bacon fat adds a smoky layer of complexity. For a vegetarian-friendly version, a neutral oil like avocado oil or vegetable oil works beautifully. Whichever you choose, the beans will be far superior to anything from a can.
This recipe walks you through every step, from the overnight soak to the final seasoning, so even if you have never made beans from scratch before, you will feel completely confident. Get ready to make a batch you will want to put on everything.
These creamy, homemade refried beans pair perfectly alongside Street Tacos for a full Mexican-inspired spread.
Why You’ll Love This Refried Beans Recipe
This recipe is one of those reliable, endlessly useful staples that earns a permanent spot in your cooking rotation.
Once you understand how simple the process is, you will make these constantly. The ingredient list is short, the technique is approachable, and the results are consistently incredible.
- Authentic flavor: Using dried pinto beans and reserved bean broth produces a depth of flavor that canned beans simply cannot replicate.
- Customizable fat: Use lard for the most traditional flavor, bacon fat for smokiness, or vegetable oil to keep things vegetarian-friendly.
- Creamy and smooth texture: Mashing the beans with their own cooking liquid creates a naturally silky consistency without any cream or fillers.
- Endlessly versatile: Spread them on tostadas, stuff them into burritos, use them as a dip, or serve them as a side dish.
- Budget-friendly: Dried pinto beans are one of the most economical ingredients you can buy, and this batch makes a generous amount.
- Great for meal prep: The beans store well in the fridge for up to five days and freeze beautifully for up to three months.
- Better than restaurant-quality: With the right fat and aromatics, these rival anything you would get from your favorite Tex-Mex spot.
You might also enjoy: Enchilada Casserole Recipe
Ingredients
You only need a handful of pantry staples to make these incredibly flavorful beans. Dried pinto beans are the star, and everything else supports and enhances their natural, earthy flavor.
- 1 pound (450g) dried pinto beans
- 10 cups (2.4 liters) water, plus more as needed for soaking
- 1 medium yellow onion, divided (half for cooking beans, half finely diced for frying)
- 6 cloves garlic, divided (3 smashed for cooking beans, 3 minced for frying)
- 1 bay leaf
- 1 teaspoon dried Mexican oregano
- 1 teaspoon kosher salt (plus more to taste)
- 3 tablespoons lard, bacon fat, avocado oil, or vegetable oil
- 1 teaspoon ground cumin
- 1/2 teaspoon chili powder
- 1/4 teaspoon smoked paprika
- Juice of 1/2 lime (about 1 tablespoon / 15ml)
- Freshly ground black pepper, to taste
For the soaking step, you will need enough cold water to cover the beans by at least 3 inches (7.5cm) in a large bowl.
Read Also: Classic Red Beans and Rice Recipe
Kitchen Equipment Needed
You do not need anything fancy here, but having the right tools makes the process much smoother and more enjoyable.
- Large mixing bowl (for soaking the beans)
- Large heavy-bottomed pot or Dutch oven (for simmering the beans)
- Colander or fine-mesh strainer (for draining and reserving the bean broth)
- Large cast iron skillet or heavy skillet (for frying the beans)
- Potato masher (for mashing to a semi-chunky consistency)
- Immersion blender (optional, for a completely smooth result)
- Wooden spoon or silicone spatula
- Measuring cups and spoons
- Large heatproof bowl or liquid measuring cup (for reserving bean broth)
- Sharp chef’s knife and cutting board
The cast iron skillet is especially useful here because it retains heat evenly, which helps the beans fry and mash to that creamy, slightly caramelized finish you want.
Another favorite recipe to make alongside these beans: Chicken Fajita Recipe
Recommended Products for This Recipe
These are products I genuinely recommend based on quality and performance for making the best homemade refried beans possible.
1. Lodge Cast Iron Skillet (12-Inch)
A well-seasoned cast iron skillet is the gold standard for frying and mashing refried beans. Its superior heat retention keeps everything cooking evenly and gives the beans that slightly caramelized, restaurant-style finish. It is also nearly indestructible and will last for generations.
2. OXO Good Grips Potato Masher
Getting the right texture on homemade refried beans comes down to the masher. This OXO model has a wide, sturdy head that lets you mash quickly and efficiently without the beans sticking or slipping. It also has a comfortable, non-slip grip that makes the process easy on your hands.
3. Mueller Austria Ultra-Stick Immersion Blender
If you prefer ultra-smooth, restaurant-style refried beans, an immersion blender is the fastest way to get there. This one is powerful enough to puree beans directly in the skillet without transferring hot liquid to a blender. It is easy to clean and very affordable.
4. Dried Pinto Beans (2-Pound Bag)
Starting with quality dried pinto beans makes a real difference in the final flavor and texture. Look for a reputable brand with a recent harvest date so the beans cook evenly and do not turn out tough or grainy.
5. Iberia Lard (Traditional Cooking Fat)
For the most authentic, restaurant-quality flavor, lard is the traditional fat used in Mexican cooking. It creates a richness and silkiness that vegetable oils cannot quite match. A little goes a long way, and this tub lasts through many batches.
This recipe also pairs beautifully alongside Pico de Gallo Recipe for a complete Tex-Mex table spread.
Step-by-Step Instructions
1. Sort and Rinse the Dried Beans
- Spread your dried pinto beans out on a clean, light-colored surface such as a baking sheet or cutting board.
- Pick through them carefully and discard any shriveled, split, or discolored beans, as well as any small stones or debris that may have made it into the bag.
- Transfer the sorted beans to a colander or fine-mesh strainer and rinse them thoroughly under cold running water, using your hands to move them around and ensure all surfaces are washed.
2. Soak the Beans Overnight
- Place the rinsed beans into a large mixing bowl.
- Cover them with cold water by at least 3 inches (7.5cm), as the beans will expand significantly as they absorb water.
- Let the beans soak at room temperature for at least 8 hours, or overnight for the best results.
- After soaking, the beans should have roughly doubled in size and have a plump, firm texture.
- Drain and rinse the soaked beans thoroughly under cold water. Discard the soaking water, as it contains compounds that can cause digestive discomfort.
3. Simmer the Beans Until Tender
- Transfer the drained, soaked beans to a large heavy-bottomed pot or Dutch oven.
- Add 10 cups (2.4 liters) of fresh cold water to the pot.
- Add half of the yellow onion (left as a large chunk, which you will discard later), the 3 smashed garlic cloves, the bay leaf, dried Mexican oregano, and 1 teaspoon of kosher salt.
- Bring the water to a boil over medium-high heat, skimming any foam that rises to the surface during the first few minutes of cooking.
- Once boiling, reduce the heat to low, cover the pot partially, and simmer gently for 1.5 to 2 hours, until the beans are completely tender when pressed between your fingers.
- Check the water level every 30 minutes. If it dips below the top of the beans, add more hot water (not cold, as cold water can slow down the cooking process and toughen the beans).
- The beans are done when they mash easily between your fingers with very little pressure.
4. Reserve the Bean Broth and Drain
- Place a large heatproof bowl or liquid measuring cup underneath a colander or strainer.
- Carefully pour the cooked beans and their liquid through the strainer, collecting all of the bean broth in the bowl below. This broth is packed with flavor and is essential for adjusting the consistency of your final refried beans.
- Remove and discard the onion chunk, bay leaf, and smashed garlic cloves.
- Set the cooked beans aside. You should have approximately 2 to 2.5 cups (480 to 600ml) of reserved bean broth.
5. Sauté the Aromatics
- Heat 3 tablespoons of your chosen fat (lard, bacon fat, avocado oil, or vegetable oil) in your large cast iron skillet over medium heat.
- Once the fat is shimmering and hot, add the remaining finely diced yellow onion.
- Cook the onion, stirring occasionally, for about 5 to 7 minutes until it is completely soft, translucent, and just starting to turn golden at the edges.
- Add the 3 minced garlic cloves to the pan and stir constantly for 60 to 90 seconds, until the garlic is fragrant and has softened. Do not let it brown, as burned garlic will make the beans bitter.
6. Add the Beans and Begin Mashing
- Reduce the heat to low.
- Add the cooked, drained pinto beans to the skillet in batches, stirring them into the onion and garlic mixture as you go.
- Pour in 1/2 cup (120ml) of the reserved bean broth and stir everything together.
- Using your potato masher, begin mashing the beans directly in the skillet. Work in a circular motion, pressing down firmly to break up the beans.
- Continue mashing and stirring for 3 to 5 minutes, adding more bean broth 1/4 cup (60ml) at a time to achieve your desired consistency.
- For semi-chunky beans, leave some whole pieces intact and stop mashing early.
- For smooth, creamy refried beans like you would find in a restaurant, continue mashing thoroughly, adding up to 1.5 cups (360ml) of bean broth total, or blend with an immersion blender directly in the skillet.
- Remember: the beans will thicken as they cool, so aim for slightly looser than your target consistency while they are still hot.
7. Season and Finish
- Add the ground cumin, chili powder, and smoked paprika to the skillet and stir thoroughly to distribute the spices evenly throughout the beans.
- Cook for an additional 2 to 3 minutes, stirring continuously, to allow the spices to bloom in the fat and fully incorporate.
- Squeeze in the juice of half a lime and stir to combine. The acidity brightens the overall flavor and makes the beans taste fresher and more vibrant.
- Taste the beans and adjust seasoning with additional salt, pepper, or lime juice as needed.
- If the beans have thickened too much during cooking, stir in a splash more of the reserved bean broth until you reach your ideal texture.
- Serve immediately, or keep warm over the lowest heat setting, stirring occasionally and adding a splash of broth as needed to prevent the beans from drying out.
Read Also: Birria Tacos Recipe
Tips for Success
A few key techniques make the difference between good refried beans and absolutely outstanding ones. Keeping these in mind will help you nail the recipe every single time.
- Never skip the overnight soak. Soaking the beans overnight not only dramatically reduces cooking time but also helps the beans cook more evenly, producing a creamier, more consistent texture throughout.
- Use the bean broth, not water. When adjusting consistency, always use the reserved cooking liquid rather than plain water. Plain water dilutes flavor, while bean broth keeps everything rich and deep-tasting.
- Control your heat carefully. When frying the beans in step 6, keep the heat on low. High heat can cause the beans to scorch on the bottom, which will impart a bitter taste to the whole batch.
- Do not rush the aromatics. Properly softened onion and fragrant garlic are the flavor foundation of this dish. Cutting corners on this step will result in a less developed, flat-tasting final product.
- Bloom your spices. Adding cumin, chili powder, and paprika directly into the hot fat with the aromatics before the beans go in, or stirring them into the hot beans and cooking for a few minutes, activates the fat-soluble flavor compounds in the spices and makes a noticeable difference.
- Taste as you go. Beans are notorious for needing more salt than you might expect. Taste the beans before and after adding the lime juice, and adjust seasoning accordingly.
- Plan for thickening. Refried beans always thicken as they cool. If they look slightly looser than you prefer right off the heat, they will likely be perfect once plated or after sitting in the refrigerator.
The same technique of slowly building flavors with aromatics works wonderfully in Black Bean Soup too.
Serving Suggestions
Refried beans are one of the most versatile Mexican dishes in existence. You can use them as a side, a filling, a dip, or even a base.
Here are some of the best ways to serve a fresh batch:
- As a side dish: Spoon them onto a plate alongside Carne Asada, Mexican rice, and warm tortillas for a complete and satisfying meal.
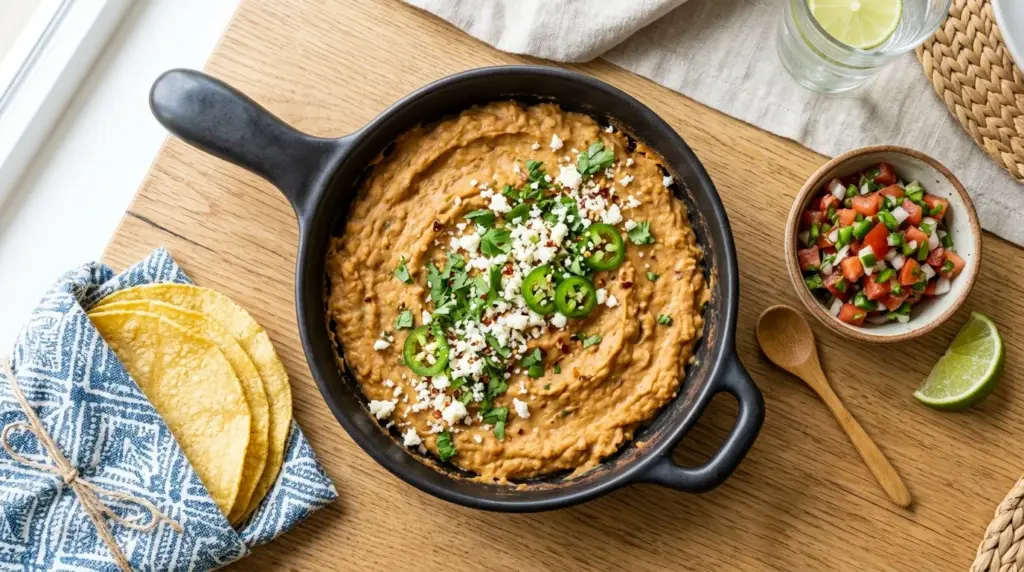
- As a dip: Serve warm in a bowl with tortilla chips for an addictive, crowd-pleasing appetizer. Top with shredded cheese, diced jalapeños, and a dollop of sour cream.
- In burritos: Spread a generous layer inside a flour tortilla before adding rice, meat, salsa, and cheese. The beans act as a creamy, flavorful binder.
- On tostadas: Spread refried beans onto a crispy tostada shell, then pile on your favorite toppings like avocado, shredded chicken, and queso fresco.
- In quesadillas: Use them as a filling in Cheese Quesadillas for an extra layer of protein and creaminess.
- As a nacho base: Spread a layer on a sheet pan before adding tortilla chips, cheese, and toppings for fully loaded nachos.
- In breakfast burritos: Use them as a hearty filling in Breakfast Burritos alongside eggs, potatoes, and salsa.
- Topped with extras: Finish with crumbled Cotija cheese, fresh cilantro, diced white onion, and a drizzle of Mexican crema for a restaurant-quality presentation.
Read Also: Enchiladas Suizas Recipe
Variations to Try
The classic pinto bean version is the standard for good reason, but there are plenty of ways to adapt this recipe to suit different preferences and uses.
- Black bean refried beans: Substitute dried black beans 1:1 for the pinto beans. Black beans produce a slightly earthier, denser result and are especially popular in certain regions of Mexico and in Cuban-style cooking.
- Spicy refried beans: Finely dice one jalapeño pepper and add it to the skillet along with the onion in step 5. For even more heat, add a pinch of cayenne pepper along with the other spices.
- Vegetarian or vegan refried beans: Use avocado oil or vegetable oil instead of lard or bacon fat. The beans will still be creamy and delicious, just with a lighter, more neutral fat profile.
- Smoky refried beans: Use bacon fat as your cooking fat and add an extra 1/4 teaspoon of smoked paprika. You can also stir in a small amount of chipotle pepper in adobo sauce for a deeper, smoky heat.
- Cheesy refried beans: Stir in 1/2 cup (55g) of shredded Monterey Jack or cheddar cheese during the last minute of cooking and mix until fully melted and incorporated.
- Refried beans with chorizo: Cook 2 to 3 ounces (55 to 85g) of crumbled Mexican chorizo in the skillet before adding the onion. Drain off any excess grease, then proceed with the recipe as written for a deeply savory, spiced variation.
- Bell pepper addition: Finely dice half a red bell pepper and sauté it alongside the onion for added sweetness and a pop of color.
For a hearty Mexican-inspired weeknight dinner, also try this Mexican Skillet Recipe.
Storage and Reheating
Refried beans store exceptionally well, making them a smart choice for meal prep and batch cooking.
- Refrigerator: Allow the beans to cool completely to room temperature before transferring them to an airtight container. They will keep in the fridge for up to 5 days.
- Freezer: Portion the cooled beans into individual freezer-safe containers or zip-lock bags. Press out as much air as possible before sealing. Freeze for up to 3 months. To thaw, move a portion to the refrigerator the night before you need it.
- Reheating on the stovetop: Add the cold beans to a small saucepan over low heat. Stir in a splash of reserved bean broth, water, or vegetable broth, a tablespoon at a time, to loosen the beans as they warm. Stir frequently to prevent sticking or scorching.
- Reheating in the microwave: Transfer a portion to a microwave-safe bowl, add a tablespoon of broth or water, and cover loosely with a damp paper towel. Microwave in 30-second intervals, stirring between each, until heated through.
- Important note: Refried beans always thicken significantly as they cool and sit. Always add a splash of liquid when reheating to restore that creamy, spreadable consistency.
You might also enjoy: Taco Casserole Recipe
Nutritional Facts
The following nutritional information is based on one serving, with the recipe yielding approximately 6 servings. Values are estimates and will vary based on the type of fat used and how much liquid is incorporated.
| Nutrient | Per Serving (approx. 1/2 cup / 120g) |
|---|---|
| Calories | 210 kcal |
| Total Fat | 7g |
| Saturated Fat | 2g |
| Carbohydrates | 28g |
| Dietary Fiber | 8g |
| Sugars | 2g |
| Protein | 10g |
| Sodium | 390mg |
| Potassium | 480mg |
| Iron | 15% Daily Value |
These values are for the traditional lard-based version. Using vegetable oil will slightly reduce the saturated fat content. Using bacon fat will increase the sodium and fat content modestly.
Another great Mexican-inspired dish to add to your table is Taco Skillet Recipe.
Health Benefits of Key Ingredients
This recipe is built on simple, wholesome ingredients that carry genuine nutritional value. Here is a closer look at what makes each one worth using.
Pinto beans are the nutritional powerhouse at the center of this recipe. They are one of the best plant-based sources of both protein and dietary fiber, with a single cup delivering roughly 15 grams of protein and 15 grams of fiber.
Their high fiber content has been linked to improved digestive health, reduced LDL cholesterol levels, and better blood sugar regulation. Pinto beans are also rich in folate, iron, magnesium, and potassium, making them particularly valuable for heart and bone health.
- Pinto beans: Rich in plant-based protein, complex carbohydrates, and soluble fiber. Their low glycemic index makes them an excellent option for people managing blood sugar levels. They are also a good source of folate, which is critical for cell growth and DNA synthesis.
- Garlic: Contains allicin, a sulfur compound with well-documented anti-inflammatory and antimicrobial properties. Regular garlic consumption has been associated with lower blood pressure and improved immune function.
- Cumin: An excellent source of iron and has traditionally been used to aid digestion. It also contains antioxidants that may help protect cells from oxidative damage.
- Lime juice: Provides vitamin C, which enhances the absorption of non-heme iron (the type found in plant-based foods like beans). Even a small squeeze significantly increases how much iron your body can absorb from each serving.
- Yellow onion: A source of quercetin, a flavonoid with antioxidant and anti-inflammatory properties. Onions also contain prebiotic fibers that feed beneficial gut bacteria.
- Smoked paprika: Contains capsaicin and various carotenoids, including beta-carotene, which support eye health and have antioxidant effects.
For another fiber-rich, warming bean dish, check out this Ham and Bean Soup Recipe.
Frequently Asked Questions
1. Can I use canned pinto beans instead of dried?
Yes, absolutely. If you are short on time, substitute 3 to 4 cans (15 ounces / 425g each) of canned pinto beans. Drain and rinse them, but save the liquid from the cans to use as your bean broth substitute during mashing.
The flavor will not be quite as deep or complex as the dried bean version, but the result is still significantly better than store-bought refried beans. To compensate for the milder flavor, increase your cumin and garlic slightly.
2. Why are they called refried beans if they are only fried once?
The name comes from the Spanish frijoles refritos, where refritos is often translated as “refried” in English. However, a more accurate translation would be “well-fried” or “thoroughly cooked.”
The beans are not literally fried twice. The “re” prefix in Spanish can imply doing something thoroughly or to a great degree, rather than doing it again. So refried beans are, in essence, just very well-fried beans.
3. What is the best fat to use for refried beans?
For the most authentic, traditional flavor, lard is the classic choice. It creates a subtle richness that is deeply savory and characteristic of restaurant-style refried beans.
Bacon fat is a close second and adds a smoky, meaty quality. Avocado oil or vegetable oil are the best neutral options for a vegetarian or vegan version. Olive oil is not typically recommended because its strong flavor can compete with the beans rather than complement them.
4. How do I fix refried beans that are too thick?
Simply stir in more of your reserved bean broth, adding it one to two tablespoons at a time over low heat until you reach your desired consistency.
If you have run out of bean broth, warm vegetable broth or even a small amount of water will work in a pinch. The key is adding liquid gradually and stirring constantly so the consistency is even rather than lumpy.
5. Can I make refried beans ahead of time?
Yes, and they are actually a great make-ahead dish. They store well in the refrigerator for up to 5 days and in the freezer for up to 3 months.
Just keep in mind that they will thicken considerably as they cool. When reheating, always add a splash of broth or water and stir over low heat until smooth and creamy again. For meal prep, making a double batch and portioning into the freezer is a practical strategy.
Read Also: Chicken Tortilla Soup Recipe
Final Thoughts
Homemade refried beans are one of those deceptively simple recipes that reward you every single time you make them.
The process is approachable, the ingredients are inexpensive, and the result is far superior to anything that comes from a can. Once you taste the difference, there is really no going back.
These beans are endlessly useful in the kitchen. Tuck them into burritos, use them as a dip for game day, spread them onto tostadas, or simply enjoy them as a hearty side with your favorite Mexican meals.
Give this recipe a try and let me know how it goes. Drop a comment below with how you served yours, or share a photo of your finished batch. I love hearing from readers who have put their own spin on a classic recipe.
Recommended:
- Picadillo Recipe
- Mexican Street Corn
- Easy Nachos
- Classic Guacamole
- Fresh Salsa
- Taco Seasoning Recipe
- Flour Tortilla Recipe
- Corn Tortilla Recipe
- Mexican Beef and Rice Skillet
- Santa Fe Soup


