
I learned to make whipped shortbread cookies recipe from my Scottish grandmother during the holidays, and they’ve become a family tradition I can’t imagine Christmas without. These delicate, buttery cookies literally melt in your mouth with every bite.
The texture is completely different from regular shortbread. It’s lighter, almost cloud-like, and that comes from whipping the butter until it’s incredibly fluffy.
My kids now ask for these cookies all year round, not just at Christmas. I don’t blame them one bit.
The best part? You only need a handful of basic ingredients you probably already have in your pantry. No special trips to the store required.
You might also enjoy: Cranberry Orange Shortbread Cookies Recipe
Why You’ll Love This Whipped Shortbread Cookies Recipe
These cookies are impossibly tender and practically dissolve on your tongue. The whipping process incorporates air into the butter, creating that signature light texture you can’t get with traditional shortbread methods.
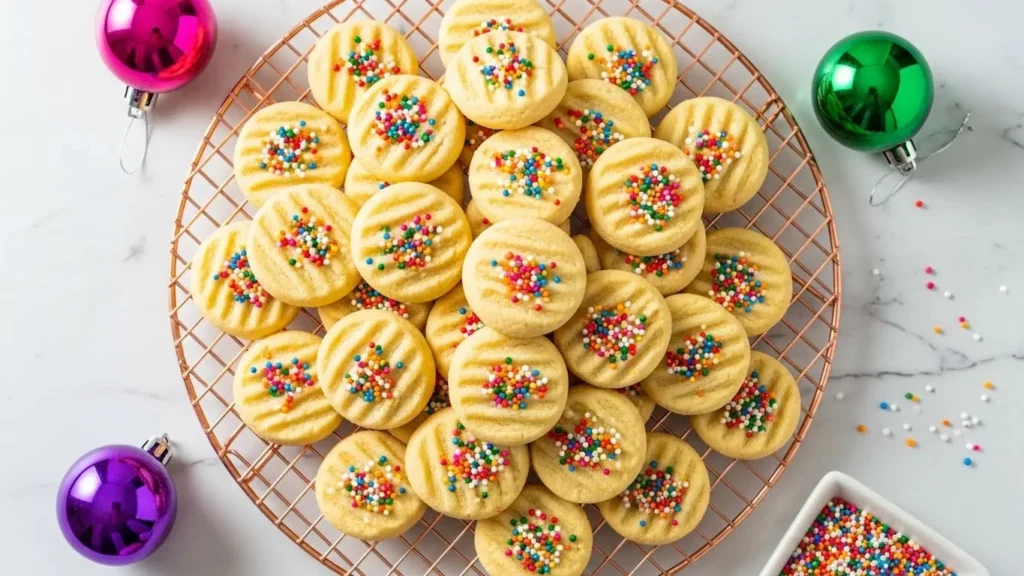
They’re incredibly versatile too. You can dress them up with colorful sprinkles for holidays or keep them simple and elegant for everyday enjoyment.
Here’s what makes this recipe so special:
- Melt-in-your-mouth texture that’s lighter than air
- Only 4 ingredients needed for the classic version
- No chilling required before baking
- Perfect for gift-giving during the holidays
- Freezes beautifully so you can make them ahead
- Customizable with different flavors and toppings
- Beginner-friendly with simple techniques
Ingredients
These cookies prove that sometimes the simplest recipes are the absolute best. The ingredient list is short, but the quality of what you use matters tremendously here.
- 1 cup (226g) unsalted butter, softened to room temperature
- ½ cup (60g) powdered sugar, sifted
- 1½ cups (190g) all-purpose flour
- ½ cup (65g) cornstarch
- ½ teaspoon vanilla extract (optional, but recommended)
- Pinch of salt
- Maraschino cherries, halved, for topping (optional)
Kitchen Equipment Needed
You don’t need a kitchen full of fancy gadgets to make these beauties. Just a few basics will do the trick.
- Stand mixer or hand mixer
- Large mixing bowl
- Measuring cups and spoons
- Sifter or fine-mesh strainer
- Baking sheets
- Parchment paper or silicone baking mats
- Cookie scoop or two spoons
- Wire cooling rack
Recommended Products for This Recipe
After making these cookies hundreds of times over the years, I’ve found a few products that genuinely make the process easier and improve the final result. These aren’t necessities, but they’re investments that’ll serve you well.
1. KitchenAid Stand Mixer
The extended whipping time really benefits from a stand mixer that can run hands-free for 8-10 minutes. My KitchenAid has been whipping butter for these cookies for over a decade without missing a beat. The powerful motor ensures your butter gets perfectly fluffy every single time.
2. European Style Butter
The higher fat content in European butter makes these cookies even more tender and flavorful. I started using it a few years ago and noticed an immediate difference in richness. Brands like Kerrygold or Plugra are worth seeking out.
3. Nordic Ware Natural Aluminum Baking Sheets
These commercial-grade baking sheets distribute heat so evenly that you’ll never have burnt bottoms again. They’re naturally non-stick and incredibly durable. I’ve been using the same pair for years, and they still look nearly new.
4. OXO Cookie Scoop
A medium cookie scoop ensures all your cookies are the same size so they bake evenly. The spring-loaded handle makes portioning effortless, and cleanup is a breeze. Uniform cookies aren’t just prettier—they bake more consistently too.
Another favorite: Cranberry Pistachio Shortbread Cookies Recipe
Step-by-Step Instructions
The key to perfect whipped shortbread is patience during the whipping stage. Don’t rush it—that air incorporation is what makes these cookies special.
1. Prepare Your Baking Sheets and Preheat the Oven
- Preheat your oven to 325°F (165°C)
- Line two baking sheets with parchment paper or silicone baking mats
- Set the prepared sheets aside while you make the dough
- Make sure your oven rack is positioned in the center for even baking
2. Whip the Butter Until Light and Fluffy
- Place the softened butter in the bowl of your stand mixer fitted with the paddle attachment
- Beat the butter on medium speed for 2 minutes until it starts to lighten in color
- Gradually increase to medium-high speed and continue beating for 8-10 minutes total
- Stop occasionally to scrape down the sides of the bowl with a rubber spatula
- The butter should become very pale, almost white, and noticeably fluffy in texture
- It should have increased in volume by about one-third
- This extended whipping time is crucial for achieving the light, melt-in-your-mouth texture
3. Add the Powdered Sugar
- Sift the powdered sugar to remove any lumps before adding it to the butter
- Add the sifted powdered sugar to the whipped butter
- Beat on low speed for about 30 seconds until the sugar is incorporated
- Increase to medium speed and beat for another 2-3 minutes
- The mixture should be smooth, light, and fluffy
- Add the vanilla extract and salt during this step if using
- Mix just until combined
4. Sift and Add the Dry Ingredients
- In a separate bowl, sift together the all-purpose flour and cornstarch
- Sifting is important here because it helps prevent lumps and creates a lighter texture
- Add the sifted flour mixture to the butter mixture all at once
- Mix on the lowest speed just until the flour is incorporated and no streaks remain
- The dough will be very soft and slightly sticky—this is exactly what you want
- Do not overmix or the cookies will become tough
- Stop mixing as soon as you can’t see any dry flour
5. Shape the Cookies
- Using a cookie scoop or two spoons, portion the dough into tablespoon-sized balls
- Place them about 2 inches apart on your prepared baking sheets
- The cookies won’t spread much during baking, so spacing isn’t as critical as with other cookies
- Gently flatten each ball slightly with your fingers or the back of a fork
- If desired, press a halved maraschino cherry into the center of each cookie
- You can also leave them plain or add other toppings like colored sugar or sprinkles
- Handle the dough gently to maintain that airy texture you’ve worked to create
6. Bake the Cookies
- Place the baking sheets in the preheated oven
- Bake for 12-15 minutes, rotating the pans halfway through for even baking
- The cookies are done when the edges are just barely starting to turn golden
- The tops should remain pale—you don’t want them to brown
- They’ll look slightly underbaked, but they’ll firm up as they cool
- Avoid overbaking or they’ll lose their tender, melt-in-your-mouth quality
- If baking two sheets at once, swap their positions halfway through
7. Cool the Cookies
- Remove the baking sheets from the oven and let the cookies cool on the pan for 5 minutes
- The cookies are very delicate when hot and need this time to set
- After 5 minutes, carefully transfer them to a wire cooling rack using a thin spatula
- Let them cool completely before storing or serving
- They’ll continue to firm up slightly as they cool
- Handle them gently as they’re quite fragile until fully cooled
Read Also: Cherry Almond Shortbread Cookies Recipe
Tips for Success
Getting the technique right makes all the difference with these delicate cookies. I’ve made every mistake possible over the years, so let me save you the trouble.
These tips will help you avoid the most common pitfalls:
- Use room temperature butter: It should be soft enough to leave an indent when pressed but not melted or greasy. Cold butter won’t whip properly, and melted butter will deflate the structure.
- Don’t skimp on whipping time: Those 8-10 minutes of beating the butter are essential. Set a timer and let the mixer do its work.
- Sift your dry ingredients: This prevents lumps and creates a lighter, more tender cookie. It’s worth the extra step.
- Avoid overmixing after adding flour: Mix just until combined. Overworking the dough develops gluten and makes tough cookies.
- Keep dough cool: If your kitchen is warm and the dough becomes too soft to handle, refrigerate it for 15-20 minutes before shaping.
- Watch the baking time closely: These cookies can go from perfectly baked to overbaked in a minute. Set a timer.
- Test with one cookie first: Bake a single test cookie to check your oven temperature and timing before baking the whole batch.
Serving Suggestions
These delicate cookies are perfect for so many occasions. I’ve served them at everything from casual afternoon tea to elegant holiday parties.
They’re incredibly versatile and pair beautifully with both hot and cold beverages. Here are some of my favorite ways to enjoy them:
- Serve alongside hot chocolate pudding for a rich dessert combination
- Pair with afternoon tea or coffee for a classic treat
- Arrange on a holiday cookie platter with Christmas shortbread cookies and gingerbread cookies
- Package in decorative tins or boxes for homemade gift giving
- Crumble over vanilla ice cream for added texture and buttery flavor
- Serve with fresh berries and whipped cream for an elegant dessert
- Enjoy with a glass of cold milk as an after-school snack
For a lighter option, try: Lemon Shortbread Cookies Recipe
Variations to Try
Once you’ve mastered the basic recipe, the flavor possibilities are endless. I love experimenting with different additions throughout the year.
Here are some variations that have become favorites in my house:
- Chocolate-dipped: Melt dark or white chocolate and dip half of each cooled cookie for an elegant finish
- Lemon zest: Add 1 tablespoon of finely grated lemon zest to the butter for a bright, citrusy twist
- Almond extract: Replace the vanilla with ½ teaspoon almond extract and top with sliced almonds
- Espresso powder: Mix 1 tablespoon instant espresso powder into the flour for coffee-flavored cookies
- Orange cardamom: Add 1 tablespoon orange zest and ½ teaspoon ground cardamom for a sophisticated flavor
- Chocolate chip: Fold in ½ cup mini chocolate chips after adding the flour
- Peppermint: Use peppermint extract instead of vanilla and crush candy canes to sprinkle on top before baking
Storage and Reheating
Proper storage keeps these cookies fresh and tender for days. They’re actually one of the better-keeping cookies I make.
Follow these guidelines to maintain their delicate texture:
- Room temperature: Store in an airtight container at room temperature for up to 1 week. Place parchment paper between layers to prevent sticking.
- Refrigerator: These cookies don’t need refrigeration and actually become too firm when chilled. Stick with room temperature storage.
- Freezer: Freeze baked cookies in a freezer-safe container for up to 3 months. Thaw at room temperature for 30 minutes before serving.
- Freezing dough: You can also freeze the unbaked dough for up to 2 months. Shape into balls, freeze on a baking sheet, then transfer to a freezer bag. Bake directly from frozen, adding 1-2 minutes to the baking time.
- Keeping them crisp: Add a small piece of bread to the storage container if cookies start to soften. The bread will absorb excess moisture.
Read Also: Almond Shortbread Cookies Recipe
Nutritional Facts
Per cookie (based on 36 cookies):
- Calories: 78
- Total Fat: 5g
- Saturated Fat: 3g
- Cholesterol: 14mg
- Sodium: 8mg
- Total Carbohydrates: 8g
- Dietary Fiber: 0g
- Sugars: 2g
- Protein: 1g
Note: Nutritional information is approximate and will vary based on specific ingredients used and cookie size.
Health Benefits of Key Ingredients
While these are definitely an indulgent treat, the simple ingredients do offer some nutritional value. Moderation is key, of course.
Here’s what each main ingredient brings to the table:
Butter: Contains fat-soluble vitamins A, D, E, and K. Butter also provides conjugated linoleic acid (CLA), which has been studied for potential health benefits. The saturated fats in butter can be part of a balanced diet when consumed in moderation.
Cornstarch: A gluten-free thickening agent that contributes to the cookies’ tender texture. It’s easily digestible and provides a small amount of calories for energy. While not nutritionally dense, it serves an important structural purpose in baking.
Vanilla extract: Contains small amounts of antioxidants and has been used traditionally for its calming properties. The vanillin compound may have anti-inflammatory effects. Even in small amounts, it adds flavor depth that makes treats more satisfying.
Another crowd-pleaser: Scottish Shortbread Cookie Recipe
Frequently Asked Questions
1. Why are my whipped shortbread cookies crumbly and falling apart?
The dough might be too dry or overworked. Make sure you’re measuring flour correctly using the spoon-and-level method rather than scooping directly from the bag.
Also check that you whipped the butter long enough—underwhipped butter won’t create the proper structure. If the dough seems too dry, you can add a teaspoon of milk or cream to help it come together.
2. Can I make whipped shortbread cookies without a mixer?
While a stand mixer or hand mixer makes the job much easier, you can make these by hand with a wooden spoon and some serious arm workout. Beat the butter vigorously for about 15-20 minutes until it’s very pale and fluffy.
Your arm will definitely feel it, but it’s possible. The texture might not be quite as light as mixer-made cookies, but they’ll still taste delicious.
3. Why didn’t my cookies spread during baking?
Whipped shortbread cookies aren’t supposed to spread much—that’s actually a sign they turned out correctly. The high butter content and cornstarch create cookies that hold their shape beautifully.
If you want them slightly flatter, press them down a bit more before baking. But truly, minimal spreading is exactly what you want with this recipe.
4. Can I use salted butter instead of unsalted?
You can, but I’d recommend reducing or omitting the additional pinch of salt in the recipe. Salted butter can make the cookies taste a bit too salty since there’s such a high proportion of butter to other ingredients.
Unsalted butter gives you better control over the final flavor. If salted butter is all you have, just taste the dough and adjust accordingly.
5. How can I tell when the cookies are done baking?
The cookies should be just barely starting to turn golden on the edges while the tops remain pale. They’ll look slightly underbaked and soft when you take them out.
They firm up considerably as they cool, so resist the urge to bake them longer. If they’re browning on top, they’ve gone too far and will lose that melt-in-your-mouth texture.
Final Thoughts
These whipped shortbread cookies have brought joy to countless gatherings in my home over the years. Their delicate, buttery texture and simple elegance never fail to impress.
The best part is how forgiving the recipe is once you understand the technique. Even if your first batch isn’t perfect, I promise they’ll still taste incredible.
I hope this whipped shortbread cookies recipe becomes as beloved in your kitchen as it is in mine. Try them this weekend and let me know how they turn out in the comments below—I’d love to hear about any flavor variations you create!
Recommended:
- Pecan Shortbread Cookies Recipe
- Shortbread Cookie Recipe
- Sugar Cookies Recipe
- Peanut Butter Blossom Cookies Recipe
- Pizzelle Recipe
- Snickerdoodle Cookie Recipe
- Oatmeal Raisin Cookie Recipe
- Oatmeal Cookie Recipe
- Peanut Butter Cookie Recipe
- No Bake Cookie Recipe


