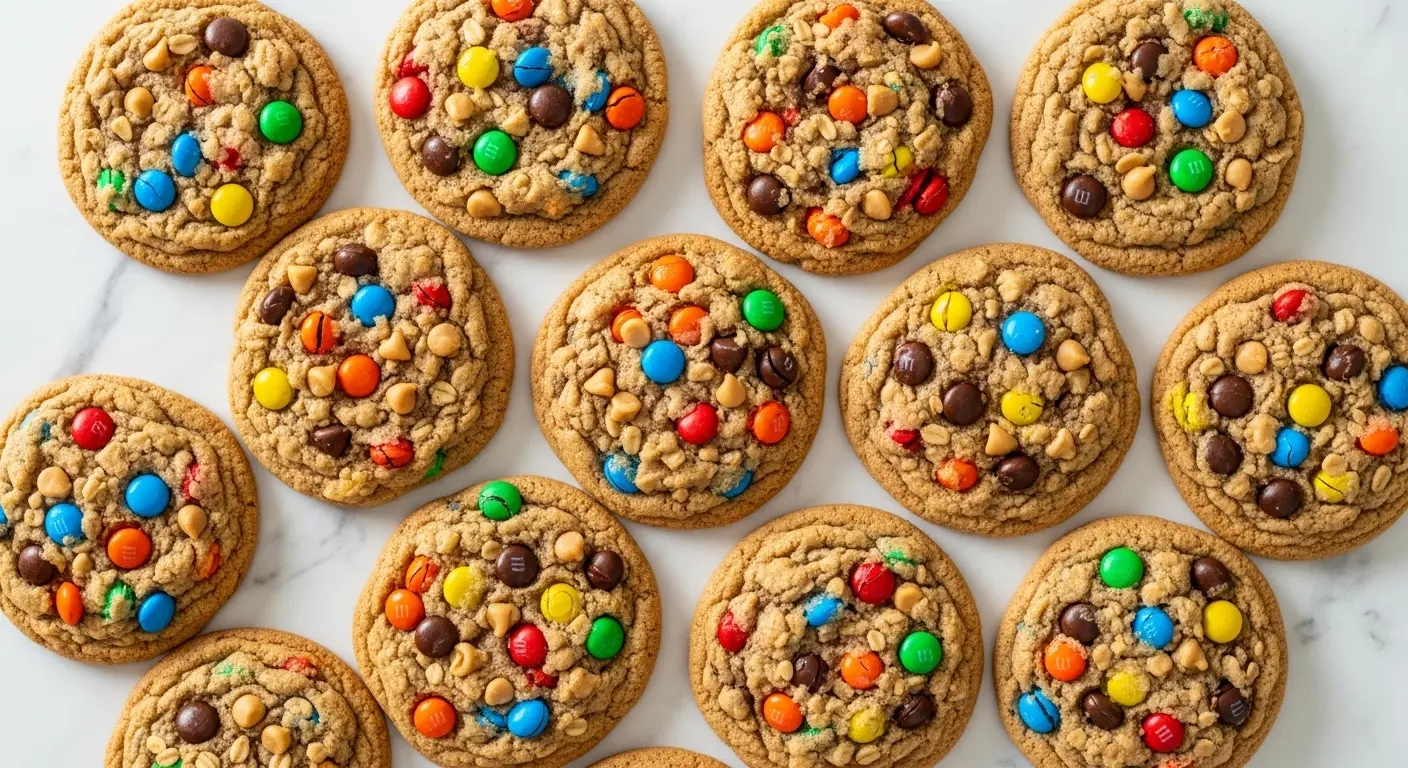
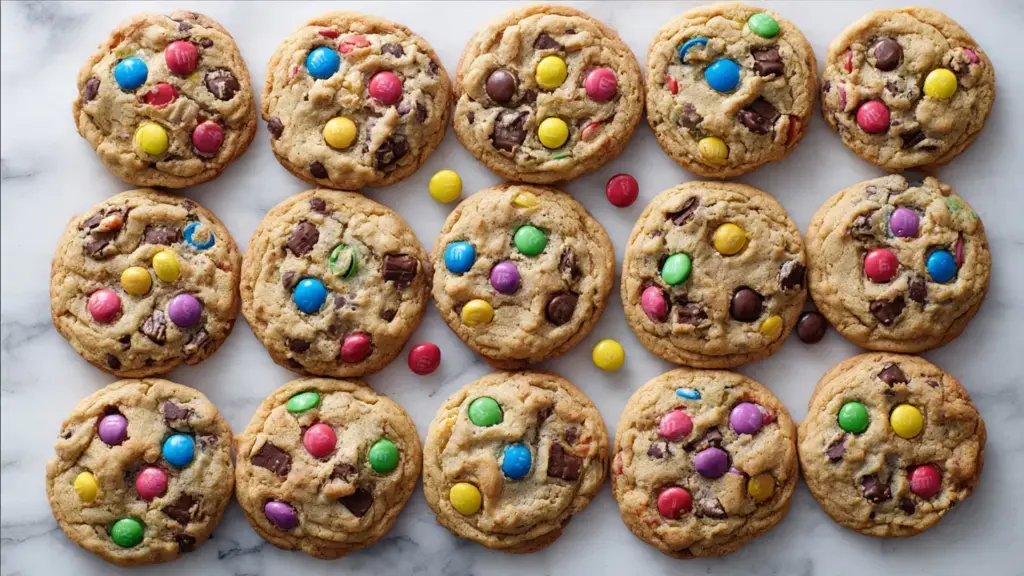
If you’ve been searching for the perfect monster cookie recipe, your search ends right here. These cookies are everything a great cookie should be: thick, chewy, golden at the edges, soft in the center, and absolutely packed with peanut butter, hearty oats, chocolate chips, and M&Ms.
Monster cookies have been a staple in American home baking for decades, and it’s easy to see why they’ve stuck around.
They bring together the best elements of an oatmeal cookie and a peanut butter cookie in one giant, glorious bite. No need to pick a favorite when you can have both.
What makes this recipe stand out is the combination of creamy peanut butter with old-fashioned rolled oats. The oats add that signature hearty chew, while the peanut butter binds everything together and gives the cookies a rich, nutty depth of flavor that regular flour-based cookies just can’t match.
Whether you’re baking for a bake sale, a party spread, or just a cozy afternoon in the kitchen, these cookies always disappear fast.
They’re big, bold, and unapologetically loaded with mix-ins. One batch makes about 24 cookies, and trust me, you’ll want every single one.
If you love peanut butter and chocolate together, you might also enjoy these Monster Cookie Bars for a slab-style version that’s just as delicious.
Why You’ll Love This Monster Cookie Recipe
This recipe hits every note that makes a truly great cookie.
For starters, these are flourless. The peanut butter, oats, and eggs work together to create structure without needing any all-purpose flour, which also makes them naturally gluten-free (just use certified gluten-free oats).
The texture is second to none. You get crispy golden edges with a soft, chewy center that stays that way even after the cookies have cooled completely.
They’re also incredibly forgiving and easy to make. No chilling required, no fancy equipment, and no special techniques. You can have these mixed and in the oven in under 20 minutes.
Here’s a quick list of reasons this recipe is a keeper:
- Made with simple, pantry-staple ingredients
- No flour needed, making them naturally gluten-free
- Thick and chewy texture with golden crispy edges
- Packed with peanut butter flavor in every single bite
- Loaded with M&Ms and chocolate chips for a colorful, fun presentation
- Incredibly easy to customize with different mix-ins
- Makes about 24 large cookies, perfect for sharing
- Freezer-friendly dough and baked cookies
Read Also: Monster Cookie Dough Dip Recipe
Ingredients
To make this classic monster cookie recipe, you don’t need anything exotic. Most of these ingredients are probably already sitting in your pantry or fridge right now.
One important note: use regular creamy peanut butter (like Jif or Skippy) rather than natural peanut butter. Natural peanut butter tends to be oilier and can make the dough greasy and the cookies more prone to crumbling. The emulsified versions give you a more consistent, reliable result every time.
Here’s everything you’ll need:
- 1 cup (226g) unsalted butter, softened to room temperature
- 1 cup (200g) granulated sugar
- 1 cup (220g) packed light brown sugar
- 2 large eggs, room temperature
- 1 tablespoon (15ml) pure vanilla extract
- 1½ cups (375g) creamy peanut butter (regular, not natural)
- 2 teaspoons (10g) baking soda
- ½ teaspoon (3g) fine sea salt
- 3 cups (270g) old-fashioned rolled oats
- 1½ cups (255g) semi-sweet chocolate chips
- 1½ cups (240g) M&M candies (plain or peanut)
Another favorite: Peanut Butter Cookie Recipe
Kitchen Equipment Needed
You don’t need a fully stocked professional kitchen to make these cookies. A few basic tools will do the job perfectly.
Using a stand mixer or hand mixer makes the creaming step much easier, but a sturdy wooden spoon and some elbow grease will also work. A light-colored baking sheet is especially important here since dark pans attract more heat and can cause the bottoms to brown too quickly before the centers are done.
Here’s what you’ll need:
- Stand mixer or hand electric mixer with paddle attachment
- Large mixing bowl
- Medium mixing bowl
- Light-colored baking sheet (half sheet pan)
- Parchment paper or silicone baking mat
- Cookie scoop (3-tablespoon size recommended for large cookies)
- Rubber spatula or wooden spoon
- Wire cooling rack
- Measuring cups and spoons
You might also enjoy: Cookie Skillet Recipe
Recommended Products for This Recipe
These are products I genuinely recommend based on quality and performance. Using the right tools and ingredients makes a real difference in how your monster cookies turn out.
1. OXO Good Grips Large Cookie Scoop
A 3-tablespoon cookie scoop is truly the best investment for making monster cookies. It ensures every single cookie is exactly the same size, which means they all bake evenly at the same rate. No more guessing with a spoon and ending up with cookies of varying thickness.
2. Nordic Ware Natural Aluminum Half Sheet
A light-colored aluminum baking sheet is the secret weapon behind perfectly baked monster cookies. Dark pans absorb too much heat and can cause burnt bottoms before the centers have a chance to set. This Nordic Ware pan distributes heat evenly and consistently for golden, never scorched, results.
3. Bob’s Red Mill Organic Old-Fashioned Rolled Oats
The quality of your oats genuinely matters in monster cookies. Bob’s Red Mill rolled oats are thick, hearty, and give cookies that satisfying chew you’re looking for. Thin or quick oats can make the texture mushy, so stick with old-fashioned for the best results.
4. Silpat Premium Non-Stick Silicone Baking Mat
A silicone baking mat creates an even surface that prevents sticking and promotes uniform heat distribution. Your cookies will lift off cleanly every time without needing to scrape or risk tearing. It’s reusable and washes easily, making it far more economical than constantly buying parchment paper.
5. KitchenAid Artisan Stand Mixer
While a hand mixer will do the job, a stand mixer makes the creaming process effortless and ensures the butter and sugars are properly aerated. That aeration is what gives monster cookies their light interior despite their size. If you bake regularly, this is a worthwhile investment that will serve you for years.
This technique works wonderfully for other chewy baked goods too, like these Oatmeal Cookie Recipe favorites.
Step-by-Step Instructions
Follow these steps closely for perfect monster cookies every time. Read through the entire recipe before starting so you know what to expect at each stage.
Step 1: Preheat the Oven and Prepare Your Baking Sheets
- Preheat your oven to 350°F (175°C). This is the ideal temperature for monster cookies. Higher heat will set the outside before the inside has a chance to spread and cook through properly.
- Line two large light-colored baking sheets with parchment paper or silicone baking mats. Set them aside.
- Make sure your oven rack is positioned in the center of the oven for the most even heat distribution.
Step 2: Soften the Butter to Room Temperature
- Take your butter out of the refrigerator at least 1 hour before baking. Proper room-temperature butter is crucial for creaming. It should be about 65°F (18°C), feel cool to the touch, and leave a slight indent when pressed with your finger.
- If your butter is too cold, the creaming step won’t properly incorporate air into the dough. If it’s too warm and greasy, your cookies will spread too flat.
- Do not microwave the butter to soften it, as this heats it unevenly and can cause the cookies to spread excessively during baking.
Step 3: Cream the Butter and Sugars
- In the bowl of a stand mixer fitted with the paddle attachment (or a large bowl using a hand mixer), add the 1 cup (226g) softened unsalted butter, 1 cup (200g) granulated sugar, and 1 cup (220g) packed light brown sugar.
- Beat on medium-high speed for 3 to 4 minutes until the mixture is pale in color, light, and fluffy. This step is more important than it might seem. Properly creamed butter and sugar creates tiny air pockets in the dough that help the cookies bake up with a tender interior and slightly crisp edges.
- Scrape down the sides and bottom of the bowl with a rubber spatula at least once during this process to make sure everything is evenly mixed.
Step 4: Add the Eggs, Vanilla, and Peanut Butter
- With the mixer on low speed, add the 2 large room-temperature eggs one at a time, mixing well after each addition. Room-temperature eggs incorporate more smoothly and evenly than cold ones, which can cause the batter to look curdled.
- Add the 1 tablespoon (15ml) pure vanilla extract and mix until combined.
- Add the 1½ cups (375g) creamy peanut butter and mix on medium speed for about 1 minute until completely smooth and well incorporated. The dough will start to look thick and glossy at this point. This is exactly what you want.
- Scrape down the sides and bottom of the bowl again to ensure there are no pockets of unmixed butter.
Step 5: Mix in the Dry Ingredients
- Sprinkle the 2 teaspoons (10g) baking soda and ½ teaspoon (3g) fine sea salt over the dough.
- Mix on low speed just until the baking soda and salt are evenly distributed, about 20 to 30 seconds. You can also stir these in by hand with a rubber spatula if you prefer.
- Now add the 3 cups (270g) old-fashioned rolled oats. Mix on low speed or fold in by hand with a rubber spatula until the oats are fully incorporated. The dough will be thick and slightly sticky. This is completely normal.
- Do not use quick oats as a substitute here. Quick oats are cut into smaller pieces and absorb more moisture, which will give you a mushier, less chewy texture. Old-fashioned rolled oats are essential for that hearty, satisfying bite.
Step 6: Fold in the Mix-Ins
- Add the 1½ cups (255g) semi-sweet chocolate chips and 1 cup (160g) of the M&M candies to the dough (reserve about ½ cup / 80g of M&Ms for pressing on top before baking).
- Fold the mix-ins in gently using a rubber spatula or wooden spoon. Try not to overmix at this stage. You want the chocolate chips and M&Ms evenly distributed without deflating the dough or cracking the candy shells too much.
- The dough will be thick, sticky, and loaded with colorful bits. Resist the urge to add more flour.
Step 7: Scoop and Portion the Dough
- Using a 3-tablespoon cookie scoop (or two spoons), portion the dough onto the prepared baking sheets, spacing each cookie ball about 2.5 to 3 inches (6 to 8 cm) apart. These cookies spread as they bake, so give them plenty of room.
- Gently press a few of the reserved M&Ms onto the top of each dough ball. This is a purely visual step, but it makes the cookies look bakery-perfect. Press them in gently so they don’t roll off.
- You should get approximately 24 large cookies from this batch, depending on how generously you scoop.
Step 8: Bake the Cookies
- Place one baking sheet at a time in the center rack of the preheated 350°F (175°C) oven.
- Bake for 10 to 12 minutes. The cookies are done when the edges look golden and set, but the centers still look slightly underdone and glossy. They will continue to firm up as they cool on the pan.
- Do not overbake. Pulling them out when the center looks slightly underdone is the key to achieving that perfect soft and chewy texture. If you wait until the centers look fully baked in the oven, they will be dry once they cool.
Step 9: Cool and Set
- Remove the baking sheet from the oven and let the cookies sit on the pan for a full 3 to 5 minutes before attempting to move them. Monster cookies are more delicate when hot, and moving them too soon can cause cracking and crumbling.
- After that initial resting period, use a thin spatula to carefully transfer the cookies to a wire cooling rack.
- Allow the cookies to cool completely on the rack before stacking or storing. They will firm up and set fully as they cool, reaching their ideal chewy texture once they’ve had at least 15 to 20 minutes to rest.
Read Also: No Bake Cookie Recipe
Tips for Success
A few practical tips can make the difference between a good monster cookie and a truly great one.
These cookies are naturally forgiving, but getting a few key details right consistently produces the best results every single time.
- Use creamy, regular peanut butter (not natural). Natural peanut butter has more oil separation and less emulsification, which can make the dough greasy and the cookies crumbly. Jif and Skippy consistently produce the best results.
- Don’t overmix after adding the oats. Overmixing can break down the oats and make the cookies denser than they should be. Fold just until everything is combined.
- Room-temperature ingredients matter. Cold butter won’t cream properly, and cold eggs can cause the mixture to look broken. Set them out at least an hour before baking.
- Use a cookie scoop for uniformity. Evenly sized cookies bake at the same rate. Unevenly portioned cookies will have some overbaked and some underbaked in the same batch.
- Bake on a light-colored pan. Dark pans absorb more heat and cause the bottoms to brown faster than the tops can set, leading to unevenly baked cookies.
- Don’t overbake. The centers should still look glossy and soft when you pull them from the oven. They set as they cool. This is the single most important tip for chewy cookies.
- Let them rest on the pan. Those 3 to 5 minutes of resting time after baking are not optional. The cookies are too fragile to move while hot and will fall apart if you rush.
The same attention to resting time pays off in other baked goods too, including these Oatmeal Raisin Cookie Recipe classics.
Serving Suggestions
Monster cookies are at their absolute best still slightly warm from the oven, when the chocolate is just starting to set and the M&Ms are still a little glossy.
They pair beautifully with cold beverages and make a stunning addition to any dessert table or cookie platter. Here are some great ways to serve them:
- Serve warm with a tall glass of ice-cold milk for the classic combo
- Stack them on a tiered dessert stand for a party or bake sale display
- Pair with a scoop of vanilla ice cream and use two cookies as an ice cream sandwich
- Set out alongside Hot Chocolate for a cozy winter treat
- Crumble over vanilla ice cream for a quick and easy cookie sundae topping
- Gift them in a cellophane bag tied with ribbon for a homemade food gift
- Serve at birthday parties, holiday cookie exchanges, or school bake sales
- Arrange on a platter alongside other cookies like Snickerdoodle Cookies for a beautiful assorted cookie spread
Variations to Try
The classic monster cookie recipe is hard to improve upon, but there’s plenty of room to play with mix-ins and adapt the recipe to your preferences or dietary needs.
Stick with the core elements of oats, peanut butter, chocolate chips, and M&Ms for the authentic experience, and think of these variations as creative additions rather than replacements.
- Peanut Butter M&Ms: Swap the regular M&Ms for peanut butter M&Ms for an extra hit of peanut butter flavor throughout.
- Butterscotch Chips: Add ½ cup (85g) of butterscotch chips alongside the chocolate chips for a warm, caramel-like sweetness.
- Pretzel Pieces: Fold in ½ cup (50g) of crushed pretzel pieces for a sweet and salty crunch that’s absolutely addictive.
- Peanut Butter Chips: Replace half the chocolate chips with peanut butter chips if you want a stronger peanut butter presence.
- Seasonal M&Ms: Use holiday-colored M&Ms (red and green for Christmas, pastels for Easter, orange and black for Halloween) to make these cookies feel festive year-round.
- Dark Chocolate Chips: Substitute semi-sweet chocolate chips with dark chocolate chips for a richer, slightly less sweet flavor.
- Gluten-Free Version: Simply use certified gluten-free old-fashioned rolled oats. No other changes needed since the base recipe is already flourless.
- Coconut Addition: Add ½ cup (45g) of sweetened shredded coconut for a tropical twist and extra chewiness.
You might also like to try making Monster Cookie Protein Balls for a no-bake, snackable version of the same flavors.
Storage and Reheating
Monster cookies store beautifully and stay fresh longer than most homemade cookies, thanks to the moisture-retaining properties of the oats and peanut butter.
Proper storage keeps them soft and chewy for days, and the dough freezes exceptionally well for baking on demand.
- Room temperature: Store baked cookies in an airtight container at room temperature for up to 5 days. Place a piece of bread in the container to help absorb excess moisture and keep the cookies soft.
- Refrigerator: The cookies can be refrigerated for up to 1 week in an airtight container, but bring them to room temperature before eating for the best texture.
- Freezing baked cookies: Arrange cooled cookies in a single layer on a baking sheet and freeze until solid, about 1 to 2 hours. Then transfer to a resealable freezer bag and freeze for up to 3 months. Thaw at room temperature for about 20 to 30 minutes before serving.
- Freezing dough balls: Scoop the dough into balls, place on a parchment-lined baking sheet, and freeze until solid. Transfer to a freezer bag and store for up to 2 months. Bake straight from frozen at 350°F (175°C), adding 2 to 3 extra minutes to the bake time.
- Reheating: To refresh a baked cookie, microwave it for 10 to 15 seconds. This softens the chocolate chips and gives the cookie that fresh-from-the-oven feel again.
Read Also: Monster Cookie Ice Cream Recipe
Nutritional Facts
The following nutrition information is an estimate per cookie, based on a yield of 24 cookies. Actual values may vary depending on specific brands and ingredient measurements used.
| Nutrient | Per Cookie (approx.) |
|---|---|
| Calories | 320 kcal |
| Total Fat | 16g |
| Saturated Fat | 6g |
| Cholesterol | 35mg |
| Sodium | 190mg |
| Total Carbohydrates | 40g |
| Dietary Fiber | 2g |
| Total Sugars | 26g |
| Protein | 6g |
Monster cookies are a treat, not a health food, and that’s completely okay. The oats do contribute a meaningful amount of fiber and complex carbohydrates compared to standard flour-based cookies. The peanut butter adds protein and healthy fats that make these slightly more satiating than a typical sugar cookie.
This pairs perfectly with a cozy dessert like the Peanut Butter Pie Recipe for a full peanut butter dessert spread.
Health Benefits of Key Ingredients
While monster cookies are absolutely a dessert, a few of the core ingredients do bring some genuine nutritional value to the table.
It’s always nice to know that your indulgence comes with a little something extra.
- Old-fashioned rolled oats are one of the most nutritious ingredients in this recipe. They’re a whole grain that contains beta-glucan, a type of soluble fiber shown to support healthy cholesterol levels and promote a feeling of fullness. Oats also contain manganese, phosphorus, magnesium, and B vitamins.
- Peanut butter is a good source of protein, heart-healthy monounsaturated fats, and niacin. It also contains resveratrol, the same antioxidant found in red wine, which has been associated with heart health benefits.
- Eggs provide high-quality complete protein, along with choline, which supports brain health and development. They also contribute to the structure and richness of these cookies.
- Dark or semi-sweet chocolate chips contain flavonoids and antioxidants that have been linked to improved cardiovascular function. The darker the chocolate, the higher the concentration of these beneficial compounds.
- Brown sugar (vs. white sugar) retains some molasses, which contributes small amounts of calcium, potassium, and iron, as well as the moisture that makes these cookies stay chewy longer.
For another treat that balances indulgence with wholesome ingredients, check out this Easy Granola Recipe.
Frequently Asked Questions
1. Why are my monster cookies flat?
Flat cookies are almost always caused by butter that was too warm or too soft at the start of the recipe. Butter that has melted or become greasy before creaming won’t hold the air needed to give the cookies structure. Make sure your butter is properly at room temperature (cool to the touch, about 65°F / 18°C) before you begin. Using natural peanut butter, which tends to be oilier, can also contribute to flat, spreading cookies. Stick with regular creamy peanut butter for the best structure and lift.
2. Can I use quick oats instead of old-fashioned rolled oats?
It’s best to stick with old-fashioned rolled oats for this recipe. Quick oats have been pre-cut into smaller pieces, which means they absorb moisture faster and can result in a mushier, less chewy texture. Old-fashioned oats retain more of their structure during baking, which is what gives monster cookies their satisfying, hearty bite. If old-fashioned oats are all you have, they’ll still work, but the texture difference is noticeable.
3. Do I need to chill the dough before baking?
This particular recipe does not require chilling before baking, which makes it even more convenient for a spontaneous cookie craving. The combination of peanut butter and oats in the dough naturally helps the cookies hold their shape without pre-chilling. That said, if you find your kitchen is very warm or the dough seems unusually soft, a 30-minute rest in the refrigerator can help prevent excessive spreading during baking.
4. Can I make these cookies smaller?
Absolutely. Use a 1.5-tablespoon cookie scoop instead of a 3-tablespoon one and reduce the baking time by 2 to 3 minutes. Start checking at the 8-minute mark. Keep in mind that smaller cookies will be less chewy in the center since there’s less mass to retain moisture. The larger format is traditional for monster cookies and produces the best texture, but smaller ones are perfectly fine and great for serving at parties where people may want just a bite or two.
5. Are monster cookies gluten-free?
The base recipe is technically flourless, which means it doesn’t contain wheat flour. However, oats can be processed in facilities that also handle wheat, so if you’re baking for someone with celiac disease or a serious gluten intolerance, you’ll need to use oats that are certified gluten-free. The M&Ms should also be verified for any gluten-containing ingredients, as formulations can vary by product and region. With certified gluten-free oats and verified mix-ins, this recipe is a great naturally gluten-free option.
Read Also: Best Chocolate Chip Cookies Recipe
Final Thoughts
This monster cookie recipe is one of those timeless bakes that never goes out of style.
It’s simple enough for a beginner baker, flexible enough to adapt to whatever mix-ins you have on hand, and delicious enough to impress anyone who tries one.
The combination of peanut butter, oats, chocolate chips, and M&Ms is pure classic comfort in cookie form.
If you’ve never made monster cookies before, this recipe is your perfect starting point. If you’re already a fan, I think you’ll find this version checks every box for thick, chewy, bakery-style results at home.
Give them a try and let me know how they turn out in the comments below. I’d love to hear which mix-ins you used and whether you made any fun variations. Don’t forget to share a photo with friends and family, because these cookies are absolutely worth showing off.
Recommended:
- Monster Cookie Bars
- Monster Cookie Protein Balls
- Monster Cookie Dough Dip
- Chewy Chocolate Chip Cookies
- Old Fashioned Chocolate Chip Cookie Recipe
- Gingerbread Cookie Recipe
- Peanut Butter Blossom Cookies
- Snickerdoodle Cookie Recipe
- Sugar Cookies Recipe
- Cut Out Sugar Cookie Recipe


