If you’ve only ever had chocolate pudding from a box, this homemade chocolate pudding recipe is about to completely change your perspective on this classic dessert.
Made with real cocoa powder, egg yolks, and whole milk, this recipe comes together in about 15 minutes on the stovetop and delivers a depth of flavor that instant pudding simply can’t match.
The secret is in tempering the egg yolks. This technique slowly raises the temperature of the yolks by adding a little hot milk mixture to them first, which prevents scrambling and gives you that impossibly silky, custard-like texture you’re after.
This is the kind of dessert that feels fancy enough for a dinner party but simple enough to whip up on a weeknight when that chocolate craving hits.
If you love homemade pudding desserts, you’ll also want to check out this Banana Pudding Recipe for another crowd-pleasing classic.
Why You’ll Love This Chocolate Pudding Recipe
This recipe checks every box when it comes to a truly satisfying homemade dessert.
It’s made entirely from pantry staples you likely already have on hand, no specialty ingredients required.
The texture is velvety and thick, coating the back of a spoon in that rich, indulgent way that only comes from cooking a proper custard.
You have complete control over the sweetness and chocolate intensity, so you can make it mild and kid-friendly or deep and bittersweet for the adults.
It’s naturally gluten-free, which makes it an excellent go-to dessert for guests with dietary restrictions.
Here’s a quick summary of why this recipe stands out:
- Real chocolate flavor from a combination of cocoa powder and optional semi-sweet chocolate
- Smooth, lump-free texture when you follow the tempering method
- Ready in under 30 minutes, including chill time if you prefer it warm
- No artificial flavors or preservatives like you’d find in boxed pudding mixes
- Endlessly customizable with toppings, mix-ins, and serving styles
- Kid and adult approved across every age group
You might also enjoy: Dirt Pudding Recipe
Ingredients
This recipe uses simple, wholesome ingredients that work together to create a deeply chocolatey and creamy pudding. Using whole milk gives the pudding its richest body, and good-quality cocoa powder (Dutch-process preferred for a smoother, less acidic flavor) makes a noticeable difference in the final taste.
- 3 cups (720 ml) whole milk, divided
- 3 large egg yolks
- ¾ cup (150 g) granulated sugar
- ¼ cup (30 g) unsweetened cocoa powder (Dutch-process preferred)
- 3 tablespoons (24 g) cornstarch
- ¼ teaspoon fine salt
- 2 tablespoons (28 g) unsalted butter
- 1 teaspoon pure vanilla extract
- 2 oz (56 g) semi-sweet chocolate chips or finely chopped chocolate (optional, for extra richness)
Read Also: Vanilla Pudding Recipe
Kitchen Equipment Needed
Having the right tools makes the process much smoother, especially when it comes to achieving a lump-free pudding. A fine mesh strainer is particularly important here since it catches any bits of cooked egg that may have formed, giving you a perfectly silky result every time.
- Medium heavy-bottomed saucepan (2 to 3 quart)
- Whisk
- Medium mixing bowl
- Fine mesh strainer
- Rubber spatula
- Measuring cups and spoons
- Individual serving ramekins or a large glass serving bowl
- Plastic wrap (to press directly onto the pudding surface)
Another favorite: Brownie Pudding Recipe
Recommended Products for This Recipe
These are products I genuinely recommend based on quality and performance for making the best homemade chocolate pudding.
1. Valrhona Dutch-Process Cocoa Powder
Dutch-process cocoa is alkalized to reduce acidity, which gives chocolate pudding a rounder, deeper, and more intense chocolate flavor compared to natural cocoa. Valrhona is widely considered one of the finest cocoa powders available and makes a noticeable difference in the finished pudding. It dissolves smoothly into the milk mixture without clumping.
2. Cuisinart Stainless Steel Saucepan
A heavy-bottomed saucepan is essential for making pudding because it distributes heat evenly and prevents the milk from scorching. The Cuisinart stainless steel line offers excellent heat control and a thick base that keeps the cooking process gradual and controlled. This is exactly what you need when cooking a delicate egg-thickened custard.
3. OXO Good Grips Fine Mesh Strainer
Straining your pudding after cooking is the single most important step for achieving a flawlessly smooth texture. The OXO fine mesh strainer has a sturdy frame and fine weave that catches any cooked egg solids or lumps before they make it into your cups. It’s a simple tool that makes a huge difference in the final result.
4. Le Creuset Stoneware Ramekins
Serving chocolate pudding in individual ramekins makes for an elegant presentation, especially for guests. Le Creuset stoneware holds temperature beautifully, keeping pudding chilled longer and presenting it with a refined, restaurant-quality look. These are dishwasher safe and built to last for years.
5. Callebaut Semi-Sweet Chocolate Chips
Adding a small amount of real melted chocolate at the end of cooking takes the flavor from good to extraordinary. Callebaut is a professional-grade Belgian chocolate brand that melts smoothly and delivers a clean, rich cocoa flavor without any waxy aftertaste. Just two ounces stirred into the finished pudding makes a remarkable difference.
This recipe also pairs wonderfully with a homemade Hot Fudge Sauce drizzled right on top.
Step-by-Step Instructions
1. Whisk Together the Dry Ingredients and Egg Yolks
- Place the egg yolks in a medium mixing bowl and set it aside on the counter.
- In the same bowl, add the sugar, cocoa powder, cornstarch, and salt.
- Whisk these dry ingredients together with the egg yolks until you have a thick, uniform paste. This may take 30 to 60 seconds of vigorous whisking.
- The paste should be smooth with no visible streaks of dry cocoa or cornstarch. This step ensures the dry ingredients are fully incorporated before adding any liquid, which prevents clumping later.
2. Warm the Milk
- Pour 2½ cups (600 ml) of the whole milk into your heavy-bottomed saucepan, reserving the remaining ½ cup (120 ml) for later.
- Place the saucepan over medium heat.
- Warm the milk, stirring occasionally, until it just begins to steam and small bubbles form around the edges. Do not let it boil.
- This should take about 4 to 5 minutes. You want the milk hot but not scalded, as boiling can affect the texture of the final pudding.
3. Add the Remaining Cold Milk to the Egg Mixture
- Pour the reserved ½ cup (120 ml) of cold milk into the egg yolk and dry ingredient paste.
- Whisk vigorously until completely smooth and pourable. This step loosens the thick paste and makes it easier to temper with the hot milk in the next step.
- The mixture should be fluid and lump-free at this point.
4. Temper the Egg Mixture
- This is the most important step in the whole recipe. Tempering prevents the eggs from scrambling when they come into contact with hot milk.
- Begin by slowly ladling or pouring about ½ cup (120 ml) of the hot milk into the egg mixture while whisking constantly and vigorously.
- Add another ½ cup (120 ml) and continue whisking. You are gradually raising the temperature of the eggs without cooking them too quickly.
- Once you’ve added about half of the hot milk to the eggs and the mixture feels warm to the touch (but not steaming), you can proceed to the next step.
5. Cook the Pudding
- Pour the tempered egg mixture back into the saucepan with the remaining hot milk, scraping every last bit out of the bowl with your rubber spatula.
- Return the saucepan to medium heat.
- Cook while whisking constantly and thoroughly, making sure to reach the bottom corners of the pan where pudding can stick and scorch.
- Continue cooking and whisking for about 3 to 5 minutes, until the pudding thickens noticeably, large bubbles begin to pop on the surface, and it looks like it coats the back of a spoon heavily.
- Once it reaches a thick, pudding-like consistency, cook for one additional minute while continuing to stir. This extra minute ensures the cornstarch is fully cooked out and your pudding won’t taste starchy.
6. Remove from Heat and Add Finishing Ingredients
- Immediately remove the saucepan from the heat once the pudding has thickened.
- Add the butter and vanilla extract, stirring until the butter is fully melted and incorporated.
- If using semi-sweet chocolate chips or chopped chocolate, add them now and stir until completely melted and smooth. This step is optional but adds an extra layer of deep chocolate richness.
7. Strain the Pudding
- Set your fine mesh strainer over a clean bowl or a large measuring cup with a pour spout.
- Pour the hot pudding through the strainer, pressing it gently through with your rubber spatula.
- Discard any solids left behind in the strainer. This step removes any bits of cooked egg and guarantees a perfectly smooth, silky pudding.
8. Portion and Set the Pudding
- Pour or ladle the strained pudding into individual serving ramekins or cups, or into one large serving bowl.
- If you prefer pudding without a skin on top, press a sheet of plastic wrap directly onto the surface of the pudding, smoothing it gently so there are no air pockets.
- If you enjoy the skin (it’s a classic!) leave the top uncovered.
- Refrigerate for at least 2 hours, or until fully set and chilled through. The pudding will thicken further as it cools.
- Serve cold with your choice of toppings, or enjoy warm straight from the pot for a more fondue-like experience.
Read Also: Sticky Toffee Pudding Recipe
Tips for Success
Even though this recipe is straightforward, a few key techniques will ensure you get the best possible result every time. The biggest pitfall most people encounter is not whisking constantly during the cooking phase, which can cause lumps or burning at the bottom of the pan.
- Use Dutch-process cocoa for the richest, smoothest chocolate flavor. Natural cocoa is more acidic and can make the pudding taste slightly sharp.
- Don’t skip the tempering step. Adding hot milk directly to cold eggs will scramble them and ruin the texture.
- Whisk constantly while the pudding is cooking on the stove. Do not walk away, even for a moment.
- Cook until you see large bubbles popping on the surface. This ensures the cornstarch has fully activated and your pudding will set properly.
- Always strain your pudding through a fine mesh strainer before portioning. This is non-negotiable for a smooth result.
- Press plastic wrap directly on the surface while chilling if you want to prevent a skin from forming.
- Chill for a minimum of 2 hours before serving for the best texture. Overnight is even better.
- Add real chocolate at the end of cooking for a noticeably deeper, more complex chocolate flavor.
You might also enjoy: Rice Pudding Recipe
Serving Suggestions
Chocolate pudding is absolutely delightful on its own, but a few thoughtful toppings can take it from a simple dessert to something truly special. The key is to balance the richness of the pudding with something that adds texture, brightness, or contrast.
Here are some wonderful ways to serve it:
- Freshly whipped cream spooned or piped generously on top for a classic combination
- Sliced fresh strawberries or raspberries to cut through the richness with a tart, fruity contrast
- A drizzle of Caramel Sauce for a salted caramel chocolate pairing
- Crushed graham crackers or Oreo cookies sprinkled on top for a crunchy texture contrast
- Toasted chopped pecans or walnuts for a nutty, earthy complement
- A generous spoonful of Hot Fudge Sundae toppings for an over-the-top presentation
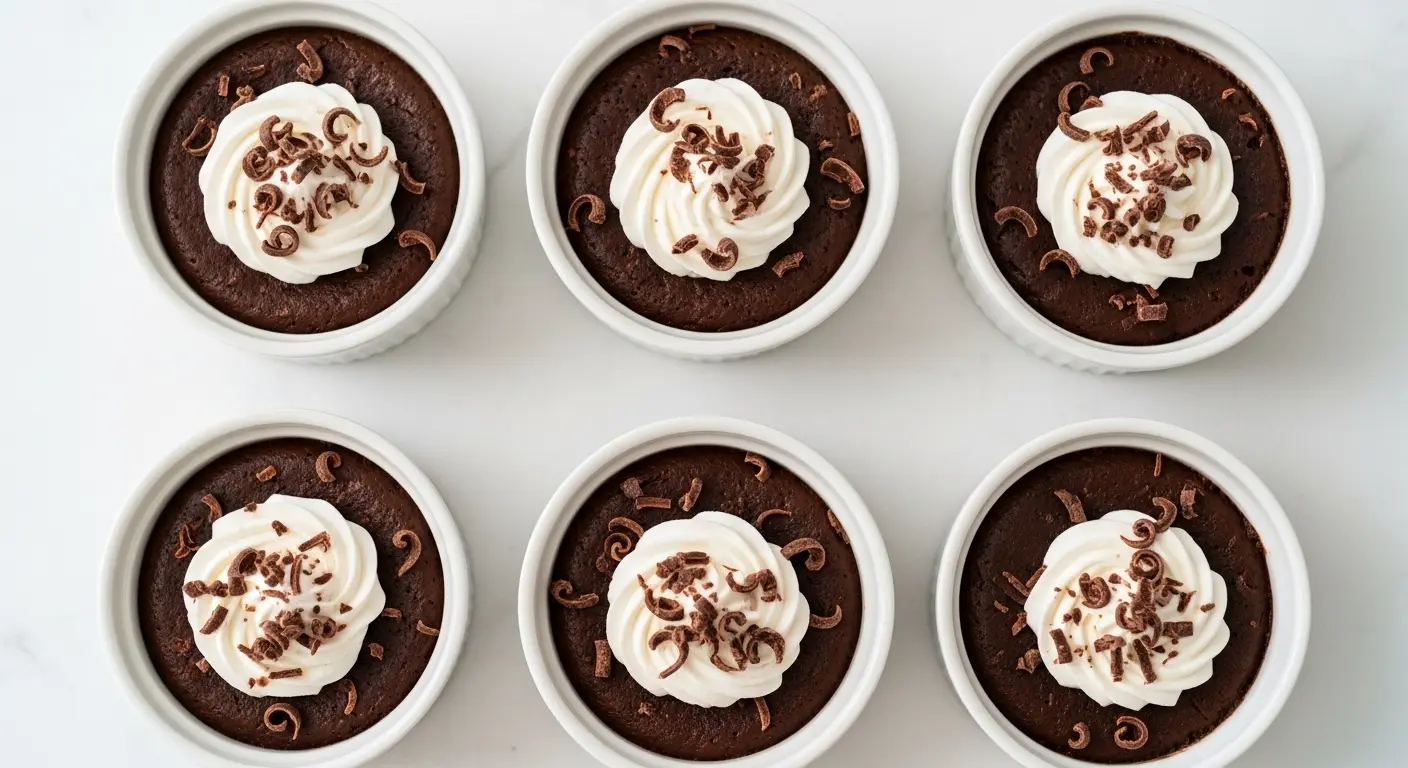
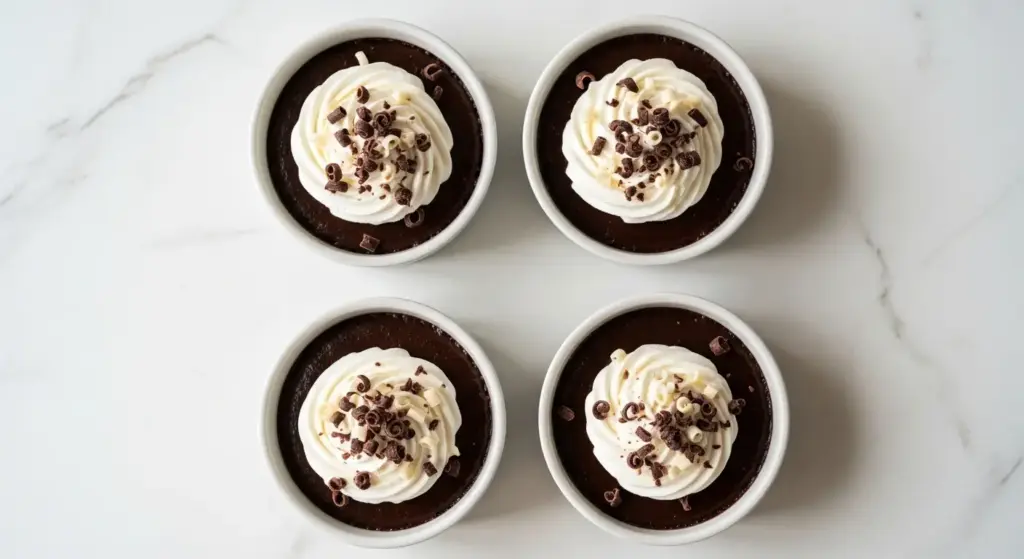
- Shaved chocolate or chocolate curls for an elegant finishing touch
- A pinch of flaky sea salt scattered on top to amplify the chocolate flavor
Variations to Try
Once you’ve mastered the base recipe, it’s easy to customize this pudding in all sorts of exciting directions. The custard base is incredibly versatile and works beautifully with a wide range of flavor additions.
- Mocha Pudding: Dissolve 1 to 2 teaspoons of instant espresso powder into the warm milk before tempering for a coffee-chocolate flavor profile.
- Mexican Chocolate Pudding: Add ½ teaspoon of cinnamon and a pinch of cayenne pepper along with the dry ingredients for a spiced, warming variation.
- Peanut Butter Chocolate Pudding: Stir 2 to 3 tablespoons of creamy peanut butter into the finished pudding along with the butter for a rich, nutty twist.
- Mint Chocolate Pudding: Replace the vanilla extract with ½ teaspoon of pure peppermint extract for a refreshing flavor combination.
- Dark Chocolate Pudding: Use 70% or higher dark chocolate chips in place of semi-sweet, and reduce sugar by 2 tablespoons for a more intense, bittersweet pudding.
- Dairy-Free Version: Substitute full-fat coconut milk or oat milk for the whole milk and use vegan butter. The texture will be slightly different but still delicious.
- Pudding Pie Filling: Use this pudding as a filling for a pre-baked pie crust or tart shell. Pour the warm pudding directly in and refrigerate until set for an easy Chocolate Pie.
Storage and Reheating
Homemade chocolate pudding stores beautifully in the refrigerator and actually tastes even better the next day once the flavors have had more time to meld. Proper storage keeps it fresh, smooth, and ready to serve for several days.
- Refrigerator: Store covered with plastic wrap pressed directly on the surface (or in an airtight container) for up to 4 days. The pudding may firm up slightly more over time, which is normal.
- Freezing: Chocolate pudding can be frozen, but the texture can become slightly grainy or watery after thawing because of the cornstarch. It is best enjoyed fresh from the refrigerator.
- Reheating: To gently warm individual portions, microwave in 20-second intervals, stirring between each, until just warmed through. Do not overheat or it may become runny.
- Make-ahead tip: This pudding is an excellent make-ahead dessert. Prepare it up to 2 days in advance, cover tightly, and refrigerate. Add toppings just before serving.
- Do not stir vigorously once fully set. Gentle stirring with a spoon will restore a smoother consistency if it appears firm on top after refrigerating.
Read Also: Bread Pudding Recipe
Nutritional Facts
The following is an approximate nutritional breakdown per serving, based on 6 servings from this recipe. Values will vary depending on specific brands and any toppings added.
| Nutrient | Per Serving |
|---|---|
| Calories | 265 kcal |
| Total Fat | 9 g |
| Saturated Fat | 5 g |
| Cholesterol | 115 mg |
| Sodium | 120 mg |
| Total Carbohydrates | 40 g |
| Dietary Fiber | 2 g |
| Total Sugars | 30 g |
| Protein | 6 g |
| Calcium | 180 mg |
| Iron | 1.5 mg |
Note: These are estimated values. For precise nutritional tracking, input the exact brands and quantities you use into a nutrition calculator.
Another great option if you love pudding-style desserts: Chia Seed Pudding Recipe
Health Benefits of Key Ingredients
While chocolate pudding is certainly a treat, several of its key ingredients do offer some meaningful nutritional value. Enjoying it as part of a balanced diet gives you more than just great flavor.
Here’s a closer look at the health contributions of the main ingredients:
- Whole milk is an excellent source of calcium, phosphorus, vitamin D, and high-quality protein, all of which support bone health and muscle function.
- Egg yolks provide vitamins A, D, E, and K, along with choline, which supports brain health and liver function.
- Cocoa powder contains flavanols, a class of antioxidants that have been linked to improved heart health, better circulation, and reduced inflammation.
- Dark or semi-sweet chocolate (when used as an add-in) contributes additional flavanol antioxidants as well as trace minerals like iron, magnesium, and zinc.
- Cornstarch is used in small quantities as a thickening agent and adds minimal caloric impact to the overall recipe.
- Cocoa also contains small amounts of theobromine, a mild stimulant that may contribute to a sense of calm alertness, which is part of why chocolate is so universally mood-boosting.
You might also enjoy: Pudding Cake Recipe With Cake Mix
Frequently Asked Questions
1. Why did my chocolate pudding turn out lumpy?
Lumps in chocolate pudding almost always come from two sources: the dry ingredients not being fully dissolved before adding hot liquid, or the eggs cooking too quickly during tempering.
To fix this, always strain the finished pudding through a fine mesh strainer before portioning. Going forward, make sure to whisk the dry ingredients thoroughly with the egg yolks first, and add the hot milk slowly and gradually while whisking constantly during the tempering step.
2. Can I use cocoa powder instead of melted chocolate?
Yes, the cocoa powder is the primary chocolate source in this recipe and delivers excellent flavor on its own.
The semi-sweet chocolate chips are an optional add-in that deepens the flavor and adds extra creaminess, but the pudding is completely delicious without them.
3. How do I prevent a skin from forming on top of the pudding?
Press a sheet of plastic wrap directly onto the surface of the pudding immediately after straining and portioning, before refrigerating.
Make sure there are no air pockets between the plastic and the pudding surface. If you enjoy the skin, simply leave the top uncovered.
4. Can I make this chocolate pudding recipe without eggs?
You can omit the egg yolks if needed, but the texture will be less rich and custardy.
To compensate, increase the cornstarch by 1 tablespoon to help the pudding set properly. The result will be more similar to a vegan or instant-style pudding rather than a classic custard-based one.
5. Can I use low-fat or skim milk instead of whole milk?
You can, but the pudding will be noticeably thinner and less creamy than when made with whole milk.
Whole milk provides the fat content that gives the pudding its full body and richness. For the best result, stick with whole milk or, for an even richer pudding, substitute up to 1 cup (240 ml) of the milk with heavy cream.
Read Also: Vanilla Pudding Recipe
Final Thoughts
Homemade chocolate pudding is one of those recipes that seems simple on the surface, but once you taste the difference between this and anything from a box, you’ll never go back.
It takes just a handful of everyday ingredients and about 15 minutes of active cooking time to produce a dessert that is silky, deeply chocolatey, and genuinely impressive.
Give this chocolate pudding recipe a try, and don’t hesitate to experiment with the variations or toppings to make it your own.
If you do make it, I’d love to hear how it turned out! Drop a comment below and let me know your favorite way to serve it, or share a photo with friends and family who deserve a taste.
Recommended:
- Dirt Pudding Recipe
- Banana Pudding Recipe
- Figgy Pudding Recipe
- Malva Pudding Recipe
- Corn Pudding Recipe
- Moist Chocolate Cake Recipe
- Easy Chocolate Cake Recipe
- Best Chocolate Chip Cookies Recipe
- Chewy Chocolate Chip Cookies Recipe
- Hot Chocolate Recipe


