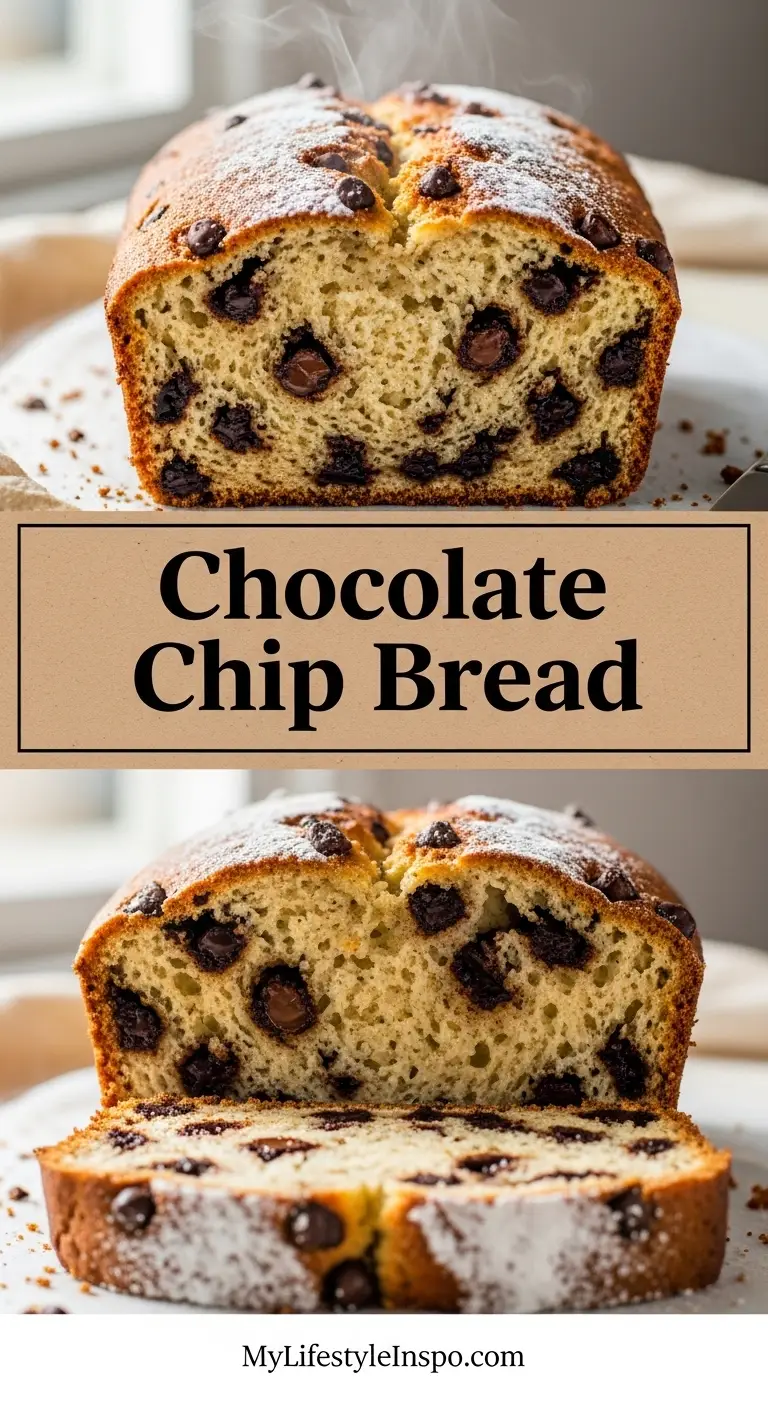
If you love the combination of tender, moist bread with pockets of melted chocolate, this chocolate chip bread recipe is about to become your new favorite treat. This sweet quick bread brings together simple pantry staples to create a loaf that tastes like a cross between cake and bread, with generous amounts of chocolate chips throughout.
The beauty of this recipe is how effortlessly it comes together. You don’t need any fancy equipment or advanced baking skills to pull off a bakery-worthy loaf.
With just one bowl and about 10 minutes of mixing time, you’ll have a batter ready to bake. The result is a golden-brown loaf with a slightly crispy exterior and an incredibly soft, tender crumb inside.
What makes this chocolate chip bread so addictive is the balance between sweet and rich flavors. Unlike traditional yeast breads that require rising time and kneading, this is a quick bread that uses baking powder as the leavening agent.
That means you can go from craving to eating in about an hour. The chocolate chips melt slightly during baking, creating little pockets of gooey chocolate throughout the loaf.
I’ve tested this recipe countless times to get the proportions just right. The texture is moist without being dense, and the sweetness level hits that perfect spot where it works equally well for breakfast or dessert.
Read Also: Starbucks Banana Bread Recipe
Why You’ll Love This Chocolate Chip Bread Recipe
This chocolate chip bread combines everything you want in a homemade baked good. It’s incredibly simple to make, requires minimal cleanup, and delivers maximum flavor with every slice.
Here’s what makes this recipe stand out:
- Easy one-bowl mixing: No need to dirty multiple bowls or use a stand mixer. Everything comes together with basic mixing tools.
- Perfect texture: The combination of butter, eggs, and sour cream creates an incredibly moist crumb that stays fresh for days.
- Customizable sweetness: The recipe balances the sweetness of sugar with the slight bitterness of semisweet chocolate chips, but you can adjust based on your preferences.
- Quick preparation: With no yeast involved, there’s no waiting for dough to rise. Mix, pour, and bake.
- Versatile serving options: Enjoy it warm from the oven, toasted with butter, or at room temperature with coffee or tea.
- Great for gifting: This bread makes a thoughtful homemade gift when wrapped in parchment paper and tied with ribbon.
- Kid-friendly: Most children love this sweet bread, making it a winner for family breakfasts or after-school snacks.
- Budget-friendly ingredients: Everything you need is likely already in your pantry and refrigerator.
For another quick bread variation, try this Blackberry Bread Recipe.
Ingredients
This recipe uses straightforward ingredients that you likely have on hand. Each component plays a specific role in creating the perfect texture and flavor.
Here’s what you’ll need for one 9×5-inch loaf:
- 2 cups (250g) all-purpose flour: Provides the structure for the bread. For best results, spoon the flour into your measuring cup and level it off rather than scooping directly from the bag.
- 1 cup (200g) granulated sugar: Adds sweetness and helps create a tender crumb by interfering with gluten development.
- 1 teaspoon (5g) baking powder: The leavening agent that helps the bread rise and creates a light texture.
- 1/2 teaspoon (3g) salt: Enhances all the flavors and balances the sweetness.
- 1/2 cup (113g) unsalted butter, softened: Contributes to the rich flavor and moist texture. Make sure it’s at room temperature for easy mixing.
- 2 large eggs, room temperature: Acts as a binder and adds structure. Room temperature eggs incorporate more easily into the batter.
- 1 teaspoon (5ml) vanilla extract: Adds depth and enhances the overall flavor profile.
- 1/2 cup (120g) sour cream: Provides moisture and creates an incredibly tender crumb with a slight tang that balances the sweetness.
- 1/2 cup (120ml) whole milk: Adds moisture and helps create a smooth batter. You can substitute with 2% milk if needed.
- 1 cup (170g) semisweet chocolate chips: The star ingredient that creates pockets of melted chocolate throughout the bread. Mini chocolate chips work well too and distribute more evenly.
This pairs beautifully with Keto Banana Bread Recipe for variety at brunch.
Kitchen Equipment Needed
Having the right tools makes baking this chocolate chip bread even easier. You don’t need any specialized equipment, just basic baking essentials.
Here’s what you’ll need:
- 9×5-inch loaf pan: The standard size for this recipe. A lighter-colored pan works best to prevent over-browning.
- Large mixing bowl: For combining wet ingredients.
- Medium mixing bowl: For whisking together dry ingredients.
- Whisk: Essential for blending the dry ingredients and ensuring there are no lumps.
- Electric mixer or sturdy wooden spoon: While you can mix by hand, an electric mixer makes the job easier, especially when creaming the butter and sugar.
- Rubber spatula: Perfect for scraping down the sides of the bowl and folding in chocolate chips.
- Measuring cups and spoons: Accurate measurements are key to baking success.
- Cooling rack: Allows air to circulate around the bread as it cools, preventing a soggy bottom.
- Toothpick or cake tester: For checking doneness.
- Cooking spray or butter: For greasing the pan.
You might also enjoy: Eggless Banana Bread Recipe
Recommended Products for This Recipe
These hand-picked products will help you achieve the best results with this chocolate chip bread and make your baking experience smoother.
1. Ghirardelli Semi-Sweet Chocolate Chips
These premium chocolate chips have a higher cocoa content than standard brands, which means they deliver a richer, more complex chocolate flavor. They hold their shape well during baking while still creating those delicious pockets of melted chocolate. The quality difference is noticeable in every bite.
2. USA Pan Bakeware Aluminized Steel Loaf Pan
This commercial-grade loaf pan features a corrugated surface that facilitates air circulation for even baking and easy release. The aluminized steel construction ensures your bread bakes uniformly without hot spots or burnt edges. It’s also incredibly durable and will last for years of regular use.
3. Nielsen-Massey Madagascar Bourbon Pure Vanilla Extract
High-quality vanilla extract makes a noticeable difference in baked goods. This Madagascar bourbon vanilla has a rich, creamy flavor profile that enhances the chocolate and adds complexity to the bread. A little goes a long way in elevating your final product.
4. OXO Good Grips 3-Piece Stainless Steel Mixing Bowl Set
These mixing bowls feature non-slip bases that stay put while you mix, making the entire process more efficient. The wide rims make pouring easy, and the stainless steel is both lightweight and durable. Having properly sized bowls is essential for successful baking.
Another favorite: Amish Banana Bread Recipe
Step-by-Step Instructions
Follow these detailed instructions to create a perfectly baked chocolate chip bread. Each step is important for achieving the ideal texture and flavor.
1. Prepare Your Baking Pan and Preheat the Oven
- Preheat your oven to 350°F (175°C) and position the rack in the center of the oven.
- Generously grease a 9×5-inch loaf pan with butter or cooking spray, making sure to coat the bottom and sides thoroughly.
- For extra insurance against sticking, you can also line the bottom with parchment paper, leaving some overhang on the sides to use as handles for easy removal later.
- Set the prepared pan aside while you mix the batter.
2. Combine the Dry Ingredients
- In a medium bowl, whisk together the all-purpose flour, baking powder, and salt.
- Whisk thoroughly for about 30 seconds to ensure the baking powder is evenly distributed throughout the flour.
- This step is crucial because it prevents pockets of leavening agent, which could create uneven rising.
- Set this bowl aside while you prepare the wet ingredients.
3. Cream the Butter and Sugar
- In a large mixing bowl, add the softened butter and granulated sugar.
- Using an electric mixer on medium-high speed (or a sturdy wooden spoon if mixing by hand), beat the butter and sugar together for 2-3 minutes until the mixture becomes light, fluffy, and pale in color.
- This creaming process incorporates air into the batter, which contributes to a lighter texture in the finished bread.
- Make sure to scrape down the sides of the bowl halfway through to ensure even mixing.
4. Add Eggs and Vanilla
- With the mixer on medium speed, add the eggs one at a time, beating well after each addition for about 30 seconds.
- This gradual addition ensures the eggs are fully incorporated and helps create an emulsified batter.
- Add the vanilla extract and mix until just combined.
- The mixture should look smooth and unified at this point.
5. Incorporate the Sour Cream and Milk
- Add the sour cream to the butter mixture and beat on low speed until fully incorporated, about 30 seconds.
- Add the milk and continue mixing on low speed until the wet ingredients are completely combined and smooth.
- The batter will be quite liquid at this stage, which is normal.
6. Add the Dry Ingredients
- With the mixer on low speed (or using a wooden spoon), gradually add the dry ingredient mixture to the wet ingredients.
- Mix just until the flour is incorporated and you no longer see dry streaks, which should take about 30-45 seconds.
- Be very careful not to overmix at this stage, as this can develop the gluten in the flour and result in a tough, dense bread.
- It’s okay if there are a few small lumps remaining.
7. Fold in the Chocolate Chips
- Using a rubber spatula, gently fold in the chocolate chips until they’re evenly distributed throughout the batter.
- Reserve about 2 tablespoons of chocolate chips to sprinkle on top of the batter for a bakery-style presentation.
- Use a folding motion rather than stirring to maintain the airiness of the batter.
8. Transfer to Pan and Prepare for Baking
- Pour the batter into your prepared loaf pan, using the spatula to scrape every bit from the bowl.
- Spread the batter evenly in the pan, smoothing the top with the spatula.
- Gently tap the pan on the counter 2-3 times to release any large air bubbles.
- Sprinkle the reserved chocolate chips over the top of the batter.
9. Bake the Bread
- Place the loaf pan in the center of the preheated oven.
- Bake for 55-65 minutes, or until a toothpick inserted into the center comes out with just a few moist crumbs attached.
- The top should be golden brown and may crack slightly down the middle, which is perfectly normal and actually desirable.
- If the top starts to brown too quickly around the 40-minute mark, loosely tent the bread with aluminum foil for the remaining baking time.
- Avoid opening the oven door during the first 45 minutes of baking, as this can cause the bread to sink in the middle.
10. Cool and Serve
- Remove the bread from the oven and place the pan on a cooling rack.
- Let the bread cool in the pan for 10-15 minutes. This cooling time allows the structure to set, making it easier to remove from the pan.
- After the initial cooling period, run a butter knife around the edges of the pan to loosen the bread.
- Carefully turn the pan upside down to release the bread onto the cooling rack (use the parchment overhang if you lined the pan).
- Allow the bread to cool completely on the rack before slicing, about 1 hour. This prevents the bread from becoming gummy when sliced.
- For the cleanest slices, use a sharp serrated knife and a gentle sawing motion.
For a lighter option, try: Banana and Apple Bread Recipe
Tips for Success
These expert tips will help you avoid common pitfalls and create the perfect chocolate chip bread every single time.
Here are my best tips:
- Room temperature ingredients are crucial: Cold eggs and butter don’t mix as well, resulting in a denser texture. Take them out of the refrigerator 30-60 minutes before you plan to bake.
- Don’t overmix the batter: Once you add the flour, mix just until you don’t see dry streaks. Overmixing develops gluten, which makes the bread tough and chewy rather than tender.
- Use the toothpick test correctly: When you insert a toothpick into the center, it should come out with a few moist crumbs, not wet batter. If it comes out completely clean, you’ve likely overbaked.
- Prevent chocolate chip sinking: Toss the chocolate chips in a tablespoon of flour before folding them in. This helps them stay suspended in the batter rather than sinking to the bottom.
- Calibrate your oven: Oven temperatures can vary by up to 25°F from what the dial says. Use an oven thermometer to ensure accuracy.
- Store properly: Keep the bread wrapped tightly in plastic wrap or in an airtight container to maintain moisture. It will dry out quickly if left exposed.
- Let it cool before slicing: I know it’s tempting to cut into warm bread, but letting it cool completely prevents it from falling apart and ensures clean slices.
- Adjust pan size carefully: If using mini loaf pans, reduce the baking time to 35-40 minutes. For muffins, bake for 20-25 minutes.
Read Also: Old Fashioned Pumpkin Bread Recipe
Serving Suggestions
This versatile chocolate chip bread works beautifully in multiple settings and can be dressed up or down depending on the occasion.
Serve it these ways:
- Classic breakfast spread: Toast thick slices and spread with salted butter or cream cheese for an indulgent morning treat.
- Coffee shop style: Warm a slice in the microwave for 15-20 seconds and serve alongside your favorite coffee or latte.
- Decadent dessert: Top warm slices with a scoop of vanilla ice cream and a drizzle of chocolate sauce.
- Tea time treat: Serve thin slices with a pot of hot tea for an afternoon pick-me-up.
- French toast upgrade: Use day-old slices to make French Toast that takes breakfast to the next level.
- Kids’ lunchbox: Pack a slice in school lunches as a special treat.
- Brunch spread: Serve alongside Scrambled Eggs, fresh fruit, and Bacon for a complete breakfast.
- Gift presentation: Wrap cooled slices individually in cellophane and tie with ribbon for homemade gifts.
- Ice cream sandwiches: Slice the bread horizontally, fill with softened ice cream, and freeze for a unique dessert.
You might also enjoy: Sweet Potato Bread Recipe
Variations to Try
Once you’ve mastered the basic recipe, these variations will keep things interesting and allow you to customize based on what you have on hand.
Try these delicious twists:
- Double chocolate: Replace 1/4 cup of the flour with unsweetened cocoa powder and add an extra 2 tablespoons of sugar for a chocolate bread studded with chocolate chips.
- Nutty addition: Fold in 1/2 cup of chopped walnuts or pecans along with the chocolate chips for added crunch and flavor.
- Cinnamon swirl: Mix 2 tablespoons of cinnamon with 3 tablespoons of sugar. Layer half the batter in the pan, sprinkle with the cinnamon-sugar, add the remaining batter, and swirl with a knife.
- Peanut butter chocolate: Replace half the chocolate chips with peanut butter chips for a PB & chocolate combination.
- Espresso enhancement: Add 1 tablespoon of instant espresso powder to the dry ingredients to intensify the chocolate flavor.
- Banana chocolate chip: Mash 1 ripe banana and reduce the sour cream to 1/4 cup. Fold the mashed banana in with the wet ingredients.
- White chocolate raspberry: Use white chocolate chips instead and fold in 1/2 cup of fresh or frozen raspberries.
- Coconut chocolate: Add 1/2 cup of shredded sweetened coconut along with the chocolate chips.
- Orange chocolate: Add 1 tablespoon of orange zest to the wet ingredients and replace the vanilla with orange extract.
Another favorite: Pineapple Quick Bread Recipe
Storage and Reheating
Proper storage keeps your chocolate chip bread fresh and delicious for several days, and knowing how to reheat it brings back that fresh-from-the-oven quality.
Follow these storage guidelines:
- Room temperature storage: Wrap the completely cooled bread tightly in plastic wrap or aluminum foil, or store in an airtight container. It will stay fresh at room temperature for 3-4 days.
- Refrigerator storage: While not necessary, refrigerating can extend the life to about 1 week. Bring to room temperature or warm before serving, as refrigeration can make it slightly denser.
- Freezer storage: Wrap the cooled bread tightly in plastic wrap, then in aluminum foil, or place in a freezer-safe zip-top bag. Freeze for up to 3 months. For easy single servings, slice before freezing and place parchment paper between slices.
- Thawing: Remove from the freezer and let thaw at room temperature for 2-3 hours, or overnight in the refrigerator. Individual slices thaw in about 30 minutes.
- Reheating in microwave: Place a slice on a microwave-safe plate and heat for 15-20 seconds until just warm. Don’t overheat or it will become rubbery.
- Reheating in oven: Wrap the bread in aluminum foil and heat at 350°F for 10-15 minutes until warmed through.
- Toaster method: Slice and toast like regular bread for a slightly crispy exterior and warm, soft interior.
Read Also: Easy Banana Bread Recipe with Self Rising Flour
Nutritional Facts
Understanding the nutritional content helps you make informed choices about portion sizes and how this bread fits into your meal plan.
Per serving (1 slice, assuming 12 slices per loaf):
- Calories: 285
- Total Fat: 12g
- Saturated Fat: 7g
- Trans Fat: 0g
- Cholesterol: 55mg
- Sodium: 135mg
- Total Carbohydrates: 41g
- Dietary Fiber: 1g
- Sugars: 25g
- Protein: 4g
- Vitamin A: 8% DV
- Calcium: 4% DV
- Iron: 8% DV
Note: Nutritional information is approximate and will vary based on specific ingredients used and slice size.
For another quick bread variation, try this Snickerdoodle Banana Bread Recipe.
Health Benefits of Key Ingredients
While this is certainly a treat, several ingredients provide nutritional benefits that contribute to a balanced diet.
Here’s what you’re getting:
- Eggs: Provide high-quality protein and essential amino acids that support muscle health and repair. They’re also rich in choline, which is important for brain function, and contain vitamins A, D, E, and B12. The eggs in this recipe contribute to the structure while adding nutritional value.
- Milk: Supplies calcium for strong bones and teeth, along with vitamin D that helps your body absorb that calcium. It also provides protein, potassium, and B vitamins. The milk adds moisture and tenderness to the bread while contributing these essential nutrients.
- Butter: While high in saturated fat, butter provides fat-soluble vitamins like vitamins A, E, and K2. It also contains conjugated linoleic acid (CLA), which has been studied for potential health benefits. Used in moderation, butter contributes to the rich flavor and tender texture.
- Sour cream: Contains probiotics that support digestive health and gut bacteria balance. It’s also a source of calcium, phosphorus, and vitamin B12. The lactic acid in sour cream tenderizes the bread and adds a subtle tang.
- Dark chocolate chips: Rich in antioxidants called flavonoids that may support heart health and reduce inflammation. Dark chocolate also contains minerals like iron, magnesium, and zinc. Choosing semisweet or dark chocolate chips over milk chocolate increases the antioxidant content.
- Flour: While refined all-purpose flour is lower in fiber than whole wheat, it’s often enriched with B vitamins (thiamin, riboflavin, niacin, folic acid) and iron, which support energy metabolism and red blood cell formation.
You might also enjoy: Maui Banana Bread Recipe
Frequently Asked Questions
1. Can I use oil instead of butter in this chocolate chip bread?
Yes, you can substitute the butter with an equal amount of neutral-flavored oil like canola or vegetable oil. However, this will change the flavor slightly, as butter provides a rich, creamy taste that oil doesn’t.
The texture will also be slightly different since oil creates a more tender, moister crumb, while butter provides structure and a subtle density. If you do use oil, I recommend adding an extra 1/4 teaspoon of vanilla extract to enhance the flavor.
2. Why did my chocolate chips sink to the bottom of the bread?
Chocolate chips sink when the batter is too thin or when they’re too heavy relative to the batter’s viscosity. To prevent this, try tossing the chocolate chips in 1 tablespoon of flour before folding them into the batter.
This coating helps the chips stay suspended as the bread bakes. Another tip is to use mini chocolate chips instead of regular-sized ones, as they’re lighter and less likely to sink. Additionally, make sure you’re not overmixing the batter, which can thin it out.
3. Can I make this chocolate chip bread recipe dairy-free?
Absolutely. Replace the butter with an equal amount of coconut oil or dairy-free margarine. Substitute the milk with your preferred non-dairy alternative like almond milk, oat milk, or soy milk.
For the sour cream, use a dairy-free sour cream alternative or coconut cream yogurt. Make sure your chocolate chips are also dairy-free, as many brands contain milk. The texture and flavor will be slightly different but still delicious.
4. How do I know when the bread is fully baked?
Insert a toothpick or cake tester into the center of the loaf. It should come out with a few moist crumbs attached but no wet batter. The top should be golden brown and spring back lightly when touched.
If the toothpick comes out with wet batter, continue baking in 5-minute increments, checking after each addition. The bread should also start pulling away slightly from the sides of the pan when done. Internal temperature should reach about 200-205°F if you’re using an instant-read thermometer.
5. Can I add other mix-ins to this recipe?
Yes, this recipe is very versatile. You can add up to 1 cup total of mix-ins without significantly affecting the texture. Try chopped nuts (walnuts, pecans, almonds), shredded coconut, dried fruit (cranberries, cherries), white chocolate chips, or even peanut butter chips.
If you’re adding heavy mix-ins like nuts or extra chocolate chips, toss them in a little flour first to prevent sinking. Just be mindful that too many additions can make the bread dense, so stick to the 1-cup maximum.
Another favorite: Paula Deen Banana Bread Recipe
Chocolate Chip Bread
Equipment
- 9×5-inch loaf pan - Lighter-colored pan recommended to prevent over-browning
- Large mixing bowl - For combining wet ingredients
- Medium mixing bowl - For whisking dry ingredients
- Whisk
- Electric mixer - Or a sturdy wooden spoon if mixing by hand
- Rubber spatula - For folding in chocolate chips and scraping bowl
- Measuring cups and spoons
- Cooling rack - Allows air circulation to prevent soggy bottom
- Toothpick or cake tester - For checking doneness
- Parchment paper - (optional) For easy loaf removal
- Oven thermometer - (optional) Recommended to verify oven accuracy
- Instant-read thermometer - (optional) Internal temp should reach 200–205°F when done
Ingredients
- 2 cups all-purpose flour - 250g; spoon into measuring cup and level off, do not scoop directly
- 1 cup granulated sugar - 200g
- 1 tsp baking powder - 5g
- 1/2 tsp salt - 3g
- 1/2 cup unsalted butter - 113g, softened to room temperature
- 2 large eggs - Room temperature
- 1 tsp vanilla extract - 5ml
- 1/2 cup sour cream - 120g; room temperature
- 1/2 cup whole milk - 120ml; 2% milk can be substituted
- 1 cup semisweet chocolate chips - 170g; mini chocolate chips also work and distribute more evenly; reserve 2 tbsp for topping
Instructions
- Preheat oven to 350°F (175°C) and position rack in the center. Grease a 9×5-inch loaf pan with butter or cooking spray, and optionally line the bottom with parchment paper for easy removal.
- In a medium bowl, whisk together the flour, baking powder, and salt for about 30 seconds until evenly combined. Set aside.
- In a large bowl, beat the softened butter and sugar together on medium-high speed for 2–3 minutes until light, fluffy, and pale, scraping down the sides halfway through.
- Add the eggs one at a time, beating well for about 30 seconds after each addition, then mix in the vanilla extract until fully incorporated.
- Beat in the sour cream on low speed until incorporated, then add the milk and mix until the wet ingredients are smooth and combined.
- With the mixer on low (or using a wooden spoon), gradually add the dry ingredients and mix just until no dry streaks remain, about 30–45 seconds — do not overmix.
- Using a rubber spatula, gently fold in the chocolate chips (reserving about 2 tablespoons for topping) until evenly distributed throughout the batter.
- Pour the batter into the prepared pan, smooth the top with a spatula, tap the pan gently on the counter 2–3 times, then sprinkle the reserved chocolate chips over the top.
- Bake for 55–65 minutes until a toothpick inserted in the center comes out with just a few moist crumbs; tent loosely with foil after 40 minutes if the top is browning too quickly.
- Cool the bread in the pan on a rack for 10–15 minutes, then turn out and cool completely (about 1 hour) before slicing with a serrated knife for clean slices.
Notes
- Room temperature ingredients: Take butter, eggs, sour cream, and milk out of the refrigerator 30–60 minutes before baking for best texture and easier mixing.
- Don’t overmix: Once the flour is added, mix only until no dry streaks remain — overmixing develops gluten and results in a tough, dense loaf.
- Prevent sinking chips: Toss the chocolate chips in 1 tablespoon of flour before folding them in to keep them suspended throughout the batter.
- Toothpick test: The toothpick should come out with a few moist crumbs — not wet batter (overbaked) and not completely clean (also overbaked). Internal temperature should reach 200–205°F.
- Oven accuracy: Use an oven thermometer to verify temperature, as ovens can vary by up to 25°F from the dial setting.
- Dairy-free option: Replace butter with coconut oil, milk with a non-dairy alternative (oat, almond, or soy), and sour cream with dairy-free sour cream or coconut cream yogurt. Use dairy-free chocolate chips.
- Mini loaf pans: Reduce baking time to 35–40 minutes. For muffins, bake 20–25 minutes.
- Storage: Wrap tightly in plastic wrap or store in an airtight container at room temperature for 3–4 days, or refrigerate for up to 1 week.
- Freezing: Wrap the cooled loaf (or individual slices with parchment between them) tightly and freeze for up to 3 months. Thaw at room temperature for 2–3 hours.
- Variations: Try adding 1/2 cup chopped walnuts or pecans, swapping half the chips for peanut butter chips, or adding 1 tbsp instant espresso powder to the dry ingredients to intensify chocolate flavor.
Final Thoughts
This chocolate chip bread recipe is one of those keepers that you’ll return to again and again. The combination of tender, cake-like texture with pockets of melted chocolate makes it perfect for so many occasions.
From special breakfasts to afternoon snacks to thoughtful homemade gifts, this versatile bread never disappoints. The best part is how simple it is to make, even if you’re new to baking.
Give this recipe a try and see for yourself why it’s such a crowd-pleaser. I’d love to hear how it turns out for you, so feel free to leave a comment below with your experience or any creative variations you tried!
Recommended:
- Banana Bread Recipe with Walnuts and Chocolate Chips
- Banana Nut Bread Recipe with Pecans
- Same Day Sourdough Bread Recipe
- Sweet Sourdough Bread Recipe
- Manna Bread Recipe
- Seeded Miso Sweet Potato Bread Recipe
- Gluten Free Dairy Free Bread Recipe
- Cunettos Garlic Cheese Bread Recipe
- Macaroni Grill Bread Recipe
- Cracklin Bread Recipe


