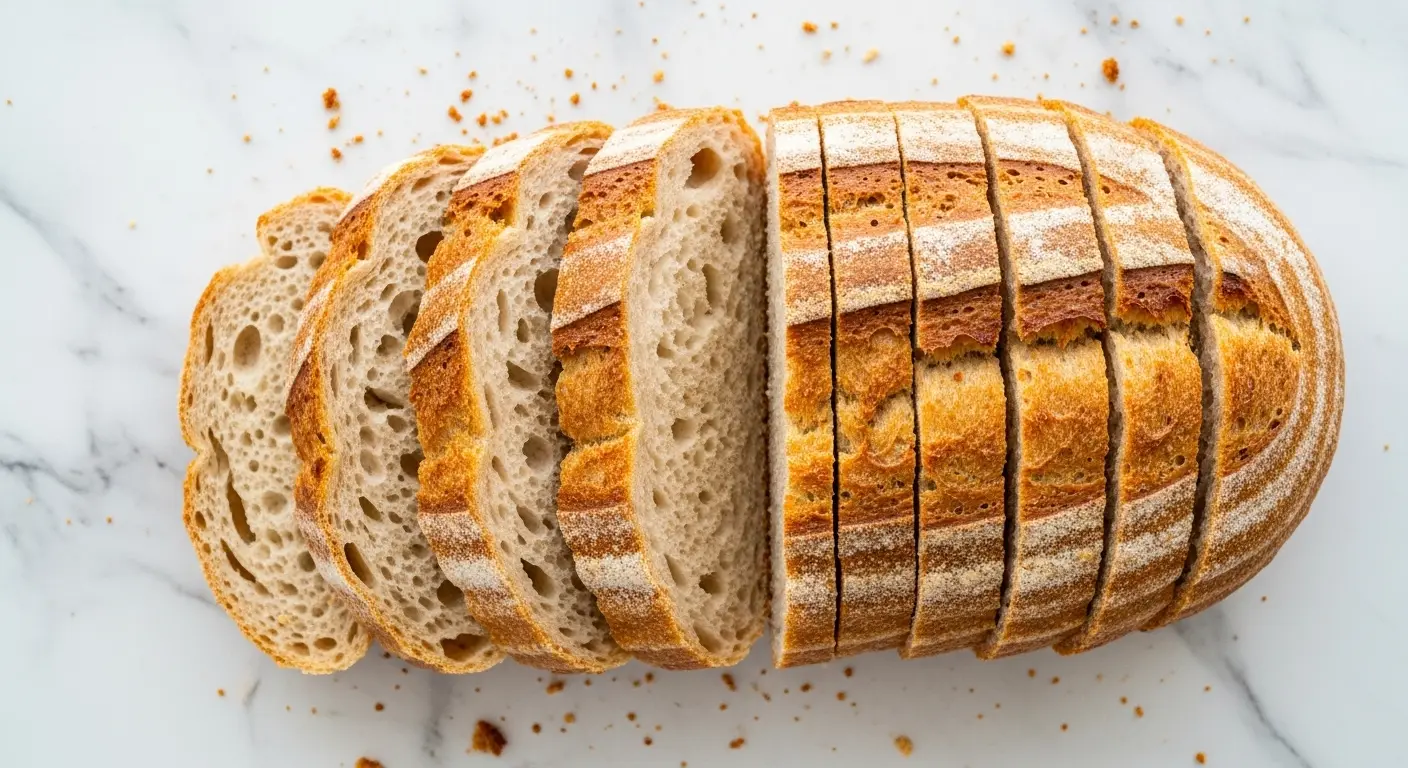
Making your own gluten free dairy free bread recipe at home can feel like a daunting task, but it doesn’t have to be. This soft, fluffy bread has the perfect texture and chew that rivals any store-bought loaf, and you can make it in just over an hour.
Gone are the days of spending a fortune on pre-packaged loaves that crumble apart or taste like cardboard. This recipe delivers a beautifully risen bread that’s perfect for sandwiches, toast, or simply slathered with your favorite spread. The combination of gluten-free flour blend, xanthan gum, and warm liquid activates the yeast to create that classic bread texture we all crave.
What makes this recipe truly special is how it addresses the two biggest challenges in gluten-free baking: structure and moisture. The xanthan gum acts as a binder to replace the gluten, while the right ratio of wet to dry ingredients ensures your bread stays soft and tender for days. You won’t believe how close this tastes to traditional wheat bread.
This bread works wonderfully for families dealing with celiac disease, gluten sensitivities, or lactose intolerance. It’s a staple recipe that you’ll return to again and again, especially once you see how simple the process really is.
Why You’ll Love This Gluten Free Dairy Free Bread Recipe
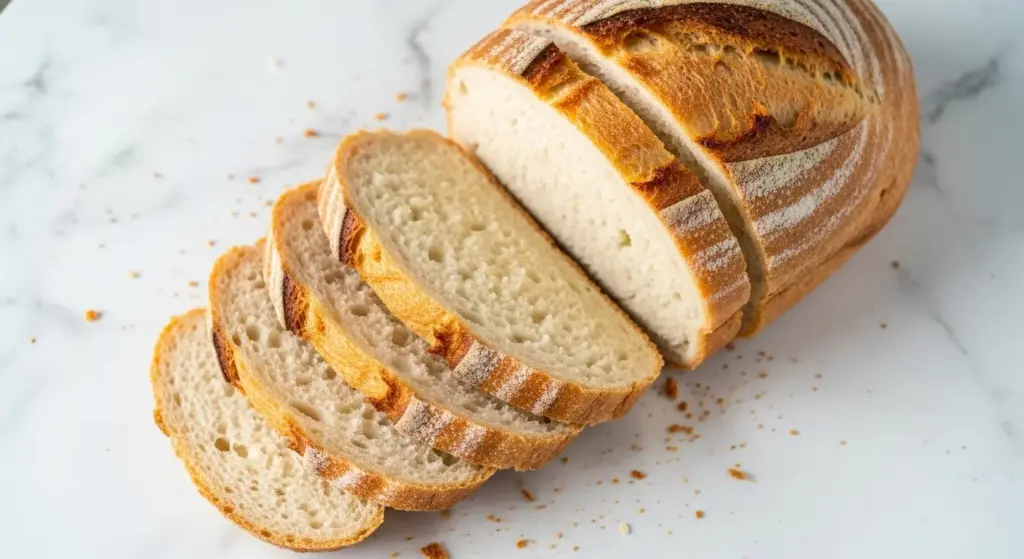
This bread checks all the boxes for what you want in a homemade loaf. It’s soft enough to make a sandwich, sturdy enough to hold toppings, and flavorful enough to eat on its own.
- Soft and fluffy texture: Unlike many gluten-free breads that turn out dense or gummy, this loaf has a light, airy crumb that bends without breaking
- Simple ingredients: You don’t need specialty items beyond a good gluten-free flour blend and xanthan gum, both of which are easy to find
- Ready in just over an hour: From start to finish, including rise time, you’ll have fresh bread ready to enjoy
- Budget-friendly: Making your own bread costs a fraction of what you’d pay for pre-made gluten-free dairy-free options
- Versatile base: Use this recipe for sandwiches, toast, French toast, or even homemade croutons
- Freezer-friendly: Double the batch and freeze extra loaves for busy weeks ahead
This easy banana bread recipe with self rising flour uses similar quick bread techniques if you’re looking for more beginner-friendly options.
Ingredients
This recipe uses straightforward ingredients that work together to create the perfect gluten-free dairy-free loaf. The key is using a high-quality gluten-free all-purpose flour blend that contains xanthan gum or adding it separately.
- 2 ½ cups (350g) gluten-free all-purpose flour blend: Use a blend like Pillsbury or Simple Truth for best results
- 1 teaspoon xanthan gum: Omit if your flour blend already contains it
- 2 teaspoons instant yeast: This helps the bread rise beautifully without a long fermentation
- 2 tablespoons (25g) granulated sugar: Feeds the yeast and adds a subtle sweetness
- 1 teaspoon salt: Enhances all the flavors in the bread
- 1 teaspoon baking powder: Provides extra lift for a lighter texture
- 3 large eggs, room temperature: Adds structure and moisture to the dough
- 3 tablespoons (45ml) olive oil or vegetable oil: Keeps the bread tender and moist
- 1 tablespoon apple cider vinegar: Creates an acidic environment that helps the dough rise
- 1 cup (240ml) warm non-dairy milk: Use almond, oat, or cashew milk heated to 105-115°F (40-46°C)
Kitchen Equipment Needed
Having the right tools makes bread-making much easier and ensures consistent results every time. You don’t need anything fancy, just a few basic kitchen essentials.
- 9×5-inch loaf pan or 9×4-inch Pullman pan: A narrower pan helps the bread rise taller
- Stand mixer with paddle attachment or hand mixer: Makes mixing the wet dough much easier
- Instant-read thermometer: Ensures your liquid is the right temperature for yeast activation
- Measuring cups and spoons: Accuracy matters in gluten-free baking
- Mixing bowls: One large and one medium bowl
- Whisk: For combining dry ingredients
- Rubber spatula: For scraping down the bowl
- Kitchen towel or plastic wrap: To cover the dough while rising
- Cooling rack: Allows bread to cool evenly
Recommended Products for This Recipe
These products have been selected based on quality and performance to help you achieve the best results with this bread.
1. Bob’s Red Mill Gluten Free 1-to-1 Baking Flour Alternative
While this specific flour is noted not to work well for yeast breads on the package, having multiple gluten-free flour options on hand lets you experiment. For this recipe, stick with Pillsbury or Simple Truth brands that are specifically yeast-friendly.
2. USA Pan Bakeware Aluminized Steel Loaf Pan
This commercial-grade pan distributes heat evenly for a perfectly golden crust every time. The aluminized steel construction prevents warping and ensures your bread rises uniformly without hot spots that can cause uneven baking.
3. Bragg Organic Apple Cider Vinegar
The acidity in apple cider vinegar works with the yeast to create a better rise and adds subtle depth to the bread’s flavor. Bragg’s organic version is raw and unfiltered, which many bakers prefer.
4. Anthony’s Xanthan Gum
This essential ingredient provides the binding and structure that gluten normally would. A little goes a long way, and this large bag will last through many batches of bread and other gluten-free baking projects.
For those interested in exploring other bread variations, the sweet sourdough bread recipe offers a different flavor profile worth trying.
Step-by-Step Instructions
Follow these detailed instructions for perfect gluten-free dairy-free bread every time. The key is being patient with the rise time and ensuring your liquids are at the right temperature.
1. Prepare Your Pan and Oven
- Grease your 9×5-inch or 9×4-inch loaf pan generously with oil or non-dairy butter substitute, making sure to coat the sides all the way to the top
- Position your oven rack in the middle position
- If your oven has a bread proofing setting (around 100°F/38°C), you can use it for rising; otherwise, find a warm spot in your kitchen
2. Mix the Dry Ingredients
- In a large mixing bowl, whisk together the gluten-free flour blend, xanthan gum (if using), baking powder, and salt until evenly combined
- Set this bowl aside while you prepare the wet ingredients
- Making sure the dry ingredients are well-mixed prevents pockets of xanthan gum or baking powder in the final bread
3. Activate the Yeast
- In a small bowl, combine the warm non-dairy milk (105-115°F/40-46°C) with the sugar, stirring until the sugar dissolves
- Sprinkle the instant yeast over the liquid and stir gently to combine
- Let this mixture sit for 5-10 minutes until it becomes foamy and bubbly on top, indicating the yeast is active and ready
- If the mixture doesn’t foam, your liquid may have been too hot (which kills yeast) or too cold (which doesn’t activate it), so you’ll need to start over with this step
4. Prepare the Wet Ingredient Mixture
- In a medium bowl, lightly beat the eggs with a fork or whisk until the yolks and whites are just combined and slightly foamy
- Add the olive oil or vegetable oil and apple cider vinegar to the eggs, whisking to combine
- The vinegar will help create a tender crumb and works with the yeast for better rise
5. Combine All Ingredients
- Add the foamy yeast mixture to the beaten eggs and oil, stirring to combine
- Pour this entire wet mixture into the bowl with the dry ingredients
- Using a stand mixer fitted with the paddle attachment (or a hand mixer), beat on medium speed for 3-4 minutes until you have a thick, smooth batter
- The consistency will be more like a thick cake batter than traditional bread dough, which is normal for gluten-free bread
- Scrape down the sides of the bowl with a rubber spatula to ensure everything is evenly mixed
6. Transfer to Pan and First Rise
- Pour the bread batter into your prepared loaf pan, using the spatula to scrape out every bit
- Smooth the top gently with the back of a spoon or offset spatula
- Cover the pan loosely with a clean kitchen towel or lightly oiled plastic wrap
- Place the pan in a warm location and let it rise for 30-45 minutes, or until the dough has risen about ½ inch above the rim of the pan
- Don’t let it rise too much or the bread may collapse during baking
7. Preheat and Bake
- About 15 minutes before your rise time is up, preheat your oven to 350°F (175°C)
- Once the bread has finished rising, remove the cover and place the pan in the preheated oven
- Bake for 45-55 minutes, or until the top is golden brown and a toothpick inserted into the center comes out clean
- If the top is browning too quickly, tent it loosely with aluminum foil after 30 minutes
- The internal temperature should reach 205-210°F (96-99°C) when fully baked
8. Cool and Slice
- Remove the bread from the oven and let it cool in the pan for 10 minutes
- Run a butter knife around the edges of the pan to loosen the bread
- Turn the loaf out onto a wire cooling rack
- Let the bread cool completely (at least 1 hour) before slicing, as gluten-free bread needs this time to set properly
- Use a sharp serrated knife for clean slices without tearing
You might also enjoy making fresh milled flour bread for a wholesome alternative when you’re not following a gluten-free diet.
Tips for Success
These tips will help you avoid common pitfalls and create the best gluten-free dairy-free bread possible.
- Measure flour correctly: Always use the spoon-and-level method rather than scooping directly from the bag, which can pack in too much flour and result in dry bread
- Check your yeast: Make sure your instant yeast is fresh and not expired, as old yeast won’t rise properly
- Temperature matters: Your liquid should be between 105-115°F (40-46°C); too hot kills the yeast, too cold won’t activate it
- Don’t skip the xanthan gum: This ingredient is crucial for binding the bread together since there’s no gluten
- Use room temperature eggs: Cold eggs can cool down your dough and slow the yeast activity
- Watch the rise time: Gluten-free dough over-proofed can collapse, so keep an eye on it during the rise
- Let it cool completely: Cutting into warm gluten-free bread can make it gummy, so patience is key
- Store properly: Keep cooled bread in an airtight container or bag to maintain moisture
Serving Suggestions
This versatile bread works beautifully in so many ways, from simple toast to elaborate sandwiches. Here are some delicious ideas to get you started.
- Classic sandwiches: Use this bread for turkey and avocado, peanut butter and jelly, or your favorite deli combinations
- Perfect toast: Slather with non-dairy butter, jam, or almond butter for a quick breakfast
- French toast: Dip slices in an egg mixture and cook until golden for a weekend brunch treat
- Grilled cheese: This bread holds up beautifully to grilling with dairy-free cheese
- Bread crumbs: Toast and pulse in a food processor for gluten-free dairy-free breadcrumbs
- Croutons: Cut into cubes, toss with olive oil and herbs, and bake until crispy
- Garlic bread: Brush with garlic-infused olive oil and toast for a delicious side
Pair your fresh bread with classic hummus for a simple, satisfying snack.
Variations to Try
Once you’ve mastered the basic recipe, these variations can add new flavors and textures to your bread-baking repertoire.
- Herb bread: Add 2 tablespoons of fresh chopped rosemary, thyme, or Italian seasoning to the dry ingredients
- Seeded bread: Mix in ¼ cup of sunflower seeds, pumpkin seeds, or sesame seeds before the first rise
- Cinnamon raisin: Add 1 tablespoon cinnamon and ½ cup raisins for a sweet breakfast bread
- Garlic and onion: Stir in 2 teaspoons garlic powder and 1 tablespoon dried minced onion
- Everything seasoning: Top the risen dough with everything bagel seasoning before baking
- Olive and sun-dried tomato: Fold in ⅓ cup chopped olives and ¼ cup chopped sun-dried tomatoes
- Egg-free version: Replace eggs with 3 flax eggs (3 tablespoons ground flaxseed mixed with 9 tablespoons water, let sit 5 minutes)
Another favorite: chocolate chip bread recipe
Storage and Reheating
Proper storage keeps your homemade bread fresh and delicious for days, and you can even freeze it for longer storage.
- Room temperature: Store completely cooled bread in an airtight container or resealable bag for up to 3 days
- Refrigerator: Keep bread in the fridge for up to 1 week wrapped in plastic wrap or in an airtight container
- Freezer: Slice the bread before freezing, then wrap tightly in plastic wrap and place in a freezer bag for up to 3 months
- Thawing: Remove slices as needed and thaw at room temperature for 30 minutes, or toast directly from frozen
- Refreshing: To restore freshness, wrap in foil and warm in a 300°F (150°C) oven for 10 minutes
- Toasting tip: Frozen slices toast beautifully straight from the freezer without thawing first
For more bread inspiration, try the pineapple quick bread recipe for something sweet and tropical.
Nutritional Facts
Per slice (assuming 12 slices per loaf):
- Calories: 145
- Total Fat: 5g
- Saturated Fat: 1g
- Cholesterol: 47mg
- Sodium: 245mg
- Total Carbohydrates: 22g
- Dietary Fiber: 2g
- Sugars: 2g
- Protein: 4g
Note: Nutritional values are approximate and will vary based on specific brands and types of ingredients used.
Health Benefits of Key Ingredients
This bread isn’t just delicious; the ingredients offer several nutritional benefits for those with dietary restrictions.
Gluten-free flour blends typically contain rice flour and starches that are easier to digest for people with celiac disease or gluten sensitivities. These blends are often fortified with vitamins and minerals to match the nutritional profile of wheat flour.
- Eggs: Provide high-quality protein and essential amino acids, plus vitamins B12 and D
- Apple cider vinegar: May support digestive health and contains beneficial enzymes and probiotics (if raw)
- Olive oil: Rich in heart-healthy monounsaturated fats and antioxidants
- Non-dairy milk: Often fortified with calcium and vitamin D, making it nutritionally comparable to dairy milk
- Yeast: Contains B-vitamins, particularly B12, and provides trace minerals like selenium
If you’re looking for more nutritious baked goods, the keto banana bread recipe offers a low-carb alternative.
Frequently Asked Questions
1. Can I use a different gluten-free flour blend?
Yes, but results may vary depending on the blend. Stick with lighter flour blends made from rice flour, tapioca starch, or potato starch for best results. Avoid blends containing heavy flours like garbanzo bean flour, as these create a denser texture. Bob’s Red Mill 1-to-1 and King Arthur Measure for Measure specifically state they’re not recommended for yeast breads.
2. Why is my bread dense and heavy?
Dense bread usually results from old yeast that didn’t activate properly, too much flour (measure carefully using the spoon-and-level method), or liquid that was too hot or cold. Make sure your yeast foams during activation, and check that you’re using the correct flour blend.
3. Can I make this bread without xanthan gum?
While xanthan gum is highly recommended for structure, you can substitute it with psyllium husk powder at a 2:1 ratio (use 2 teaspoons psyllium husk instead of 1 teaspoon xanthan gum). The texture may be slightly different but still good.
4. How do I know when the bread is done baking?
The bread is done when the top is golden brown, it sounds hollow when tapped, and an instant-read thermometer inserted into the center reads 205-210°F (96-99°C). A toothpick should come out clean or with just a few moist crumbs.
5. Can I make this recipe vegan?
Yes, replace the eggs with flax eggs or aquafaba. For flax eggs, mix 3 tablespoons ground flaxseed with 9 tablespoons water and let sit for 5 minutes. Alternatively, use ¾ cup aquafaba (liquid from canned chickpeas) in place of the three eggs.
You might also enjoy: Eggless Banana Bread Recipe

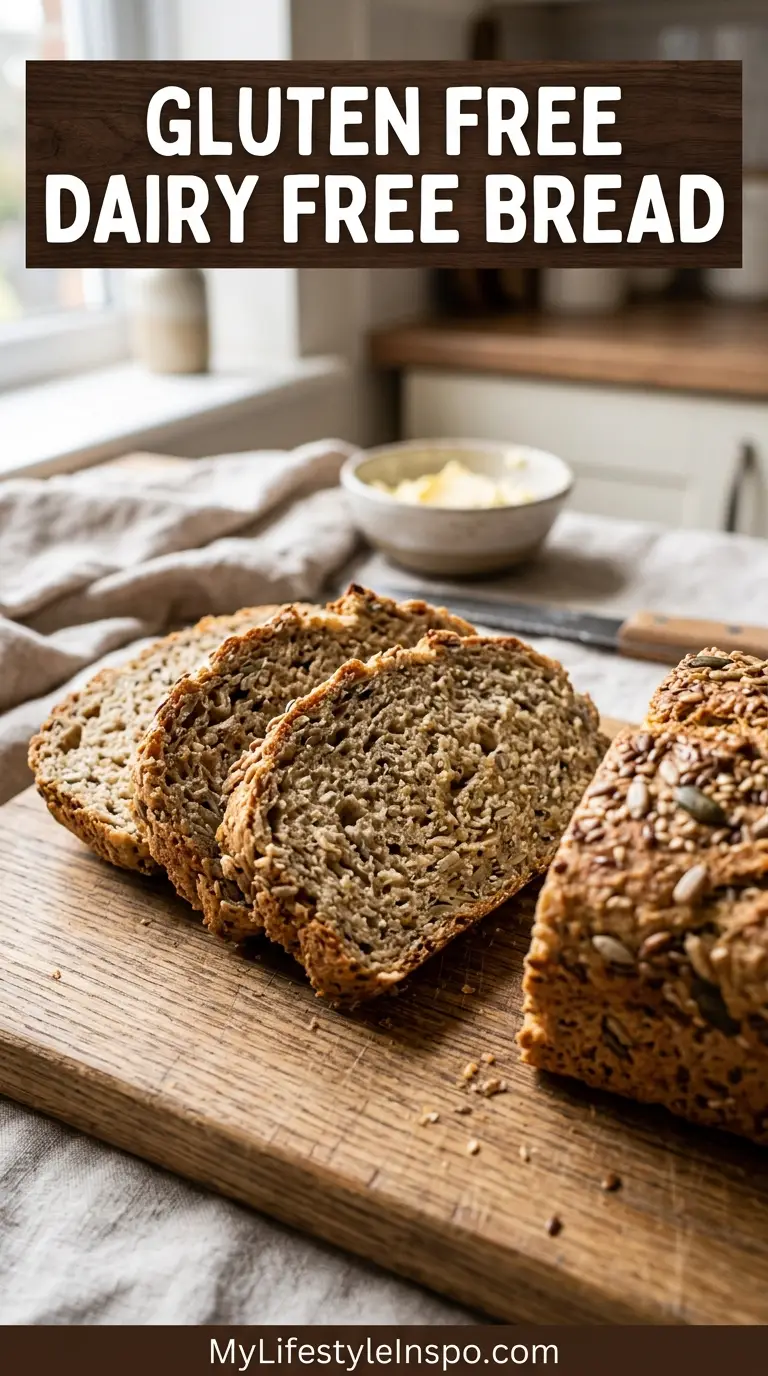
Gluten Free Dairy Free Bread
Equipment
- 9×5-inch loaf pan or 9×4-inch Pullman pan - Narrower pan helps bread rise taller
- Stand mixer with paddle attachment - Or hand mixer
- Instant-read thermometer - To check liquid temperature for yeast activation
- Measuring cups and spoons
- Large mixing bowl
- Medium mixing bowl
- Whisk - For combining dry ingredients
- Rubber spatula - For scraping down the bowl
- Kitchen towel or plastic wrap - To cover dough during rising
- Wire cooling rack - Allows bread to cool evenly
- Serrated knife - For clean slices without tearing
Ingredients
- 2.5 cups gluten-free all-purpose flour blend - 350g; use a yeast-friendly blend such as Pillsbury or Simple Truth
- 1 tsp xanthan gum - Omit if your flour blend already contains it
- 2 tsp instant yeast - Make sure it is fresh and not expired
- 2 tbsp granulated sugar - 25g; feeds the yeast and adds subtle sweetness
- 1 tsp salt
- 1 tsp baking powder - Provides extra lift for a lighter texture
- 3 large eggs - Room temperature
- 3 tbsp olive oil or vegetable oil - 45ml; keeps the bread tender and moist
- 1 tbsp apple cider vinegar - Helps dough rise and adds subtle depth of flavor
- 1 cup warm non-dairy milk - 240ml; almond, oat, or cashew milk heated to 105–115°F (40–46°C)
Instructions
- Generously grease a 9×5-inch loaf pan with oil or non-dairy butter, coating the sides all the way to the top. Position the oven rack in the middle position.
- In a large bowl, whisk together the gluten-free flour blend, xanthan gum (if using), baking powder, and salt until evenly combined. Set aside.
- Stir the sugar into the warm non-dairy milk until dissolved, then sprinkle the instant yeast over the top and stir gently. Let sit for 5–10 minutes until foamy and bubbly; if no foam forms, start this step again.
- Lightly beat the eggs in a medium bowl until just combined, then whisk in the oil and apple cider vinegar.
- Stir the foamy yeast mixture into the egg mixture, then pour everything into the dry ingredients. Beat with a stand mixer (paddle attachment) or hand mixer on medium speed for 3–4 minutes until you have a thick, smooth batter similar to cake batter.
- Transfer the batter to the prepared pan, smooth the top, and cover loosely with a kitchen towel or oiled plastic wrap. Let rise in a warm spot for 30–45 minutes until dough is about ½ inch above the rim.
- About 15 minutes before the rise is complete, preheat your oven to 350°F (175°C).
- Remove the cover and bake for 45–55 minutes until the top is golden brown and a thermometer inserted in the center reads 205–210°F (96–99°C). If the top browns too quickly, tent loosely with foil after 30 minutes.
- Cool in the pan for 10 minutes, then run a knife around the edges and turn out onto a wire rack. Cool completely (at least 1 hour) before slicing with a serrated knife.
Notes
- Measure flour using the spoon-and-level method — scooping directly from the bag packs in too much flour and results in dry, dense bread.
- Use a yeast-friendly gluten-free flour blend such as Pillsbury or Simple Truth. Bob’s Red Mill 1-to-1 and King Arthur Measure for Measure are not recommended for yeast breads.
- Make sure your liquid is between 105–115°F (40–46°C). Too hot kills the yeast; too cold won’t activate it.
- Do not skip the xanthan gum — it replaces the binding role of gluten. If your flour blend already contains xanthan gum, omit the additional teaspoon.
- Xanthan gum can be substituted with psyllium husk powder at a 2:1 ratio (use 2 teaspoons psyllium husk per 1 teaspoon xanthan gum).
- Use room temperature eggs to avoid cooling the dough and slowing yeast activity.
- Do not over-proof — gluten-free dough can collapse if it rises too much before baking. Watch carefully during the rise.
- To make this recipe vegan, replace the 3 eggs with 3 flax eggs (3 tbsp ground flaxseed + 9 tbsp water, rested 5 minutes) or ¾ cup aquafaba.
- Store cooled bread in an airtight container at room temperature for up to 3 days, refrigerated for up to 1 week, or freeze slices for up to 3 months.
- Frozen slices can be toasted directly from the freezer — no thawing needed.
Final Thoughts
Making your own gluten free dairy free bread recipe at home is easier than you might think. This recipe delivers a soft, fluffy loaf that rivals anything you can buy at the store, and it costs a fraction of the price.
The beauty of this bread is its versatility and how well it freezes, so you can always have fresh bread on hand. Once you master this basic recipe, you’ll find yourself experimenting with different add-ins and flavors to suit your taste.
Give this recipe a try and discover how satisfying homemade gluten-free bread can be. Share your results in the comments below, and let us know what variations you tried!
Recommended:
- Starbucks Banana Bread Recipe
- Amish Banana Bread Recipe
- Paula Deen Banana Bread Recipe
- Banana Bread Recipe With Walnuts and Chocolate Chips
- Maui Banana Bread Recipe
- Old Fashioned Pumpkin Bread Recipe
- Sweet Potato Bread Recipe
- Blackberry Bread Recipe
- Snickerdoodle Banana Bread Recipe
- Manna Bread Recipe


