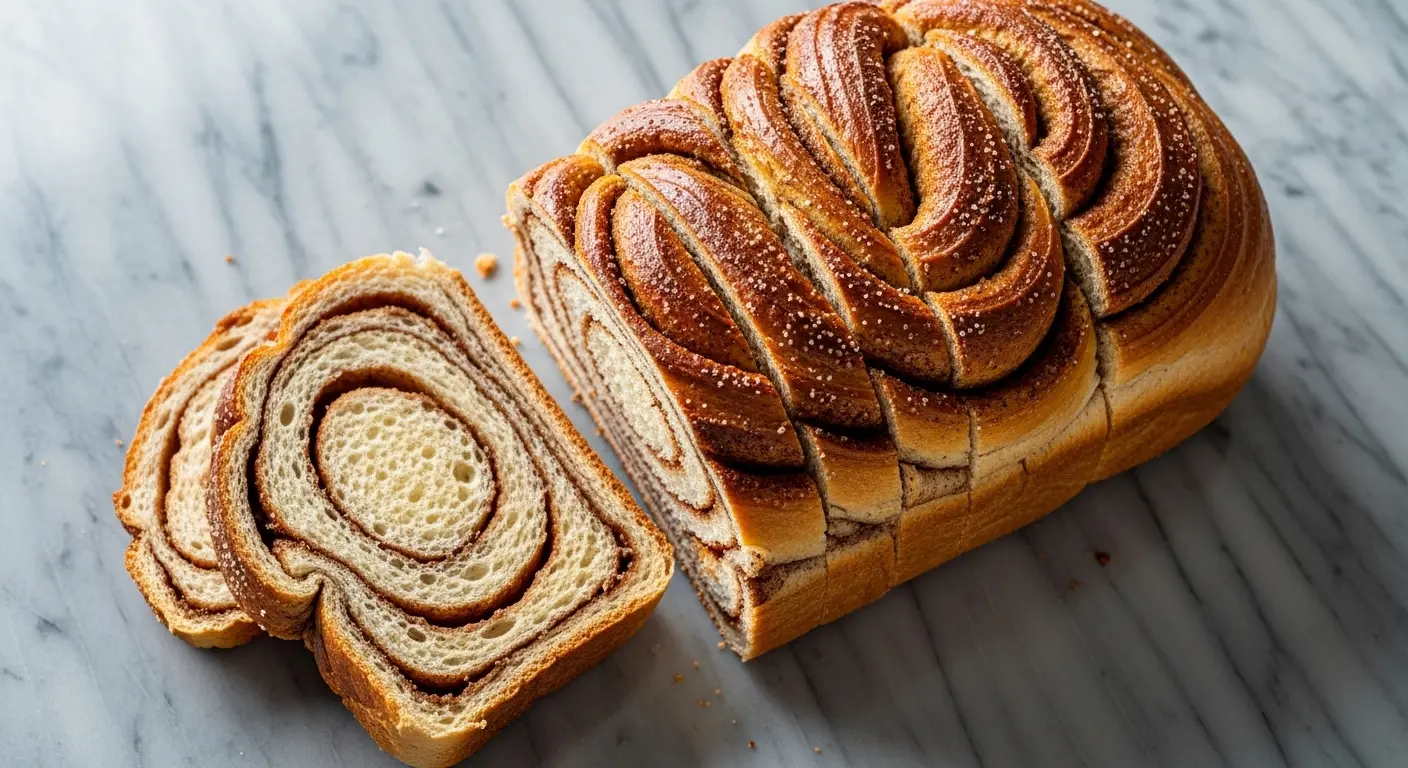
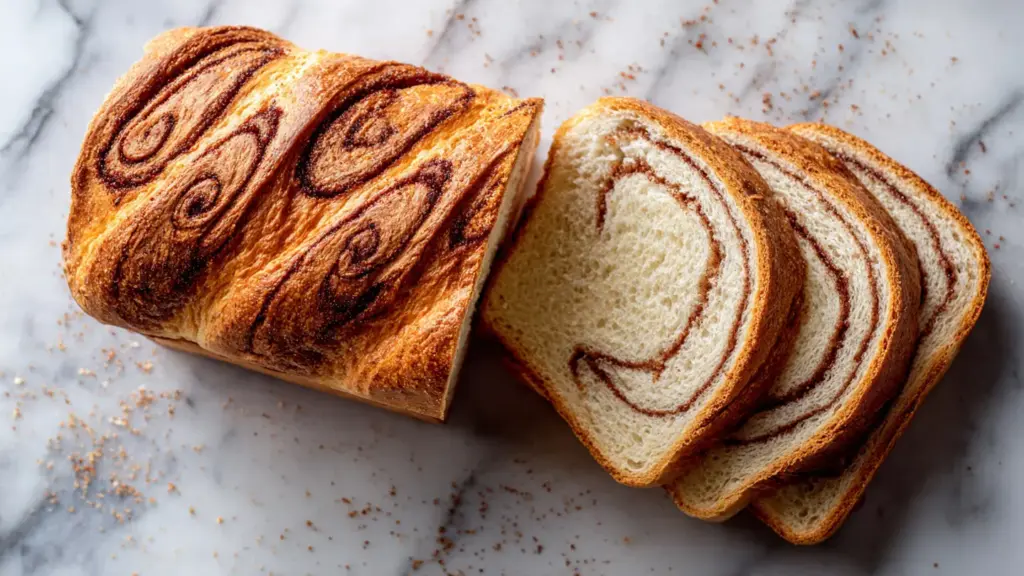
Making sweet sourdough bread at home brings together the tangy depth of traditional sourdough with a delightful sweetness that transforms breakfast and snack time. This recipe creates a soft, pillowy loaf swirled with cinnamon sugar that’s perfect for toast, French toast, or simply enjoying with butter.
The first time I pulled a loaf of this bread from the oven, the kitchen filled with the most incredible aroma of cinnamon, butter, and that signature sourdough tang.
My family gathered around the cooling rack, hardly able to wait the full hour before slicing. Now it’s become our weekend tradition, and I’m excited to share this recipe with you so you can create the same magic in your kitchen.
This sweet sourdough bread strikes the perfect balance between enriched bread and classic sourdough. The addition of milk, butter, and sugar creates a tender crumb that’s softer than traditional sourdough, while the cinnamon swirl adds warmth and sweetness to every bite.
If you’re looking for more comforting baked goods, this sweet sourdough is a wonderful place to start your baking journey.
Why You’ll Love This Sweet Sourdough Bread Recipe
This recipe transforms your active sourdough starter into something truly special. The enriched dough is surprisingly forgiving, making it accessible even if you’re new to sourdough baking.
Here’s what makes this bread so wonderful:
- Naturally leavened sweetness – The sourdough starter provides lift and flavor while the added sugar and cinnamon create a deliciously sweet profile
- Soft, tender crumb – Unlike crusty artisan loaves, this bread stays soft for days thanks to the milk and butter enrichment
- Versatile uses – Perfect for breakfast toast, French toast, bread pudding, or afternoon snacks with tea
- Long-lasting freshness – The fat content helps this bread stay moist longer than traditional sourdough
- Beautiful swirls – The cinnamon-sugar filling creates gorgeous swirls that look as impressive as they taste
- Gut-friendly benefits – The fermentation process makes this bread easier to digest while maintaining that signature tang
Ingredients
This sweet sourdough bread comes together with simple pantry staples and your active sourdough starter. The combination of enriching ingredients creates a tender, sweet loaf that’s nothing like traditional crusty sourdough.
For the Dough:
- 100g (1/2 cup) active sourdough starter, bubbly and at peak
- 240ml (1 cup) whole milk, warmed to room temperature
- 50g (1/4 cup) granulated sugar
- 50g (3.5 tablespoons) unsalted butter, melted and slightly cooled
- 500g (4 cups) bread flour, plus more for dusting
- 10g (2 teaspoons) fine sea salt
- 1 large egg, beaten (for egg wash)
For the Cinnamon Sugar Filling:
- 60g (5 tablespoons) unsalted butter, softened
- 100g (1/2 cup) brown sugar, packed
- 15g (2 tablespoons) ground cinnamon
- Pinch of salt
Kitchen Equipment Needed
Having the right tools makes this recipe significantly easier, though you can absolutely make do with what you have in your kitchen. The most important item is a good loaf pan that distributes heat evenly.
Essential Equipment:
- Digital kitchen scale for accurate measurements
- Large mixing bowl for the dough
- 9×5 inch loaf pan for baking
- Bench scraper or dough scraper for handling sticky dough
- Rolling pin for shaping
- Pastry brush for egg wash
- Clean kitchen towels or plastic wrap for covering
- Wire cooling rack
Nice to Have:
- Stand mixer with dough hook (though hand-kneading works beautifully)
- Instant-read thermometer to check dough temperature
- Parchment paper for easy removal
Recommended Products for This Recipe
These carefully selected products will help you achieve bakery-quality results at home. I’ve tested each of these items and can vouch for their quality and performance.
1. USA Pan Bakeware Loaf Pan
This aluminized steel loaf pan distributes heat incredibly evenly, preventing those dreaded burnt edges while ensuring your sweet sourdough bakes to golden perfection. The nonstick coating releases cleanly every time, and the corrugated surface creates better airflow for even browning.
2. King Arthur Baking Company Bread Flour
Consistent protein content makes a huge difference in sourdough baking, and King Arthur’s bread flour delivers every time. The 12.7% protein creates excellent gluten structure for that perfect tender yet structured crumb.
3. OXO Good Grips Dough Scraper
This might seem like a small tool, but it’s invaluable for handling enriched dough. The comfortable grip and flexible edge make it easy to scrape every bit of dough from your bowl and shape your loaf without overhandling.
4. Escali Primo Digital Kitchen Scale
Precision matters in bread baking, and this scale delivers accurate measurements up to 11 pounds. The tare function makes it easy to measure multiple ingredients in one bowl, saving you cleanup time.
You might also enjoy: Sourdough Focaccia Recipe
Step-by-Step Instructions
Taking your time with each step ensures the best texture and flavor. This recipe requires patience, but the hands-on work is minimal, making it perfect for fitting into your schedule.
1. Feed Your Sourdough Starter
- Feed your sourdough starter 4-6 hours before you plan to mix the dough
- Use a 1:1:1 ratio (equal parts starter, flour, and water by weight)
- Place in a warm spot (75-80°F / 24-27°C) until it doubles in size and becomes bubbly and active
- Look for a dome shape on top and bubbles throughout as signs it’s ready to use
- The starter should smell pleasantly tangy and yeasty, not overly sour or acetone-like
2. Mix the Dough
- In a large mixing bowl, combine the warm milk, active sourdough starter, and granulated sugar
- Whisk together until the starter is fully dissolved and the mixture looks slightly frothy
- Pour in the melted butter and whisk again to incorporate
- Add the bread flour and salt to the bowl
- Using a wooden spoon or your hands, mix until all the flour is hydrated and no dry patches remain
- The dough will look shaggy and somewhat rough at this stage, which is perfectly normal
- Cover the bowl with a damp tea towel or plastic wrap
3. Autolyse (Rest Period)
- Allow the dough to rest for 30-60 minutes at room temperature
- During this time, the flour absorbs the liquid and gluten begins developing naturally
- You’ll notice the dough becomes smoother and more cohesive after this rest
- This step makes kneading much easier and creates better texture in the final bread
- Don’t skip this step, as it significantly improves the dough’s workability
4. Knead the Dough
- After the autolyse, turn the dough out onto a lightly floured surface
- Knead by hand for 8-10 minutes, or use a stand mixer with dough hook on medium speed for 5-7 minutes
- The dough should transform from sticky to smooth and elastic
- Perform the windowpane test: stretch a small piece of dough between your fingers; it should form a thin, translucent membrane without tearing
- Add small amounts of flour only if the dough is excessively sticky, but keep in mind this is an enriched dough and will be slightly tacky
- Shape the dough into a smooth ball and place it in a lightly greased bowl
- Turn the dough to coat it with oil on all sides
5. Bulk Fermentation (First Rise)
- Cover the bowl with plastic wrap or a damp towel
- Place in a warm, draft-free location at 75-78°F (24-26°C)
- Allow the dough to rise for 6-8 hours, or until it has doubled in size
- The timing depends heavily on your kitchen temperature and starter strength
- In cooler kitchens, this may take up to 10 hours; in warmer environments, it could be as quick as 4-5 hours
- Look for the dough to be puffy, with visible air bubbles under the surface
- When gently pressed with a finger, the dough should slowly spring back but leave a slight indentation
Read Also: Homemade Bread Recipe
6. Prepare the Cinnamon Sugar Filling
- While the dough is rising, make your cinnamon sugar filling
- In a small bowl, combine the softened butter, brown sugar, cinnamon, and pinch of salt
- Mix with a fork until it forms a spreadable paste
- The mixture should be creamy and smooth, not grainy
- If it’s too stiff, let the butter come to room temperature a bit more
- Set aside at room temperature until ready to use
7. Shape the Loaf
- Once the dough has doubled, gently deflate it by pressing down with your hands
- Turn the dough out onto a lightly floured work surface
- Using a rolling pin, roll the dough into a rectangle approximately 9 inches wide and 12-14 inches long
- The width should match the length of your loaf pan
- Spread the cinnamon sugar filling evenly over the entire surface, leaving a 1/2-inch border along one long edge
- Use an offset spatula or the back of a spoon for even coverage
- Starting from the long edge opposite the bare border, tightly roll the dough into a log
- Pinch the seam firmly to seal, and pinch the ends closed
- Place the rolled dough seam-side down into a greased 9×5-inch loaf pan
8. Second Rise (Proofing)
- Cover the loaf pan loosely with a damp towel or plastic wrap
- Let the dough rise at room temperature for 2-4 hours
- The dough should rise to about 1 inch above the rim of the pan
- When you gently press the dough, it should slowly spring back but hold a slight indentation
- Don’t let it over-proof or it may collapse during baking
- A properly proofed loaf will have a domed top and feel light and airy
9. Prepare for Baking
- About 30 minutes before the dough is ready to bake, preheat your oven to 350°F (175°C)
- Position a rack in the center of the oven for even heat distribution
- Gently brush the top of the risen loaf with beaten egg wash
- This creates a beautiful golden-brown crust and gives the bread a professional bakery appearance
- Be careful not to deflate the dough while brushing
- Optional: sprinkle a little coarse sugar on top for extra sweetness and crunch
10. Bake the Bread
- Place the loaf pan on the center rack of the preheated oven
- Bake for 45-50 minutes, rotating the pan halfway through for even browning
- The bread is done when the top is deep golden brown and an instant-read thermometer inserted into the center reads 190-200°F (88-93°C)
- If the top is browning too quickly, tent it loosely with aluminum foil for the last 15 minutes of baking
- You should hear a hollow sound when you tap the bottom of the loaf (carefully remove from pan to test)
11. Cool and Serve
- Remove the loaf from the oven and let it cool in the pan for 10 minutes
- This allows the structure to set and makes the bread easier to remove
- Carefully turn the loaf out onto a wire cooling rack
- Let cool for at least 1 hour before slicing to allow the crumb to set properly
- Cutting too early can result in a gummy texture
- Once cooled, slice with a sharp serrated knife using a gentle sawing motion
- Enjoy warm with butter, or toast slices for an even more intense flavor
Tips for Success
These tried-and-true tips come from many batches of sweet sourdough bread and will help you avoid common pitfalls while achieving the best possible results.
Key Tips:
- Use an active starter – Your starter should be at peak activity, doubled in size and bubbly, for the best rise
- Watch the temperature – Dough ferments faster in warm kitchens (above 75°F) and slower in cool ones; adjust timing accordingly
- Don’t skip the windowpane test – This ensures proper gluten development for a tender, structured crumb
- Roll tightly – A tight roll prevents gaps in the cinnamon swirl and creates beautiful layers
- Seal the seam well – A loose seam can cause the loaf to unravel during baking
- Don’t over-proof – The second rise is complete when dough barely springs back when pressed; over-proofed dough collapses
- Use an instant-read thermometer – This takes the guesswork out of knowing when your bread is perfectly baked
- Cool completely before slicing – Patience here prevents a gummy, compressed crumb
- Adjust hydration – If your dough seems too dry or sticky, adjust by adding water or flour 1 tablespoon at a time
Another favorite: Cinnamon Roll Recipe
Serving Suggestions
This sweet sourdough bread shines in so many different ways. The soft texture and cinnamon swirl make it incredibly versatile for breakfast, brunch, or dessert.
Delicious Ways to Serve:
- Classic buttered toast – Simply toast a slice and spread with salted butter while it’s still warm
- French toast – The slightly sweet bread makes extraordinary French toast; dip thick slices in egg mixture and cook until golden
- Bread pudding – Day-old slices are perfect for a cinnamon-raisin bread pudding
- With coffee or tea – Enjoy alongside your morning Coffee Cake for a cozy breakfast
- Cream cheese spread – Top with whipped cream cheese mixed with a touch of vanilla and honey
- Ice cream sandwiches – Toast slices and sandwich vanilla ice cream between them for a unique dessert
- Peanut butter and banana – A nostalgic combination that works beautifully with the cinnamon notes
- Grilled cheese – The sweetness creates an interesting sweet-savory contrast with sharp cheddar
- With Scrambled Eggs – Balance the sweetness with savory breakfast eggs
Variations to Try
Once you’ve mastered the basic recipe, these variations open up exciting new flavor possibilities. Each one builds on the foundation while adding unique twists.
Creative Variations:
- Raisin swirl – Soak 1 cup raisins in warm water for 15 minutes, drain, and sprinkle over the cinnamon filling before rolling
- Chocolate chip – Add 1 cup mini chocolate chips to the cinnamon filling for a dessert-like treat
- Orange zest – Mix 1 tablespoon orange zest into the dough for a citrusy twist that pairs beautifully with cinnamon
- Cardamom sugar – Replace 1 teaspoon of cinnamon with ground cardamom for a Scandinavian-inspired flavor
- Maple pecan – Brush the filling with maple syrup and sprinkle with chopped pecans before rolling
- Cream cheese swirl – Spread 4 oz softened cream cheese over the dough before adding cinnamon sugar
- Apple cinnamon – Dice 1 small apple finely and mix into the cinnamon filling
- Whole wheat version – Replace up to 200g of bread flour with whole wheat flour for a heartier loaf (you may need to add 2-3 tablespoons more liquid)
Storage and Reheating
Proper storage keeps your sweet sourdough bread fresh and delicious for days. The enriched dough actually improves slightly as it sits, with flavors melding together beautifully.
Storage Guidelines:
- Room temperature – Store in an airtight container or plastic bag at room temperature for up to 4 days
- Refrigeration – Not recommended, as it will dry out the bread faster
- Freezing – Slice the cooled bread, separate slices with parchment paper, and freeze in a freezer bag for up to 3 months
- Individual slices – Freeze slices individually so you can pull out just what you need
- Thawing – Leave frozen slices at room temperature for 30 minutes or toast directly from frozen
- Refreshing – Warm slices in a 300°F (150°C) oven for 5-7 minutes to refresh day-old bread
- Toasting tip – Day-old bread makes the best toast; the drier texture crisps up beautifully in a toaster
For a lighter option, try: Sourdough Pancakes Recipe
Nutritional Facts
Per Slice (based on 12 slices per loaf):
- Calories: 285
- Total Fat: 9g
- Saturated Fat: 5g
- Cholesterol: 35mg
- Sodium: 320mg
- Total Carbohydrates: 44g
- Dietary Fiber: 2g
- Sugars: 12g
- Protein: 7g
Nutritional information is approximate and based on standard ingredients. Values may vary depending on specific brands and ingredient substitutions used.
Health Benefits of Key Ingredients
While this is definitely a sweet treat, the sourdough fermentation process and quality ingredients offer some nutritional advantages over conventional sweet breads.
Notable Benefits:
- Sourdough starter – The fermentation breaks down phytic acid in flour, making minerals more bioavailable and the bread easier to digest
- Lower glycemic impact – Sourdough fermentation produces organic acids that lower the bread’s glycemic index compared to yeasted sweet breads
- Probiotics – While baking kills most bacteria, some beneficial compounds from fermentation remain
- Cinnamon – Contains antioxidants and may help regulate blood sugar levels
- Whole milk – Provides calcium, vitamin D, and protein for bone health and muscle function
- Bread flour protein – Higher protein content than all-purpose flour supports satiety and provides essential amino acids
- Natural leavening – No commercial yeast or chemical leaveners, just naturally occurring wild yeast from your starter
Read Also: Sourdough Discard Recipes
Frequently Asked Questions
1. Can I make this bread without a stand mixer?
Absolutely! This dough is wonderful to knead by hand.
After the autolyse, turn the dough onto a floured surface and knead for 8-10 minutes until smooth and elastic. The enriched dough is quite forgiving and actually benefits from the warmth of your hands during hand-kneading.
2. Why didn’t my bread rise properly?
Several factors can affect rise. Your starter may not have been active enough (it should be bubbly and doubled before using), your kitchen might be too cold (aim for 75-78°F for optimal fermentation), or you may have over-proofed the dough during the second rise.
Check that your starter floats in water before using it, which indicates it’s ready.
3. Can I make this bread the same day?
This recipe is designed for a longer fermentation, but you can speed it up. Feed your starter with a higher ratio (1:2:2 or 1:3:3) to make it more active, use warmer water (around 90°F), and keep the dough in a warm spot (80-85°F).
You might reduce total time to 4-6 hours, but the flavor will be less developed.
4. How do I know when my dough is kneaded enough?
The windowpane test is your best indicator. Take a small piece of dough and gently stretch it between your fingers.
If it stretches thin enough to see light through without tearing, gluten development is complete. The dough should also feel smooth, elastic, and spring back when poked.
5. Can I use sourdough discard instead of active starter?
You can, but you’ll need to add commercial yeast (1.5 teaspoons instant yeast) to ensure a good rise. Mix the discard with the wet ingredients as usual, then add the yeast with the flour.
The fermentation benefits will be reduced, but you’ll still get that tangy flavor and use up your discard.
Final Thoughts
Sweet sourdough bread brings together the best of both worlds: the complex flavor and digestibility of traditional sourdough with the tender, sweet comfort of enriched bread. Each slice reveals beautiful cinnamon swirls that make breakfast feel special.
This recipe has become one of my most-requested bakes, perfect for weekend mornings or whenever you want to fill your kitchen with an irresistible aroma. I hope it becomes a favorite in your home too.
Give this sweet sourdough bread recipe a try and let me know how it turns out! Drop a comment below with your results, and don’t forget to share your beautiful loaf photos.
Recommended:
- Banana Bread Recipe
- Pumpkin Bread Recipe
- Zucchini Bread Recipe
- Irish Soda Bread Recipe
- Sourdough Sandwich Bread Recipe
- Sourdough Cinnamon Rolls Recipe
- Artisan Bread Recipe
- Brioche Bread Recipe
- Challah Bread Recipe


