If you’ve never baked with freshly milled flour, this fresh milled flour bread recipe is about to completely change the way you think about homemade bread. The difference is staggering.
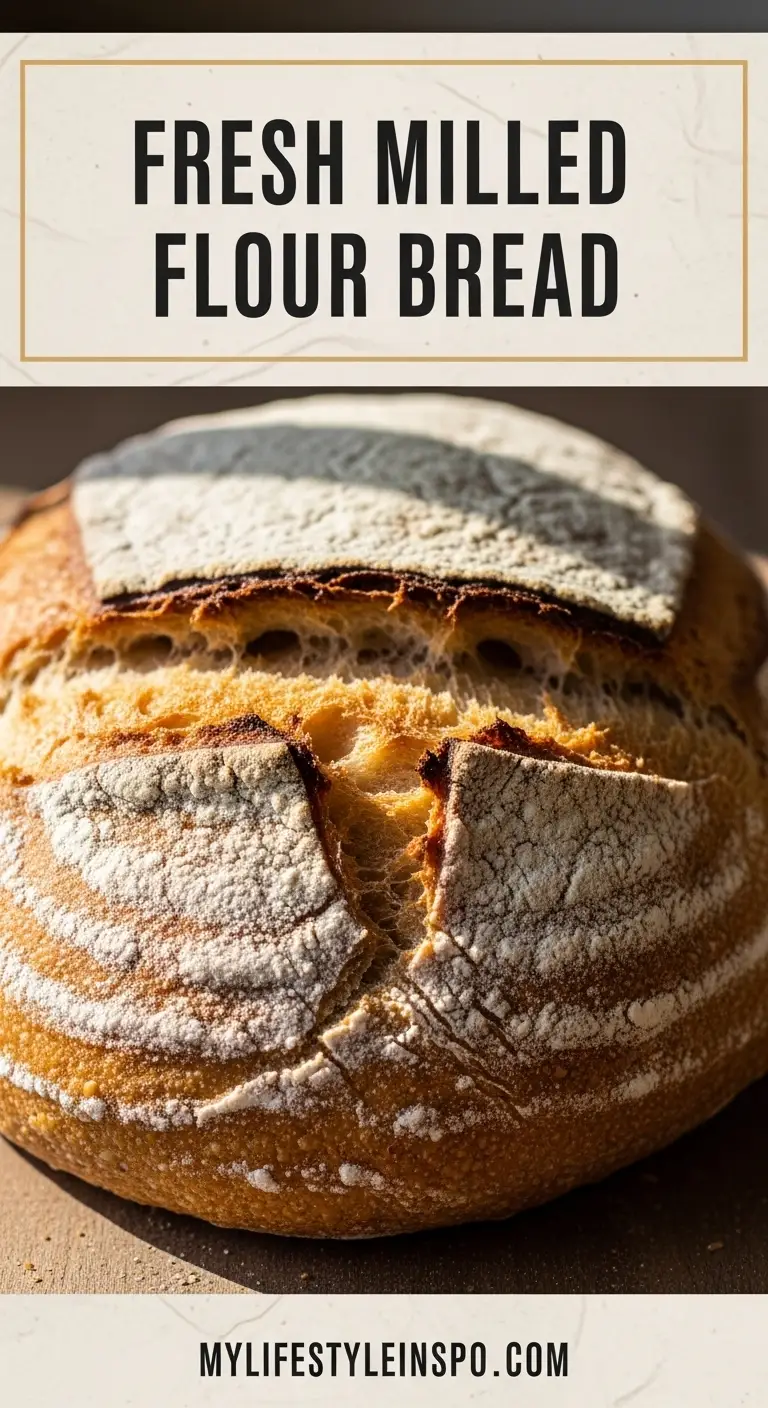
Freshly milled flour retains the bran, germ, and endosperm of the whole grain, which means your loaf is packed with nutrients, flavor, and a beautiful depth that store-bought flour simply can’t replicate. The result is a loaf with a hearty, slightly nutty taste, a tender crumb, and a crust that shatters satisfyingly when you slice into it.
Baking with fresh milled flour does require a few adjustments compared to conventional bread recipes. Whole grain flours absorb more water, so hydration is key.
The natural oils from the germ also make fresh milled flour more perishable than white flour, but that’s precisely what makes it so nutritionally superior. Once you understand these nuances, you’ll find the process straightforward and deeply rewarding.
This recipe follows the most widely recognized approach to fresh milled flour bread: a simple sandwich loaf style that’s soft enough for everyday use, sturdy enough to slice cleanly, and delicious enough to eat warm with just a smear of honey butter.
Why You’ll Love This Fresh Milled Flour Bread Recipe
Baking this bread isn’t just about producing a loaf. It’s about connecting with your ingredients in a way that feels genuinely satisfying.
Fresh milled flour tastes alive in a way that aged, processed flour does not. The wheaty, nutty flavor shines through in every slice, and the aroma while baking is absolutely intoxicating.
The nutritional profile is also dramatically better. Because the bran and germ are still intact, you get more fiber, B vitamins, iron, and essential fatty acids compared to refined white flour bread.
This recipe is beginner-friendly despite the specialty flour. The steps are methodical and the ingredient ratios are forgiving, which makes it a great introduction to whole grain baking.
It’s also incredibly versatile. This loaf works beautifully as sandwich bread, toast, or a side to soups and stews.
Making your own fresh milled flour bread means you control every ingredient. No preservatives, no additives, just pure and wholesome food made from scratch.
- Deeply nutty, rich flavor from freshly milled whole grain flour
- More nutritious than bread made with conventional all-purpose or even store-bought whole wheat flour
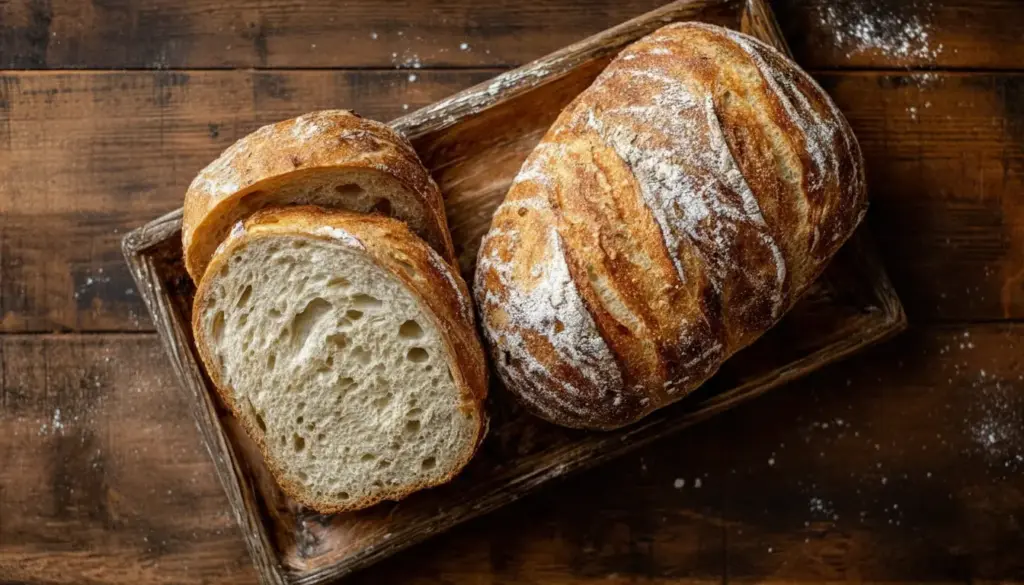
- Beautiful, golden-brown crust with a soft, tender interior
- A satisfying and meditative baking experience from grain to loaf
- Freezes well for easy meal prep throughout the week
If you love baking hearty whole grain loaves, you might also enjoy this Einkorn Bread Recipe for another ancient grain baking adventure.
Ingredients
Making fresh milled flour bread requires just a handful of wholesome pantry staples. The magic is all in the flour itself.
- 4 cups (480g) freshly milled whole wheat flour (hard red wheat or hard white wheat berries, freshly milled)
- 1 ¼ cups (300ml) warm water (around 110°F / 43°C)
- 2 ¼ teaspoons (7g) active dry yeast (one standard packet)
- 2 tablespoons (30ml) honey
- 1 ½ teaspoons (9g) salt
- 2 tablespoons (28g) unsalted butter, softened (or neutral oil such as avocado or coconut oil)
- 1 tablespoon (15ml) olive oil for greasing
Read Also: Sourdough Starter Recipe
Kitchen Equipment Needed
You don’t need a professional bakery setup to make this recipe. A few essential tools will get you through start to finish.
- Grain mill or home flour mill (for milling your own wheat berries)
- Stand mixer with dough hook (or a large mixing bowl for hand kneading)
- Loaf pan, 9×5 inch
- Kitchen scale (highly recommended for accurate flour measurements)
- Instant-read thermometer
- Large mixing bowl
- Clean kitchen towel or plastic wrap
- Wire cooling rack
You might also enjoy making your own Sourdough Focaccia once you get comfortable working with whole grain doughs.
Recommended Products for This Recipe
These are hand-picked products based on quality and performance that will genuinely elevate your fresh milled flour bread baking experience.
1. Nutrimill Harvest Grain Mill
A quality home grain mill is the most important investment you can make for this recipe. The Nutrimill Harvest mills wheat berries finely and consistently, giving you flour that hydrates beautifully and produces a well-structured loaf. It’s quiet, efficient, and built to last for years of regular use.
2. Hard White Wheat Berries
The variety of wheat berry you use directly impacts flavor and texture. Hard white wheat berries produce a milder, slightly sweeter flavor than hard red wheat, making them ideal for sandwich bread. They’re packed with nutrients and mill beautifully into a fine, workable flour.
3. USA Pan Aluminized Steel Loaf Pan 9×5
A high-quality loaf pan ensures even baking and prevents sticking. The USA Pan loaf pan has a non-stick coating and a corrugated surface that promotes air circulation for a more evenly baked crust. It’s a workhorse that will handle hundreds of loaves without warping.
4. Escali Primo Digital Kitchen Scale
Accurate measurement is especially important when working with fresh milled flour, which can vary in density. A reliable digital kitchen scale takes the guesswork out of flour measurement and leads to consistent, repeatable results every time you bake.
5. ThermoWorks Thermapen Instant-Read Thermometer
Knowing when your bread is fully baked internally is one of the most reliable ways to guarantee a perfect loaf. A high-quality instant-read thermometer lets you check the internal temperature (aim for 190-200°F / 88-93°C) without guessing.
For another wholesome homemade bread option, check out this Easy Sourdough Bread Recipe.
Step-by-Step Instructions
1. Mill Your Flour Fresh
- Set up your home grain mill according to the manufacturer’s instructions.
- Measure out approximately 2 ½ cups (about 450g) of whole wheat berries. Hard red wheat gives a more robust, earthy flavor, while hard white wheat produces a milder, lighter loaf.
- Mill the wheat berries on the finest setting available. You should end up with approximately 4 cups (480g) of freshly milled flour.
- Allow the flour to sit for 15 minutes after milling. It will be slightly warm from the milling process, and resting helps it cool and absorb moisture more evenly once liquids are added.
2. Activate the Yeast
- In a small bowl or measuring cup, combine 1 ¼ cups (300ml) of warm water (110°F / 43°C). If the water is too hot, it will kill the yeast; if too cool, the yeast will not activate properly. A kitchen thermometer is helpful here.
- Add 2 tablespoons (30ml) of honey to the warm water and stir briefly to dissolve.
- Sprinkle the 2 ¼ teaspoons (7g) of active dry yeast over the honey-water mixture.
- Let it sit undisturbed for 5 to 10 minutes until the mixture becomes foamy and bubbly. This tells you the yeast is alive and active. If no foam forms, start over with fresh yeast.
3. Mix the Dough
- In the bowl of a stand mixer (or a large mixing bowl), combine the 4 cups (480g) of freshly milled flour and 1 ½ teaspoons (9g) of salt. Stir briefly to distribute the salt through the flour.
- Pour the activated yeast mixture over the flour mixture.
- Add the 2 tablespoons (28g) of softened butter or oil.
- If using a stand mixer, attach the dough hook and mix on low speed for 2 minutes until the ingredients begin to come together into a shaggy dough.
- Increase to medium speed and mix for another 5 to 6 minutes until the dough is smooth and slightly tacky but not sticky.
- If mixing by hand, stir the ingredients together until a rough dough forms, then turn it out onto a lightly floured surface and knead for 8 to 10 minutes until smooth and elastic.
4. Check the Dough Consistency
- Fresh milled flour is thirstier than processed flour and will absorb more water over time, so be patient with the hydration.
- The dough should feel slightly tacky (it gently sticks to your fingers but releases without leaving residue) but should not be sticky enough to smear. If it is too sticky, add additional flour one tablespoon at a time, kneading after each addition.
- If the dough feels very stiff and dry, add warm water one teaspoon at a time and knead it in.
- The dough will feel denser than a standard white flour bread dough. This is completely normal and expected with fresh milled whole grain flour.
5. First Rise (Bulk Fermentation)
- Lightly grease a large bowl with the 1 tablespoon (15ml) of olive oil.
- Shape the dough into a smooth ball and place it in the greased bowl, turning it once so all sides are coated in oil.
- Cover the bowl with a clean kitchen towel or plastic wrap.
- Place the covered bowl in a warm, draft-free spot in your kitchen. A turned-off oven with just the oven light on works wonderfully, as does any warm corner of your home.
- Allow the dough to rise for 1 to 1 ½ hours, or until it has roughly doubled in size. Fresh milled flour dough may rise slightly more slowly than white flour dough due to the bran cutting through gluten strands, so be patient and judge by size rather than time alone.
6. Shape the Loaf
- Lightly grease your 9×5 inch loaf pan with butter or cooking spray.
- Once the dough has doubled, gently punch it down to release the gas bubbles trapped inside.
- Turn the dough out onto a lightly floured surface.
- Using your hands, pat the dough into a rough rectangle that is approximately 9 inches wide and 12 inches long.
- Starting from the short end closest to you, roll the dough tightly into a log, pressing gently after each turn to ensure there are no air gaps.
- Pinch the seam along the bottom tightly to seal it.
- Place the shaped loaf seam-side down into the prepared loaf pan, pressing gently so it touches the sides of the pan evenly.
7. Second Rise (Proof)
- Cover the loaf pan loosely with a clean kitchen towel or lightly greased plastic wrap.
- Place the pan back in your warm, draft-free spot.
- Allow the dough to rise for 45 minutes to 1 hour. The dough should rise about 1 inch above the rim of the loaf pan and look puffy and full.
- While the dough is proofing, preheat your oven to 375°F (190°C). Placing the oven rack in the center position ensures even heat distribution.
8. Bake the Bread
- Once the dough has proofed and your oven is fully preheated, remove the kitchen towel or plastic wrap from the loaf pan.
- Optional: For a shiny crust, brush the top of the loaf gently with a little milk or a beaten egg using a pastry brush.
- Place the loaf pan on the center rack of your preheated oven.
- Bake for 30 to 35 minutes, until the top is deep golden brown and the loaf sounds hollow when you tap it on the bottom.
- For the most reliable results, insert an instant-read thermometer into the center of the loaf. It should read between 190°F and 200°F (88°C to 93°C) when fully baked.
- If the top is browning too quickly before the interior is fully baked, tent the loaf loosely with aluminum foil during the last 10 minutes of baking.
9. Cool and Slice
- Remove the loaf pan from the oven and immediately turn the bread out onto a wire cooling rack.
- Allow the bread to cool for at least 30 minutes before slicing. This is not optional. Slicing too early releases steam and collapses the interior structure, resulting in a gummy, dense crumb.
- Once the loaf has cooled to just warm, slice it with a sharp serrated bread knife using gentle, back-and-forth sawing motions rather than pressing down.
This bread pairs beautifully served alongside a warming bowl of Sourdough Sandwich Bread technique tips if you want to expand your bread-baking repertoire.
Tips for Success
A few key insights will take your fresh milled flour bread from good to absolutely great.
- Mill your flour right before baking. Freshly milled flour is at its peak nutritional value and flavor within hours of milling. The natural oils in the germ begin to oxidize quickly, so the fresher the better.
- Weigh your ingredients. Volume measurements like cups can be inconsistent, especially with whole grain flours that settle and pack differently than refined flours. A kitchen scale will give you perfect, repeatable results every time.
- Be patient with the rise. Whole grain doughs naturally rise more slowly than white flour doughs because the sharp bran particles cut through gluten development. Don’t rush the rise by adding more yeast. Simply give it more time.
- Don’t overwork the dough. Over-kneading can break down the gluten structure, especially in whole grain doughs, leading to a dense loaf. Stop kneading when the dough is smooth and elastic.
- Check for doneness with a thermometer. Judging bread doneness by color alone can be misleading. An internal temperature of 190 to 200°F (88 to 93°C) is the gold standard for a fully baked loaf.
Another great wholesome bread option is this Same Day Sourdough Bread Recipe if you want to experiment with fermented doughs.
Serving Suggestions
Fresh milled flour bread is wildly versatile and pairs well with so many different foods.
The simplest and most satisfying way to enjoy it is sliced warm with butter or Honey Butter. The slightly sweet honey plays beautifully off the nutty, earthy flavor of the whole grain bread.
- Toasted slices with avocado and a sprinkle of flaky sea salt (try it with this Avocado Toast for inspiration)
- Used as sandwich bread for hearty lunch fillings like grilled chicken, roasted vegetables, or Classic Chicken Salad
- Served alongside a warming bowl of soup such as Vegetable Soup
- As a base for bruschetta with fresh tomatoes and basil
- Enjoyed as breakfast toast with nut butter and sliced banana
Read Also: Dinner Rolls Recipe
Variations to Try
Once you’ve mastered the base recipe, there are so many delicious directions you can take your fresh milled flour bread.
- Honey Oat Loaf: Replace ¼ cup of the fresh milled flour with rolled oats and increase honey to 3 tablespoons. Sprinkle extra oats on top before baking.
- Seeded Loaf: Add 2 tablespoons each of sunflower seeds, pumpkin seeds, and sesame seeds to the dough during mixing. You can also press seeds onto the top of the loaf before the second rise.
- Herb and Garlic Bread: Fold in 1 tablespoon of dried rosemary and 2 cloves of minced garlic when mixing the dough for a savory, aromatic loaf. Or take inspiration from this Garlic Naan Bread Recipe for more garlic bread flavor ideas.
- Cinnamon Raisin: Add 1 teaspoon of cinnamon and ½ cup (75g) of raisins to the dough during the mixing stage. Roll them in before shaping the loaf.
- Spelt or Einkorn Substitution: Try milling spelt or einkorn berries instead of standard wheat berries. These ancient grains have slightly different gluten structures and produce bread with unique, complex flavors.
Read Also: Sweet Sourdough Bread Recipe
Storage and Reheating
Proper storage keeps your fresh milled flour bread tasting its best for as long as possible.
Because fresh milled flour contains natural oils from the wheat germ, this bread goes stale slightly faster than white flour bread. Storing it correctly makes a meaningful difference.
- Room temperature: Wrap the cooled loaf tightly in beeswax wrap, plastic wrap, or store it in a zip-lock bag or bread bag at room temperature. It will stay fresh for 2 to 3 days.
- Refrigerator: Refrigerating bread is generally not recommended as it accelerates staling, but if your kitchen is warm and humid, a brief stay in the fridge in an airtight bag is better than letting the bread mold.
- Freezer: Slice the loaf before freezing for easy portioning. Wrap individual slices in plastic wrap and store them in a freezer-safe bag for up to 3 months. Pull out individual slices as needed.
- Reheating from frozen: Toast frozen slices directly in a toaster or toaster oven. For a full loaf, thaw overnight at room temperature, then refresh in a 350°F (175°C) oven for 10 minutes.
You might also love making a batch of Homemade Biscuits to serve alongside your fresh baked bread spreads.
Nutritional Facts
The following nutritional information is an estimate per slice, based on a loaf yielding approximately 12 slices. Values will vary slightly depending on the type of wheat berries used and any additions to the recipe.
| Nutrient | Per Slice (approx.) |
|---|---|
| Calories | 155 kcal |
| Total Fat | 3g |
| Saturated Fat | 1.2g |
| Carbohydrates | 28g |
| Dietary Fiber | 4g |
| Sugars | 2g |
| Protein | 5.5g |
| Sodium | 240mg |
| Iron | 10% DV |
| Magnesium | 8% DV |
Nutritional values are estimates only and will vary based on specific ingredients used.
Another wholesome bread option worth exploring is this Gluten-Free Dairy-Free Bread Recipe for those with dietary restrictions.
Health Benefits of Key Ingredients
Freshly milled whole wheat flour isn’t just delicious. It’s genuinely one of the most nutrient-dense ingredients you can build a loaf around.
Unlike commercial whole wheat flour (which often has the germ removed and then added back in degraded form), freshly milled flour retains all three parts of the wheat kernel: the bran, germ, and endosperm. This makes it nutritionally superior in virtually every way.
- High in fiber: The bran in fresh milled flour is rich in dietary fiber, which supports digestive health, helps regulate blood sugar, and promotes a lasting feeling of fullness.
- Rich in B vitamins: Freshly milled flour contains significant amounts of thiamine, riboflavin, niacin, and B6, all of which are essential for energy metabolism and brain function.
- Good source of minerals: Whole wheat flour provides iron, magnesium, phosphorus, and zinc, which support everything from immune function to bone health.
- Natural healthy fats: The wheat germ contains polyunsaturated fats and vitamin E, an antioxidant that protects cells from oxidative damage.
- Lower glycemic impact: Whole grain bread made with fresh milled flour has a lower glycemic index than white bread, meaning it causes a more gradual rise in blood sugar, which is better for sustained energy levels.
- Honey: A natural sweetener that adds trace antioxidants and antimicrobial properties, making it a smarter choice than refined white sugar in baking.
Read Also: 4 Ingredient Gluten Free Bread Recipe
Frequently Asked Questions
1. Can I use a regular blender or coffee grinder instead of a grain mill?
A dedicated grain mill is strongly recommended because it produces a fine, consistent flour with the proper texture for bread baking. A coffee grinder can mill small amounts of grain, but the flour tends to be unevenly textured and the grinder can overheat, damaging the delicate oils in the wheat germ. A high-powered blender like a Vitamix can work in a pinch for smaller batches, but the results will not be as fine or consistent as a proper grain mill.
2. What type of wheat berries work best for this recipe?
Hard white wheat berries are the most popular choice for sandwich bread because they produce a milder, lighter-flavored loaf. Hard red wheat berries give a more robust, slightly bitter, earthy flavor that many bakers love. Soft wheat berries are better suited to pastries and quick breads, not yeasted sandwich loaves, as they have lower protein and gluten content.
3. Why is my fresh milled flour bread so dense?
Density is the most common challenge when first baking with fresh milled flour. The most frequent causes are: not enough hydration (fresh milled flour needs more water than white flour), not enough kneading to develop gluten strength, the dough not rising long enough before baking, or the oven temperature being too low. Make sure you measure by weight, give the dough ample rise time, and always verify oven temperature with a thermometer.
4. Do I have to use a stand mixer?
Not at all. This bread can absolutely be made by hand. Hand kneading whole grain dough does take more time and effort, typically 10 to 12 minutes of active kneading, compared to 5 to 6 minutes in a stand mixer. Your goal is a smooth, elastic dough that springs back slowly when poked. If your hands are tiring out before the dough is smooth, take a 5-minute rest break and come back to it.
5. Can I make this recipe with a sourdough starter instead of active dry yeast?
Yes, and it produces an even more flavorful loaf. To adapt this recipe, replace the active dry yeast with ½ cup (120g) of active, bubbly sourdough starter. Reduce the water slightly to about 1 cup (240ml) and omit the honey if you prefer a more sour profile. The rise times will be significantly longer, typically 4 to 8 hours for the first rise and 1 to 2 hours for the second, depending on the strength and temperature of your starter.
For a complete guide to maintaining your own starter, check out this Sourdough Starter Recipe.

Fresh Milled Flour Bread
Equipment
- Grain mill or home flour mill - For milling wheat berries into fresh flour
- Stand mixer with dough hook - Or use a large mixing bowl for hand kneading
- 9×5-inch loaf pan - Greased before use
- Kitchen scale - Highly recommended for accurate flour measurements
- Instant-read thermometer - For checking water temperature and bread doneness
- Large mixing bowl - For proofing the dough
- Clean kitchen towel or plastic wrap - For covering the dough during rises
- Wire cooling rack - For cooling the loaf after baking
- Pastry brush - (Optional) For applying egg wash or milk to the top crust
- Serrated bread knife - For slicing the cooled loaf
Ingredients
- 4 cups freshly milled whole wheat flour - 480g; hard red or hard white wheat berries, milled just before baking
- 1 ¼ cups warm water - 300ml; around 110°F / 43°C
- 2 ¼ tsp active dry yeast - 7g; one standard packet
- 2 tbsp honey - 30ml
- 1 ½ tsp salt - 9g
- 2 tbsp unsalted butter - 28g; softened; or substitute neutral oil such as avocado or coconut oil
- 1 tbsp olive oil - 15ml; for greasing the proofing bowl
Instructions
- Mill approximately 2½ cups (450g) of wheat berries on the finest setting of your grain mill to yield about 4 cups (480g) of fresh flour. Allow the milled flour to rest for 15 minutes to cool before using.
- Combine the warm water (110°F / 43°C) and honey in a small bowl, then sprinkle the yeast over the top. Let it sit for 5 to 10 minutes until the mixture is foamy and bubbly.
- In the bowl of a stand mixer, combine the flour and salt, then add the yeast mixture and softened butter. Mix on low for 2 minutes, then increase to medium and knead for 5 to 6 minutes until smooth and slightly tacky. For hand kneading, work the dough for 8 to 10 minutes on a lightly floured surface.
- The dough should be slightly tacky but not sticky enough to smear; add flour one tablespoon at a time if too sticky, or a teaspoon of warm water if too dry. Fresh milled dough will naturally feel denser than white flour dough.
- Shape the dough into a ball, place it in a lightly oiled bowl, and turn to coat. Cover with a kitchen towel and let rise in a warm, draft-free spot for 1 to 1½ hours, or until roughly doubled in size.
- Punch down the risen dough, turn it out onto a lightly floured surface, and pat it into a 9×12-inch rectangle. Roll it tightly from the short end into a log, pinch the seam closed, and place it seam-side down in a greased 9×5-inch loaf pan.
- Cover the loaf pan loosely and let the dough proof in a warm spot for 45 minutes to 1 hour, until it rises about 1 inch above the rim. Preheat your oven to 375°F (190°C) during the last 20 minutes of proofing.
- Optionally brush the top of the loaf with milk or beaten egg, then bake on the center rack for 30 to 35 minutes until deep golden brown and the internal temperature reads 190 to 200°F (88 to 93°C). Tent with foil if the crust browns too quickly.
- Immediately turn the loaf out onto a wire cooling rack and let it cool for at least 30 minutes before slicing. Use a sharp serrated knife with gentle sawing motions for clean slices.
Notes
- Mill your flour immediately before baking for maximum flavor and nutrition. The natural oils in the wheat germ begin to oxidize quickly after milling.
- Always weigh your flour rather than measuring by volume for consistent, repeatable results. Fresh milled flour can pack and settle differently each time.
- Hard white wheat berries produce a milder, lighter-flavored loaf, while hard red wheat berries give a more robust, earthy flavor. Both work well in this recipe.
- If your yeast does not foam within 10 minutes, it may be expired or the water temperature may be off. Start over with fresh yeast before proceeding.
- Whole grain doughs rise more slowly than white flour doughs because bran particles cut through gluten strands. Judge rise by size (doubled), not strictly by time.
- Do not skip the 30-minute cooling period before slicing. Cutting too early releases steam and results in a gummy, collapsed crumb interior.
- To adapt this recipe for sourdough, replace the yeast with ½ cup (120g) of active sourdough starter, reduce water to 1 cup (240ml), and allow much longer rise times (4 to 8 hours for the first rise).
- Store the cooled loaf tightly wrapped at room temperature for 2 to 3 days, or freeze sliced portions for up to 3 months. Toast frozen slices directly from the freezer.
- For a seeded variation, fold in 2 tablespoons each of sunflower seeds, pumpkin seeds, and sesame seeds during mixing, and press extra seeds onto the top before the second rise.
- If you do not own a grain mill, a high-powered blender such as a Vitamix can mill small amounts of wheat berries in a pinch, though the flour texture will be less consistent than a dedicated mill.
Final Thoughts
Baking a fresh milled flour bread recipe from scratch is one of those deeply satisfying kitchen projects that rewards every bit of effort you put into it.
The moment you slice into that warm, golden loaf and catch that nutty, wheaty aroma, you’ll understand why home bakers become genuinely passionate about milling their own grain.
This recipe is your solid, trustworthy starting point. Once you’ve nailed it, the world of whole grain baking opens up beautifully.
Give it a try this weekend, and feel free to share your results in the comments below. I’d love to hear how your loaf turned out and what variations you tried!
Recommended:
- Einkorn Bread Recipe
- Manna Bread Recipe
- Sweet Sourdough Bread Recipe
- Blackberry Bread Recipe
- Chocolate Chip Bread Recipe
- Skillet Cornbread Recipe
- Sweet Cornbread Recipe
- Buttermilk Biscuit Recipe
- Easy Garlic Bread Recipe
- Easy Naan Bread Recipe


