If you’ve been craving the bold, saucy flavors of traditional enchiladas but don’t want to spend the evening rolling each one individually, this enchilada casserole recipe is exactly what you need.
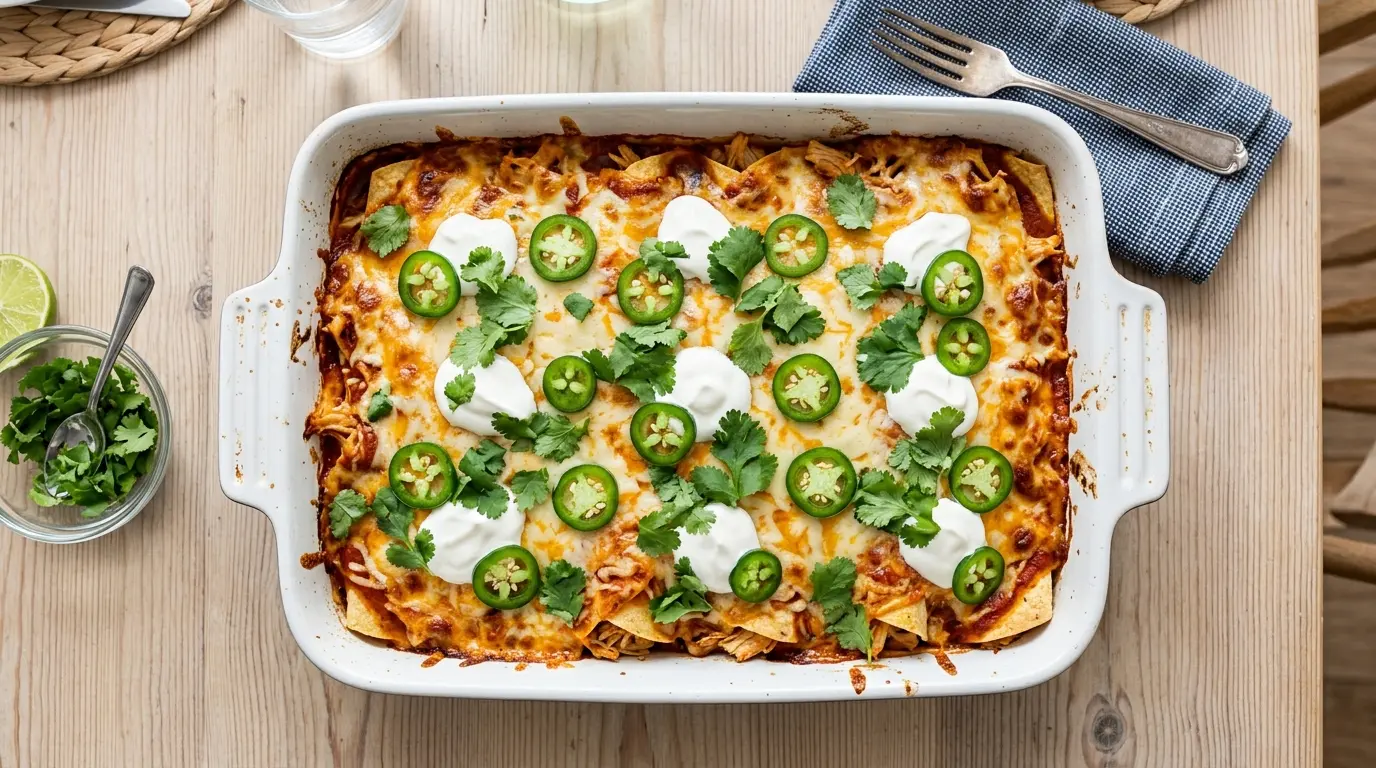
It layers all the same key components — seasoned ground beef, corn tortillas, red enchilada sauce, and loads of melty cheese — right inside a 9×13 baking dish, stacked up like a savory Tex-Mex lasagna.
This dish is a weeknight hero. It feeds a crowd, reheats like a dream, and comes together in under an hour.
The magic of this recipe is in the layering technique. By briefly dipping the corn tortillas in enchilada sauce before assembling, you infuse every single layer with deep, chili-forward flavor rather than leaving that work to the filling alone.
And because the sauce seeps into every tortilla as it bakes, what comes out of the oven is tender, cohesive, and packed with Tex-Mex goodness from top to bottom.
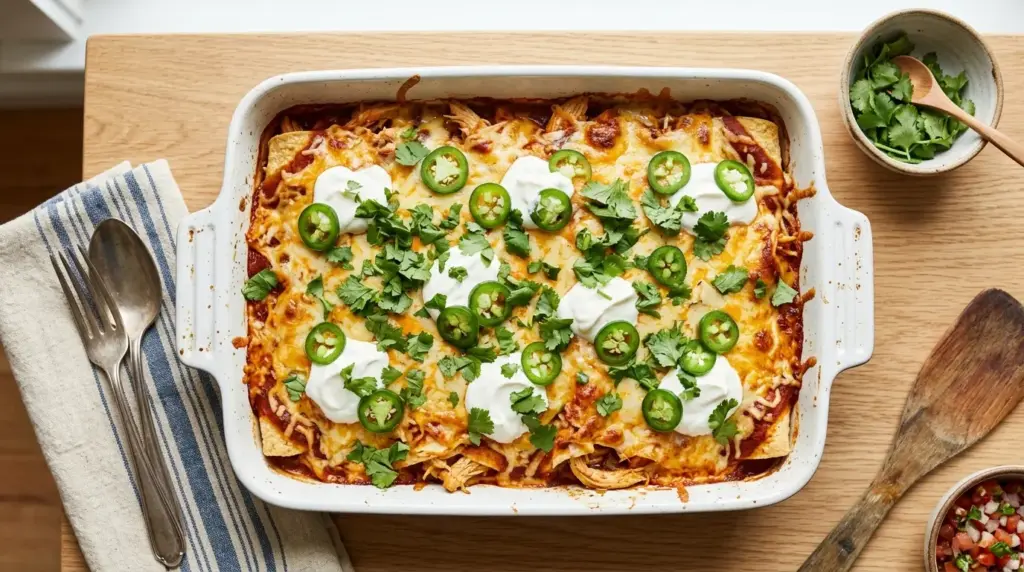
You can dress it up with all your favorite toppings right at the table — sour cream, fresh pico de gallo, jalapeños, avocado — or keep it simple. Either way, this casserole is going to earn a permanent spot in your dinner rotation.
You might also enjoy the classic Enchiladas Suizas Recipe for another amazing tortilla-based baked dinner!
Why You’ll Love This Enchilada Casserole Recipe
This dish has everything going for it: bold flavor, satisfying texture, and an easy, forgiving assembly process.
It’s the kind of recipe that looks impressive but takes very little technique to pull off.
Even beginner cooks can nail this one on the first try, and more experienced cooks will appreciate how easily it scales up for a bigger crowd.
Here’s why this enchilada casserole deserves a spot in your regular dinner rotation:
- No rolling required. Skip the tedious step of individually stuffing and rolling enchiladas — layering gets you the same flavors in a fraction of the time.
- Crowd-friendly portion size. One 9×13 dish serves 6 to 8 people generously, making it perfect for family dinners, potlucks, or meal prep.
- Customize to your heart’s content. Swap the ground beef for shredded chicken, add black beans, stir in corn — this recipe is incredibly flexible.
- Make-ahead friendly. Assemble the night before and refrigerate unbaked, then pop it in the oven when you’re ready.
- Budget-conscious. Ground beef, canned sauce, tortillas, and cheese are all affordable, pantry-staple ingredients that don’t break the bank.
- Leftovers taste even better. The sauce continues to soak into the tortillas overnight, making day-two slices deeply flavorful and satisfying.
Another favorite for weeknights: Enchilada Skillet Recipe
Ingredients
This recipe uses simple, widely available ingredients. The combination of refried beans and chunky salsa mixed into the beef filling is what makes this particular version extra cohesive and saucy — the beans act as a binder that holds everything together as it bakes.
Here’s what you’ll need:
For the Beef Filling:
- 1½ lbs (680g) ground beef (85% lean recommended)
- 1 medium yellow onion, diced
- 3 garlic cloves, minced
- 1 can (15 oz / 425g) refried beans
- 1 cup (240ml) chunky salsa (mild, medium, or hot based on preference)
- 1 teaspoon chili powder
- 1 teaspoon ground cumin
- ½ teaspoon garlic powder
- ½ teaspoon onion powder
- Salt and black pepper, to taste
For the Casserole Assembly:
- 2½ cups (590ml) red enchilada sauce (store-bought or homemade)
- 12 corn tortillas (6-inch / 15cm)
- 2 cups (225g) shredded sharp cheddar cheese
- 1 cup (113g) shredded Monterey Jack cheese
- Cooking spray
Optional Toppings:
- Sour cream
- Fresh cilantro
- Sliced jalapeños
- Diced tomatoes
- Sliced black olives
Read Also: Enchilada Sauce Recipe
Kitchen Equipment Needed
You don’t need any specialized tools for this recipe. A large skillet for the filling, a baking dish for assembly, and some basic utensils are all that’s required.
Here’s the full list of what you’ll need:
- 9×13 inch baking dish
- Large skillet or sauté pan
- Wooden spoon or spatula
- Shallow bowl (for dipping tortillas in sauce)
- Aluminum foil
- Ladle or measuring cup
- Chef’s knife and cutting board
- Box grater (for shredding cheese from block, which melts better than pre-shredded)
- Meat thermometer (optional, for checking internal temperature)
This dish pairs beautifully with a classic Taco Casserole Recipe if you’re planning a Tex-Mex themed dinner night!
Recommended Products for This Recipe
These are products selected based on quality and real-world performance for this specific recipe. Each one genuinely improves the outcome.
1. HeatSafe Ceramic 9×13 Baking Dish
A quality baking dish with high sides ensures the casserole layers hold their shape while baking evenly without burning the edges. Ceramic distributes heat gently and consistently, which is exactly what you want for a saucy, cheesy casserole. It also goes from oven to table beautifully.
2. Red Enchilada Sauce (Canned, Quality Brand)
The enchilada sauce is the backbone of this recipe’s flavor, and a quality brand makes a huge difference compared to bland generic options. Look for a sauce made with dried chiles, not just tomato paste, for a richer, more layered flavor. It’s the single ingredient that most affects the final dish.
3. Lodge Cast Iron Skillet (for the Filling)
Cooking the ground beef filling in a cast iron skillet builds a better fond and deeper browning than a standard nonstick pan. That extra browning translates directly to richer flavor in the casserole. Cast iron retains heat evenly, making it easier to cook large batches of beef without steaming.
4. Block Mexican Cheese Blend
Shredding cheese from a block rather than using pre-shredded bagged cheese makes a noticeable difference in meltability. Pre-shredded cheese contains anti-caking agents that prevent it from melting as smoothly. A block of Monterey Jack or Mexican blend shredded fresh will give you those gorgeous, stretchy cheese pulls.
5. Taco Seasoning Blend (Quality Mix)
While this recipe uses individual spices, a quality taco seasoning blend can be used as a convenient shortcut for the beef filling. A good blend will have balanced ratios of chili powder, cumin, oregano, and garlic that save you time without sacrificing flavor.
Another great Mexican-inspired casserole option: Chicken Broccoli Rice Casserole Recipe
Step-by-Step Instructions
Step 1: Preheat the Oven and Prepare the Baking Dish
- Preheat your oven to 375°F (190°C). Position a rack in the center of the oven for even heat distribution.
- Lightly coat your 9×13 inch (23x33cm) baking dish with cooking spray, making sure to cover the sides as well as the bottom. This prevents the tortillas from sticking to the dish edges during baking.
- Set the baking dish aside while you prepare the filling.
Step 2: Cook the Ground Beef Filling
- Heat a large skillet over medium-high heat. Once hot, add the 1½ lbs (680g) of ground beef to the pan.
- Break the beef apart with a wooden spoon or spatula into small crumbles as it cooks. Do not stir constantly — letting the meat sit for 30 to 45 seconds at a time encourages browning, which builds flavor.
- After about 3 minutes, add the diced yellow onion directly to the skillet with the beef. Stir to combine and continue cooking for another 4 to 5 minutes, until the beef is fully cooked through with no pink remaining and the onion has softened.
- Add the minced garlic and stir for about 30 seconds until fragrant. Be careful not to let the garlic burn.
- If there is excess grease in the pan, carefully tilt the skillet and spoon out or drain off the excess fat, leaving just a thin coating.
Step 3: Season and Add the Beans and Salsa
- Reduce the heat to medium. Sprinkle in the 1 teaspoon chili powder, 1 teaspoon ground cumin, ½ teaspoon garlic powder, and ½ teaspoon onion powder directly over the beef mixture.
- Stir well to coat the beef and onions evenly with the spices. Cook for 1 minute, stirring constantly, to bloom the spices in the heat — this deepens their flavor significantly.
- Add the entire can of refried beans (15 oz / 425g) to the skillet. Stir thoroughly to incorporate the beans into the beef. The mixture will thicken noticeably.
- Pour in 1 cup (240ml) of chunky salsa. Stir again until evenly combined. The salsa adds moisture, acidity, and a burst of tomato and pepper flavor that brightens the whole filling.
- Taste the filling and adjust with salt and black pepper as needed. Remove from heat and set aside.
Step 4: Prepare the Enchilada Sauce and Tortillas
- Pour 2 cups (475ml) of red enchilada sauce into a shallow bowl or wide dish. Reserve the remaining ½ cup (120ml) of sauce for the base of the baking dish.
- Take a corn tortilla and briefly dip it in the enchilada sauce, turning to coat both sides. You’re not soaking it — just a quick 2 to 3 second dip on each side is enough. This step infuses the tortilla with flavor and helps it soften during baking without becoming mushy.
- Set the dipped tortilla on a plate and repeat with the remaining tortillas. Work in small batches so the tortillas don’t stack and tear before you’re ready to use them.
Step 5: Build the First Layer
- Pour the reserved ½ cup (120ml) of enchilada sauce into the bottom of the prepared baking dish. Use the back of a spoon or a spatula to spread it into an even layer across the entire bottom. This prevents the bottom tortillas from sticking and helps the first layer absorb flavor.
- Arrange 6 sauce-dipped corn tortillas over the sauce layer, covering the bottom of the dish as completely as possible. You may need to overlap the edges slightly or cut a tortilla in half to fit the corners. The goal is full coverage with no large gaps.
Step 6: Add the First Beef Layer and Cheese
- Spoon half of the beef filling (approximately 2 cups / 475g) over the tortilla layer. Spread it out evenly using the back of a spoon or an offset spatula, reaching all the way to the edges.
- Sprinkle 1 cup (113g) of shredded sharp cheddar and ½ cup (57g) of shredded Monterey Jack over the beef filling, distributing the cheese evenly. The cheese layer in the middle helps meld the layers together and adds richness throughout the casserole.
Step 7: Build the Second Layer
- Arrange the remaining 6 sauce-dipped corn tortillas over the first cheese layer, again covering as completely as possible and overlapping the edges where needed.
- Spoon the remaining half of the beef filling over the second layer of tortillas and spread it evenly to the edges.
- Top with the remaining 1 cup (113g) of shredded sharp cheddar and ½ cup (57g) of Monterey Jack cheese.
- If you have any remaining enchilada sauce left in the bowl after dipping, drizzle it evenly over the top cheese layer for extra moisture and flavor.
Step 8: Cover and Bake
- Tear off a sheet of aluminum foil large enough to cover the baking dish completely. Lightly spray the underside of the foil with cooking spray so it doesn’t stick to the cheese.
- Cover the dish tightly with the foil. Place the covered dish in the preheated oven.
- Bake covered for 20 minutes. During this time, the casserole will heat all the way through and the tortillas will begin to soften and absorb the sauce.
Step 9: Uncover and Finish Baking
- After 20 minutes, carefully remove the foil from the dish (watch out for hot steam when lifting the edge).
- Return the uncovered casserole to the oven and bake for an additional 10 to 15 minutes, until the top cheese layer is fully melted, bubbly, and beginning to turn golden at the edges.
- The casserole is done when the internal temperature in the center reads at least 165°F (74°C) on an instant-read thermometer, or when the edges are bubbling and the cheese is beautifully browned.
Step 10: Rest, Slice, and Serve
- Remove the casserole from the oven and allow it to rest uncovered for 5 to 10 minutes before cutting. This resting time is important — it lets the layers firm up slightly, making the casserole much easier to slice and serve in clean portions.
- Use a sharp knife or bench scraper to cut the casserole into 6 to 8 servings. A wide spatula works well to lift individual portions cleanly out of the dish.
- Serve immediately with your choice of toppings: sour cream, fresh cilantro, sliced jalapeños, diced tomatoes, or sliced black olives.
This casserole pairs wonderfully alongside homemade Chicken Tortilla Soup for the ultimate Tex-Mex spread!
Tips for Success
A few smart techniques make the difference between a good enchilada casserole and a truly great one. Keep these pointers in mind as you cook.
- Dip, don’t soak. A quick 2 to 3 second dip per side in the enchilada sauce is enough. Over-soaking will make the tortillas too soft and the casserole can become soggy.
- Drain the beef thoroughly. After browning, draining excess fat from the beef prevents a greasy casserole and keeps the filling from making the layers too wet.
- Shred your own cheese. Block cheese melts smoother and more evenly than pre-shredded because it doesn’t contain anti-caking starches. The difference in texture is noticeable.
- Spray the foil before covering. Lightly spraying the inside of the foil prevents it from sticking to and pulling off the top cheese layer when you remove it.
- Let it rest before slicing. Those 5 to 10 minutes of resting time allow the filling to set so it doesn’t ooze apart when you cut into it. Don’t skip this step.
- Taste your filling before assembling. The filling is where all your seasoning control happens. Once assembled and baked, you can’t adjust the salt or spice level, so get it right at the skillet stage.
- Warm cold tortillas before dipping. If your corn tortillas are brittle or crack when you try to dip them, wrap them in a damp paper towel and microwave for 30 seconds to soften them before using.
Also try this simple Taco Seasoning Recipe to make your own spice blend for the beef filling!
Serving Suggestions
This casserole is incredibly satisfying on its own, but rounding it out with a few sides and toppings turns dinner into a full feast.
A generous spread of fresh, colorful toppings right at the table is the perfect way to let everyone customize their serving.
Here are some of the best ways to serve this enchilada casserole:
- Sour cream drizzled over the top adds cool, creamy richness that balances the heat from the enchilada sauce beautifully.
- Fresh Pico de Gallo brings brightness, acidity, and crunch — the perfect contrast to all that melty cheese.
- Easy Guacamole served alongside is a crowd favorite that makes this feel like a full restaurant-quality Tex-Mex dinner.
- Mexican Street Corn is a phenomenal side dish that complements the bold flavors in the casserole without competing with them.
- Sliced avocado layered over individual portions adds healthy fats and a buttery, mild flavor that rounds out each bite.
- Simple green salad with lime vinaigrette provides a refreshing contrast and some greenery to balance the richness of the casserole.
- Warm flour or corn tortillas served on the side are perfect for scooping up any extra filling that spills out when you slice.
You might also enjoy: Chicken Fajita Recipe
Variations to Try
One of the best things about enchilada casserole is how flexible it is. The layered format accommodates a wide variety of proteins, fillings, and sauces without changing the technique at all.
Here are some popular and delicious variations to explore:
- Chicken Enchilada Casserole: Replace the ground beef with 3 cups of cooked, shredded rotisserie chicken. Season lightly with cumin, garlic powder, and a squeeze of lime. This is a slightly lighter version that’s just as flavorful.
- Green Chile Chicken Version: Use green enchilada sauce instead of red, and pair it with shredded chicken, canned green chiles, and Pepper Jack cheese for a tangy, slightly spicy twist.
- Vegetarian Enchilada Casserole: Skip the meat entirely. Double up on the refried beans and add sautéed bell peppers, zucchini, corn, and black beans for a hearty, plant-based filling.
- Spicy Version: Add ¼ teaspoon cayenne pepper to the beef filling, use hot salsa, and top with extra sliced jalapeños. This one is for the heat lovers in the family.
- Breakfast Enchilada Casserole: Swap the beef for scrambled eggs, cooked breakfast sausage, and diced green peppers. Use a milder sauce and top with Colby Jack cheese for a brunch-worthy version.
- White Enchilada Casserole: Use a creamy white sauce (sour cream and chicken broth-based) instead of red enchilada sauce, and fill with shredded chicken and Monterey Jack cheese for a milder, creamier style.
Read Also: Corn Casserole Recipe
Storage and Reheating
This casserole stores beautifully, making it a fantastic option for weekly meal prep. The flavors actually deepen and improve after a night in the refrigerator.
Here’s how to store and reheat it properly:
- Refrigerator storage: Allow the casserole to cool completely before storing. Transfer individual portions or the full dish to an airtight container. Refrigerate for up to 4 days.
- Freezer storage (baked): Cover the cooled casserole tightly with two layers of plastic wrap followed by a layer of foil. Freeze for up to 3 months. Thaw overnight in the refrigerator before reheating.
- Freezer storage (unbaked): Assemble the casserole but do not bake. Cover tightly and freeze for up to 3 months. When ready, thaw overnight in the refrigerator and bake as directed, adding 10 to 15 extra minutes to the covered baking time.
- Reheating in the oven (best method): Preheat oven to 350°F (175°C). Cover the dish with foil and bake for 20 to 25 minutes until heated through. Uncover for the last 5 minutes to re-crisp the cheese.
- Reheating in the microwave: Place individual portions on a microwave-safe plate. Cover loosely with a damp paper towel (this prevents the tortillas from drying out) and heat in 1-minute intervals until warmed through.
Note: The tortillas will soften further as they sit in the fridge, which is actually quite delicious — the whole casserole takes on a dense, cohesive texture similar to a casserole rather than individual enchiladas.
Another comforting casserole to bookmark: Cowboy Casserole Recipe
Nutritional Facts
Nutrition estimates are based on 8 servings per recipe. Actual values will vary based on specific brands, cheese amounts, and optional toppings used.
| Nutrient | Per Serving (approx.) |
|---|---|
| Calories | 420 kcal |
| Total Fat | 22g |
| Saturated Fat | 10g |
| Cholesterol | 75mg |
| Sodium | 780mg |
| Total Carbohydrates | 32g |
| Dietary Fiber | 6g |
| Sugars | 4g |
| Protein | 26g |
| Calcium | 280mg |
| Iron | 3.5mg |
Note: Using reduced-fat cheese and leaner ground beef (93% lean) can meaningfully reduce the fat and calorie content. Reducing the cheese by half also cuts roughly 80 to 100 calories per serving.
For another satisfying casserole dinner idea, check out this Chicken Casserole Recipe!
Health Benefits of Key Ingredients
This enchilada casserole isn’t just delicious — the core ingredients each bring genuine nutritional value to the table.
Beyond the flavor, you’re getting a well-rounded mix of protein, fiber, and key micronutrients in every serving.
Here’s a closer look at the health benefits of the star ingredients:
- Ground beef is an excellent source of complete protein, zinc, iron, and B vitamins including B12, which supports energy production and neurological function. Using 85% lean beef keeps the fat moderate while preserving the rich flavor and satiety that makes this dish so filling.
- Corn tortillas are naturally gluten-free and lower in calories than flour tortillas. They also provide a small but meaningful amount of dietary fiber, magnesium, and phosphorus. Their firm structure holds up well during baking without adding excess carbs.
- Refried beans are a nutritional powerhouse in this recipe. They’re loaded with plant-based protein, soluble dietary fiber (which supports healthy cholesterol levels and digestive health), and resistant starch that feeds beneficial gut bacteria.
- Cheddar and Monterey Jack cheeses contribute calcium for bone health, phosphorus, and fat-soluble vitamins A and K2. Cheese also adds protein and fat that help the casserole keep you feeling full and satisfied long after the meal.
- Enchilada sauce (chili-based) contains capsaicin from dried chiles, which has been studied for its potential anti-inflammatory and metabolism-boosting properties. Chili-based sauces also provide lycopene from tomatoes, a powerful antioxidant.
- Salsa adds a low-calorie boost of vitamin C from tomatoes and peppers, along with antioxidants from fresh garlic and onions. Using chunky salsa keeps more of these nutrients intact compared to cooked sauce.
Read Also: Broccoli Casserole Recipe
Frequently Asked Questions
1. Can I use flour tortillas instead of corn tortillas?
Yes, you can use flour tortillas in this casserole. Corn tortillas are the more traditional choice and hold up slightly better during baking because they’re sturdier, but flour tortillas work well too.
If using flour tortillas, you don’t necessarily need to dip them in sauce before layering — they’ll absorb moisture from the filling and sauce as they bake. Just be aware that flour tortillas produce a slightly softer, less distinct layer structure compared to corn.
2. Can I make this enchilada casserole ahead of time?
Absolutely — this is one of the best features of this recipe. Assemble the entire casserole up to the point of baking, cover tightly with plastic wrap or foil, and refrigerate for up to 24 hours.
When ready to bake, remove the casserole from the refrigerator 30 minutes before putting it in the oven to allow it to come closer to room temperature. You may need to add 5 to 10 extra minutes to the covered baking time since it’s starting cold.
3. How do I prevent the casserole from getting soggy?
The main culprits for sogginess are too much sauce and over-dipping the tortillas. Keep your tortilla dips brief — just 2 to 3 seconds per side — and avoid using more than 2½ cups of enchilada sauce total.
Draining the beef well after browning also helps. Excess fat from the beef can pool at the bottom of the dish and make the lower layers wet. Baking uncovered for the final 10 to 15 minutes also helps evaporate any extra moisture.
4. Can I freeze this casserole before baking?
Yes, and this is actually the recommended method if you want the best texture after freezing. Assemble the full casserole, cover it tightly with a double layer of plastic wrap followed by foil, and freeze for up to 3 months.
When ready to use, thaw the casserole overnight in the refrigerator. Then remove it 30 minutes before baking, and bake as directed, increasing the covered baking time by about 15 minutes to ensure it heats through completely.
5. What’s the best cheese to use for enchilada casserole?
A combination of sharp cheddar and Monterey Jack is the classic and most popular choice. Sharp cheddar brings bold, tangy flavor, while Monterey Jack melts incredibly smoothly and creates that stretchy, melty texture everyone loves.
A pre-blended Mexican cheese mix (which typically contains cheddar, Monterey Jack, asadero, and queso quesadilla cheeses) is another great option that delivers a more complex flavor. For extra heat, try substituting Pepper Jack for the Monterey Jack.
Read Also: Green Bean Casserole Recipe
Final Thoughts
This enchilada casserole recipe delivers everything you love about traditional enchiladas — the saucy layers, the melty cheese, the bold Tex-Mex seasonings — without the time-consuming rolling process.
It’s the kind of dish that feels special enough for a weekend dinner but simple enough to make on a Tuesday night after work.
The layering technique, the quick tortilla dip in enchilada sauce, and the blend of refried beans and salsa in the filling all combine to create something that tastes like it took far more effort than it did.
Make it once, and it’s going to become one of those recipes you find yourself coming back to again and again — for weeknight dinners, potlucks, meal prep, and everything in between.
Give this enchilada casserole a try, and let us know how it turns out! Drop a comment below with your favorite variation or topping combination — we love hearing how you make the recipe your own.
Recommended:
- Squash Casserole Recipe
- Hashbrown Casserole Recipe
- Tater Tot Casserole Recipe
- Sweet Potato Casserole Recipe
- Birria Tacos Recipe
- Fresh Salsa Recipe
- Corn Tortilla Recipe
- Mexican Beef and Rice Skillet Recipe
- Easy Nachos Recipe
- Taco Skillet Recipe


