Creating your own sourdough starter recipe from scratch is one of the most rewarding projects you can undertake in the kitchen. This living culture of wild yeast and beneficial bacteria will become the heart of all your sourdough baking adventures, from crusty artisan loaves to fluffy pancakes and everything in between.
The process takes about 7 days from start to finish, but the hands-on time each day is just a few minutes. All you need is flour, water, and a little patience to cultivate your very own bubbly, active starter that can last for generations with proper care.
Once your starter is established, it opens up a whole new world of baking possibilities. You’ll be able to create naturally leavened breads with complex flavors and superior texture, all without relying on commercial yeast.
This guide walks you through the entire process with detailed daily instructions, troubleshooting tips, and everything you need to know to successfully maintain your starter for years to come. The result is a reliable culture that will transform simple ingredients into extraordinary baked goods.
Why You’ll Love This Sourdough Starter Recipe
Making your own starter connects you to centuries of baking tradition. This method has been tested and refined to give you the highest success rate, even if you’ve never worked with sourdough before.
The process is surprisingly forgiving and flexible. You don’t need any special equipment or fancy ingredients, just basic flour, water, and a jar.
Here’s what makes this recipe special:
- Uses simple pantry ingredients you already have
- Requires only 5-10 minutes of active time per day
- Creates a robust, reliable starter in about 7 days
- Works in any climate with easy temperature adjustments
- Eliminates commercial yeast from your baking routine
- Produces tangy, complex flavors you can’t get any other way
- Lasts indefinitely with minimal weekly maintenance
- Saves money compared to buying starter or commercial yeast
- Gives you complete control over your bread’s fermentation
This starter becomes more flavorful and reliable over time. Some bakers have kept their starters alive for decades, passing them down through generations.
Read Also: Sweet Sourdough Bread Recipe
Ingredients
Creating a sourdough starter requires just two basic ingredients, though starting with whole grain flour helps jumpstart fermentation by providing more nutrients for the wild yeast. After the initial days, you’ll transition to all-purpose or bread flour to build a strong, active culture. Using filtered or non-chlorinated water is important because chlorine can inhibit yeast growth.
For Days 1-2:
- 1 cup (120g) whole wheat flour or rye flour
- 1/2 cup (120g) filtered water, lukewarm (about 80°F/27°C)
For Days 3-7+ (Daily Feedings):
- 1 scant cup (113g) all-purpose flour or bread flour
- 1/2 cup (113g) filtered water, lukewarm
Total Quantities for 7 Days:
- Approximately 5 cups (600g) all-purpose or bread flour
- 1 cup (120g) whole wheat or rye flour
- Approximately 3.5 cups (840g) filtered water
Kitchen Equipment Needed
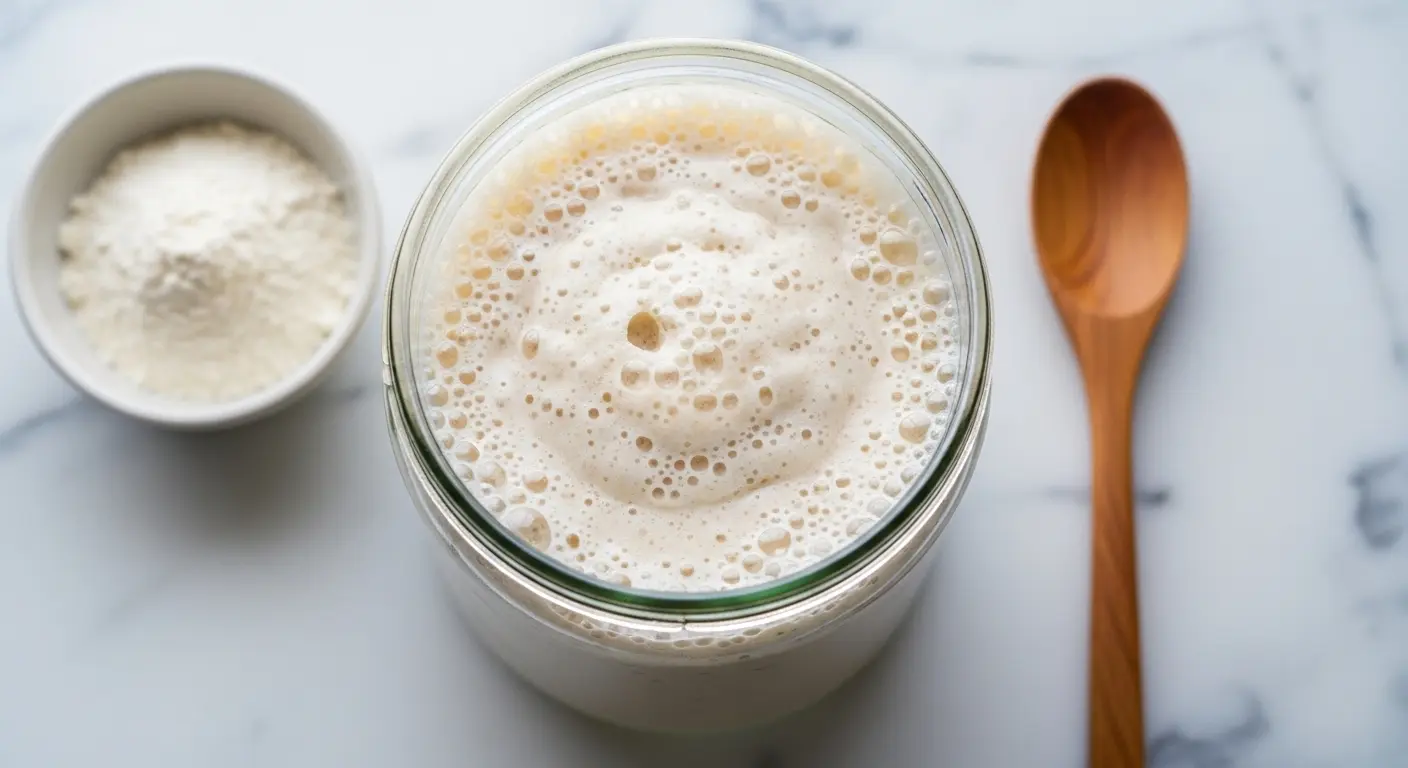
You don’t need specialized equipment to make a sourdough starter, but having the right tools makes the process easier and more accurate. A clear glass jar allows you to see the bubbles forming and monitor your starter’s growth. Using a kitchen scale ensures precise measurements, which is crucial for maintaining the proper flour-to-water ratio that keeps your starter healthy and active.
- Large glass jar or container (at least 1-quart capacity)
- Kitchen scale for accurate measurements
- Wooden spoon or silicone spatula for mixing
- Breathable cover (clean dish towel, coffee filter, or loose lid)
- Rubber band or string to secure the cover
- Thermometer (optional, for checking water temperature)
- Marker or rubber band for marking starter height
- Small bowl for discarding excess starter
Recommended Products for This Recipe
These carefully selected products will help you achieve the best results with your sourdough starter and make the maintenance process easier and more enjoyable.
1. Weck Glass Jar with Glass Lid
This traditional German canning jar is perfect for maintaining your sourdough starter. The straight sides make it easy to see fermentation activity, and the glass lid allows for breathability when placed loosely on top. The wide mouth makes feeding and stirring simple, and it’s dishwasher safe for easy cleaning.
2. OXO Good Grips Digital Kitchen Scale
Precision matters when feeding your starter, and this scale measures in both grams and ounces with accuracy down to 1 gram. The pull-out display ensures you can see the numbers even when using a large bowl. It’s an invaluable tool for consistent starter maintenance and all your sourdough baking.
3. King Arthur Organic All-Purpose Flour
This high-quality, organic flour consistently produces strong, active starters with excellent fermentation. The protein content is ideal for developing a robust yeast culture, and being organic means it’s free from additives that could inhibit fermentation. Many professional bakers rely on this flour for their sourdough starters.
4. Berkey Water Filter System
Since chlorine in tap water can slow down or prevent proper starter development, filtered water is essential. This gravity-fed system removes chlorine, fluoride, and other chemicals while retaining beneficial minerals. It’s a worthwhile investment for anyone serious about sourdough baking and overall water quality.
For a different approach to sourdough baking, check out Same Day Sourdough Bread Recipe.
Step-by-Step Instructions
Follow these detailed daily instructions to create your sourdough starter from scratch. Consistency is key during the first week, so try to feed your starter at approximately the same time each day.
1. Day 1: Initial Mix
Begin your sourdough journey by combining whole grain flour with water to create the base for your starter.
- Place your clean glass jar on the kitchen scale and tare it to zero
- Add 1 cup (120g) whole wheat flour or rye flour to the jar
- Add 1/2 cup (120g) lukewarm filtered water (about 80°F/27°C)
- Stir vigorously with a wooden spoon or spatula for about 1 minute, ensuring there are no dry pockets of flour
- Scrape down the sides of the jar so all the mixture is at the bottom
- Cover the jar loosely with a breathable cloth secured with a rubber band, or place the lid on loosely (do not seal tightly)
- Mark the height of the mixture with a marker or rubber band on the outside of the jar
- Place the jar in a warm spot (ideally 70-75°F/21-24°C) away from direct sunlight
- Leave undisturbed for 24 hours
The mixture will look thick and pasty at this stage. Don’t worry if you don’t see any activity on day 1, this is completely normal.
2. Day 2: First Feeding
On day 2, you may notice some small bubbles forming, or the mixture might still look unchanged. Either scenario is fine.
- Remove and discard half of the starter mixture (about 113g or 1/2 cup), saving it in a small bowl if you want to use it later
- Add 1 scant cup (113g) all-purpose flour or bread flour to the remaining starter in the jar
- Add 1/2 cup (113g) lukewarm filtered water
- Stir vigorously for 1-2 minutes until everything is well combined and the mixture is smooth
- Scrape down the sides of the jar
- Mark the new height with a marker or move your rubber band to the new level
- Cover loosely and return to your warm spot
- Leave for another 24 hours
At this stage, the discard doesn’t have much flavor yet and is not recommended for recipes. You can compost it or throw it away.
3. Day 3: Establishing Routine
By day 3, you should start seeing more consistent bubbling activity. The starter might have a slightly sour smell.
- At the same time as yesterday, discard half of the starter (113g)
- Feed with 1 scant cup (113g) all-purpose or bread flour
- Add 1/2 cup (113g) lukewarm filtered water
- Mix thoroughly until smooth and lump-free, stirring for at least 1 minute
- Scrape down the sides to keep the jar clean
- Mark the height and cover loosely
- Place back in the warm location
- Check after 12 hours to observe any rise or bubble formation
You might notice the starter rising slightly between feedings now. This is a good sign that wild yeast is beginning to colonize.
4. Day 4: Building Strength
Day 4 often shows more dramatic changes. The starter might rise noticeably and develop more bubbles throughout.
- Discard half of the starter at your regular feeding time
- Add 1 scant cup (113g) all-purpose or bread flour
- Pour in 1/2 cup (113g) lukewarm filtered water
- Stir vigorously for 1-2 minutes, ensuring complete incorporation
- Clean the sides of the jar with your spatula
- Mark the new level and cover
- Return to the warm spot
- Observe the starter’s activity over the next 24 hours
If your starter seems sluggish at this point, make sure it’s in a warm enough location. You can place it in an oven with just the light on for gentle warmth.
5. Day 5: Increasing Activity
By day 5, your starter should be showing consistent signs of life with regular bubbling and a pleasant tangy aroma.
- Perform the daily discard of half the starter
- Feed with 1 scant cup (113g) flour
- Add 1/2 cup (113g) lukewarm water
- Mix thoroughly for 1-2 minutes until smooth
- Scrape the jar sides clean
- Mark the height and cover loosely
- Place in warm location
- Check every few hours to see how quickly it rises
The starter might now be rising and falling in a more predictable pattern. Note how long it takes to reach its peak height.
6. Day 6: Near Maturity
Your starter is almost ready to use. It should be doubling in size within 4-12 hours after feeding.
- Discard half the starter as usual
- Feed with 1 scant cup (113g) flour
- Add 1/2 cup (113g) lukewarm water
- Stir well for 1-2 minutes
- Clean the jar sides
- Mark the height carefully this time
- Cover and place in warm spot
- Watch closely to see when it doubles, using the mark as your guide
- Perform the float test: drop a small spoonful into a glass of room temperature water (if it floats, the starter is active and ready to use)
If it passes the float test and consistently doubles after feeding, your starter is ready for baking.
7. Day 7 and Beyond: Ready to Use
Congratulations! If your starter has been doubling consistently and passes the float test, it’s ready to use in recipes.
- Continue daily feedings using the same discard-and-feed method
- Use the starter when it’s at its peak (doubled in size and very bubbly)
- Reserve at least 113g (1/2 cup) of starter after using some for a recipe
- Feed the reserved starter with 1 scant cup (113g) flour and 1/2 cup (113g) water
- If storing in the refrigerator, wait until it’s fully established with consistent activity
- Refrigerated starters need feeding only once per week
- Before baking, remove from the fridge and give it 1-2 feedings at room temperature
Your starter will continue to develop flavor and strength over the coming weeks and months.
If you enjoy working with alternative flours, try Einkorn Bread Recipe.
Tips for Success
These proven tips will help you navigate common challenges and ensure your sourdough starter thrives from day one through its entire lifetime.
Creating and maintaining a healthy starter:
- Use the same feeding schedule every day during the first week for consistency
- Keep your starter in a location that maintains 70-75°F (21-24°C) for optimal fermentation
- If your house is cold, place the jar in an oven with just the light on, or on top of the refrigerator
- Always use lukewarm water, not hot water, which can kill the yeast
- Stir vigorously during feedings to incorporate oxygen, which the yeast needs
- Use a clean jar every 3-4 days to prevent buildup of bacteria on the sides
- Don’t seal the jar tightly as the starter needs to breathe and can build up pressure
- If you see a layer of clear or dark liquid (hooch) on top, it means your starter is hungry, just stir it back in
- A strong alcohol or vinegar smell means the starter needs to be fed more frequently
- Mold (pink, green, or fuzzy white) means you should discard everything and start over
- Save your discard after day 5 for pancakes, waffles, crackers, and other recipes
- Whole wheat or rye flour feedings can give a sluggish starter a boost of activity
- Using filtered or bottled water is crucial in areas with heavily chlorinated tap water
- Label your jar with the date you started to track its age
- Keep notes during the first week about timing and changes to help you learn your starter’s patterns
This pairs beautifully with Same Day Sourdough Bread Recipe for quick sourdough baking.
Serving Suggestions
Once your starter is active and ready to use, the possibilities are endless. You can use it for traditional bread baking or explore a wide range of other recipes that benefit from sourdough fermentation.
Use your mature starter in classic sourdough boules and batards for crusty, tangy artisan loaves. The complex flavor develops over long, slow fermentation periods.
Ways to use your sourdough starter:
- Artisan sourdough bread with crispy crusts and open, airy crumb
- Sourdough pizza dough for thin, crispy bases with great flavor
- Sourdough pancakes and waffles that are fluffy and tender
- English muffins with signature nooks and crannies
- Sourdough cinnamon rolls with a subtle tang that balances the sweetness
- Crackers made from discard for a crispy, flavorful snack
- Sourdough bagels with chewy texture and complex taste
- Focaccia bread with herbs and olive oil
- Sourdough brownies and chocolate cake for unique desserts
- Biscuits and scones with layers and buttery flavor
Try pairing your sourdough creations with Homemade Alfredo Sauce for Italian-inspired meals.
Variations to Try
Once you have the basic sourdough starter down, you can experiment with different flours and techniques to create unique flavor profiles and characteristics. Each variation produces slightly different results in both the starter and the final baked goods.
Different starter variations:
- Whole wheat starter: Feed exclusively with whole wheat flour for a more robust, earthy flavor
- Rye starter: Use only rye flour for a tangier taste and faster fermentation
- Spelt starter: Creates a milder, slightly sweet flavor profile
- Einkorn starter: For ancient grain enthusiasts, produces a delicate, nutty taste
- Mixed grain starter: Combine different flours in each feeding for complex flavors
- Stiff starter (less water): Use 2:1 flour to water ratio for a firmer consistency preferred in some European breads
- Liquid starter (more water): Use equal parts flour and water by volume for a more liquid consistency
- Honey-fed starter: Add a tiny amount of honey to jumpstart fermentation in very cold climates
You might also enjoy Manna Bread Recipe for sprouted grain options.
Storage and Reheating
Proper storage ensures your sourdough starter remains healthy and ready to use whenever you need it. The storage method you choose depends on how frequently you plan to bake.
For regular bakers (using starter 2-3 times per week):
- Keep the starter at room temperature in a clean jar
- Feed it once daily using the standard discard-and-feed method
- Use it at its peak (doubled in size and bubbly) for best results in recipes
- Transfer to a fresh, clean jar every 3-4 days to prevent buildup
For occasional bakers (using starter once a week or less):
- Store the starter in the refrigerator in a jar with a loose lid
- Feed it once per week by removing it from the fridge, discarding half, and feeding with fresh flour and water
- Allow it to sit at room temperature for 2-3 hours after feeding before returning to the fridge
- Before baking, remove from refrigerator and give it 1-2 feedings at room temperature over 24 hours
For extended breaks (going on vacation or taking time off):
- Feed the starter well, let it rise at room temperature for 2 hours, then refrigerate
- It can survive in the fridge for up to 2-3 weeks without feeding
- Revive it with 2-3 daily feedings at room temperature before using it again
- For breaks longer than a month, dehydrate or freeze a backup
Note: Sourdough starter is a living culture and doesn’t require reheating. However, if you’ve refrigerated it, let it come to room temperature before feeding and using.
For sweet baking ideas using your starter, check out Amish Banana Bread Recipe.
Nutritional Facts
Serving Size: 2 tablespoons (30g) active sourdough starter
Servings: This recipe creates approximately 1 cup (240g) of starter
Per Serving:
- Calories: 60
- Total Fat: 0g
- Saturated Fat: 0g
- Trans Fat: 0g
- Cholesterol: 0mg
- Sodium: 0mg
- Total Carbohydrates: 13g
- Dietary Fiber: 0.5g
- Total Sugars: 0g
- Protein: 2g
- Vitamin D: 0mcg
- Calcium: 5mg
- Iron: 0.8mg
- Potassium: 30mg
Note: Nutritional values are approximate and vary based on the type of flour used. Most of the starter is discarded during feedings, so actual consumption is minimal.
Health Benefits of Key Ingredients
The fermentation process in sourdough starter creates more than just great flavor. The wild yeast and beneficial bacteria work together to transform simple flour and water into a nutritional powerhouse.
The lactic acid bacteria in sourdough produce enzymes that break down phytic acid in grains, making minerals like iron, zinc, and magnesium more bioavailable for your body to absorb. This means you get more nutrition from your bread.
Key health benefits:
- Improved digestibility compared to commercial yeast breads due to longer fermentation
- Lower glycemic index that helps regulate blood sugar levels
- Increased bioavailability of minerals through phytate breakdown
- Natural probiotics from beneficial bacteria that support gut health
- Higher levels of antioxidants created during fermentation
- Better protein digestibility from enzymatic breakdown
- Production of beneficial organic acids that may improve nutrient absorption
- Reduced gluten content due to fermentation (though not gluten-free)
- Rich in B vitamins, particularly folate and other B-complex vitamins
- Contains prebiotic fibers that feed beneficial gut bacteria
This technique also works wonderfully in Fresh Milled Flour Bread Recipe.
Frequently Asked Questions
1. How do I know when my sourdough starter is ready to use?
Your starter is ready when it consistently doubles in size within 4-12 hours after feeding and passes the float test. To perform the float test, drop a small spoonful of starter into a glass of room temperature water.
If it floats, the starter has enough gas bubbles and is active enough for baking. It should also have a pleasant, tangy aroma and be full of bubbles throughout.
2. Why do I need to discard half the starter?
Discarding maintains a healthy ratio of flour to yeast and bacteria, ensuring the microorganisms have enough food during fermentation. If you kept adding flour and water without discarding, you’d quickly have an enormous amount of starter that would be difficult to maintain.
The limited amount also means the yeast and bacteria don’t have to compete as much for nutrients, resulting in a stronger, more active culture. Save your discard after the first week for delicious recipes like pancakes, waffles, and crackers.
3. Can I use tap water for my sourdough starter?
It depends on your local water supply. If your tap water contains high levels of chlorine or chloramine, it can inhibit or kill the wild yeast and beneficial bacteria.
Try using filtered, bottled, or spring water instead. If you must use tap water, let it sit uncovered overnight to allow some chlorine to evaporate before using it.
4. My starter hasn’t shown any activity after 4 days, what should I do?
Don’t give up! Some starters take longer to activate, especially in cooler environments. Make sure your starter is in a warm location (70-75°F/21-24°C).
Try switching to whole wheat or rye flour for a few feedings, as these contain more nutrients that can help jumpstart fermentation. Continue the daily feeding routine, and most starters will eventually show signs of life within 10-14 days.
5. Can I speed up the sourdough starter process?
While the traditional method takes 7 days, you cannot safely rush true fermentation. However, you can optimize conditions by keeping your starter at a consistent warm temperature (around 75°F/24°C) and using whole grain flours.
Some people add a pinch of commercial yeast to jumpstart the process, but this defeats the purpose of cultivating wild yeast. Patience during the initial week results in a stronger, more reliable starter for years to come.
For another classic bread option, try Macaroni Grill Bread Recipe.
Final Thoughts
Creating your own sourdough starter from scratch is a journey that connects you to thousands of years of baking history. The simple act of combining flour and water creates something alive, a culture that will serve you for years with just a few minutes of weekly care.
The process might seem mysterious at first, but as you watch your starter bubble and grow each day, you’ll develop an intuition for its rhythms and needs. Soon, feeding your starter will become second nature, and you’ll find yourself eager to experiment with all the delicious recipes it makes possible.
Don’t be discouraged if your first attempt takes longer than expected or if you encounter challenges along the way. Every baker’s starter is unique, influenced by the wild yeast in their local environment.
Start your sourdough starter today and discover the satisfaction of baking bread the way it’s been made for centuries. Share your results in the comments below, and let me know what you bake first with your new starter!
Recommended:
- Sweet Sourdough Bread Recipe
- Same Day Sourdough Bread Recipe
- Einkorn Bread Recipe
- Manna Bread Recipe
- Amish Banana Bread Recipe
- Fresh Milled Flour Bread Recipe
- Macaroni Grill Bread Recipe
- Homemade Alfredo Sauce Recipe
- Gluten Free Dairy Free Bread Recipe
- Seeded Miso Sweet Potato Bread Recipe


