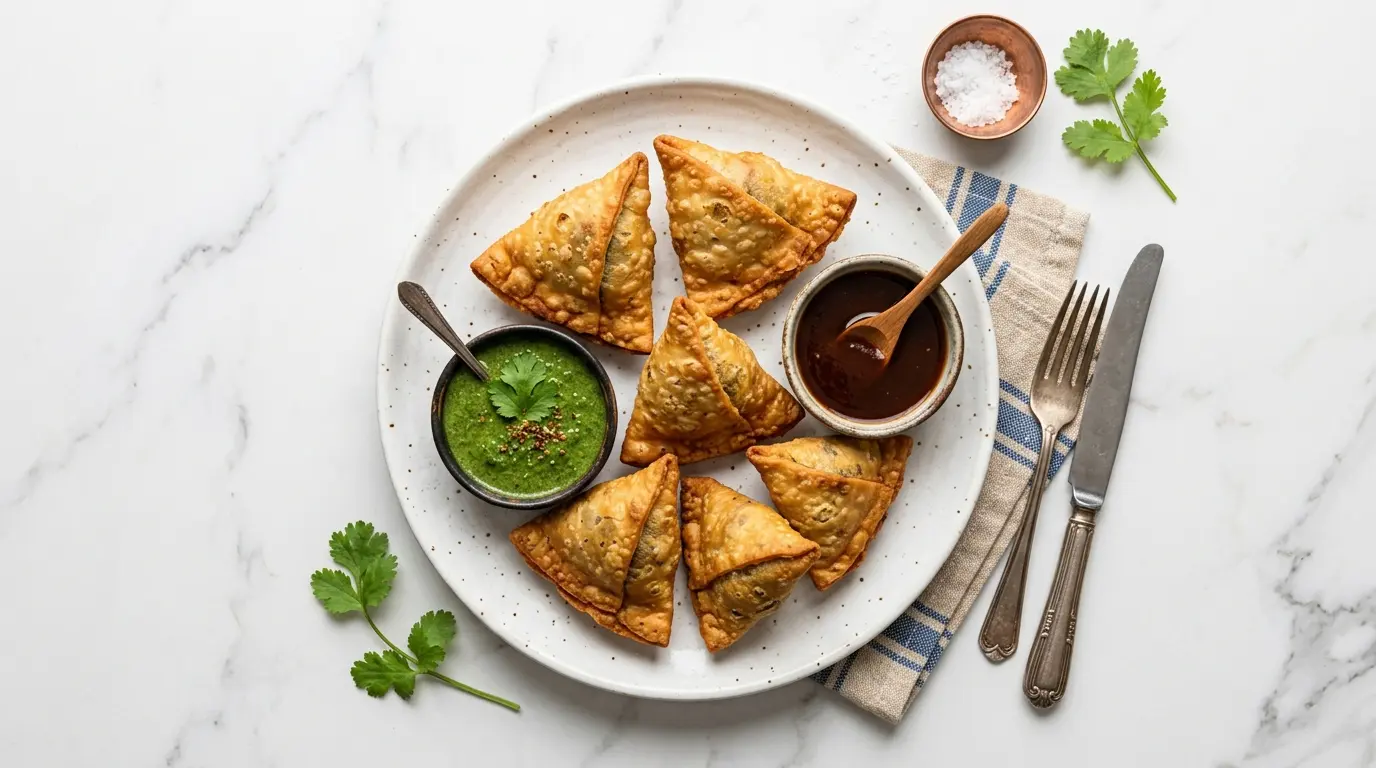
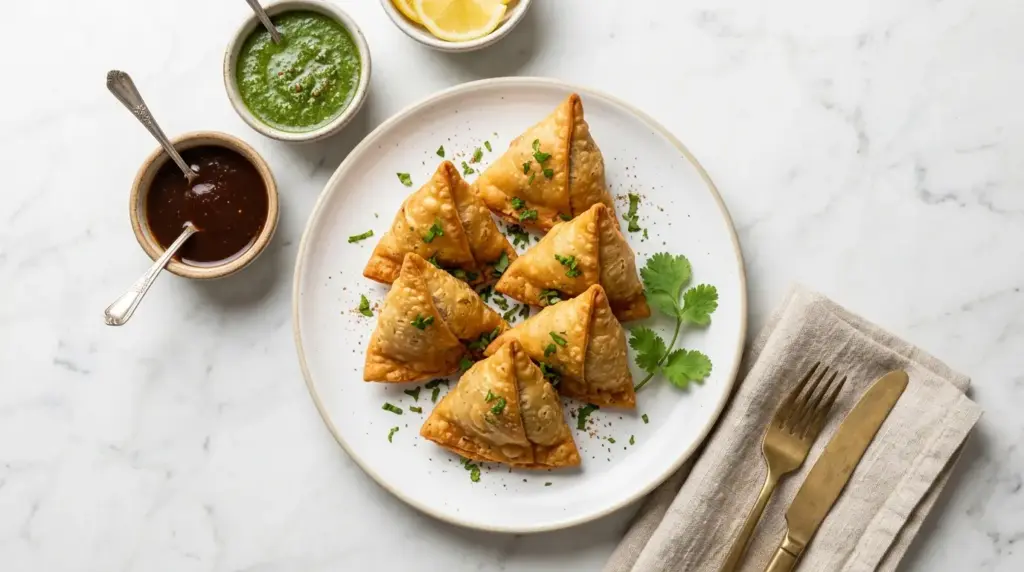
Few snacks can rival the satisfaction of biting into a perfectly crispy samosa. This samosa recipe gives you everything you need to make these iconic fried Indian pastries completely from scratch — flaky, golden shells packed with a warmly spiced potato and pea filling that is deeply savory, fragrant, and utterly addictive.
Samosas have been enjoyed across India, the Middle East, and Central Asia for centuries. The version most people know and love today — the Punjabi-style aloo (potato) samosa — is the undisputed king of Indian street food.
What makes this recipe special is the technique. By rubbing fat thoroughly into the flour before adding water, you create a dough that fries up beautifully flaky without being greasy or heavy.
Once you try homemade samosas, there’s no going back to store-bought. The difference is remarkable.
Pair them with a cool Cucumber Raita for the perfect contrast of hot and cold, creamy and crispy.
Why You’ll Love This Samosa Recipe
Homemade samosas are a labor of love, but the payoff is extraordinary. Every single element — from the crunch of the pastry to the aroma of the filling — is something you simply cannot replicate with frozen or restaurant versions.
Here’s why this recipe is worth every minute:
- Deeply flavorful filling: The potato and pea filling is seasoned with cumin, coriander, garam masala, fresh ginger, and green chili — a combination that creates layers of warm, earthy, slightly spicy flavor.
- Perfectly flaky pastry: The fat-to-flour ratio and rubbing technique are the secrets to a light, crispy shell with no sogginess.
- Customizable heat level: You control the spice, making these as mild or fiery as you like.
- Great for entertaining: Samosas are crowd-pleasers every single time, whether served as appetizers or party snacks.
- Make-ahead friendly: You can shape and freeze samosas ahead of time, then fry straight from frozen when you need them.
- Naturally vegetarian and vegan-adaptable: Use oil instead of ghee in the dough for a fully plant-based version.
Read Also: Authentic Butter Chicken Recipe
Ingredients
Getting the right ingredients makes all the difference in samosa quality. Use high-quality spices and fresh potatoes for the best-tasting filling, and make sure your ghee or oil is properly incorporated into the flour for that signature flaky crust.
For the Samosa Dough:
- 2 cups (260g) all-purpose flour (maida)
- 1/2 tsp ajwain seeds (carom seeds) — optional but traditional
- 1/2 tsp salt
- 4 tbsp ghee or neutral-flavored oil (such as vegetable or sunflower oil)
- 6–8 tbsp (90–120ml) cold water, added gradually
For the Potato and Pea Filling:
- 4 medium potatoes (about 1.5 lbs / 680g), boiled and roughly mashed
- 1/2 cup (75g) frozen green peas, thawed
- 2 tbsp oil or ghee
- 1 tsp cumin seeds
- 1 tsp garam masala
- 1 tsp ground coriander
- 1/2 tsp turmeric powder
- 1/2 tsp red chili powder (adjust to taste)
- 1/2 tsp amchur (dry mango powder) — adds essential tanginess
- 1 tbsp fresh ginger, finely grated
- 1–2 green chilies, finely chopped (adjust to heat preference)
- 2 tbsp fresh cilantro (coriander leaves), chopped
- Salt to taste
For Frying:
- Oil for deep frying (enough to fill your pot 3 inches / 7.5cm deep)
For Sealing:
- 2 tbsp all-purpose flour mixed with 2 tbsp water (flour paste for sealing edges)
This pairs perfectly with our Indian Onion Salad for a restaurant-worthy presentation.
Kitchen Equipment Needed
Having the right tools makes the process smoother and helps you achieve that perfect samosa shape and texture. You don’t need anything fancy, but a few key items are worth having on hand.
- Large mixing bowl
- Deep frying pot or Dutch oven
- Cooking thermometer — essential for monitoring oil temperature
- Rolling pin
- Sharp knife or pastry cutter
- Slotted spoon or spider strainer
- Paper towels for draining
- Baking sheet or plate for resting shaped samosas
- Small bowl for flour paste
- Pastry brush or fingertips for sealing
Recommended Products for This Recipe
These are products chosen for quality and performance to help you make the best possible samosas at home.
1. Pure Desi Cow Ghee
Using authentic ghee in your samosa dough makes a tremendous difference in flavor and flakiness. The milk solids in ghee give the pastry a subtle richness and a deeper golden color compared to plain vegetable oil. It’s worth the upgrade.
2. Amchur (Dry Mango Powder)
Amchur is the secret ingredient that gives the potato filling its distinctive tart, slightly fruity tang. Many home cooks skip it, but it’s what separates an average samosa filling from one that tastes truly authentic and restaurant-quality.
3. Digital Instant-Read Cooking Thermometer
Frying samosas at the right temperature is critical. Too hot and they blister; too cool and they become greasy. A reliable thermometer removes the guesswork entirely and gives you perfect results every time.
4. Heavy-Bottomed Deep Fry Pot
A heavy-bottomed pot maintains steady oil temperature, which is key to achieving that signature golden, blister-free crust. Thin pots cause temperature swings that lead to unevenly cooked samosas.
5. Ajwain (Carom Seeds)
Ajwain seeds are the subtle flavor note that makes samosa dough taste distinctively authentic. They have a slightly bitter, herbal quality reminiscent of thyme and celery seed and are hard to replicate with any substitution.
You might also enjoy: Garlic Naan Bread Recipe
Step-by-Step Instructions
1. Boil the Potatoes for the Filling
- Wash and peel your 4 medium potatoes, then cut them into quarters for faster, more even cooking.
- Place the potato pieces in a large pot and cover with cold salted water by about 1 inch (2.5cm).
- Bring to a boil over high heat, then reduce to a medium boil and cook for 15–20 minutes, until a fork slides through the potato easily with no resistance.
- Drain the potatoes in a colander and allow them to steam dry for 3–5 minutes. Excess moisture in the filling will make your samosas soggy.
- Roughly mash the potatoes — you want them mostly mashed with a few small lumps for texture. Do not over-mash into a smooth puree.
2. Prepare the Spiced Potato Filling
- Heat 2 tablespoons of oil or ghee in a medium skillet or pan over medium heat.
- Once the oil shimmers, add 1 teaspoon of cumin seeds. Allow them to sizzle for about 30–45 seconds until they darken slightly and become fragrant. This “blooming” step releases the essential oils from the cumin and is key to a deeply flavored filling.
- Add the finely grated ginger and chopped green chilies and stir-fry for 1 minute until the raw ginger smell softens.
- Add the thawed green peas and stir to coat them in the oil and spices. Cook for 2–3 minutes, stirring occasionally.
- Reduce the heat to low and add the roughly mashed potatoes to the pan. Mix everything together gently.
- Sprinkle in the garam masala, ground coriander, turmeric, red chili powder, and amchur powder. Stir well to distribute the spices evenly through the filling.
- Add salt to taste. The filling should be well-seasoned — taste it and adjust salt, chili, and amchur as needed.
- Stir in the freshly chopped cilantro, remove from heat, and spread the filling on a plate to cool completely before using. This is important — hot filling makes the dough difficult to handle.
3. Make the Samosa Dough
- In a large mixing bowl, combine the all-purpose flour, ajwain seeds (if using), and salt. Stir briefly to distribute evenly.
- Add the ghee or oil to the flour mixture.
- Using your fingertips, begin rubbing the ghee into the flour. Work methodically, picking up flour from the bottom and rubbing it between your thumbs and fingers. Continue for 3–5 minutes until the mixture resembles coarse breadcrumbs. This step is non-negotiable — it is what creates the flaky, layered pastry.
- To test if the fat is sufficiently incorporated: press a small handful of the mixture firmly in your palm. If it holds together in a clump without crumbling, you are ready to add water.
- Add cold water one tablespoon at a time, mixing after each addition. Use just enough water to bring the dough together — typically 6–8 tablespoons total.
- The finished dough should be smooth, firm, and pliable — firmer than bread dough, but not stiff or cracking. Do not knead the dough aggressively.
- Shape the dough into a smooth ball, wrap tightly in plastic wrap or place under a damp cloth, and rest at room temperature for 30 minutes. This resting period allows the gluten to relax, making the dough easier to roll.
4. Make the Flour Paste for Sealing
- In a small bowl, mix 2 tablespoons of all-purpose flour with 2 tablespoons of water to form a thick paste. This is your “glue” for sealing the samosa edges. Set aside.
5. Divide and Roll the Dough
- After resting, divide the dough into 7 equal portions. Roll each portion into a smooth ball and keep them covered with a damp cloth as you work.
- Work with one dough ball at a time. On a clean, dry surface (no flour needed — the fat in the dough prevents sticking), roll each ball into a thin circle about 6–7 inches (15–18cm) in diameter and roughly 1/8 inch (3mm) thick.
- Using a sharp knife, cut the circle directly in half to create two semicircles. Each semicircle will make one samosa. You will get 14 samosas total from the full batch.
6. Shape and Fill the Samosas
- Take one semicircle of dough and lay it flat, with the curved edge facing away from you and the straight cut edge nearest to you.
- Apply the flour paste along the entire straight (cut) edge using your fingertip or a small pastry brush.
- Fold one corner of the straight edge over to meet the opposite corner, overlapping slightly, forming a cone shape. Press firmly along the glued seam to seal it tightly. You should now have an open cone, like an ice cream cone.
- Hold the cone upright by placing it between your thumb and index finger to keep it open.
- Fill the cone with 2–3 tablespoons of the cooled potato filling. Do not overfill — leave about 1/2 inch (1.2cm) of dough at the top.
- Apply flour paste generously around the open rim of the cone.
- Press the open end shut, creating a tight seal along the top edge. Crimp or fold the top edge slightly for extra security.
- The finished samosa should be a neat triangular pyramid shape with no gaps or holes. Place it on a clean plate and cover with a damp cloth while you repeat with the remaining dough and filling.
7. Fry the Samosas
- Pour oil into your deep frying pot to a depth of at least 3 inches (7.5cm). This depth ensures the samosas are fully submerged and cook evenly.
- Begin heating the oil over medium-low heat. It is critical that the oil is not too hot when you start frying — the ideal starting temperature is around 300–320°F (150–160°C). Use your cooking thermometer to check.
- To test without a thermometer: dip the handle of a wooden spoon into the oil. When small, steady bubbles rise around it, the oil is ready. If bubbles are vigorous and immediate, the oil is too hot — reduce heat.
- Gently slide 3–4 samosas into the oil (do not crowd the pot — this drops the temperature and leads to greasy samosas).
- Fry on medium-low heat for 12–15 minutes, turning occasionally, until the samosas are pale golden and the pastry feels set to the touch.
- Increase the heat to medium-high and continue frying for another 3–5 minutes until they reach a deep, even golden-brown color.
- Remove with a slotted spoon and drain on paper towels. Allow the oil to return to temperature between batches before adding more samosas.
- Serve immediately while hot and crispy.
Read Also: Chicken Tikka Masala Recipe
Tips for Success
Getting your samosas right the first time is all about understanding a few key principles. These tips will save you from the most common mistakes and make the process smoother.
- Rub the fat properly: The single most important step. Rushing the fat-rubbing creates dense, hard pastry instead of flaky layers. Take the full 3–5 minutes.
- Don’t overwork the dough: Over-kneading develops too much gluten, which makes the crust tough and rubbery rather than light and flaky.
- Cool your filling completely: Adding warm filling to the dough causes it to soften, making the samosas difficult to shape and more likely to burst during frying.
- Seal firmly: Press every seam very firmly and double-check for any gaps before frying. Even a small opening will allow oil to enter and the filling to escape.
- Fry low and slow first: Starting at a lower oil temperature (300–320°F / 150–160°C) ensures the inside cooks through before the exterior browns too quickly.
- Don’t skip resting the dough: A full 30-minute rest makes the dough noticeably easier to roll and less likely to spring back or crack.
- Keep shaped samosas covered: Cover with a damp cloth while you continue shaping. This prevents the dough from drying out and cracking.
Another favorite: Easy Naan Bread Recipe
Serving Suggestions
Samosas are best served immediately after frying, while still hot and crackly. They are incredibly versatile as a snack, appetizer, or light meal.
Pair them with these for the complete experience:
- Cucumber Raita: The cool, creamy yogurt sauce is the classic pairing that balances the warmth of the spiced filling perfectly.
- Indian Onion Salad: A thinly sliced raw onion salad seasoned with chaat masala and lemon juice cuts through the richness of the fried pastry.
- Tamarind chutney: Sweet, sour, and slightly tangy, this is the quintessential samosa dipping sauce. Look for it at any Indian grocery store.
- Green mint-cilantro chutney: Blended fresh mint, cilantro, green chili, garlic, and lemon juice creates a vibrant, herby sauce that pairs beautifully.
- A cup of masala chai: In India, samosas and chai are an inseparable pairing. The spiced tea complements the savory pastry perfectly.
- Jeera Rice: For a more filling meal, serve samosas alongside fragrant cumin-spiced rice with a bowl of curry.
Variations to Try
Once you master the classic potato and pea version, samosas open up a world of filling possibilities. Here are some popular and delicious alternatives to explore.
- Keema Samosa: Replace the potato filling with a spiced minced lamb or beef filling cooked with onions, green peas, and aromatic spices. Rich, hearty, and incredibly flavorful.
- Onion Samosa: A thinner, crispier samosa filled with finely sliced spiced onions — popular in South India and a great option for a lighter bite.
- Paneer and Pea Samosa: Substitute half the potatoes with crumbled paneer (Indian fresh cheese) for a creamier, richer filling with a subtle milky flavor.
- Cauliflower and Potato Samosa (Gobi Aloo): Add small cauliflower florets to the potato mixture for a heartier, vegetable-loaded filling.
- Baked Samosa: Brush shaped samosas generously with oil and bake at 375°F (190°C) for 35–40 minutes, flipping halfway through. The texture is less flaky but still enjoyable for a lighter version.
- Air Fryer Samosa: Brush with oil and air fry at 375°F (190°C) for 15–18 minutes, turning once. Check out our Air Fryer Egg Rolls Recipe for tips on air frying stuffed pastries.
- Mini Party Samosas: Divide the dough into 14 portions instead of 7 to make smaller, bite-sized samosas perfect for entertaining.
Storage and Reheating
Samosas keep well and reheat beautifully, making them an excellent make-ahead snack. Here’s how to store them at every stage.
- Uncooked shaped samosas: Place on a parchment-lined baking sheet and freeze until solid, about 2 hours. Transfer to a freezer bag and store frozen for up to 3 months. Fry directly from frozen — no thawing needed.
- Cooked samosas (refrigerator): Store in an airtight container in the refrigerator for up to 3 days. They will soften slightly.
- Reheating in oven: Place on a baking sheet in a 350°F (175°C) oven for 8–10 minutes until heated through and the crust re-crisps. This is the best reheating method.
- Reheating in air fryer: Air fry at 300°F (150°C) for 6–8 minutes. Excellent results with restored crispiness.
- Reheating in microwave: Works in a pinch but results in a soft, not crispy crust. Use only when time is very short.
- Do not leave samosas out: Never leave fried samosas at room temperature for more than 2 hours.
Read Also: Chicken Korma Recipe
Nutritional Facts
The following values are approximate and based on one deep-fried samosa (approximately 1/14 of the full recipe).
| Nutrient | Amount Per Samosa |
|---|---|
| Calories | 165 kcal |
| Carbohydrates | 22g |
| Protein | 3g |
| Fat | 7g |
| Saturated Fat | 1.5g |
| Fiber | 2g |
| Sodium | 180mg |
| Sugar | 1g |
| Vitamin C | 8mg |
| Iron | 1.5mg |
Nutritional values are estimates and will vary based on exact ingredients and frying time.
This recipe is naturally vegetarian. For a vegan version, replace ghee with neutral oil in the dough.
Another great Indian recipe to try: Chicken Curry Recipe
Health Benefits of Key Ingredients
Samosas may be a fried treat, but several key ingredients in the filling offer genuine nutritional value that makes them more wholesome than you might expect.
Here’s a closer look at the health benefits packed into each bite:
- Potatoes: Despite their reputation, potatoes are a good source of potassium, vitamin C, and vitamin B6. They provide sustained energy and contain resistant starch when cooled, which acts as a prebiotic to support gut health.
- Green peas: Peas are a plant-based protein powerhouse. They are also rich in fiber, folate, and vitamins A, C, and K — all essential for immune function, bone health, and energy production.
- Turmeric: Curcumin, the active compound in turmeric, is one of the most studied anti-inflammatory agents in natural medicine. Even the small amounts used in cooking contribute meaningful antioxidant benefits over time.
- Ginger: Fresh ginger is well-known for its digestive benefits and anti-nausea properties. It also contains gingerol, a bioactive compound with potent anti-inflammatory effects.
- Cumin seeds: Cumin is rich in iron and antioxidants. It has traditionally been used to support digestion and is known to stimulate the production of digestive enzymes.
- Coriander (ground and fresh): Ground coriander has antimicrobial properties and supports healthy blood sugar levels. Fresh cilantro is rich in vitamin K and acts as a natural chelating agent.
- Garam masala: A blend of warming spices including cardamom, cloves, and cinnamon, all of which have been studied for their antioxidant and anti-inflammatory properties.
Read Also: Tandoori Chicken Recipe
Frequently Asked Questions
1. Why did my samosas get bubbles and blisters on the crust?
Blistering is almost always caused by frying in oil that is too hot. The pastry surface sets too quickly, trapping air inside and creating bubbles.
To prevent this, always start frying at a lower temperature of around 300–320°F (150–160°C) and only increase heat toward the end to achieve the golden color.
2. Can I make samosa dough in advance?
Yes, absolutely. Make the dough, wrap it tightly in plastic wrap, and refrigerate it for up to 24 hours.
Let it sit at room temperature for 15–20 minutes before rolling, as cold dough can be stiff and prone to cracking.
3. Can I bake samosas instead of frying them?
You can, though the texture will be noticeably different. Baked samosas are less flaky and crispy compared to fried ones.
If you go this route, brush them very generously with oil all over and bake at 375°F (190°C) for 35–40 minutes, flipping halfway through.
4. Why is my samosa crust hard instead of flaky?
A hard crust is caused by one of two things: either the fat was not rubbed into the flour thoroughly enough, or the dough was over-kneaded.
Spend the full 3–5 minutes rubbing the ghee into the flour until it resembles breadcrumbs, and handle the dough gently once the water is added.
5. Can I use store-bought pastry or spring roll wrappers instead of homemade dough?
Spring roll wrappers and puff pastry can be used in a pinch, but they produce a very different result. Spring roll wrappers create a thinner, crispier shell, while puff pastry is more buttery and layered.
For the authentic Punjabi samosa texture, homemade dough is strongly recommended. The process is simpler than it looks.
You might also enjoy: Chinese Dumplings Recipe
Final Thoughts
Making samosas from scratch is one of those cooking experiences that feels like a real achievement. The process takes a bit of time and patience, but every fold, every seal, and every sizzle in the oil brings you closer to something genuinely special.
When that first golden samosa hits the plate and you break through the crispy shell to reveal the fragrant, spiced potato filling inside — it’s a moment that makes every minute worthwhile.
Serve them hot, share them generously, and don’t be surprised when the entire batch disappears faster than you expect. This is the kind of recipe that quickly becomes a household tradition.
Give this samosa recipe a try and let us know how it turned out in the comments below! We’d love to hear about your experience, any variations you tried, or tips you discovered along the way.
Recommended:
- Cucumber Raita Recipe
- Chicken Tikka Masala Recipe
- Basmati Rice Recipe
- Mulligatawny Soup Recipe
- Easy Butter Chicken Recipe
- Chicken Korma Recipe
- Easy Hummus Recipe
- Jeera Rice Recipe
- Easy Pad Thai Recipe
- Chicken Curry Recipe


