
There’s nothing quite like pulling a golden, bubbling peach pie out of the oven on a warm summer afternoon. The smell alone is enough to make your neighbors jealous.
I grew up making this peach pie recipe with my grandmother every August when the peaches at the farmers market were at their peak. She’d always say that a great peach pie starts with fruit that’s so ripe and fragrant, you can smell it from across the room.
Now I make this same pie whenever I want to capture that feeling of summer in a dish. The filling strikes that perfect balance between sweet and slightly tart, with just enough cinnamon to make things interesting without overpowering the star ingredient.
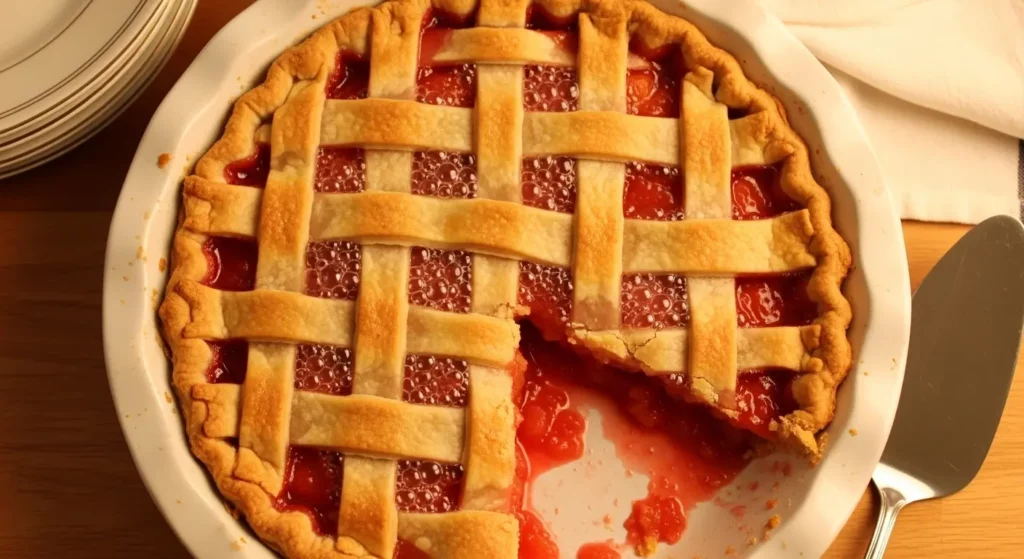
The crust is buttery and flaky, exactly what you want in a classic fruit pie. This recipe works beautifully as a traditional double-crust pie, but I’ve also included tips for making it with a lattice top if you’re feeling fancy.
Why You’ll Love This Peach Pie Recipe
This peach pie comes together more easily than you might think, and it delivers that wow factor every single time. Fresh peaches transform into a luscious, jammy filling that somehow tastes even better than the fruit on its own.
The recipe is flexible enough to work with different varieties of peaches, and I’ve had great success using both freestone and clingstone types. You can adjust the sweetness based on how ripe your fruit is, making this a forgiving recipe that still produces consistently delicious results.
Here’s what makes this peach pie special:
- Perfectly spiced filling that enhances the peach flavor without masking it
- Flaky, buttery crust that stays crisp even with all that juicy filling
- Simple ingredients you probably already have in your pantry
- Impressive presentation that looks bakery-quality
- Make-ahead friendly so you can prep components in advance
Another favorite: Cherry Pie Recipe
Ingredients
The beauty of this peach pie lies in its simplicity. You’ll need fresh peaches at their peak, basic pantry staples, and a little patience while it bakes.
For the best results, choose peaches that yield slightly to gentle pressure but aren’t mushy. They should smell sweet and fragrant at the stem end.
For the Crust:
- 2½ cups all-purpose flour
- 1 tablespoon granulated sugar
- 1 teaspoon salt
- 1 cup (2 sticks) cold unsalted butter, cut into small cubes
- 6-8 tablespoons ice water
For the Filling:
- 6-7 cups fresh peaches, peeled and sliced (about 8-10 medium peaches)
- ¾ cup granulated sugar (adjust based on peach sweetness)
- ¼ cup light brown sugar
- ¼ cup cornstarch
- 1 teaspoon ground cinnamon
- ¼ teaspoon ground nutmeg
- 2 tablespoons fresh lemon juice
- 1 teaspoon vanilla extract
- 2 tablespoons unsalted butter, cut into small pieces
For Assembly:
- 1 egg, beaten (for egg wash)
- 1 tablespoon heavy cream or milk
- 2 tablespoons coarse sugar (optional, for sprinkling)
Kitchen Equipment Needed
Having the right tools makes pie-making significantly easier and more enjoyable. You don’t need anything fancy, but a few key items will help you achieve professional results.
I recommend having everything ready before you start, especially when working with pie dough that needs to stay cold.
- 9-inch pie dish (glass or ceramic works best)
- Large mixing bowls
- Pastry cutter or food processor
- Rolling pin
- Sharp knife or peach pitter
- Medium saucepan
- Measuring cups and spoons
- Pastry brush
- Plastic wrap
- Parchment paper
- Pie weights or dried beans (optional)
Recommended Products for This Recipe
After years of making fruit pies, I’ve found a few products that genuinely make a difference in both the process and the final result. These are items I reach for every time I bake.
1. Emile Henry Modern Classics Pie Dish
This ceramic pie dish distributes heat so evenly that you’ll get a perfectly golden bottom crust every single time. The fluted edges make crimping easier, and it goes straight from oven to table looking gorgeous.
2. OXO Good Grips Pastry Blender
This pastry blender cuts through cold butter like a dream and helps you achieve that perfect pea-sized crumb texture in your pie crust. The comfortable grip means your hands won’t ache even when making multiple batches.
3. King Arthur Baking Company Pie Crust Mix
For those days when you want homemade pie without the extra step of making crust from scratch, this mix delivers reliably flaky results. It’s my secret weapon when I’m short on time but still want that homemade taste.
4. Organic Freestone Peaches
When fresh local peaches aren’t in season, high-quality frozen organic peaches are your next best option. Freestone varieties work beautifully in pies since the flesh separates easily from the pit, and freezing doesn’t significantly affect the texture once baked.
This pairs beautifully with my Banana Cream Pie Recipe for a complete dessert spread.
Step-by-Step Instructions
Making peach pie from scratch might seem intimidating, but breaking it down into clear steps makes the process manageable and even enjoyable. Take your time with each stage, and you’ll be rewarded with an incredible homemade pie.
1. Prepare the Pie Crust
- In a large mixing bowl, whisk together the flour, sugar, and salt until evenly combined
- Add the cold butter cubes to the flour mixture, tossing them to coat with flour
- Using a pastry cutter or your fingertips, work the butter into the flour until the mixture resembles coarse crumbs with pea-sized pieces of butter still visible throughout
- Drizzle 6 tablespoons of ice water over the mixture, one tablespoon at a time, and mix gently with a fork after each addition
- Add more water if needed, just until the dough starts to come together when pressed (it should be slightly shaggy, not wet)
- Divide the dough in half, shape each half into a flat disk, wrap tightly in plastic wrap, and refrigerate for at least 1 hour or up to 2 days
2. Prepare the Peaches
- Bring a large pot of water to a boil and prepare a bowl of ice water nearby
- Score an “X” on the bottom of each peach with a sharp knife
- Drop peaches into the boiling water for 30-60 seconds, just until the skins start to loosen
- Immediately transfer peaches to the ice water bath using a slotted spoon
- Once cool enough to handle, peel off the skins (they should slip right off)
- Cut peaches in half, remove the pits, and slice into ¼-inch thick wedges
- Place sliced peaches in a large bowl and toss gently with lemon juice to prevent browning
3. Make the Filling
- In a separate bowl, whisk together the granulated sugar, brown sugar, cornstarch, cinnamon, and nutmeg until no lumps remain
- Pour the sugar mixture over the sliced peaches and add the vanilla extract
- Toss everything together gently but thoroughly, making sure every peach slice is coated with the mixture
- Let the filling sit at room temperature for 15-20 minutes to allow the peaches to release some juice and the sugar to dissolve slightly
- Taste a piece of peach and adjust sweetness if needed (remember that baking will concentrate the flavors slightly)
4. Roll Out the Bottom Crust
- Remove one disk of dough from the refrigerator and let it sit at room temperature for 5-10 minutes to soften slightly
- On a lightly floured surface, roll the dough from the center outward, rotating the dough a quarter turn after every few rolls
- Continue rolling until you have a circle about 12 inches in diameter and ⅛-inch thick
- Carefully transfer the dough to your pie dish by rolling it loosely around your rolling pin, then unrolling it over the dish
- Gently press the dough into the bottom and sides of the dish, being careful not to stretch it
- Trim the edges, leaving about 1 inch of overhang beyond the rim of the dish
- Place the lined pie dish in the refrigerator while you roll out the top crust
5. Roll Out the Top Crust
- Remove the second disk of dough from the refrigerator and let it soften for 5-10 minutes
- Roll it out on a floured surface to about 11 inches in diameter and ⅛-inch thick
- If making a lattice top, cut the dough into 1-inch wide strips using a sharp knife or pastry wheel
- Transfer the rolled dough (or strips) to a parchment-lined baking sheet and refrigerate while you assemble the pie
- Keeping the top crust cold until assembly helps prevent shrinking during baking
6. Assemble the Pie
- Preheat your oven to 425°F (220°C) and position a rack in the lower third of the oven
- Remove the pie dish from the refrigerator and pour the peach filling into the crust, spreading it evenly
- Dot the top of the filling with the 2 tablespoons of butter pieces, distributing them evenly
- Remove the top crust from the refrigerator and place it over the filling (or weave your lattice pattern if using strips)
- Trim the top crust to match the bottom, leaving a 1-inch overhang
- Fold the edges of both crusts together and under themselves, then crimp decoratively using your fingers or a fork
- Cut 4-5 steam vents in the top crust if using a solid top (not necessary for lattice)
- Brush the entire top crust with the egg wash (egg beaten with cream) and sprinkle with coarse sugar if desired
7. Bake the Pie
- Place the pie on a baking sheet lined with parchment paper or foil to catch any drips
- Bake at 425°F for 20 minutes to set the crust
- Reduce the oven temperature to 375°F (190°C) and continue baking for 40-50 minutes
- The pie is done when the crust is deep golden brown and you can see the filling bubbling through the vents or lattice
- If the edges brown too quickly, cover them with a pie shield or strips of aluminum foil after 30 minutes of baking
- Watch carefully during the last 15 minutes to ensure the top doesn’t burn
8. Cool and Serve
- Remove the pie from the oven and place it on a wire cooling rack
- Let the pie cool at room temperature for at least 4 hours before slicing (I know this is torture, but it’s crucial!)
- This cooling time allows the filling to set properly so your slices hold their shape
- The filling will be extremely hot and liquid if you cut into it too early
- Once cooled, slice with a sharp knife, wiping the blade clean between cuts for neat slices
- Serve at room temperature or slightly warm with vanilla ice cream or whipped cream
You might also enjoy: Blueberry Pie Recipe
Tips for Success
Getting peach pie just right involves a few key techniques that make all the difference. These tips come from years of trial and error in my own kitchen.
The most common issue people face is a soggy bottom crust, but this is easily preventable with the right approach.
- Choose the right peaches: Look for ripe but firm fruit that’s fragrant and gives slightly when pressed. Avoid peaches that are rock-hard or overly soft and mushy.
- Keep your dough cold: Cold butter creates steam in the oven, which makes flaky layers. If your kitchen is warm, chill your bowl and work quickly.
- Don’t skip the resting time: Refrigerating the dough after mixing allows the gluten to relax, preventing shrinkage and making the crust easier to roll.
- Adjust sugar based on peach sweetness: Taste your peaches first. Very sweet peaches need less sugar, while tart ones may need a bit more.
- Use cornstarch for thickening: It creates a clear, glossy filling that’s not gummy. Tapioca starch works too, but avoid flour as it can make the filling cloudy.
- Let the filling cool completely: A hot filling in a warm pie won’t set properly. Patience here is absolutely essential for clean slices.
- Brush with egg wash: This creates that gorgeous golden color and professional bakery shine on your crust.
- Place pie on a baking sheet: This catches drips and makes it easier to move the hot pie in and out of the oven safely.
Read Also: Sweet Potato Pie Recipe
Serving Suggestions
Peach pie is delicious on its own, but the right accompaniments can elevate it from great to unforgettable. I love serving it slightly warm so the filling is still a bit gooey.
A scoop of cold vanilla ice cream melting over a warm slice creates the perfect temperature contrast and adds creaminess that complements the fruit filling beautifully.
Here are my favorite ways to serve this pie:
- Classic à la mode: Top each slice with a generous scoop of vanilla ice cream or Homemade Vanilla Bean Ice Cream
- Whipped cream: Dollop freshly whipped cream on top, optionally flavored with a touch of cinnamon or vanilla
- Crème fraîche: The slight tanginess of crème fraîche provides a sophisticated contrast to the sweet filling
- Caramel drizzle: Warm caramel sauce adds another layer of richness and sweetness
- Toasted pecans: Sprinkle chopped toasted pecans over each slice for added crunch and nutty flavor
- Fresh mint: A small sprig of fresh mint adds a pop of color and a refreshing note
Variations to Try
Once you’ve mastered the basic recipe, these variations let you customize the pie to your taste or work with what you have on hand. Each one brings something unique to the table.
My personal favorite is the bourbon variation, which adds a sophisticated depth that adults especially appreciate.
- Peach-blueberry pie: Replace 2 cups of peaches with fresh blueberries for a beautiful color contrast and flavor combination
- Bourbon peach pie: Add 2 tablespoons of bourbon to the filling along with the vanilla for a grown-up twist
- Ginger peach pie: Add 1 teaspoon of fresh grated ginger and replace cinnamon with ½ teaspoon ground ginger
- Almond peach pie: Replace vanilla extract with almond extract and sprinkle sliced almonds over the filling before adding the top crust
- Streusel-topped peach pie: Skip the top crust and instead cover with a crumbly streusel made from flour, butter, brown sugar, and oats
- Honey peach pie: Replace half the granulated sugar with honey for a more floral, complex sweetness
- Cardamom peach pie: Add ¼ teaspoon ground cardamom to the filling for an aromatic, unexpected twist
This recipe works wonderfully alongside Key Lime Pie Recipe for a citrus and stone fruit pairing.
Storage and Reheating
Proper storage keeps your peach pie tasting fresh for several days. The key is protecting it from drying out while preventing the crust from getting soggy.
I find that peach pie actually tastes even better the day after baking once all the flavors have had time to meld together.
- Room temperature storage: Cover cooled pie loosely with aluminum foil and keep at room temperature for up to 2 days
- Refrigerator storage: Wrap tightly in plastic wrap or store in an airtight container for up to 5 days (the crust may soften slightly)
- Freezing baked pie: Wrap cooled pie tightly in plastic wrap, then aluminum foil, and freeze for up to 3 months (thaw overnight in the refrigerator before serving)
- Freezing unbaked pie: Assemble the pie completely, wrap tightly, and freeze for up to 2 months (bake directly from frozen, adding 15-20 minutes to the baking time)
- Reheating individual slices: Warm slices in a 350°F oven for 10-15 minutes, or microwave for 30-45 seconds
- Crisping soggy crust: Place pie in a 375°F oven uncovered for 10-15 minutes to restore crispness to the crust
Nutritional Facts
This nutritional information is approximate and based on one slice of a pie cut into 8 servings. Values will vary based on the specific ingredients you use and serving size.
Per Slice (1/8 of pie):
- Calories: 385
- Total Fat: 16g
- Saturated Fat: 10g
- Cholesterol: 55mg
- Sodium: 320mg
- Total Carbohydrates: 58g
- Dietary Fiber: 3g
- Sugars: 32g
- Protein: 4g
- Vitamin C: 15% DV
- Calcium: 2% DV
- Iron: 8% DV
- Potassium: 6% DV
Health Benefits of Key Ingredients
While peach pie is definitely a treat, the fresh peaches in this recipe do provide some nutritional value alongside all that deliciousness. It’s nice to know you’re getting a few vitamins with your dessert.
Fresh peaches are packed with nutrients that support overall health in multiple ways. They’re particularly rich in antioxidants that help protect your cells from damage.
Here’s what the key ingredients offer:
- Peaches: High in vitamins A and C, which support immune function and skin health. They also contain fiber for digestive health and potassium for heart health.
- Cinnamon: Contains powerful antioxidants and may help regulate blood sugar levels. It also has anti-inflammatory properties that benefit overall health.
- Nutmeg: Provides minerals like manganese and copper. It has been traditionally used to aid digestion and may have mood-boosting properties.
- Lemon juice: Rich in vitamin C and helps your body absorb iron. The acidity also balances the sweetness and prevents the peaches from browning.
- Butter: Provides fat-soluble vitamins A, D, E, and K. While high in saturated fat, it adds richness and helps create that flaky, tender crust texture.
Read Also: Boston Cream Pie Recipe
Frequently Asked Questions
1. Can I use frozen peaches instead of fresh?
Yes, frozen peaches work well in this recipe. Use the same amount called for in the recipe and thaw them completely before using.
Drain the excess liquid from the thawed peaches and pat them dry with paper towels. You may need to increase the cornstarch slightly to 5-6 tablespoons since frozen fruit releases more liquid than fresh.
2. Why is my pie filling runny?
Runny filling usually means the pie was cut before it cooled completely. The filling needs at least 4 hours to set properly at room temperature.
If you’ve let it cool completely and it’s still runny, you may not have used enough cornstarch or your peaches were exceptionally juicy. Next time, increase the cornstarch by 1-2 tablespoons or let the fruit mixture sit and drain some liquid before adding to the pie.
3. How do I prevent a soggy bottom crust?
Several techniques help prevent soggy crusts. First, bake the pie in the lower third of your oven so the bottom gets direct heat.
You can also brush the unbaked bottom crust with a thin layer of beaten egg white before adding the filling, which creates a moisture barrier. Using a glass or ceramic pie dish helps too since you can see when the bottom is properly browned.
4. Do I have to peel the peaches?
Peeling is highly recommended for the best texture. Peach skins become tough and chewy when baked and can detract from the smooth, luscious filling.
The blanching method I describe makes peeling incredibly easy and quick. However, if you’re really pressed for time, you can leave the skins on, though the texture won’t be quite as refined.
5. Can I make the pie crust ahead of time?
Absolutely! Pie dough actually improves with a rest in the refrigerator. You can make it up to 2 days ahead and keep it wrapped in the fridge.
You can also freeze wrapped dough disks for up to 3 months. Thaw overnight in the refrigerator before rolling out, and let it sit at room temperature for about 10 minutes before rolling so it’s pliable enough to work with.
Final Thoughts
Making peach pie from scratch is one of those kitchen projects that fills your home with the most incredible aroma and delivers results that store-bought desserts simply can’t match. There’s something deeply satisfying about serving a pie you made with your own hands.
This recipe has been a staple in my kitchen for years, and I hope it becomes one in yours too. The combination of buttery, flaky crust and sweet, spiced peaches never fails to impress, whether you’re baking for a special occasion or just because it’s Tuesday.
I’d love to hear how your peach pie turns out! Drop a comment below with your results, any variations you tried, or questions you have. And if you loved this recipe, please share it with your friends and family who appreciate homemade desserts.
Recommended:
- Peach Cobbler Recipe
- Pear Cobbler Recipe
- Apple Pie Biscuits Recipe
- Pumpkin Bar Recipe
- Cottage Cheese Chips Recipe
- Cranberry Sauce Recipe
- Caramel Sauce Recipe
- Strawberry Sauce Recipe
- Fruit Salad Recipe
- Honey Butter Recipe


