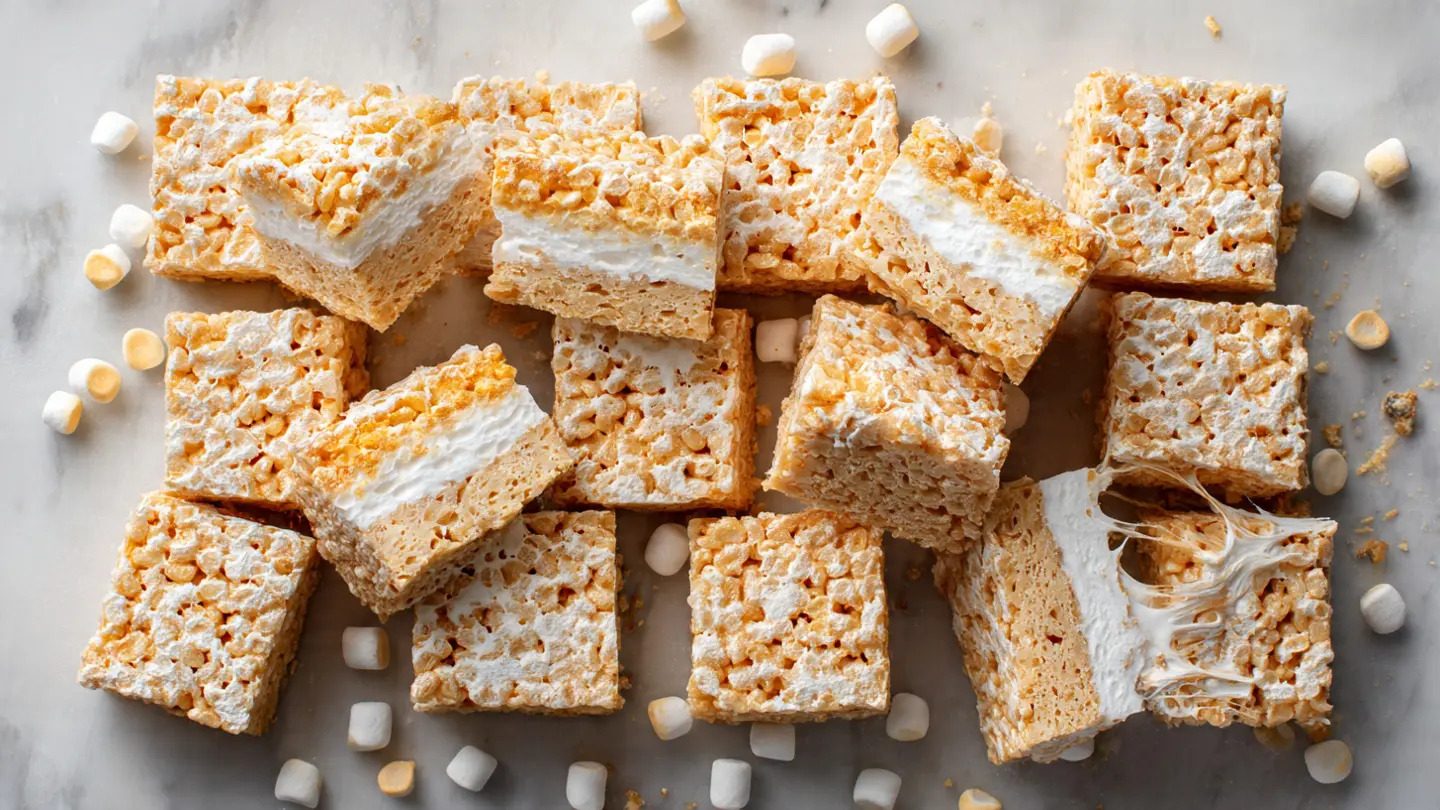
If you’ve ever bitten into a gooey rice krispie treat that stretches and pulls with every bite, you know exactly why this dessert has such a devoted following. This gooey rice krispie treat recipe takes the classic version up a notch with extra marshmallows, a generous amount of butter, and one simple trick that makes all the difference in achieving that ultra-soft, chewy texture.
The secret isn’t complicated. It’s all about using more marshmallows than you think you need, not overheating the mixture, and pressing the treats into the pan with a light hand so they stay soft and airy rather than dense and brick-like.
These come together in under 20 minutes with no oven required, making them one of the easiest no-bake desserts around. Whether you’re making them for a bake sale, a weeknight treat, or just because the craving strikes, this recipe delivers every single time.
You might also enjoy: Original Rice Krispie Treat Recipe
Why You’ll Love This Gooey Rice Krispie Treat Recipe
This recipe has earned its place as a go-to treat for a reason. It’s practically foolproof, endlessly crowd-pleasing, and comes together with pantry staples you likely already have on hand.
Here’s what makes this version stand out:
- Extra marshmallow ratio: This recipe uses more marshmallows than the standard box ratio, which creates that signature gooey pull without making the treats too sweet.
- Brown butter base: Browning the butter before adding the marshmallows adds a subtle, nutty, almost caramel-like depth of flavor that takes these far beyond basic.
- No-bake and beginner-friendly: There’s no oven involved and no complicated techniques. If you can melt butter, you can make these.
- Soft for days: Thanks to the higher marshmallow-to-cereal ratio and the brown butter, these stay soft and chewy much longer than the standard version.
- Completely customizable: The base recipe is a blank canvas. Stir in chocolate chips, drizzle with caramel, or top with sprinkles to make them your own.
Read Also: Easy Rice Krispie Treat Recipe
Ingredients
The ingredient list is short, but quality matters here. Using fresh marshmallows (not ones that have been sitting in your pantry for months) and good-quality butter will make a noticeable difference in the final texture and flavor.
- 6 tablespoons (85g) unsalted butter, plus extra for greasing
- 16 oz (450g) mini marshmallows, divided (about 8 cups)
- 1/2 teaspoon vanilla extract
- 1/4 teaspoon fine sea salt
- 6 cups (180g) Rice Krispies cereal (or any puffed rice cereal)
Note: Dividing the marshmallows is intentional. Most of them go in during cooking, but a full cup gets stirred in at the very end off the heat. Those un-melted marshmallow bits are what create those irresistible gooey pockets throughout each bar.
For a peanut butter twist on these treats, check out this Peanut Butter Rice Krispie Treat Recipe.
Kitchen Equipment Needed
You don’t need much to make these, but having the right tools makes the process smoother and helps you get the best results.
- Large heavy-bottomed saucepan or Dutch oven (a 3-quart saucepan works perfectly)
- 9×13-inch non-stick baking pan
- Silicone spatula (heat-resistant, for stirring)
- Parchment paper
- Kitchen scale (optional, but helpful for accuracy)
- Measuring cups and spoons
- Butter wrapper or parchment for pressing the treats flat
Read Also: Microwave Rice Krispie Treat Recipe
Recommended Products for This Recipe
These are products I genuinely recommend based on quality and how much easier they make this recipe to pull off.
1. All-Clad Stainless Steel Saucepan
A heavy-bottomed saucepan is essential for browning butter without burning it. Thin pans heat unevenly and can scorch your marshmallow mixture before you know it. The All-Clad distributes heat evenly and gives you full control over the process. It’s worth every penny if you cook regularly.
2. USA Pan Nonstick Rectangular Baking Pan
A good 9×13-inch pan makes the difference between treats that release cleanly and ones that stick and crumble. The USA Pan’s nonstick coating means you can skip the lining if you’re in a hurry, though parchment still helps for easy lifting. Durable, dishwasher-safe, and built to last.
3. Jet-Puffed Mini Marshmallows
Not all marshmallows are created equal. Jet-Puffed mini marshmallows are consistently fresh, melt evenly, and produce the stretchiest, gooiest results. Buying a fresh bag (rather than using leftover marshmallows from the back of the pantry) is one of the easiest ways to guarantee success.
4. GIR Silicone Spatula
A high-heat silicone spatula is a must when working with melted marshmallows. It won’t melt, it scrapes the pan cleanly, and it makes folding the cereal into the marshmallow mixture much easier. GIR makes some of the best in the business.
You might also enjoy: Rice Krispie Treat Recipe with Marshmallow Fluff
Step-by-Step Instructions
1. Prepare Your Pan
- Line your 9×13-inch baking pan with parchment paper, leaving some overhang on the sides so you can lift the bars out easily later.
- Lightly grease the parchment with butter or a little nonstick cooking spray. This ensures nothing sticks, even with the extra-gooey marshmallow mixture.
- Set the pan aside near your stovetop so you can work quickly once the marshmallow mixture is ready.
2. Measure Out Your Ingredients
- Measure 6 cups (180g) of Rice Krispies cereal and set them in a large mixing bowl or keep them close at hand. You’ll be adding them to the marshmallow mixture quickly, so having everything ready is important.
- Divide your marshmallows: place 7 cups (about 12.5 oz / 355g) in one bowl and set aside 1 cup (about 1.5 oz / 45g) in a separate small bowl. The smaller amount will be stirred in at the end off the heat.
- Measure your vanilla extract and salt and keep them next to the stove.
3. Brown the Butter
- Place the 6 tablespoons (85g) of unsalted butter in your large heavy-bottomed saucepan over medium heat.
- Let it melt completely, then continue cooking, swirling the pan occasionally, until the butter begins to foam, then the foam subsides, and golden-brown specks appear on the bottom of the pan. This takes about 3 to 5 minutes total.
- You’ll notice a nutty, toasty aroma — that’s your cue that it’s ready. Watch carefully at this stage because it can go from perfectly browned to burnt quickly.
- If you prefer not to brown the butter, simply melt it until fully liquid and proceed from there. The treats will still be delicious, just without that extra depth of flavor.
4. Melt the Marshmallows
- Reduce the heat to low. Add the larger portion of marshmallows (7 cups / 355g) to the browned butter.
- Stir continuously with your silicone spatula, scraping the bottom of the pan to prevent sticking or scorching.
- Keep stirring until the marshmallows are fully melted and the mixture is completely smooth. This usually takes about 2 to 3 minutes over low heat. Do not rush this step by raising the heat — low and slow is what keeps the texture gooey rather than tough.
- Once fully melted, remove the pan from the heat.
5. Add Vanilla, Salt, and Reserved Marshmallows
- Immediately stir in the 1/2 teaspoon vanilla extract and 1/4 teaspoon fine sea salt. These add flavor depth and balance out the sweetness.
- Add the reserved 1 cup of mini marshmallows. Stir just enough to incorporate them — you want some of them to remain whole or only partially melted. These unmelted bits create the gooey pockets that make this version so special.
- Work quickly at this stage because the mixture will start to set as it cools.
6. Fold in the Cereal
- Add the 6 cups (180g) of Rice Krispies cereal to the marshmallow mixture all at once.
- Fold gently with your silicone spatula until the cereal is evenly coated. Try not to crush the cereal by pressing or stirring too aggressively — you want the treats to stay light and airy, not compacted.
- If the mixture feels like it’s setting too fast, you can briefly return the pan to very low heat for 20 to 30 seconds to loosen it up again.
7. Press Into the Pan
- Transfer the mixture into your prepared pan.
- Use a lightly buttered piece of parchment or the back of a buttered spatula to gently press the mixture into an even layer. Press very lightly — just enough to flatten it out. Pressing too firmly packs the treats down and makes them dense and hard instead of soft and gooey.
- Aim for an even layer that is roughly 1 to 1.5 inches (2.5 to 4 cm) thick.
8. Cool and Cut
- Allow the treats to cool at room temperature for at least 30 minutes before cutting. This gives them time to set while remaining soft.
- Once cooled, lift the slab out of the pan using the parchment overhang and place it on a cutting board.
- Cut into squares or rectangles using a sharp knife or a bench scraper. For clean cuts, run the blade under warm water and dry it between cuts.
- Enjoy immediately or store as directed below.
Read Also: Single Serve Rice Krispie Treat Recipe
Tips for Success
A few extra details make a big difference between okay rice krispie treats and truly exceptional ones. Keep these in mind every time you make this recipe.
- Use fresh marshmallows. Stale marshmallows don’t melt as smoothly and produce a drier, less gooey result. Fresh bags always give you the best texture.
- Don’t skip the brown butter. It takes only a few extra minutes but adds a caramel-nuttiness that elevates the entire recipe. Use a light-colored pan so you can see the color change easily.
- Low heat is your friend. Melting marshmallows over high heat makes them tough and hard once cooled. Always use low to medium-low heat and stir constantly.
- Press lightly. This is the most common mistake. Press the mixture just enough to create an even layer — firm pressing = dense, hard bars.
- Work fast once the cereal is added. The mixture sets quickly. Have your pan ready and move efficiently from mixing to pressing.
- Let them cool fully before cutting. Cutting too early causes the bars to fall apart or stick to your knife.
For treats made with large marshmallows instead of mini, try this Rice Krispie Treat Recipe with Large Marshmallows.
Serving Suggestions
These gooey rice krispie treats are delicious on their own, but they also shine as part of a larger dessert spread. Here are some fun ways to serve and present them.
Pair them alongside a tray of No Bake Cookies for an easy, crowd-pleasing snack table that requires zero oven time.
- Serve warm (microwave individual bars for 8 to 10 seconds) for maximum gooey, stretchy texture.
- Cut into small bite-sized squares and arrange on a platter for parties or holiday gatherings.
- Package individually in cellophane bags tied with ribbon for homemade gifts or bake sale treats.
- Drizzle with melted dark or white chocolate and let it set before cutting for an elevated presentation.
- Serve alongside a scoop of vanilla ice cream for a simple but impressive dessert.
- Dip the bottom halves in melted chocolate and set on parchment until firm.
Variations to Try
Once you’ve mastered the classic gooey version, these easy variations let you customize the recipe to suit any occasion or craving.
The base recipe is incredibly adaptable, and most add-ins can be folded in right along with the cereal for zero extra effort.
- Chocolate chip: Fold in 1/2 cup (85g) of mini chocolate chips after the cereal. The warmth of the mixture will partially melt them, creating chocolate swirls throughout.
- Peanut butter: Stir 3 tablespoons of creamy peanut butter into the butter before adding the marshmallows for a rich, nutty flavor.
- Fruity Pebbles swap: Replace the Rice Krispies with Fruity Pebbles for a colorful, fruity twist. See also: Fruity Pebbles Rice Krispie Treat Recipe
- Salted caramel: Drizzle warm caramel sauce over the pressed treats and sprinkle with flaky sea salt before they cool.
- Vegan version: Use vegan butter and vegan marshmallows for a dairy-free, gelatin-free version. Check out this Vegan Rice Krispie Treat Recipe for full details.
- Copycat Starbucks style: Make them extra thick (press into an 8×8 pan instead) for a bakery-style version like the Copycat Starbucks Rice Krispie Treat.
- S’mores: Mix in crushed graham crackers and mini chocolate chips, then top with additional marshmallows briefly torched or broiled.
For another fun no-bake treat the whole family will love, check out this Muddy Buddy Recipe.
Storage and Reheating
These gooey rice krispie treats store beautifully, and with the right technique, they stay soft for several days.
Proper wrapping is the single most important factor in keeping them from drying out.
- Room temperature: Store cut bars in an airtight container with pieces of parchment or wax paper between layers. They stay soft and chewy for up to 3 days.
- For longer storage: Wrap individual bars tightly in plastic wrap, then place in a zip-top bag. This keeps them fresh for up to 5 days at room temperature.
- Freezer: Wrap individually in plastic wrap and store in a freezer-safe bag for up to 6 weeks. Thaw at room temperature for about 30 minutes.
- To reheat: Microwave a single bar for 8 to 10 seconds to restore that warm, gooey texture. Don’t overheat or they’ll become too soft to hold their shape.
- Do not refrigerate: Cold temperatures dry them out and make them stiff. Always store at room temperature.
For another crowd-pleasing no-bake treat, the Buckeyes Recipe is just as easy and equally irresistible.
Nutritional Facts
The following values are approximate and based on one bar, assuming the batch is cut into 16 equal servings.
| Nutrient | Per Serving (1 bar) |
|---|---|
| Calories | ~180 kcal |
| Total Fat | 5g |
| Saturated Fat | 3g |
| Cholesterol | 12mg |
| Sodium | 100mg |
| Total Carbohydrates | 32g |
| Dietary Fiber | 0g |
| Sugars | 18g |
| Protein | 1g |
These values will vary based on exact brand of cereal and marshmallows used, portion size, and any add-ins or toppings.
Read Also: Monster Cookie Bars Recipe
Health Benefits of Key Ingredients
Rice krispie treats are an indulgent dessert, but a few of their core ingredients do offer some nutritional value.
It’s worth understanding what’s in what you’re eating, even for a treat.
- Puffed rice cereal: Rice Krispies are fortified with vitamins and minerals including B vitamins (thiamin, niacin, B6, B12) and iron. While the sugar content is modest, the fortification means each serving provides meaningful micronutrients.
- Marshmallows: Primarily made of sugar, gelatin, and air. They’re fat-free and very low in sodium, which is part of why rice krispie treats have a more moderate fat profile than most baked sweets.
- Butter: Real butter contains fat-soluble vitamins A, D, E, and K. Used in moderation, it contributes richness and satisfying flavor. Browning it doesn’t eliminate the nutrients but does enhance the flavor dramatically.
- Vanilla extract: Pure vanilla extract contains small amounts of antioxidants and has been studied for potential calming and anti-inflammatory properties, though in the amounts used here the impact is minimal.
- Sea salt: A pinch of good sea salt actually brings out sweetness and balances flavor rather than adding much sodium.
Another cookie-style dessert worth trying is the Oatmeal Cookie Recipe, which packs more fiber and whole grains per serving.
Frequently Asked Questions
1. Why are my rice krispie treats hard instead of gooey?
The most common culprits are overheating the marshmallows and pressing the mixture too firmly into the pan.
Marshmallows that are cooked over high heat or for too long become stiff once cooled. Always melt them on low heat and stir constantly. And when pressing the mixture into the pan, use a very gentle touch.
2. Can I make these ahead of time?
Yes, these are a great make-ahead treat.
Make them up to 24 hours in advance and store in an airtight container at room temperature. For best results, wrap each bar individually in plastic wrap to retain moisture.
3. What’s the difference between using regular and mini marshmallows?
Both work, but mini marshmallows melt more evenly and quickly because of their smaller surface area.
Regular marshmallows can be used (cut them smaller if you like) but may require slightly more stirring time to melt completely. Mini marshmallows are ideal for this recipe.
4. Can I use margarine instead of butter?
You can, but the flavor won’t be as rich, and margarine can’t be browned.
For the best results, stick with real unsalted butter. It’s one of only three ingredients that drives the overall flavor, so it’s worth using the good stuff.
5. Why do I add marshmallows at the end off the heat?
Stirring in a portion of un-melted marshmallows at the end is the key trick to ultra-gooey treats.
Those marshmallows don’t fully melt — they soften and create pillowy, stretchy pockets throughout the bars. This simple step is what separates a truly gooey rice krispie treat from the standard version.
For more snack-style recipes, you might enjoy: Monster Cookie Protein Balls
Final Thoughts
If you’ve been settling for average rice krispie treats, this recipe is about to change things.
The combination of browned butter, extra marshmallows, and that final handful stirred in off the heat creates a treat that’s genuinely special. Stretchy, soft, buttery, and absolutely addictive.
Give this gooey rice krispie treat recipe a try the next time you need a quick dessert — you’ll be amazed at how a few small tweaks make such a big difference. Drop a comment below to let us know how yours turned out, and feel free to share any add-ins or variations you tried!
Recommended:
- Bourbon Balls Recipe
- Dirt Pudding Recipe
- Chocolate Pudding Recipe
- No Bake Cheesecake Recipe
- Best Chocolate Chip Cookies Recipe
- Chewy Chocolate Chip Cookies Recipe
- Peanut Butter Cookie Recipe
- Oatmeal Raisin Cookie Recipe
- Snickerdoodle Cookie Recipe
- Toffee Recipe


