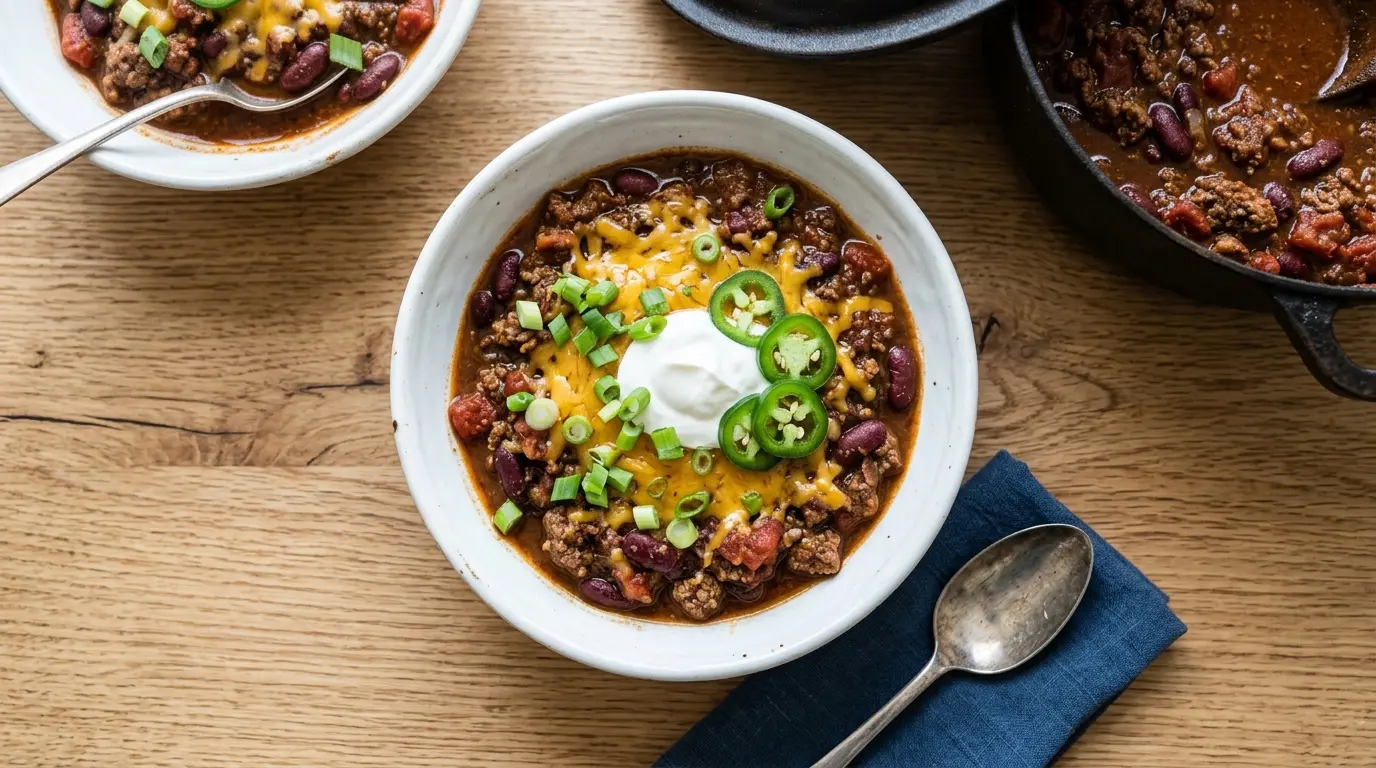
If you’ve been searching for the ultimate beef chili recipe, your search ends here. This is the kind of chili that fills your kitchen with the most incredible smell, the kind that draws everyone to the table before you even call them.
It’s thick, deeply savory, and packed with tender ground beef, two kinds of beans, and a rich blend of chili spices that build real depth of flavor.
This isn’t a quick-dump-everything-in-a-pot situation. A few simple techniques, like browning the beef properly and blooming the spices, make all the difference between a forgettable bowl and one that people ask about for weeks.
Make it for game day, a cozy weeknight, or a big family gathering, and it delivers every single time.
You might also enjoy: Slow Cooker Chili Recipe
Why You’ll Love This Beef Chili Recipe
This chili checks every box you could want in a comfort meal.
It’s rich and hearty enough to be a complete dinner on its own, but it’s also incredibly versatile when it comes to toppings and serving ideas.
The spice blend uses pantry staples you likely already have, so there’s no hunting down hard-to-find ingredients.
It actually gets better as it sits, making it a fantastic meal-prep option for the week ahead.
Here’s a quick rundown of why this recipe is a keeper:
- Bold, layered flavor from bloomed spices and slow-simmered beef
- One-pot meal with minimal cleanup
- Feeds a crowd easily, scaling up or down without fuss
- Freezer-friendly and ideal for batch cooking
- Customizable heat level from mild to fiery depending on your preference
Read Also: Texas Chili Recipe
Ingredients
Making a great beef chili starts with quality ingredients. The ground beef provides the meaty backbone, the tomatoes build the base, and the spices tie it all together into something genuinely satisfying.
- 2 lbs (900g) ground beef (80/20 blend recommended for flavor)
- 1 large yellow onion, diced
- 1 green bell pepper, diced
- 4 cloves garlic, minced
- 2 cans (15 oz / 425g each) kidney beans, drained and rinsed
- 1 can (15 oz / 425g) black beans, drained and rinsed
- 1 can (28 oz / 800g) crushed tomatoes
- 1 can (14.5 oz / 410g) diced tomatoes
- 2 tablespoons tomato paste
- 1 cup (240ml) beef broth
- 3 tablespoons chili powder
- 2 teaspoons ground cumin
- 1 teaspoon smoked paprika
- 1 teaspoon garlic powder
- 1 teaspoon onion powder
- 1/2 teaspoon dried oregano
- 1/2 teaspoon black pepper
- 1/4 teaspoon cayenne pepper (adjust to taste)
- 1 1/2 teaspoons salt, plus more to taste
- 2 tablespoons olive oil or neutral oil
For topping (optional but highly recommended):
- Shredded cheddar cheese
- Sour cream
- Sliced green onions
- Sliced jalapeños
- Lime wedges
- Hot sauce
Another great recipe to explore alongside this one: Wendy’s Chili Recipe
Kitchen Equipment Needed
You don’t need any specialty equipment to make this chili. A good heavy-bottomed pot is your best friend here, since it distributes heat evenly and prevents scorching during the long simmer.
- Large Dutch oven or heavy-bottomed pot (6-quart or larger)
- Wooden spoon or silicone spatula
- Sharp chef’s knife
- Cutting board
- Measuring cups and spoons
- Can opener
- Ladle for serving
Read Also: White Chili Recipe
Recommended Products for This Recipe
These are products I genuinely recommend based on quality, performance, and how much they improve the final result in this recipe.
1. Lodge Enameled Cast Iron Dutch Oven
A cast iron Dutch oven is the single best vessel for making chili. It retains heat beautifully, allows for deep browning of the beef, and keeps the chili at a perfect, steady simmer. The enameled interior also makes cleanup far easier than traditional cast iron.
2. Ancho Chili Powder (Single-Origin)
Most grocery store chili powder blends are fine, but upgrading to a single-origin ancho chili powder adds a deeper, slightly smoky, and more complex flavor that transforms this recipe. It’s one small swap with a big payoff.
3. San Marzano Crushed Tomatoes
Not all canned tomatoes are created equal. San Marzano tomatoes have a naturally sweeter, less acidic flavor and a smoother texture that makes your chili base richer and more balanced from the very first bite.
4. OXO Good Grips Can Opener
A smooth, reliable can opener is one of those tools that makes life genuinely easier, especially when you’re working with four or five cans at once. This one is comfortable to use and built to last.
For more hearty bowl food inspiration, check out this Chicken Chili Recipe.
Step-by-Step Instructions
1. Prep Your Vegetables
- Dice the yellow onion into small, even pieces, roughly 1/4 inch (6mm). Even cuts ensure they cook at the same rate and blend smoothly into the chili.
- Dice the green bell pepper to the same size as the onion.
- Mince the 4 garlic cloves finely. A garlic press also works well here if you have one.
- Open and drain both cans of kidney beans and the black beans in a colander. Rinse them under cold water to remove excess sodium and the starchy liquid.
- Open the cans of crushed tomatoes, diced tomatoes, and set them aside along with the tomato paste and beef broth so everything is within reach before you start cooking.
2. Mix Your Spices Together
- In a small bowl, combine the chili powder, ground cumin, smoked paprika, garlic powder, onion powder, dried oregano, black pepper, and cayenne pepper.
- Stir them together so they’re evenly blended. Having your spice blend ready to go means you can add it to the hot pan quickly, which is the key to blooming the spices properly later.
3. Brown the Ground Beef
- Heat your Dutch oven or heavy-bottomed pot over medium-high heat. Add the olive oil and let it get hot for about 30 seconds.
- Add the ground beef to the pot, breaking it apart with your wooden spoon or spatula as it goes in.
- Spread the beef out into an even layer and let it sit, undisturbed, for 2 to 3 minutes. This allows it to develop a proper sear and build flavor. Resist the urge to stir constantly.
- Continue breaking up the beef and cooking until it’s fully browned throughout, about 8 to 10 minutes total.
- If there is more than 2 tablespoons of fat remaining in the pot, carefully drain some off. A small amount of fat left behind adds flavor, but excess grease can make the chili feel heavy.
4. Cook the Aromatics
- Reduce the heat to medium. Add the diced onion and green bell pepper to the pot with the browned beef.
- Stir everything together and cook for 5 to 7 minutes, until the onion becomes soft and translucent and the bell pepper has softened.
- Add the minced garlic and stir it in. Cook for 1 minute until the garlic is fragrant, being careful not to let it burn.
5. Bloom the Spices
- Add your premixed spice blend and the tomato paste directly over the beef and vegetables.
- Stir vigorously to coat everything evenly in the spices and tomato paste. Let this cook for 1 to 2 minutes, stirring constantly. This step, called “blooming,” activates the fat-soluble flavor compounds in the spices and is what gives this chili its deep, complex aroma. You’ll notice the smell in your kitchen intensify considerably.
6. Build the Chili Base
- Pour in the crushed tomatoes, the diced tomatoes (with their juices), and the beef broth. Stir well to combine everything thoroughly, scraping up any browned bits from the bottom of the pot. Those browned bits are pure flavor.
- Add the drained and rinsed kidney beans and black beans. Stir to distribute them evenly throughout the pot.
- Add the salt and stir again. Taste the liquid and adjust if needed, keeping in mind that flavors will concentrate as the chili simmers.
7. Simmer Low and Slow
- Bring the chili to a boil over medium-high heat, stirring occasionally to prevent sticking.
- Once it reaches a boil, reduce the heat to low. Place the lid on the pot slightly ajar (not fully sealed) to allow some steam to escape and the chili to thicken.
- Simmer for at least 45 minutes, and ideally 1 to 1.5 hours. Stir every 15 to 20 minutes to prevent the bottom from scorching.
- The chili is ready when it has thickened noticeably, the beans are creamy and tender, and the flavors have melded together into something cohesive and deeply savory.
8. Taste, Adjust, and Serve
- Before serving, taste the chili one more time. Adjust the salt, add more cayenne if you want more heat, or a small pinch of sugar if the tomatoes taste too acidic.
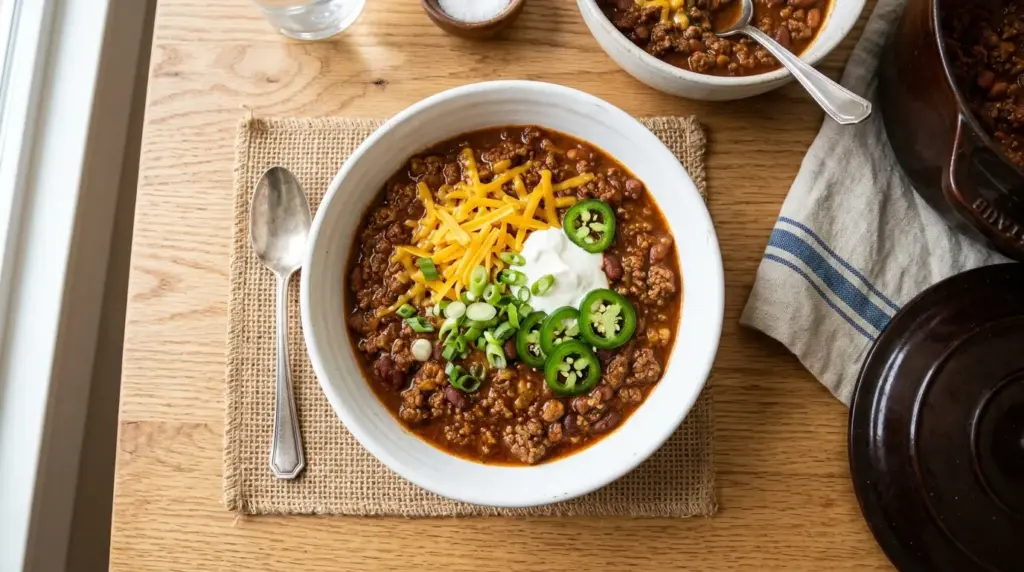
- Ladle the chili into bowls and set out your toppings: shredded cheddar, sour cream, green onions, jalapeños, lime wedges, and hot sauce. Let everyone customize their own bowl.
This chili pairs wonderfully with Skillet Cornbread for a truly satisfying meal.
Tips for Success
Even a simple chili recipe has a few details that separate a good bowl from a truly great one. Keep these in mind as you cook.
- Don’t skip the browning step. Properly browned beef has Maillard reaction flavors that make the entire chili taste richer and more complex. Crowding the pan or stirring too often steams the meat instead of searing it.
- Bloom your spices. Cooking dry spices in oil or fat for 1 to 2 minutes before adding liquid is not optional. It makes a substantial flavor difference.
- Let it simmer long enough. Rushing through a 20-minute simmer will give you a chili that tastes flat. Give it at least 45 minutes to 1 hour for the flavors to develop properly.
- Use kidney and black beans together. Kidney beans hold their shape and add heartiness, while black beans break down slightly and thicken the base. This combination gives great texture.
- Taste and adjust at the end. Canned tomatoes vary in acidity and saltiness between brands. Always taste before serving.
- Rest before serving if you can. Like most stews, chili tastes noticeably better after 30 minutes off the heat. The flavors continue to meld as it cools slightly.
- Add a splash of apple cider vinegar at the very end (about 1 teaspoon) to brighten the overall flavor if it tastes flat or one-dimensional.
Read Also: Turkey Chili Recipe
Serving Suggestions
This beef chili is hearty enough to stand alone, but the right sides and toppings take it to the next level. The key is balancing the rich, spiced chili with something cool, crunchy, or bright.
Here are some of the best ways to serve it:
- Cornbread for dunking, scooping, and soaking up every drop of that rich broth
- Baked Potato loaded with chili, cheese, and sour cream for the ultimate comfort food mashup
- Cilantro Lime Rice on the side or mixed directly into the bowl for a filling meal
- Homemade Tortilla Chips for scooping up the thick chili like a dip
- Baked Beans alongside for a classic cookout-style spread
For toppings, set up a full station with shredded cheese, sliced jalapeños, sour cream, green onions, and lime wedges so everyone can build their own perfect bowl.
For a lighter pairing: Broccoli Salad
Variations to Try
Once you’ve nailed this classic version, it’s easy to riff on it and make it your own. Here are some crowd-pleasing variations worth exploring.
- Smoky Beef Chili: Add 1 to 2 teaspoons of liquid smoke and swap the regular paprika for chipotle powder for a deeper, more barbecue-influenced profile.
- Texas-Style Chili: Omit the beans entirely. In Texas, traditional chili is all meat, all spice, and very proud about it.
- Extra Spicy Chili: Double the cayenne and add a diced fresh jalapeño or serrano pepper along with the bell pepper.
- Beef and Pork Chili: Substitute half the ground beef with ground pork for a slightly richer, fattier result.
- Cincinnati-Style Chili: Add warm spices like cinnamon, allspice, and a hint of unsweetened cocoa powder. Serve over spaghetti noodles with cheddar and diced onion on top.
- Chuck Roast Chili: Replace ground beef with a 2 lb (900g) chuck roast cut into 1-inch cubes, seared in batches, and simmered for at least 2 hours until fork-tender. Incredible texture payoff.
If you love hearty bean-based chilis, this Vegan Chili Recipe is also a fantastic option to try.
Storage and Reheating
Beef chili is one of those rare dishes that genuinely improves after a day in the fridge, making it perfect for making ahead or saving leftovers.
- Store cooled chili in an airtight container in the refrigerator for up to 5 days.
- For longer storage, freeze chili in individual portions in freezer-safe containers or zip-lock bags (lay them flat to save space) for up to 3 months. Thaw overnight in the fridge before reheating.
- To reheat on the stovetop, add the chili to a pot with a splash of beef broth or water and heat over medium-low, stirring occasionally, until warmed through, about 10 minutes.
- For microwave reheating, place in a microwave-safe bowl, cover loosely, and heat in 90-second intervals, stirring in between, until hot all the way through.
- Add toppings fresh after reheating, never before storing, as sour cream and cheese will break down in the fridge.
You might also want to explore this Crockpot Beef Stew Recipe for another make-ahead comfort meal.
Nutritional Facts
The following values are approximate per serving, based on 8 servings total, without toppings.
- Calories: ~380 kcal
- Protein: 30g
- Total Fat: 16g
- Saturated Fat: 6g
- Carbohydrates: 28g
- Dietary Fiber: 9g
- Sugars: 7g
- Sodium: 750mg
- Cholesterol: 75mg
Note: These values will vary based on the specific brands and exact amounts of ingredients used. Using leaner ground beef (90/10) will reduce fat and calorie counts.
Read Also: Vegetarian Chili Recipe
Health Benefits of Key Ingredients
Beyond being delicious, this beef chili delivers some genuinely impressive nutritional value. It’s a balanced, protein-packed meal with a good amount of fiber and micronutrients from both the beans and the tomatoes.
Here’s a look at what the key ingredients bring to the table:
- Ground beef is a complete protein source, providing all essential amino acids along with iron, zinc, and vitamin B12, which support energy levels and immune function.
- Kidney beans and black beans are rich in plant-based protein, dietary fiber, folate, and slow-digesting complex carbohydrates that help stabilize blood sugar levels.
- Crushed and diced tomatoes are excellent sources of lycopene, a powerful antioxidant linked to heart health, as well as vitamins C and K.
- Garlic contains allicin and other sulfur compounds that have well-documented anti-inflammatory and antimicrobial properties.
- Cumin and chili powder both contain antioxidants and have been studied for their potential benefits in supporting digestion and metabolic health.
- Bell pepper adds vitamin C, beta-carotene, and a range of B vitamins without adding significant calories to the dish.
This Chicken Chili Recipe is a great lower-fat alternative if you’re watching your calorie intake.
Frequently Asked Questions
1. Can I make this beef chili in a slow cooker?
Yes, absolutely. Brown the beef, onion, bell pepper, garlic, and spices in a skillet on the stovetop first, then transfer everything to the slow cooker along with the remaining ingredients. Cook on low for 6 to 8 hours or on high for 3 to 4 hours. Browning the beef first is worth the extra step for flavor.
2. What’s the best cut of beef for chili?
Ground beef with an 80/20 fat ratio is the classic choice and gives the best balance of flavor and texture. The fat renders into the chili as it cooks, adding richness. If you want a leaner version, 90/10 works, but you may want to add a tablespoon of olive oil to compensate. Cubed chuck roast is another excellent option if you prefer a chunkier, more stew-like chili.
3. How do I make chili thicker?
The easiest method is to let it simmer uncovered for the last 15 to 20 minutes to allow excess moisture to evaporate. You can also mash some of the beans directly in the pot using the back of your spoon, which naturally thickens the base. Another option is to stir in a tablespoon of masa harina (corn flour) mixed with a little water, which adds thickness and a subtle corn flavor.
4. Can I use dried beans instead of canned?
Yes, but you’ll need to soak them overnight and cook them separately before adding to the chili, as dried beans require significantly longer cooking times than the simmer in this recipe allows. Using pre-cooked dried beans is absolutely delicious and often results in creamier, better-flavored beans. Just make sure they’re fully tender before incorporating them.
5. How spicy is this chili recipe?
As written with 1/4 teaspoon of cayenne, this chili has a mild to medium heat level that most people find very approachable. To increase the heat, add more cayenne, a diced fresh jalapeño or serrano, or a dash of your favorite hot sauce. To make it completely mild, simply omit the cayenne pepper. The chili powder itself adds flavor without significant heat.
Read Also: Taco Seasoning Recipe
Final Thoughts
This beef chili recipe is exactly the kind of dish that earns a permanent spot in your cooking rotation.
It’s simple enough for a weeknight but rich and satisfying enough to serve proudly at a party or cook-off. The combination of properly browned beef, bloomed spices, and a long, slow simmer produces a result that feels like it took far more effort than it actually did.
Try it this week and make it your own, adjusting the heat, swapping the beans, or loading on the toppings until it’s exactly the bowl of chili you’ve always been looking for.
If you make it, drop a comment below and let me know how it turned out! I’d love to hear how you customized it or what sides you served alongside.
Recommended:
- Chili Recipe
- White Chicken Chili
- Crockpot Taco Soup
- Hamburger Soup
- Beef and Barley Soup
- Cowboy Stew
- Easy Taco Soup
- Santa Fe Soup
- Stuffed Pepper Soup
- Loaded Potato Soup


