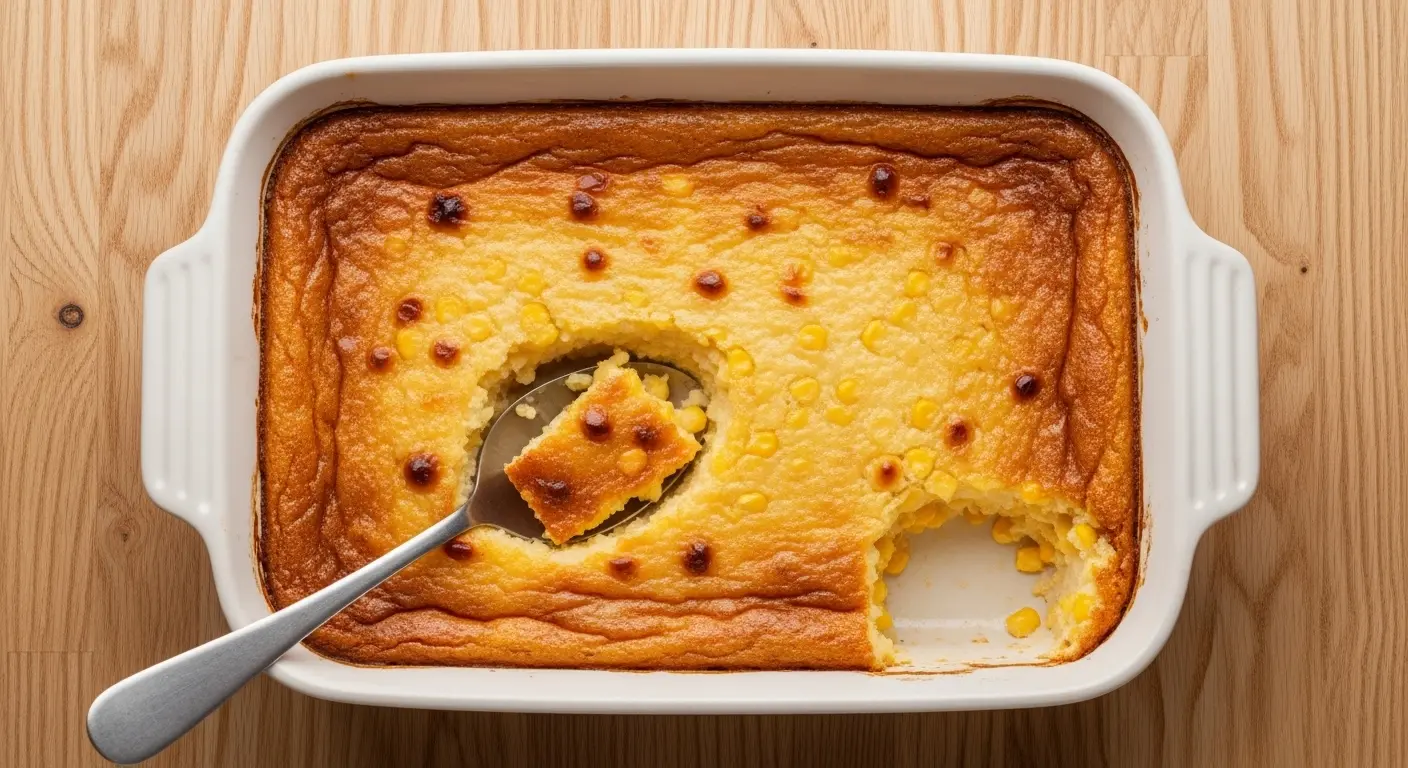
If you’ve never made a corn pudding recipe from scratch, you’re about to discover one of the most comforting side dishes in all of Southern cooking.
It’s that creamy, golden, custard-like casserole that disappears from the holiday table faster than anything else.
This dish sits somewhere between a rich cornbread and a silky soufflé, and it works for everything from casual weeknight dinners to Thanksgiving spreads.
The magic is in the combination of whole kernel corn and cream-style corn, both working together to deliver big corn flavor and a moist, spoonable texture.
Add in eggs, sour cream, melted butter, and a little sugar, and you get something that feels indulgent but is surprisingly simple to put together.
This version uses Jiffy corn muffin mix as the base, which is widely regarded as the easiest and most reliable method for home cooks. It bakes up beautifully every single time.
If you love cozy, crowd-pleasing sides, this corn casserole is a must-make that belongs in your regular rotation.
Why You’ll Love This Corn Pudding Recipe
This corn pudding recipe has earned its place as one of the most-requested dishes at potlucks, holiday dinners, and family gatherings across the South.
It comes together in about 10 minutes of active prep, which means you can spend more time enjoying dinner and less time in the kitchen.
The texture is absolutely irresistible. It’s creamy in the center with lightly golden, slightly crisp edges, and every bite is packed with sweet, buttery corn flavor.
It uses pantry-friendly ingredients you can find at any grocery store, so there’s no hunting for specialty items.
The recipe is endlessly adaptable. You can keep it sweet and simple or dress it up with shredded cheese, jalapeños, or green onions.
It’s also a fantastic make-ahead dish. You can mix everything the night before, refrigerate it, and bake fresh the next day with zero stress.
- It bakes in one casserole dish with minimal cleanup
- The sweet-savory balance makes it pair well with a huge variety of main dishes
- Kids and adults love it equally
- Leftovers reheat beautifully, so nothing goes to waste
- It’s a reliable crowd-pleaser that delivers consistent results every single time
You might also enjoy: Corn Soufflé
Ingredients
The ingredient list for this corn pudding recipe is short, simple, and relies on pantry staples. The key is using both cream-style corn and whole kernel corn together, since they contribute two different but equally important things: the cream-style corn melts into the batter and creates that luscious custard texture, while the whole kernel corn adds little pockets of sweetness and a satisfying chew.
- 1 box (8.5 oz / 241g) Jiffy corn muffin mix
- 1 can (15.25 oz / 432g) whole kernel corn, drained
- 1 can (14.75 oz / 418g) cream-style corn
- 1 cup (230g) sour cream
- 2 large eggs
- 1/2 cup (113g / 1 stick) unsalted butter, melted
- 2 tablespoons (25g) granulated sugar
- 1/2 teaspoon (2.5g) salt
- 1/4 teaspoon (0.6g) ground nutmeg (optional, but adds a warm depth of flavor)
- 1 teaspoon (5ml) vanilla extract (optional)
Read Also: Jiffy Cornbread Recipe With Creamed Corn
Kitchen Equipment Needed
You don’t need any special equipment to make this corn pudding recipe. A large mixing bowl, a whisk, and a baking dish are really all that stand between you and a perfect pan of this classic Southern side. That said, a good-quality baking dish makes a real difference in how evenly the pudding bakes and how easy cleanup is afterward.
- 9×13-inch baking dish (glass or ceramic recommended for even heat distribution)
- Large mixing bowl
- Whisk
- Rubber spatula
- Measuring cups and measuring spoons
- Can opener
- Cooking spray or softened butter for greasing the dish
- Oven mitts
Read Also: Sweet Cornbread Recipe
Recommended Products for This Recipe
These are personally recommended products based on quality and performance that will help you get the best results with this corn pudding recipe.
1. Pyrex 9×13 Glass Baking Dish
A glass baking dish distributes heat evenly and lets you monitor the browning on the bottom and sides of your pudding as it bakes. Glass also holds heat well after you remove the dish from the oven, which keeps the pudding warm and spoonable at the table. It’s a durable, affordable staple that every kitchen should have.
2. KitchenAid Stand Mixer Bowl Scraper Spatula
A good silicone spatula ensures you get every last bit of batter out of the mixing bowl and into the dish without waste. It also works for folding ingredients together gently without overmixing, which keeps the batter light. This is one of those small tools that genuinely makes a difference in your finished dish.
3. OXO Good Grips Whisk
Whisking your eggs and wet ingredients together properly is key to that smooth, uniform texture in the finished pudding. A well-balanced whisk with a comfortable grip makes this easy step even easier. This one is a kitchen classic for good reason.
4. Nielsen-Massey Pure Vanilla Extract
Vanilla extract is an optional but genuinely worthwhile addition to this corn pudding recipe. A quality pure vanilla extract adds a subtle warmth and complexity that elevates the overall flavor well beyond what imitation vanilla can offer. A small bottle goes a long way.
This recipe pairs wonderfully with a side of skillet cornbread for a full corn-forward spread.
Step-by-Step Instructions
Step 1: Preheat the Oven and Prepare Your Baking Dish
- Preheat your oven to 350°F (175°C). Allow at least 15 minutes for it to come fully up to temperature before you put the dish in.
- While the oven preheats, grease your 9×13-inch baking dish thoroughly with either softened butter or cooking spray. Make sure to coat the corners and sides, not just the bottom, so the pudding releases cleanly after baking.
- Set the prepared dish aside on your counter.
Step 2: Mix the Wet Ingredients
- Crack 2 large eggs into your large mixing bowl and beat them lightly with a whisk for about 30 seconds until the yolks and whites are fully combined. This step ensures the eggs distribute evenly throughout the batter rather than creating dense pockets.
- Add 1 cup (230g) of sour cream to the beaten eggs and whisk together until smooth and uniform. The sour cream is what gives this pudding its rich, moist interior, so don’t skip it.
- Pour in 1/2 cup (113g) of melted unsalted butter. Make sure the butter has cooled slightly before adding it so it doesn’t accidentally scramble the eggs. Whisk everything together until fully combined.
- Add 2 tablespoons (25g) of granulated sugar, 1/2 teaspoon (2.5g) of salt, and 1/4 teaspoon (0.6g) of ground nutmeg if using. Whisk until the sugar and salt are dissolved into the mixture.
- Stir in 1 teaspoon (5ml) of vanilla extract if using.
Step 3: Add the Corn
- Open and drain your can of whole kernel corn completely. Press the corn gently against the strainer or colander to remove as much excess liquid as possible. Too much extra moisture can make the pudding watery.
- Add the drained whole kernel corn to the bowl.
- Open your can of cream-style corn and add it directly to the bowl without draining, since the thick cream sauce from this corn is part of what creates the pudding texture.
- Use your rubber spatula to fold the corn into the wet mixture, stirring gently but thoroughly until everything is evenly distributed.
Step 4: Fold in the Jiffy Mix
- Open your box of Jiffy corn muffin mix and add the entire contents to the bowl.
- Using your rubber spatula or a large spoon, fold the Jiffy mix into the batter with slow, sweeping strokes. Mix just until you no longer see dry streaks of the muffin mix, which should take about 20-25 folds.
- Do not overmix at this stage. Overworking the batter activates the gluten in the mix and can result in a tougher, denser texture rather than the tender, spoonable pudding you’re aiming for.
- The batter will look slightly lumpy, and that is completely normal and expected.
Step 5: Transfer to the Baking Dish and Bake
- Pour the batter into your prepared 9×13-inch baking dish, using your rubber spatula to scrape every bit from the bowl.
- Spread the batter into an even layer, smoothing the top gently with the spatula. A level batter means even baking from edge to edge.
- Place the dish on the center rack of your preheated 350°F (175°C) oven.
- Bake uncovered for 45 to 55 minutes. The pudding is done when the top is golden brown, the edges have pulled away slightly from the sides of the pan, and the center no longer jiggles when you gently shake the dish.
- If the top is browning too quickly before the center is set, you can loosely tent the dish with aluminum foil for the last 10 minutes of baking.
Step 6: Rest and Serve
- Remove the corn pudding from the oven and let it rest on a wire rack or folded kitchen towel for at least 10 minutes before serving. This resting time allows the custard to finish setting in the residual heat.
- Serve warm, scooped directly from the dish with a large spoon. The pudding should be spoonable and creamy in the center with slightly firmer, golden edges.
This dish pairs naturally alongside a comforting bowl of chicken corn chowder for a truly satisfying corn-forward meal.
Tips for Success
A few smart techniques separate a good corn pudding from a great one. The biggest mistake most people make is overbaking, which turns the creamy custard into something dry and dense. Pull it from the oven as soon as the center is just set, even if it still looks slightly soft in the very middle. It will firm up as it rests.
- Don’t skip draining the whole kernel corn. Excess liquid from the can will throw off the batter consistency and can result in a watery pudding.
- Use full-fat sour cream. Low-fat or fat-free versions contain more water and less fat, both of which can affect the richness and texture of the finished dish.
- Let the butter cool before adding. Adding very hot melted butter directly to the eggs can partially cook them, which creates an unpleasant grainy texture.
- Bake on the center rack. This ensures the most even heat distribution and prevents the bottom from over-browning before the top is done.
- Check for doneness at the 45-minute mark. Every oven is different, and some run hotter than others. Start checking early to avoid overbaking.
- Resist slicing for at least 10 minutes after baking. Cutting into the pudding too soon causes it to collapse before it’s had time to set properly.
- Use room-temperature eggs and sour cream. Cold ingredients can cause the melted butter to seize and clump. Letting them sit on the counter for 20-30 minutes before mixing helps everything come together smoothly.
For another classic Southern baked side dish, you’ll love this squash casserole recipe.
Serving Suggestions

Corn pudding is one of the most versatile side dishes you can have in your rotation. Because it’s sweet, creamy, and rich, it pairs beautifully with savory, salty, or spiced main courses. Think of it as the soft, comforting counterpart to whatever bold flavors are on the rest of your plate.
It’s a Thanksgiving and Christmas classic for a reason, and it holds its own alongside everything from roasted turkey to glazed ham to slow-cooked pork.
- Serve alongside Thanksgiving Turkey as part of a holiday spread
- Pair with Collard Greens and Sausage Gravy for a true Southern comfort meal
- Serve next to Prime Rib for a festive holiday dinner
- Plate alongside Southern Fried Chicken for a quintessential Southern feast
- Pair with Meatloaf and roasted vegetables for a hearty weeknight dinner
- Top individual servings with a pat of Honey Butter for an extra layer of richness
- Serve at a potluck or holiday buffet alongside Classic Deviled Eggs
Another favorite: Sweet Potato Casserole
Variations to Try
Once you’ve mastered the basic corn pudding recipe, the variations are genuinely fun to explore. The base batter is wonderfully adaptable, and small additions can shift it from a classic Southern side to a Tex-Mex-inspired crowd-pleaser or a cheesy, indulgent casserole that barely resembles the original but is equally delicious.
- Cheesy Corn Pudding: Fold 1 cup (115g) of shredded sharp cheddar cheese into the batter before baking, and sprinkle another 1/4 cup on top for a melted, golden crust. Gruyère also works beautifully here.
- Jalapeño Corn Pudding: Add 1 or 2 seeded and finely diced fresh jalapeños to the batter for a spicy kick. For a milder version, use a small can of diced green chiles instead.
- Green Onion Corn Pudding: Stir in 3-4 finely sliced green onions for a savory, fresh flavor note that cuts through the richness of the pudding.
- Bacon Corn Pudding: Fold in 4-6 strips of crispy cooked and crumbled bacon for a smoky, salty layer of flavor that takes this dish to a whole new level.
- Extra-Sweet Version: Increase the sugar to 1/4 cup (50g) and add a pinch of cinnamon for a dessert-adjacent corn pudding that’s especially popular with kids.
- From-Scratch Version: Skip the Jiffy mix and use 1/2 cup (65g) all-purpose flour, 1/4 cup (40g) cornmeal, 1 teaspoon baking powder, and a tablespoon of sugar to replicate the mix from scratch with no additives.
Read Also: Mexican Street Corn Recipe
Storage and Reheating
Corn pudding stores well and actually tastes just as good the next day, which makes it a fantastic dish to make for meal prep or to stretch across multiple meals. The key to successful storage is letting the pudding cool completely before covering it, since trapping steam can introduce excess moisture and make the texture waterlogged.
- Refrigerator: Let the pudding cool to room temperature, then cover the dish tightly with plastic wrap or transfer leftovers to an airtight container. It will keep in the refrigerator for up to 4 days.
- Freezer: Portion the cooled pudding into freezer-safe containers and freeze for up to 2 months. Thaw overnight in the refrigerator before reheating.
- Oven Reheating: Cover the dish with foil and reheat at 325°F (163°C) for 15-20 minutes, or until heated through. This method preserves the texture best and brings back the slightly crisp edges.
- Microwave Reheating: For individual portions, microwave on medium power in 45-second increments, stirring gently between rounds. Full power can make the pudding rubbery, so lower power is key.
- Make-Ahead Tip: You can assemble the unbaked batter and refrigerate it (covered) for up to 24 hours before baking. Let it sit at room temperature for 20-30 minutes before going into the oven.
For another fantastic make-ahead side dish, check out this green bean casserole recipe.
Nutritional Facts
The following nutrition information is based on a standard serving size of approximately 1/10 of the full 9×13 casserole (about 3/4 cup or 180g). Actual values may vary depending on specific brands and any optional ingredients added.
| Nutrient | Per Serving |
|---|---|
| Calories | ~280 kcal |
| Total Fat | 15g |
| Saturated Fat | 8g |
| Cholesterol | 75mg |
| Sodium | 420mg |
| Total Carbohydrates | 32g |
| Dietary Fiber | 1.5g |
| Total Sugars | 11g |
| Protein | 5g |
| Calcium | 6% DV |
| Iron | 4% DV |
| Vitamin C | 4% DV |
These values are estimates. Using reduced-fat sour cream or less butter will lower the fat and calorie count. Adding cheese or bacon will increase both fat and sodium.
This dish makes a great accompaniment to a comforting bowl of corn soup.
Health Benefits of Key Ingredients
While corn pudding is undeniably a comfort food rather than a health food, several of its core ingredients do contribute meaningful nutritional value. Understanding what each ingredient brings to the table helps you make informed choices about portions, swaps, and additions.
Corn, eggs, and dairy each bring a different set of nutrients, and together they create a dish that’s more nourishing than it might initially appear.
- Corn is a whole grain source of dietary fiber, which supports healthy digestion and helps maintain steady blood sugar levels. It also provides lutein and zeaxanthin, two antioxidants that support eye health, as well as B vitamins including folate, which is important for cell function.
- Eggs are one of the most nutrient-dense foods available. They provide complete protein with all nine essential amino acids, as well as choline, vitamin D, and vitamin B12. The healthy fats in egg yolks also support brain function and hormone production.
- Butter contains fat-soluble vitamins A, D, E, and K, all of which require dietary fat for proper absorption. Moderate amounts of butter from quality dairy sources also provide conjugated linoleic acid (CLA), which has been studied for its potential anti-inflammatory properties.
- Sour cream delivers calcium and phosphorus, both essential for strong bones and teeth. It also provides a small amount of beneficial probiotics from the culturing process, which can support gut health.
- Jiffy corn muffin mix contributes a source of enriched grain, including iron and several B vitamins that support energy metabolism and red blood cell production.
Read Also: Corn Chowder Recipe
Frequently Asked Questions
1. What is corn pudding and how is it different from corn casserole?
Corn pudding and corn casserole are often used interchangeably, but there is a subtle difference in texture and tradition. Corn pudding is the older term and tends to refer to a dish with a softer, more custardy, spoonable texture, similar to a baked custard made with corn. Corn casserole typically uses a cornbread mix like Jiffy and has a slightly firmer, more structured texture that holds its shape when cut. The recipe here falls somewhere in between, using Jiffy mix for structure while keeping a creamy, pudding-like interior.
2. Can I make corn pudding without Jiffy mix?
Absolutely. To make a from-scratch version without Jiffy mix, combine 1/2 cup (65g) of all-purpose flour, 1/4 cup (40g) of fine yellow cornmeal, 1 teaspoon of baking powder, 1 tablespoon of sugar, and 1/4 teaspoon of salt. Use this homemade blend in place of the box of Jiffy mix in the recipe. The result will be very similar in flavor and texture with a slightly more pronounced corn flavor from the cornmeal.
3. Can I use fresh or frozen corn instead of canned?
Yes, you can substitute fresh or frozen whole kernel corn for the canned version. Use about 1 1/2 cups (240g) of fresh or thawed frozen corn in place of one drained can. If using frozen corn, thaw it completely and pat it dry with paper towels before adding it to the batter to prevent excess moisture from making the pudding watery. For the cream-style corn component, a store-bought can is the most reliable option, though you can make a homemade version by blending 1 cup (160g) of corn kernels with 1/4 cup (60ml) of heavy cream until roughly smooth.
4. Why is my corn pudding runny in the middle?
A runny center usually means the pudding was underbaked. The most reliable test for doneness is the gentle shake test: when you carefully shake the dish, the center should be set with only the slightest jiggle, similar to a baked cheesecake. If it moves in waves, it needs more time. Return it to the oven and check again every 5 minutes. A too-deep baking dish can also contribute to a runny center, as the batter takes longer to bake through. A shallow 9×13 dish is ideal for this reason.
5. Can I make corn pudding ahead of time?
Yes, and it works beautifully as a make-ahead dish. You have two options. First, you can mix the unbaked batter, pour it into the greased dish, cover it tightly with plastic wrap, and refrigerate it for up to 24 hours before baking. Let it sit at room temperature for about 20-30 minutes before going into the oven to take the chill off. Second, you can bake the pudding completely, let it cool, cover it, and refrigerate it for up to 4 days. Reheat it covered in a 325°F (163°C) oven for 15-20 minutes before serving.
For another crowd-pleasing dish that’s easy to make ahead, try this hashbrown casserole recipe.
Final Thoughts
This corn pudding recipe is the kind of dish that earns a permanent spot in your cooking rotation after the very first bite.
It’s simple enough for a busy weeknight but impressive enough to bring to a holiday table, and it consistently gets rave reviews from every age group at the table.
The combination of sweet corn, creamy sour cream, and buttery Jiffy mix creates something that tastes like it came from a beloved grandmother’s kitchen, even if it’s your very first time making it.
Give it a try this week, and don’t be surprised when you find yourself making a double batch.
If you make this recipe, leave a comment below and let me know how it turned out! I’d love to hear what variations you tried and what you served it alongside.
Recommended:
- Corn Casserole Recipe
- Squash Casserole Recipe
- Sweet Potato Casserole Recipe
- Green Bean Casserole Recipe
- Tater Tot Casserole Recipe
- Broccoli Casserole Recipe
- Funeral Potatoes Recipe
- Cheesy Potatoes Recipe
- Dirt Pudding Recipe
- Banana Pudding Recipe


