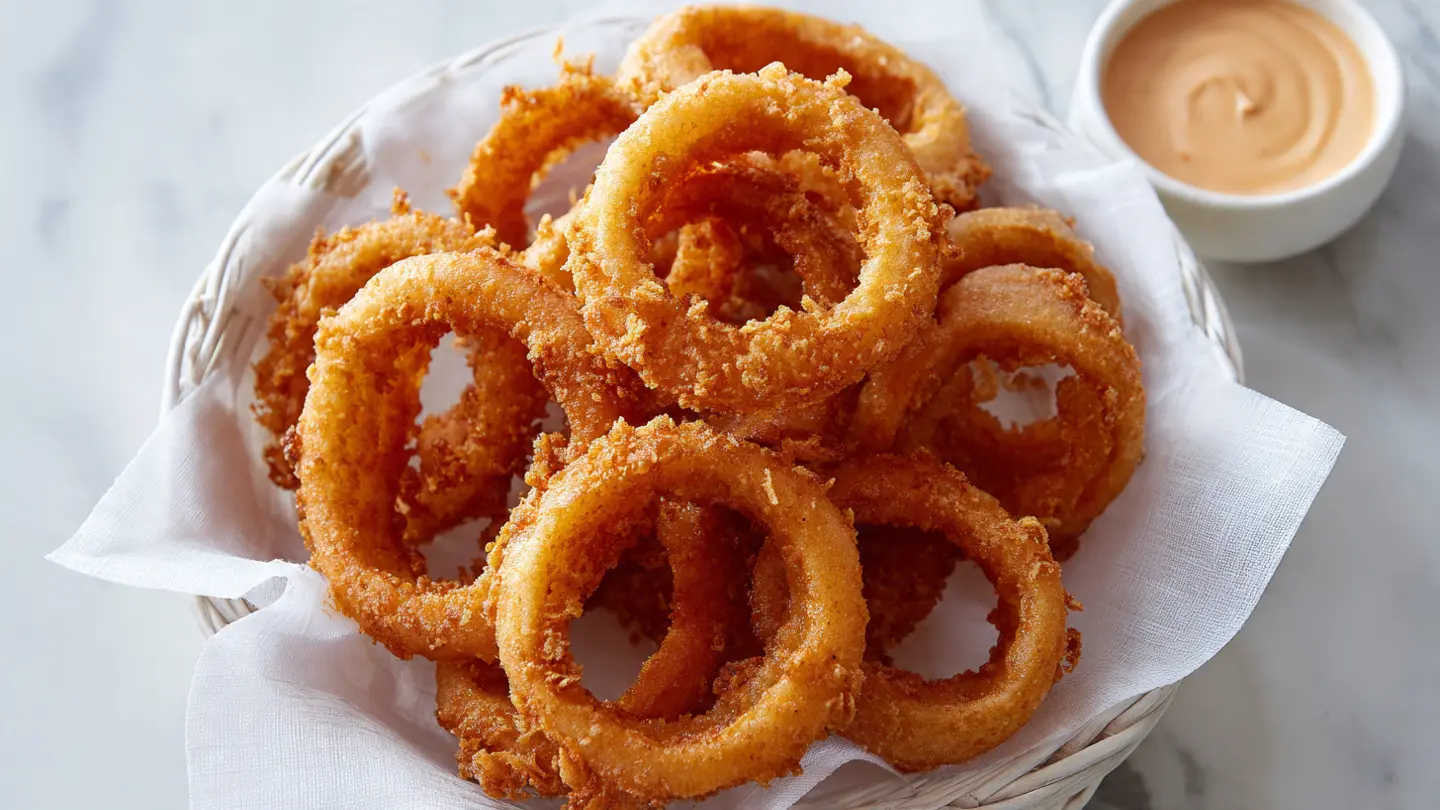
If you’ve ever ordered an onion rings recipe at a restaurant and thought, “I could totally make these at home,” you are absolutely right. Homemade onion rings are simpler than most people expect, and the results are leagues above anything frozen or drive-through.
The secret is a seasoned buttermilk soak followed by a well-seasoned flour-and-cornstarch dredge that clings tightly to every ring. That combination is what gives you that shatteringly crisp, golden crust encasing a tender, sweet onion inside.
Once you make these at home, you’ll wonder why you ever settled for anything else.
For another beloved fried side to serve alongside these rings, check out this Air Fryer French Fries Recipe.
Why You’ll Love This Onion Rings Recipe
You don’t need a deep fryer or a culinary degree to pull this off. Just a few pantry staples, a heavy pot, and a little patience are all it takes.
The buttermilk is key. It tenderizes the onion slightly, adds a subtle tang, and creates a tacky surface that helps the seasoned coating grip every inch of the ring. Skipping it will leave you with a batter that slides right off.
The combination of all-purpose flour and cornstarch is another non-negotiable. Flour adds color and savory depth during frying, while cornstarch keeps the crust light and crispy rather than dense or doughy.
These rings are:
- Deeply golden and crispy on the outside
- Tender and sweet on the inside
- Made with simple, easy-to-find ingredients
- Ready in under an hour from start to finish
- Perfect as a snack, appetizer, or side dish
You might also enjoy: Comeback Sauce Recipe — it’s one of the best dipping sauces you’ll ever make for fried foods.
Ingredients
You only need a handful of everyday ingredients for this recipe. The seasoning blend in the coating is what transforms a plain batter into something truly memorable — don’t skip the smoked paprika or the pinch of cayenne.
- 2 large sweet onions (Vidalia or yellow), cut into ½-inch (1.25 cm) thick rings
- 1 cup (240 ml) buttermilk
- 1 large egg
- 1 cup (125 g) all-purpose flour
- ½ cup (60 g) cornstarch
- 1½ teaspoons (9 g) salt, divided
- 1 teaspoon (2 g) smoked paprika
- 1 teaspoon (3 g) garlic powder
- ½ teaspoon (1 g) onion powder
- ½ teaspoon (1 g) black pepper
- ¼ teaspoon (0.5 g) cayenne pepper
- Vegetable oil or canola oil for frying (enough for 2–3 inches / 5–7.5 cm of depth in your pot)
These ingredients pair beautifully with a homemade Bang Bang Sauce for dipping — it’s a creamy, spicy combo that takes these rings to the next level.
Kitchen Equipment Needed
You don’t need anything fancy here, but a few key tools will make the process much smoother and safer. A thermometer is especially important — oil that isn’t hot enough leads to greasy, soggy rings, and oil that’s too hot burns the coating before the onion has time to cook through.
- Large heavy-bottomed pot or Dutch oven (for deep frying)
- Instant-read oil thermometer or deep-fry thermometer
- 3 shallow bowls or dishes (for the dredging stations)
- Wire cooling rack set over a baking sheet
- Sharp chef’s knife and cutting board
- Tongs or a spider strainer
- Paper towels
- Large mixing bowl
Read Also: Easy Fried Chicken Recipe
Recommended Products for This Recipe
These are products recommended based on quality and performance for making the crispiest, most flavorful homemade onion rings.
1. Dutch Oven for Deep Frying
A heavy enameled cast iron Dutch oven distributes heat evenly and maintains oil temperature far better than a thin-bottomed pot. Consistent oil temperature is the single biggest factor in achieving evenly crispy, non-greasy onion rings. It also reduces dangerous temperature drops when you add cold-battered rings to the oil.
2. Deep Fry Thermometer
Guessing oil temperature is one of the most common reasons homemade fried foods come out soggy or burnt. A quality clip-on deep fry thermometer takes the guesswork out completely and keeps your oil right in that 360–375°F (182–190°C) sweet spot throughout the whole frying session.
3. Fine-Ground Smoked Paprika
Smoked paprika is what gives this batter a subtle, complex depth that goes beyond plain flour and salt. A high-quality smoked Spanish paprika makes a noticeable difference in both the flavor and the rich red-gold color of the finished coating.
4. Spider Strainer
A stainless steel spider strainer makes it easy to lower rings into the oil and scoop them out in one smooth motion without tearing the crust or burning your hands. It’s also helpful for draining excess oil quickly over the pot before transferring rings to the rack.
Another favorite to serve these with: Burger Sauce Recipe
Step-by-Step Instructions
1. Slice and Separate the Onions
- Peel the outer papery skin from both onions and cut off the top stems.
- Place each onion flat on the cutting board and slice into rounds that are approximately ½ inch (1.25 cm) thick — not thinner, or they’ll cook down to almost nothing inside; not thicker, or the batter may burn before the onion softens.
- Gently push each round apart from the center outward to separate the individual rings. You’ll get the large outer rings and several smaller inner rings — use all of them.
- Discard any very small innermost rings (less than 1 inch / 2.5 cm diameter) that won’t hold batter well.
- Inspect each ring for the thin, transparent membrane between layers. If present, peel it away carefully. This membrane can shrink during frying, causing the onion to slip out of its coating in one piece — which is the classic “onion escape” problem.
- Set the separated rings on a large plate or baking sheet while you prepare the dredging stations.
2. Set Up Your Three-Stage Dredging Stations
- In the first shallow bowl, whisk together the buttermilk and egg until fully combined. This is your wet station.
- In the second shallow bowl, combine the all-purpose flour, cornstarch, 1 teaspoon (6 g) of the salt, smoked paprika, garlic powder, onion powder, black pepper, and cayenne pepper. Whisk or stir until the mixture is evenly blended with no visible clumps of cornstarch. This is your dry station.
- The third station is a clean plate or wire rack. This is where your battered rings will rest before frying — this resting step is important and should not be skipped (more on that in the next step).
- Set up the stations in order: dry bowl → wet bowl → resting rack. This creates a logical assembly-line flow that makes coating faster and less messy.
3. Coat the Onion Rings
- Working with one onion ring at a time, first dredge it in the seasoned flour-cornstarch mixture. Press it down and flip it, making sure the entire surface of the ring is coated, including the inside edge.
- Shake the ring gently to remove any excess dry mixture — you want a light, even coating, not a clumpy one.
- Transfer the flour-coated ring immediately into the buttermilk-egg mixture. Turn it to coat all sides and let any excess drip back into the bowl for 2–3 seconds.
- Return the ring to the seasoned flour mixture for a second coat. Press gently so the flour adheres all over, paying attention to any wet spots that might have been missed.
- Place the double-coated ring on the wire rack. Do not stack rings on top of each other — this causes them to stick and tears the coating.
- Repeat with all remaining rings.
- Once all rings are coated, allow them to rest on the wire rack for 10 minutes. This rest time lets the coating set and become slightly tacky, which helps it grip the onion tightly during frying rather than puffing away and falling off.
4. Heat the Oil
- While the coated rings are resting, pour vegetable or canola oil into your heavy pot to a depth of 2–3 inches (5–7.5 cm).
- Attach your thermometer to the side of the pot, making sure the probe tip is submerged in the oil but not touching the bottom of the pot.
- Heat the oil over medium to medium-high heat until it reaches 360–375°F (182–190°C). This may take 8–12 minutes depending on your stove and pot.
- Do not rush this step by cranking the heat too high. Oil that reaches temperature too quickly may be hotter at the bottom than at the surface, and rings fried in unevenly heated oil can come out blotchy or partially raw.
- Place a wire rack over a paper towel-lined baking sheet near the stove. This is where finished rings will drain.
- Have your tongs or spider strainer ready before you begin frying.
5. Fry in Batches
- Once the oil reaches temperature, carefully lower 4–6 onion rings into the hot oil using tongs or your spider strainer. Do not overcrowd the pot — adding too many rings at once drops the oil temperature rapidly, which causes the batter to absorb oil instead of crisping up.
- Fry the rings for 2–3 minutes on the first side, until the bottom is a deep golden brown and the coating looks set and dry.
- Use tongs to flip each ring carefully. Fry the second side for another 1–2 minutes until it matches the color of the first side.
- If your oil drops below 360°F (182°C) during frying, pause between batches and let the temperature recover before adding the next batch.
- Remove finished rings with tongs or a spider strainer, letting excess oil drip back into the pot for 3–4 seconds before transferring.
- Place finished rings on the wire rack in a single layer — not directly on paper towels, which can trap steam underneath and soften the crust. The rack allows air to circulate all around the ring.
- Sprinkle with the remaining ½ teaspoon (3 g) of salt while still hot.
- Continue frying in batches until all rings are done.
6. Serve Immediately
- Onion rings are at their absolute best within the first 5–10 minutes of coming out of the oil.
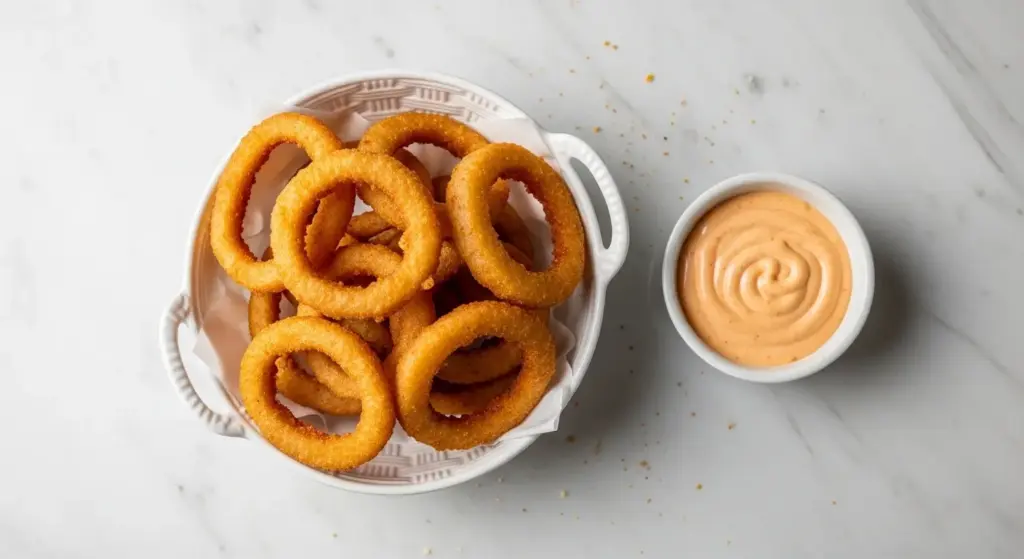
- Serve them on a platter or in a basket lined with parchment and bring your dipping sauces alongside.
- If you need to keep them warm for a few minutes, place the wire rack with the rings in an oven set to 200°F (93°C) — this holds them without steaming the crust soft.
- Do not cover hot onion rings with foil or place them in a closed container, as trapped steam will make the coating soggy almost immediately.
Read Also: Southern Fried Chicken Recipe
Tips for Success
Getting consistently crispy, perfectly coated onion rings every time comes down to a few key details. Once you internalize these, the whole process becomes second nature.
- Always remove the inner membrane. The thin translucent skin between onion layers shrinks during frying and pulls the onion right out of the batter. Take an extra 30 seconds per ring to peel it away before coating.
- Don’t skip the rest time. After coating, letting the rings sit on a rack for 10 minutes allows the coating to become slightly sticky and tacky — this is what makes the batter stay put during frying.
- Use a thermometer, not guesswork. The ideal frying temperature is 360–375°F (182–190°C). A wooden chopstick dipped into the oil should produce a steady stream of small bubbles — not a violent sizzle and not slow bubbling.
- Fry in small batches. Each time you add rings, the oil temperature drops. Crowded rings cook unevenly and come out greasy. Four to six rings per batch for a medium pot is ideal.
- Drain on a rack, not paper towels. Resting on paper towels traps steam underneath the ring and softens the crust within minutes. A wire rack lets hot air circulate on all sides.
- Season hot. Salt sticks best to freshly fried, slightly oily surfaces. Add your final sprinkle of salt the moment the rings come out of the oil.
- Slice consistently. Rings that are the same thickness fry at the same rate. Uneven slices mean some rings are overcooked while others are underdone.
This technique for achieving a crispy coating also works wonderfully with Air Fryer Zucchini Fries if you’re looking for a lighter variation.
Serving Suggestions
Onion rings are at home in so many settings — as an appetizer at a backyard cookout, a side dish at a weeknight dinner, or just a snack on their own. Here are some of the best ways to serve them:
Pair them with a great dipping sauce. The classics include ketchup, ranch, and BBQ Sauce, but they also shine with a spicy mayo, honey mustard, or a tangy comeback sauce. For the best results, prepare your sauces before you start frying so everything hits the table at once.
Serve alongside any of the following for a full, crowd-pleasing spread:
- Classic Smash Burger — onion rings and burgers are one of the greatest classic pairings
- Crack Burger — for an indulgent cookout centerpiece
- Easy Deviled Eggs — a classic appetizer platter addition
- Creamy Coleslaw — cool and creamy against the hot, crispy rings
- Chicken Tenders — a perfect fried platter combo
- Potato Salad — a picnic classic that rounds out any fried spread
- Easy Nachos — serve both as a big game day snack spread
Variations to Try
Once you’ve nailed the classic version, this basic dredge-and-fry method opens the door to a lot of fun variations. The coating and technique remain the same — only the flavors and ingredients change.
- Beer-Battered Onion Rings: Replace the buttermilk and egg with 1 cup (240 ml) of cold beer and 2 tablespoons (30 ml) of flour mixed in. The carbonation creates a lighter, airier batter with a slightly hoppy flavor that many people prefer.
- Spicy Onion Rings: Double the cayenne pepper and add ½ teaspoon (1 g) of chipotle powder to the dry mix. Serve with a cooling dipping sauce to balance the heat.
- Parmesan Herb Onion Rings: Add ¼ cup (25 g) finely grated Parmesan cheese and 1 teaspoon (1 g) of dried Italian seasoning into the dry coating mix. The Parmesan crisps beautifully and adds a salty, nutty edge.
- Panko-Crusted Onion Rings: After the second flour dredge, press each ring into a shallow bowl of panko breadcrumbs for an extra-crunchy exterior. This version has a more textured crust than the pure flour version.
- Air Fryer Onion Rings: Spray the coated rings with cooking spray and air fry at 400°F (200°C) for 8–10 minutes, flipping halfway. They won’t be quite as deeply crispy as the fried version, but they’re a solid lighter alternative.
- Sweet Onion and Blue Cheese Rings: Use Vidalia onions for maximum sweetness and serve with a creamy blue cheese dipping sauce. The sweetness of the onion against the tangy cheese is a winning combination.
Read Also: Air Fryer Chicken Wings Recipe
Storage and Reheating
Homemade onion rings are truly best eaten fresh, but if you have leftovers, here’s how to handle them without turning them into a soggy mess.
- Refrigerating: Allow rings to cool completely to room temperature before storing. Place them in a single layer on a parchment-lined container, or separate layers with parchment paper to prevent sticking. They will keep in the refrigerator for up to 3 days.
- Freezing: Arrange fully cooled rings in a single layer on a baking sheet and freeze for 1–2 hours until solid. Once frozen, transfer to a zip-top freezer bag with parchment between layers. They’ll keep for up to 2 months.
- Reheating in the oven (best method): Place rings on a wire rack over a baking sheet and bake at 400°F (200°C) for 8–12 minutes, flipping once halfway through. This method restores significant crispiness without making the coating chewy.
- Reheating in an air fryer: Air fry at 375°F (190°C) for 4–6 minutes until hot and re-crisped. This is the fastest and most effective method for smaller quantities.
- Avoid the microwave: Microwaving makes the coating chewy and steam-soft within seconds. It’s the worst way to reheat these and should be avoided entirely.
This technique is similar to how you’d store and reheat Air Fryer Chicken Tenders — a wire rack in the oven is your best friend for getting that crunch back.
Nutritional Facts
The following values are approximate per serving (about 6–8 rings), based on the recipe as written. Actual values will vary depending on the amount of oil absorbed during frying and the size of your onion rings.
| Nutrient | Per Serving (approx.) |
|---|---|
| Calories | 280–320 kcal |
| Total Fat | 12–16 g |
| Saturated Fat | 1.5–2 g |
| Carbohydrates | 38–44 g |
| Fiber | 2 g |
| Sugar | 6 g |
| Protein | 5–6 g |
| Sodium | 480–550 mg |
| Potassium | 180 mg |
These values assume approximately 4 servings from the recipe (about 2 large onions yielding 24–32 rings total).
Read Also: Easy Tartar Sauce Recipe
Health Benefits of Key Ingredients
Onion rings are a treat, not a health food — but the ingredients inside aren’t without their merits. Here’s a look at what each key component brings to the table beyond flavor.
Onions are one of the most nutrient-dense vegetables available and they deserve more credit than they get. They are a rich source of quercetin, a powerful antioxidant flavonoid that has been linked to reduced inflammation and improved heart health in numerous studies.
Onions also contain prebiotic fiber in the form of inulin and fructooligosaccharides. These compounds feed beneficial bacteria in the gut, supporting digestive health and immune function over time.
Here’s a summary of the benefits of each key ingredient:
- Onions: High in quercetin (antioxidant), vitamin C, B6, and prebiotic fiber. Quercetin may support heart health and reduce inflammation.
- Buttermilk: Contains calcium, phosphorus, and probiotics. The lactic acid in buttermilk is easier to digest than regular milk for many people.
- All-purpose flour: Provides carbohydrates for energy and small amounts of iron and B vitamins when enriched.
- Cornstarch: Primarily a carbohydrate source; its role here is textural rather than nutritional — it keeps the crust light and airy.
- Smoked paprika: Contains capsaicin and carotenoids, both of which have antioxidant properties. Paprika is also a source of vitamin A.
- Garlic powder: Retains many of the allicin-related benefits of fresh garlic, including antimicrobial and anti-inflammatory properties.
- Eggs: Provide complete protein, choline for brain health, and fat-soluble vitamins A, D, and E.
Read Also: Cheese Sauce Recipe
Frequently Asked Questions
1. What is the best onion to use for onion rings?
Sweet onions — like Vidalia, Walla Walla, or Maui varieties — are widely considered the best choice for onion rings. Their natural sweetness mellows further during frying, and their high water content creates a tender, juicy interior contrast against the crispy coating.
Yellow onions are the most common substitute and work very well. White onions can also be used, but they tend to have a sharper, more pungent flavor that some people find overpowering once fried. Red onions are generally not recommended — their strong flavor and tendency to turn slightly bitter when exposed to high heat make them a less appealing option for this application.
2. Why does my batter keep falling off?
Batter falling off is almost always caused by one of three things: oil that isn’t hot enough, a coating that hasn’t been allowed to set, or onions with residual moisture on the surface.
Make sure your oil is at 360–375°F (182–190°C) before you add the rings. If the oil is too cool, the batter soaks in oil rather than immediately crisping, and it slides right off. Also make sure to let coated rings rest on a wire rack for 10 full minutes before frying — this rest period allows the coating to become tacky and adhesive. Finally, check for the thin inner membrane on each ring and remove it; that slippery layer is often what causes the onion to slip free of even well-adhered batter.
3. Can I make the rings ahead of time?
You can coat the rings up to 2 hours in advance and refrigerate them on a wire rack, uncovered. The cold air in the fridge actually helps the coating set even more firmly before frying.
Do not coat the rings and leave them at room temperature for more than 30 minutes, as the moisture from the onion can cause the coating to become gummy. When ready to fry, pull them straight from the fridge into the hot oil — the temperature contrast creates a particularly crispy crust.
4. Can I use an air fryer instead of deep frying?
Yes, the air fryer works reasonably well for this recipe. Spray the coated rings generously with cooking spray on both sides and air fry at 400°F (200°C) for 8–10 minutes, flipping once at the halfway point.
The result won’t have quite the same deep golden color or shattering crispiness as deep-fried rings, but they’re still delicious and significantly lighter in terms of fat content. The double-dredge method described in the instructions is especially helpful when air frying, as it builds up a thicker coating that holds together better in the circulating hot air.
5. How do I keep onion rings crispy while serving a large batch?
The best method is to place a wire rack over a baking sheet and put it in an oven preheated to 200°F (93°C). As each batch comes out of the oil, transfer it straight to the rack in the warm oven.
This method keeps rings hot and maintains their crunch for up to 20–30 minutes without any significant loss in quality. The low oven temperature is warm enough to keep them hot but not so hot that it continues cooking them. Avoid stacking or covering the rings, as both trapped heat and trapped steam will soften the coating quickly.
Read Also: Sunshine Sauce Recipe
Final Thoughts
Making a homemade onion rings recipe is one of those simple cooking wins that delivers a huge payoff. With the right technique — a seasoned dry dredge, a buttermilk soak, proper oil temperature, and a patience-testing resting period — you’ll have golden, shatteringly crispy rings that make any meal feel like a celebration.
Give this recipe a try the next time you’re firing up the grill for burgers, hosting friends, or just craving something fried and satisfying.
If you make these, leave a comment below and let us know how they turned out. Share a photo or tag us — we love seeing your kitchen successes!
Recommended:
- Air Fryer French Fries Recipe
- Easy Fried Chicken Recipe
- Crack Burger Recipe
- Buffalo Chicken Dip Recipe
- Easy Pigs in a Blanket Recipe
- Broccoli Salad Recipe
- Easy Guacamole Recipe
- Loaded Nachos Recipe
- Chipotle Chicken Recipe
- Easy Nachos Recipe


