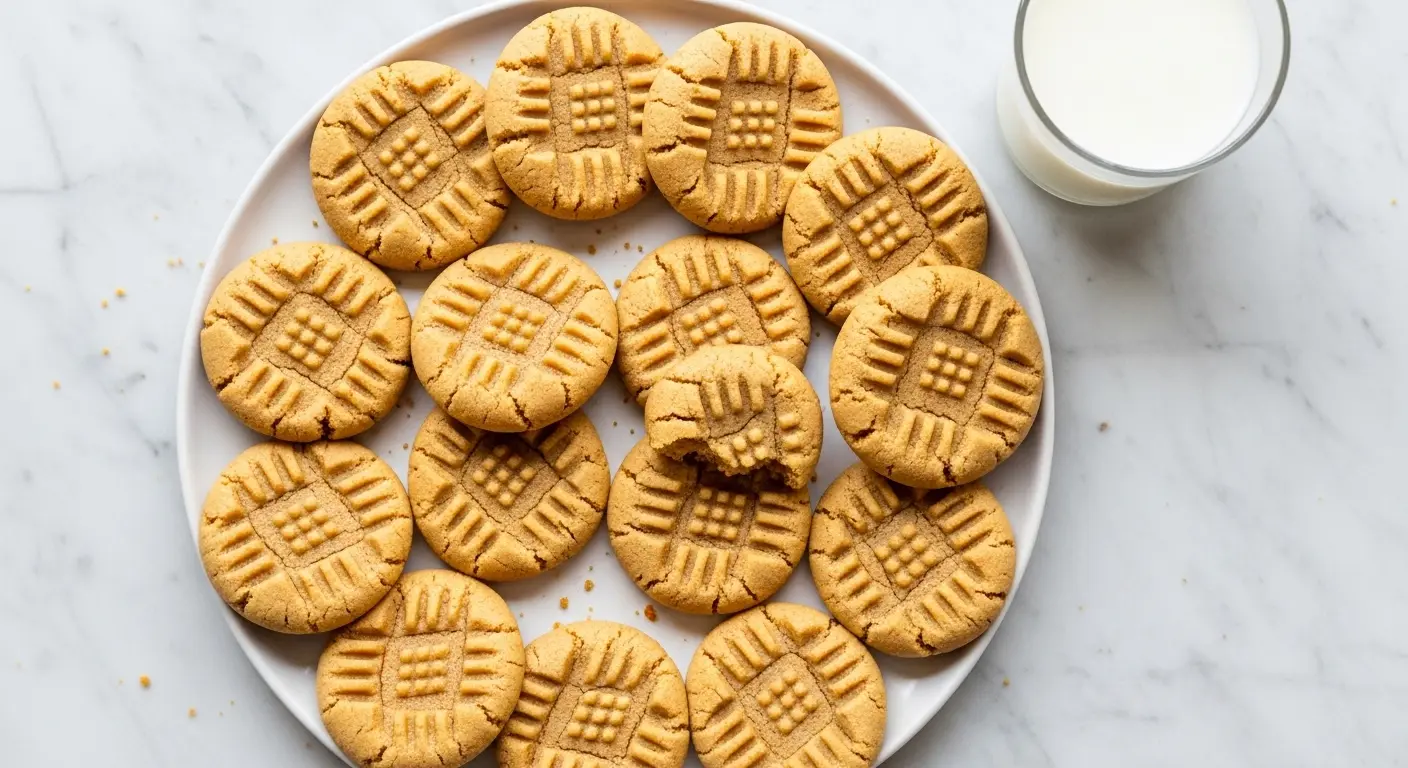
Few homemade treats hit quite like a warm, freshly baked peanut butter cookie recipe made from scratch. That iconic fork-pressed crisscross on top, the golden edges, the rich and nutty aroma drifting through your kitchen — it’s the kind of baking that feels like a hug.
This is the classic version you grew up loving. Soft and chewy in the center, slightly crisp at the edges, and loaded with bold peanut butter flavor in every bite.
The secret is in the balance of ingredients. Using both granulated sugar and brown sugar gives you the best of both worlds: the crisp edges from white sugar and the soft, moist chew that brown sugar brings.
One more thing that makes a big difference — creamy, shelf-stable peanut butter like Jif or Skippy. Natural peanut butter contains more oil and less stabilization, which can make cookies spread too thin or turn out crumbly.
If you love classic cookie baking, you’ll also want to check out these Peanut Butter Blossom Cookies — they use a nearly identical base dough topped with a chocolate kiss for an irresistible combination.
Why You’ll Love This Peanut Butter Cookie Recipe
This recipe checks every box that cookie lovers care about.
The ingredients are simple and pantry-friendly. You likely already have everything you need on hand right now.
These cookies bake up soft and chewy without being cakey or overly dense. The texture is spot-on — the kind that makes you reach for a second (or third).
The recipe is incredibly forgiving for beginner bakers. No special techniques, no complicated steps, and no candy thermometers required.
Cleanup is minimal since everything comes together in just two bowls. Less mess means more time to enjoy the actual cookies.
The flavor is deep and nutty with just the right amount of sweetness. These are genuinely crowd-pleasing cookies that disappear fast at any gathering.
- They come together in about 30 minutes from start to finish
- No stand mixer required — a hand mixer or even a wooden spoon works just fine
- The dough can be made ahead and refrigerated for up to 3 days
- These freeze beautifully, both baked and unbaked
- The recipe is easy to double for larger batches or cookie exchanges
Another crowd favorite in the same flavor family is this No Bake Cookie Recipe — a chocolatey, peanut butter-packed treat that requires zero oven time.
Ingredients
Getting the ingredient ratios right is what separates a good peanut butter cookie from a truly great one. Each component plays a specific role in achieving that classic soft and chewy texture.
- 1 cup (240g) creamy peanut butter (Jif or Skippy recommended; avoid natural/oil-separation varieties)
- ½ cup (113g) unsalted butter, softened to room temperature
- ½ cup (100g) granulated sugar, plus extra for rolling
- ½ cup (110g) packed light brown sugar
- 1 large egg, at room temperature
- 1 teaspoon pure vanilla extract
- 1 ¼ cups (160g) all-purpose flour, spooned and leveled
- ¾ teaspoon baking soda
- ¼ teaspoon baking powder
- ¼ teaspoon fine sea salt (reduce to ⅛ teaspoon if using salted butter)
You might also enjoy this Oatmeal Cookie Recipe as a delicious variation in your cookie baking rotation.
Kitchen Equipment Needed
You do not need fancy equipment for this recipe. A few basic kitchen tools are all it takes to turn out bakery-worthy cookies at home.
- Large mixing bowl
- Medium mixing bowl
- Electric hand mixer or stand mixer (or a sturdy wooden spoon and some elbow grease)
- Rubber spatula or wooden spoon for folding
- Measuring cups and measuring spoons
- Kitchen scale (highly recommended for accurate flour measurement)
- Whisk
- Rimmed baking sheet (two sheets preferred)
- Parchment paper or silicone baking mat
- Cookie scoop (a #40 scoop, about 1.5 tablespoons, is ideal)
- Fork for pressing the crisscross pattern
- Wire cooling rack
- Plastic wrap (for chilling the dough, optional but recommended)
Read Also: Snickerdoodle Cookie Recipe
Recommended Products for This Recipe
These are hand-picked products that genuinely make a difference when baking this peanut butter cookie recipe. Each one was chosen for quality and practical impact on your results.
1. OXO Good Grips Medium Cookie Scoop
Consistent cookie sizes mean even baking — no more underdone or overdone cookies from size inconsistencies. The OXO Medium Cookie Scoop releases dough cleanly and is comfortable to squeeze repeatedly through a full batch. It is one of the most useful tools you can have in a home baking kitchen.
2. Nordic Ware Natural Aluminum Baker’s Half Sheet
Thin, cheap baking sheets can cause cookies to overbrown on the bottom before the centers are fully set. The Nordic Ware half sheet is thick, warp-resistant, and distributes heat evenly for reliably golden cookies every time. It is the go-to sheet pan recommended by professional bakers.
3. Silpat Premium Non-Stick Silicone Baking Mat
A silicone baking mat eliminates the need for parchment paper and provides a perfectly non-stick surface for your cookies. The Silpat mat also helps regulate heat distribution, reducing the chance of burning the bottoms. It is reusable, easy to clean, and will last for years of regular baking.
4. KitchenAid 5-Speed Hand Mixer
Creaming the butter and sugar properly is crucial for the right cookie texture. The KitchenAid 5-Speed Hand Mixer makes this effortless, with enough power to cream cold-ish butter and mix thick peanut butter dough without straining the motor. It is compact, affordable, and reliable.
5. Pure Vanilla Extract
Imitation vanilla can taste artificial and sharp in baked goods. A bottle of pure vanilla extract adds a warm, rounded flavor that makes your cookies taste more like the real homemade article. A small amount goes a long way, making it a cost-effective upgrade for all your baking.
You might also love these Oatmeal Raisin Cookies for another timeless classic cookie experience.
Step-by-Step Instructions
Step 1: Prep Your Oven and Baking Sheets
- Preheat your oven to 350°F (175°C). This temperature gives the cookies enough heat to bake through without burning.
- Position one oven rack in the center of the oven. If baking two sheets at once, position racks in the upper-third and lower-third.
- Line your baking sheet(s) with parchment paper or a silicone baking mat. This prevents sticking and encourages even browning on the bottoms.
- Set the prepared sheets aside while you make the dough.
Step 2: Whisk the Dry Ingredients
- In a medium bowl, add 1 ¼ cups (160g) of all-purpose flour. It is important to spoon the flour into the measuring cup and level it off with a straight edge — do not scoop directly from the bag, as this packs in extra flour and can make the cookies dry and crumbly.
- Add ¾ teaspoon of baking soda, ¼ teaspoon of baking powder, and ¼ teaspoon of fine sea salt to the flour.
- Whisk everything together until the leavening agents are evenly distributed throughout the flour. Set this bowl aside.
Step 3: Cream the Butter and Sugars
- In a large mixing bowl, add ½ cup (113g) of softened unsalted butter. The butter should be at room temperature — it should give slightly when pressed but not be greasy or melting. Cold butter will not cream properly, and melted butter will make the dough too soft.
- Add ½ cup (100g) of granulated sugar and ½ cup (110g) of packed light brown sugar to the butter.
- Using your electric hand mixer or stand mixer fitted with the paddle attachment, beat on medium speed for 2 to 3 minutes until the mixture is light, pale in color, and fluffy. This step is called creaming, and it incorporates air into the dough, which contributes to the cookies’ texture. Do not rush this step.
- Scrape down the sides of the bowl with a rubber spatula partway through to ensure everything is evenly mixed.
Step 4: Add the Peanut Butter, Egg, and Vanilla
- Add 1 cup (240g) of creamy peanut butter to the creamed butter and sugar mixture.
- Beat on medium speed until the peanut butter is fully incorporated and the mixture is smooth and uniform, about 1 minute.
- Crack in 1 large egg and add 1 teaspoon of pure vanilla extract.
- Beat again on medium speed just until the egg is fully blended into the mixture. The dough will look glossy and smooth at this point. Do not overbeat after adding the egg.
- Scrape down the bowl again with the spatula to ensure nothing is stuck to the sides or bottom.
Step 5: Add the Dry Ingredients
- With the mixer on its lowest speed (or by hand with a rubber spatula), slowly add the flour mixture to the peanut butter mixture.
- Mix until the flour is just incorporated and no dry streaks remain. It is very important not to overmix at this stage. Overmixing develops gluten in the flour, which will make your cookies tough and dense rather than tender.
- The dough will be thick and slightly sticky — this is exactly right.
- If the dough feels very soft and hard to handle, cover the bowl with plastic wrap and refrigerate for 30 to 60 minutes. Chilled dough holds its shape better during baking and results in a thicker cookie.
Step 6: Portion and Shape the Cookies
- Pour about 3 tablespoons of granulated sugar into a small bowl for rolling.
- Use a cookie scoop (about 1.5 tablespoons or 30g of dough) to portion out the dough. If you do not have a cookie scoop, use a heaping tablespoon measurement.
- Roll each portion of dough between your palms into a smooth ball.
- Roll each ball in the granulated sugar to coat it lightly. This step is optional but adds a beautiful sparkle and a subtle crunch to the exterior of the baked cookies.
- Place the sugar-coated dough balls onto the prepared baking sheet, spacing them about 2 inches (5cm) apart to allow room for spreading.
Step 7: Press the Crisscross Pattern
- Take a fork and dip the tines in granulated sugar (this prevents sticking).
- Press the fork gently but firmly down onto the top of one dough ball to slightly flatten it. You should see the tine marks in the dough.
- Rotate the fork 90 degrees and press again to create the classic crisscross or hashtag pattern.
- Repeat with every dough ball on the sheet. The cookies should be about ½ inch (1.3cm) thick after pressing.
- If the edges crack during pressing, gently press them back together with your fingertips. Slightly thicker discs bake into thicker, chewier cookies.
Step 8: Bake the Cookies
- Place one baking sheet in the center of your preheated 350°F (175°C) oven.
- Bake for 9 to 11 minutes. The cookies are done when the edges look set and very lightly golden but the centers still appear pale and slightly underdone. This is correct — they will continue to firm up as they cool.
- Do not wait until the centers look fully baked before pulling them out, or you will end up with dry, overbaked cookies.
- If baking two sheets at once, rotate them between racks and front-to-back at the 5-minute mark for even baking.
Step 9: Cool and Enjoy
- Remove the baking sheet from the oven and let the cookies rest on the sheet for exactly 5 minutes. This allows them to firm up enough to transfer safely without breaking.
- After 5 minutes, use a flat spatula to transfer the cookies to a wire cooling rack.
- Let the cookies cool for at least 10 more minutes before eating. They continue to set up as they cool, and cutting in too early will give you a cookie that falls apart.
- Serve at room temperature for the best texture. They are incredible alongside a cold glass of milk.
Read Also: Gingerbread Cookie Recipe
Tips for Success
Small adjustments can make the difference between good cookies and cookies everyone raves about. Here are the most important things to keep in mind when making this peanut butter cookie recipe.
- Use room temperature butter. Cold butter will not cream properly with the sugars, which affects texture. Let it sit out for 30 to 45 minutes before you start.
- Spoon and level your flour. Do not scoop flour directly from the bag. Spooning it into the measuring cup and leveling off the top prevents over-measuring, which is the number-one cause of dry, crumbly peanut butter cookies.
- Use conventional peanut butter. Brands like Jif and Skippy have stabilizers that keep the oil from separating, giving you a more consistent dough. Natural peanut butter can cause the cookies to spread too thin or crumble.
- Do not overmix once the flour is added. Mix just until the dry ingredients disappear. Overmixing builds gluten and makes cookies tough.
- Pull the cookies out while the centers still look soft. They will set up as they cool, and this is what gives them that perfect chewy center.
- Chill the dough if it is too soft to handle. Even 30 minutes in the refrigerator will firm it up and help the cookies hold their shape better.
- Dip your fork in sugar before pressing. Sugared fork tines release cleanly from the dough without sticking or dragging.
You might love these Best Chocolate Chip Cookies as another classic to add to your baking lineup.
Serving Suggestions
Peanut butter cookies are fantastic on their own, but there are so many ways to enjoy them.
A cold glass of whole milk is the most classic pairing. The milk cuts through the richness of the peanut butter perfectly and makes each bite taste even better.
For a dessert spread at a party or holiday gathering, these cookies pair beautifully with a variety of other sweets. They hold up well on a cookie tray for hours at room temperature.
- Sandwich two cookies around a scoop of vanilla ice cream for a quick and indulgent ice cream sandwich
- Crumble them over a bowl of Vanilla Pudding for a fun dessert topping
- Serve alongside a mug of hot chocolate for a cozy winter treat
- Press a chocolate kiss or chocolate chip into the center right after they come out of the oven for a variation on peanut butter blossoms
- Drizzle cooled cookies with melted milk chocolate for an elevated presentation
Variations to Try
The base recipe is incredibly versatile. Once you have the classic version down, here are some delicious ways to customize it.
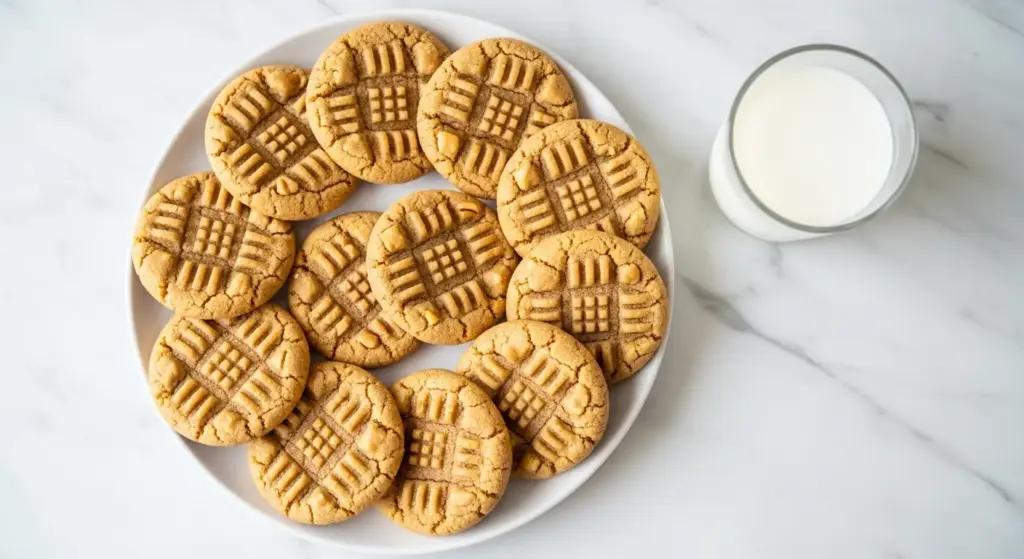
- Chunky Peanut Butter Cookies: Swap creamy peanut butter for chunky or crunchy peanut butter for added texture and extra peanut pieces in every bite.
- Chocolate Chip Peanut Butter Cookies: Fold in ¾ cup (130g) of semi-sweet chocolate chips or mini chocolate chips when adding the flour mixture for a rich, chocolatey twist.
- Peanut Butter Blossom Variation: Skip the fork press and keep the balls round. Immediately after pulling them from the oven, press one chocolate kiss into the center of each cookie.
- Brown Butter Peanut Butter Cookies: Brown the butter in a saucepan before using it in the recipe. Let it cool to room temperature first. Brown butter adds a deep, nutty, almost caramel-like depth that is absolutely incredible.
- Stuffed Peanut Butter Cookies: Flatten a dough ball in your palm, place a chocolate candy or small peanut butter cup in the center, then wrap the dough around it and seal. Press gently with a fork and bake as usual.
- Gluten-Free Version: Substitute the all-purpose flour with a 1:1 gluten-free flour blend. Alternatively, use the flourless method by omitting the flour entirely — the cookies will be crispier and denser, but delicious.
Another peanut butter treat worth making is this Peanut Butter Pie Recipe — a dreamy, no-bake dessert with incredible richness.
Storage and Reheating
Proper storage keeps these cookies tasting fresh for days, and the dough can even be frozen for future batches whenever a craving strikes.
- Room temperature: Store baked cookies in an airtight container at room temperature for up to 5 days. To keep them soft, add a slice of white sandwich bread to the container — the cookies will absorb moisture from the bread and stay chewy.
- Refrigerator: Baked cookies can be refrigerated in an airtight container for up to 7 days. Bring them to room temperature before eating for the best texture.
- Freezer (baked): Layer cooled cookies between sheets of parchment paper in an airtight freezer-safe container. Freeze for up to 3 months. Thaw at room temperature for 30 to 45 minutes before serving.
- Freezer (unbaked dough): Scoop and press the dough balls, then freeze them flat on a baking sheet. Once solid, transfer to a zip-top freezer bag. Freeze for up to 2 months. Bake directly from frozen, adding 2 to 3 extra minutes to the bake time.
- Reheating: To revive a baked cookie, microwave it for 10 to 15 seconds. It will taste like it just came out of the oven — warm, soft, and irresistible.
For another make-ahead sweet treat with peanut butter, try these Peanut Butter Rice Krispie Treats — no-bake, easy, and absolutely addictive.
Nutritional Facts
The following is an approximate per-cookie calculation based on a batch of 24 cookies using the ingredients listed.
| Nutrient | Per Cookie (Approximate) |
|---|---|
| Calories | 145 kcal |
| Total Fat | 9g |
| Saturated Fat | 3.5g |
| Cholesterol | 18mg |
| Sodium | 110mg |
| Total Carbohydrates | 14g |
| Dietary Fiber | 0.5g |
| Sugars | 9g |
| Protein | 3.5g |
Please note that nutritional values will vary depending on specific brands of ingredients used, the exact size of each cookie, and any variations or substitutions made to the recipe.
Another fan-favorite sweet treat in a similar flavor profile is this Buckeyes Recipe — no-bake peanut butter balls dipped in chocolate that are as easy as they are impressive.
Health Benefits of Key Ingredients
Peanut butter cookies are a treat, but several of the core ingredients bring real nutritional value alongside the indulgence.
Peanut butter is one of the most nutritionally dense ingredients in this recipe. It is a solid source of plant-based protein and healthy monounsaturated fats, both of which help with satiety and sustained energy. It also provides vitamin E, niacin (vitamin B3), and magnesium.
Eggs contribute high-quality complete protein as well as important fat-soluble vitamins including A, D, and B12. They also provide choline, a nutrient that supports brain health and liver function.
- Peanut butter: Provides monounsaturated fats that support heart health, plus about 8 grams of protein per 2 tablespoon serving
- Eggs: Rich in complete protein, B vitamins, choline, and antioxidants like lutein and zeaxanthin
- Brown sugar: While still a refined sugar, the molasses in brown sugar provides trace amounts of calcium, iron, and potassium compared to white sugar alone
- All-purpose flour: Contributes carbohydrates for energy, with small amounts of iron and B vitamins
- Butter: Contains fat-soluble vitamins A, D, E, and K, plus small amounts of beneficial short-chain fatty acids
For another peanut butter-powered treat with great flavor, try this Chocolate Peanut Butter Banana Smoothie as a satisfying snack option.
Frequently Asked Questions
1. Why do peanut butter cookies have fork marks?
The fork marks are both functional and traditional. Peanut butter cookie dough is dense and does not spread on its own the way other cookie doughs do, so pressing it down with a fork ensures even baking throughout. The crosshatch pattern became the universally recognized signature of these cookies decades ago, and it has stuck ever since. It also makes them visually distinct and instantly recognizable on any cookie tray.
2. Can I use natural peanut butter in this recipe?
You can, but the results will be less predictable. Natural peanut butter has a higher oil content and no stabilizers, which can cause the cookies to spread too much, turn out greasy, or fall apart more easily. If you want to use natural peanut butter, stir it very thoroughly first and consider chilling the dough for at least an hour before baking. For the most reliable and consistent results, conventional creamy peanut butter like Jif or Skippy is the best choice.
3. Why did my peanut butter cookies turn out dry and crumbly?
The most common culprit is too much flour. Scooping flour directly from the bag compacts it into the measuring cup, adding significantly more than the recipe intends. Always spoon the flour into the measuring cup and level it off with a straight edge. Overbaking is another common cause — pull the cookies out when the centers still look slightly underdone. Finally, overmixing the dough after the flour is added can develop too much gluten, resulting in a tough, dry cookie.
4. Do I have to chill the dough?
The recipe does not strictly require it, but chilling the dough for 30 to 60 minutes (or even overnight) does produce a better cookie. Chilled dough spreads less during baking, which means thicker, chewier cookies with a more defined crisscross pattern. If your kitchen is warm or your butter was very soft, chilling is especially recommended. If you are short on time, you can skip it and still get great results — just expect slightly thinner cookies.
5. Can I freeze peanut butter cookie dough?
Absolutely — and it is one of the most practical things you can do for future snacking. Scoop and press the dough into balls, then freeze them flat on a lined baking sheet. Once solid, transfer to a zip-top freezer bag and freeze for up to 2 months. When ready to bake, place the frozen dough balls on a lined sheet and bake at 350°F (175°C) directly from frozen, adding about 2 to 3 extra minutes to the usual baking time. No need to thaw first.
Read Also: Monster Cookie Recipe
Final Thoughts
This peanut butter cookie recipe is the kind of recipe that earns a permanent spot in your baking rotation.
It is simple enough for a weeknight baking session with kids, and impressive enough to bring to a cookie exchange or holiday party.
Every batch comes out with that irresistible combination of soft centers, golden edges, and deeply savory-sweet peanut butter flavor that no store-bought cookie can replicate.
If you give this recipe a try, leave a comment below and let me know how it went — I would love to hear from you!
Did you make any variations or add-ins? Share your version in the comments, and do not forget to save this recipe or share it with a fellow peanut butter lover.
Recommended:
- Chewy Chocolate Chip Cookies
- Old Fashioned Chocolate Chip Cookie
- Cut Out Sugar Cookie
- Easy Sugar Cookie
- Sugar Cookies
- Fudge Stripe Cookies
- Shortbread Cookie
- Cookie Skillet
- Muddy Buddy
- Peanut Butter Jelly Smoothie


