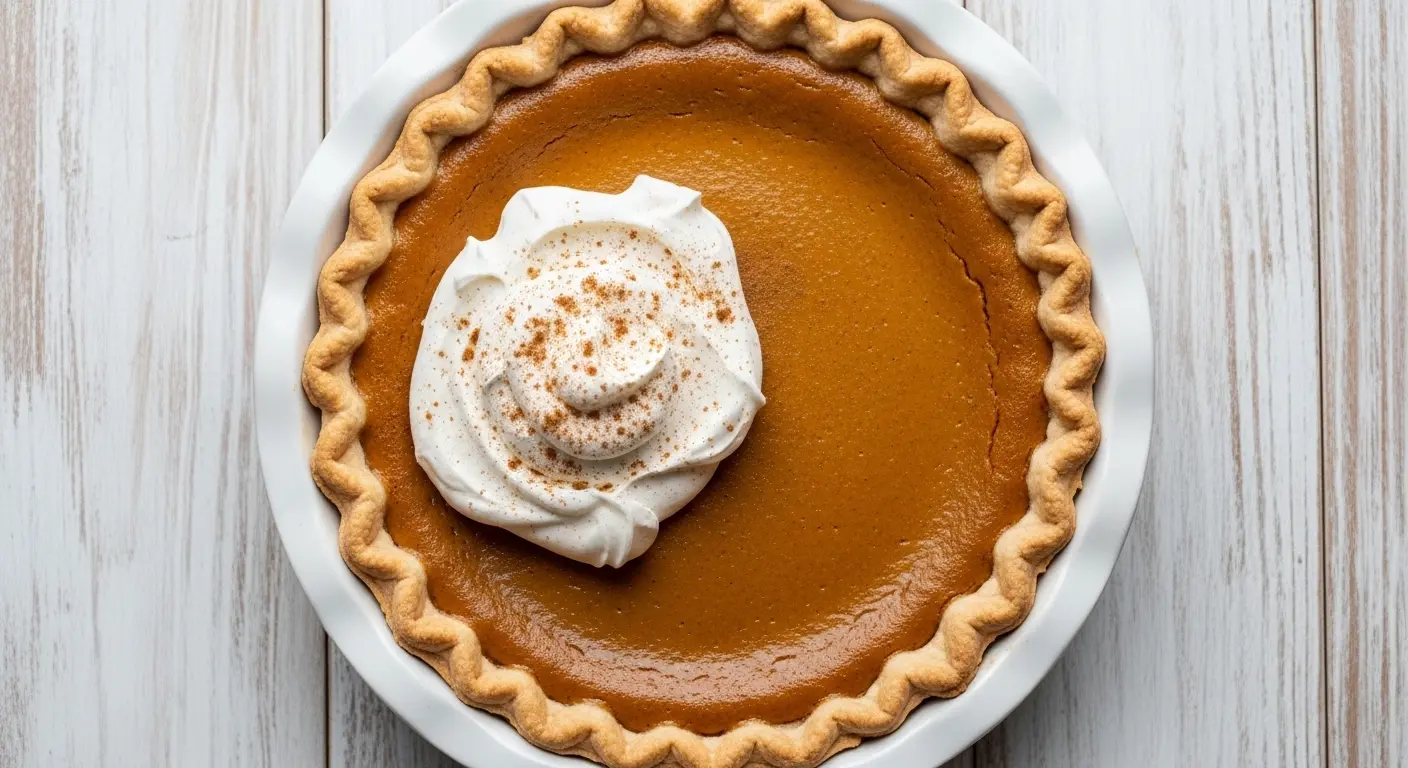
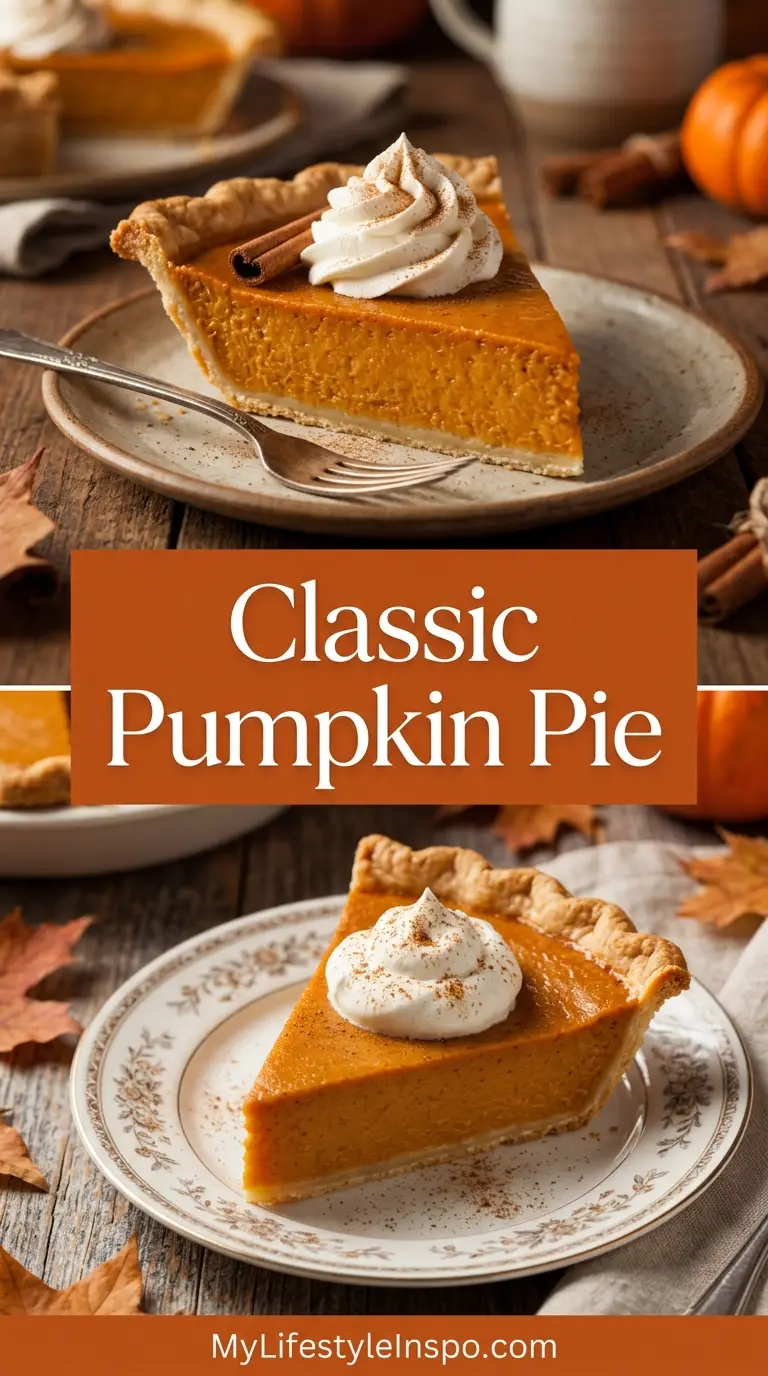
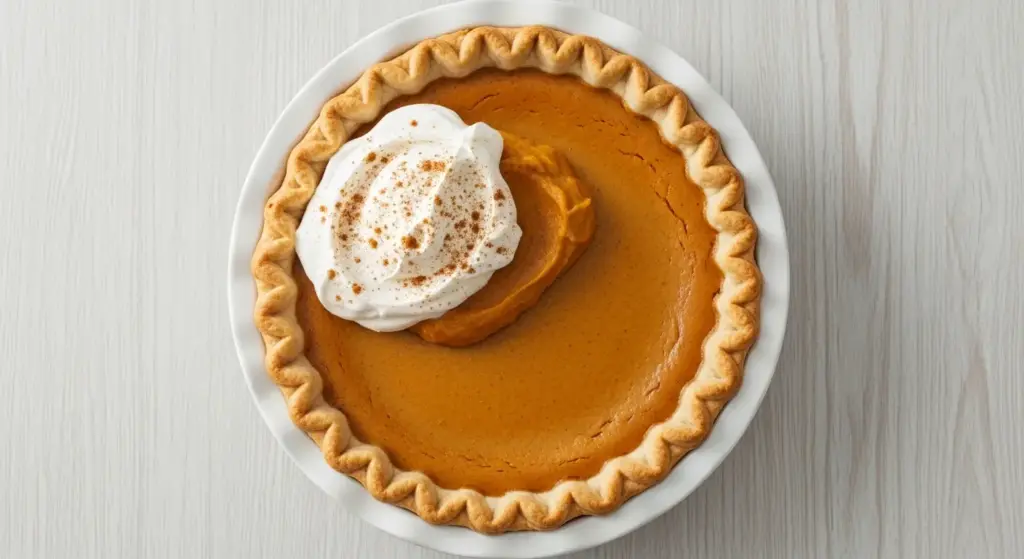
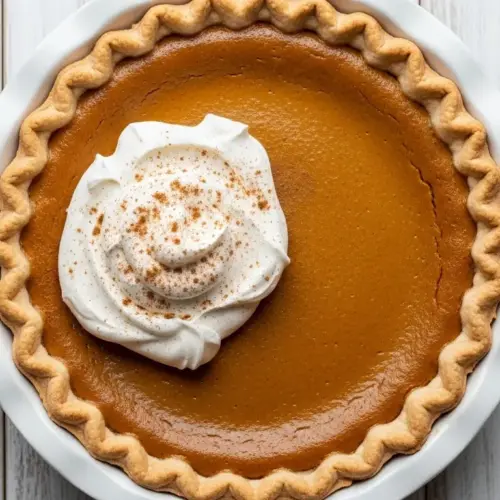
Nothing says fall and the holidays quite like a warm slice of classic pumpkin pie. This timeless dessert has graced Thanksgiving tables for generations, bringing families together with its creamy, spiced filling and buttery, flaky crust.
The beauty of a classic pumpkin pie recipe lies in its simplicity. You don’t need fancy techniques or hard-to-find ingredients to create a dessert that will have everyone asking for seconds. With just a handful of pantry staples and about an hour of your time, you can bake a pie that rivals any bakery version.
This recipe delivers exactly what you expect from a traditional pumpkin pie: smooth, velvety filling bursting with warm spices like cinnamon, ginger, and nutmeg, all nestled in a perfectly golden crust. The filling sets beautifully as it cools, making it easy to slice and serve.
What makes this version special is the balance of flavors. The pumpkin shines through without being overshadowed by too much sugar or spice. Each bite offers that nostalgic taste you remember from childhood, with just the right amount of sweetness and warmth from the aromatic spices.
The technique is straightforward, even for beginner bakers. You’ll start with an unbaked pie shell, whisk together your filling ingredients, pour everything into the crust, and bake. The high initial temperature helps set the crust, then you lower the heat to gently cook the filling to perfection.
Looking to try a more involved version? Check out this From Scratch Pumpkin Pie for a completely homemade approach.
Why You’ll Love This Classic Pumpkin Pie Recipe
This classic pumpkin pie hits all the right notes. The filling is silky smooth with no lumps or graininess, and it slices beautifully without falling apart.
The spice blend creates that signature pumpkin pie flavor without any single spice overpowering the others. You get warmth from cinnamon, a subtle kick from ginger, and depth from nutmeg and cloves working together in harmony.
Here’s what makes this recipe a keeper:
- Simple ingredients – Everything you need is probably already in your pantry
- Foolproof technique – Clear instructions that work every time, even for first-time pie bakers
- Make-ahead friendly – Bake it the day before your gathering and refrigerate until serving
- Perfectly textured – The filling sets up firm enough to slice cleanly but stays creamy, never rubbery
- Crowd-pleaser – This is the classic flavor everyone expects and loves at holiday gatherings
- Not overly sweet – Balanced sweetness that lets the pumpkin and spices shine through
Ingredients
This recipe uses traditional ingredients that create the authentic pumpkin pie flavor you know and love. Canned pumpkin puree works beautifully here and saves you time without sacrificing quality.
For the Filling:
- 1 (15-ounce / 425g) can pure pumpkin puree (not pumpkin pie filling)
- 3/4 cup (150g) granulated sugar
- 1 teaspoon ground cinnamon
- 1/2 teaspoon ground ginger
- 1/2 teaspoon salt
- 1/4 teaspoon ground nutmeg
- 1/4 teaspoon ground cloves
- 3 large eggs
- 1 (12-ounce / 354ml) can evaporated milk
For the Crust:
- 1 unbaked 9-inch (23cm) pie crust (homemade or store-bought)
Kitchen Equipment Needed
Having the right tools makes the pie-making process smoother and ensures better results. Most of these items are basic kitchen essentials you likely already own.
- 9-inch deep-dish pie pan
- Large mixing bowl
- Medium mixing bowl
- Whisk
- Measuring cups and spoons
- Rubber spatula
- Cooling rack
- Aluminum foil (for tent)
Recommended Products for This Recipe
These carefully selected products can elevate your pumpkin pie game and make the baking process easier and more enjoyable.
1. Libby’s 100% Pure Pumpkin
This is the gold standard for canned pumpkin. It has the perfect consistency and clean pumpkin flavor without any additives or fillers. The smooth texture means you won’t end up with stringy bits in your filling, and the quality is consistent from can to can.
2. Emile Henry Modern Classics Pie Dish
This French ceramic pie dish distributes heat evenly, preventing hot spots that can cause uneven baking or burnt edges. The beautiful finish makes it oven-to-table ready, and the fluted edges help your crust hold its shape beautifully. It’s an investment that will last for decades.
3. Nielsen-Massey Pure Vanilla Extract
While vanilla isn’t in the base recipe, adding half a teaspoon to your filling takes the flavor to the next level. This premium vanilla extract has a rich, complex flavor that enhances the warm spices without overwhelming them.
4. OXO Good Grips Balloon Whisk
A quality whisk makes incorporating the eggs and evaporated milk effortless. The balloon shape creates more air circulation, helping you achieve a silky smooth filling without lumps. The comfortable handle reduces hand fatigue during mixing.
Step-by-Step Instructions
Follow these detailed instructions to create a perfect pumpkin pie every time. Each step is broken down to ensure success, even if you’re new to pie baking.
1. Prepare Your Oven and Pie Crust
- Preheat your oven to 425°F (220°C)
- If using a store-bought frozen pie crust, let it sit at room temperature for about 10 minutes to soften slightly
- If using a homemade crust, roll it out to fit your 9-inch pie pan, leaving about 1 inch of overhang
- Crimp or flute the edges of the crust decoratively using your fingers or a fork
- Place the prepared pie crust in the refrigerator while you make the filling to keep it cold
2. Mix the Dry Ingredients
- In a medium bowl, whisk together the granulated sugar, cinnamon, ginger, salt, nutmeg, and cloves
- Make sure the spices are evenly distributed throughout the sugar with no clumps
- This step helps prevent pockets of concentrated spice in your finished pie
- Set this spice-sugar mixture aside while you prepare the wet ingredients
3. Beat the Eggs
- Crack the 3 eggs into a large mixing bowl
- Whisk the eggs vigorously for about 30 seconds until they’re well beaten and slightly frothy
- The eggs should be completely blended with no visible streaks of yolk or white
- Well-beaten eggs incorporate more easily into the pumpkin mixture and help create a smoother filling
4. Add Pumpkin and Spices
- Add the entire can of pumpkin puree to the beaten eggs
- Pour in the spice-sugar mixture you prepared in step 2
- Whisk everything together until completely smooth and uniform in color
- Make sure there are no lumps of pumpkin or pockets of dry sugar remaining
- The mixture should be thick and well combined at this point
5. Incorporate the Evaporated Milk
- Gradually pour in the evaporated milk while whisking constantly
- Add the milk in a slow, steady stream rather than all at once to prevent lumps
- Continue whisking until the filling is completely smooth and pourable
- The final consistency should be similar to heavy cream, fluid but rich
- If you see any lumps, whisk vigorously for another 30 seconds to smooth them out
6. Fill the Pie Crust
- Remove your prepared pie crust from the refrigerator
- Place the pie pan on the oven rack before filling to avoid spills while transferring
- Carefully pour the pumpkin filling into the unbaked crust
- Fill the crust to about 1/4 inch from the top edge
- Use a rubber spatula to scrape every bit of filling from the bowl
- Gently tap the pie pan on the counter once or twice to release any air bubbles
7. Bake at High Heat Initially
- Place the filled pie in the preheated 425°F (220°C) oven
- Set a timer for exactly 15 minutes
- This high initial temperature helps set the crust and gives it a head start on browning
- Don’t open the oven door during this time, as temperature fluctuations can affect the crust
- The edges of the crust should just begin to turn golden during this phase
8. Reduce Temperature and Continue Baking
- After the 15-minute mark, reduce the oven temperature to 350°F (175°C)
- Don’t remove the pie from the oven, simply adjust the temperature dial
- Continue baking for 40 to 50 minutes at this lower temperature
- The filling needs this gentler heat to cook through without cracking or curdling
- Start checking for doneness around the 40-minute mark
9. Check for Doneness
- At the 40-minute mark, gently shake the pie pan using an oven mitt
- The edges should be set and firm, while the center can still have a slight jiggle about the size of a quarter
- The center should not slosh or ripple like liquid
- Alternatively, insert a thin knife about 1 inch from the center; it should come out mostly clean
- Remember that the pie will continue cooking and setting as it cools
- If the crust edges are browning too quickly, tent them loosely with aluminum foil
10. Cool the Pie Completely
- Remove the pie from the oven and place it on a wire cooling rack
- Let it cool at room temperature for at least 2 hours, but preferably 3 to 4 hours
- This cooling time is crucial for the filling to set properly
- Resist the urge to refrigerate it immediately, as this can cause cracking
- Once completely cooled to room temperature, you can refrigerate the pie if making ahead
- The pie will firm up considerably as it cools, making it easy to slice clean pieces
You might also enjoy: Dutch Apple Pie
Tips for Success
These tried-and-true tips will help you avoid common pitfalls and achieve bakery-quality results every time you make this classic pumpkin pie.
- Use pure pumpkin puree, not pumpkin pie filling – Pumpkin pie filling already contains sugar and spices, which will throw off the recipe’s balance
- Don’t overbake – The center should still jiggle slightly when you remove it from the oven; it will set as it cools
- Prevent a soggy bottom – Make sure your oven is fully preheated before baking, and don’t skip the high-heat initial bake
- Avoid cracks – Let the pie cool gradually at room temperature rather than rushing it in the fridge
- Test temperature, not time – Ovens vary, so use the jiggle test or knife test rather than relying solely on the timer
- Protect the crust edges – If your crust is browning too quickly, cover the edges with a pie shield or aluminum foil strips
- Beat eggs well – Thoroughly beaten eggs create a smoother, more uniform filling
- Use fresh spices – Old spices lose their potency; fresh spices give the best flavor
Serving Suggestions
This classic pumpkin pie shines on its own, but these accompaniments can take it to the next level and add visual appeal to your dessert presentation.
Serve each slice with a generous dollop of freshly whipped cream sweetened with just a touch of sugar and vanilla. The light, airy cream balances the dense, rich filling perfectly.
More delicious ways to serve your pumpkin pie:
- Top with a drizzle of Comeback Sauce for an unexpected sweet-savory twist
- Sprinkle toasted pecans or walnuts over whipped cream for added texture and nutty flavor
- Serve with a scoop of vanilla ice cream for a temperature contrast that’s irresistible
- Dust the top lightly with cinnamon or pumpkin pie spice just before serving
- Pair with hot cider or spiced coffee to complement the warm spices in the pie
- Garnish with a few fresh cranberries for a pop of color and tartness
- Add a caramel drizzle over the whipped cream for extra decadence
Variations to Try
Once you’ve mastered the classic version, these variations let you customize the recipe to suit different tastes and dietary needs.
Popular flavor and preparation variations:
- Bourbon Pumpkin Pie – Add 2 tablespoons of bourbon to the filling for a sophisticated depth of flavor
- Maple Pumpkin Pie – Replace 1/4 cup of sugar with pure maple syrup for a subtle maple undertone
- Gingersnap Crust – Use crushed gingersnap cookies mixed with melted butter instead of traditional pie crust
- Cream Cheese Swirl – Swirl 4 ounces of sweetened cream cheese into the filling before baking for a cheesecake twist
- Pecan Streusel Topping – Add a buttery pecan crumb topping during the last 15 minutes of baking
- Mini Pumpkin Pies – Divide the filling among muffin tins lined with pie crust for individual servings
- Gluten-Free Version – Use your favorite gluten-free pie crust recipe or store-bought option
- Dairy-Free – Substitute coconut cream for the evaporated milk and use a vegan butter crust
Read Also: Classic Apple Pie Recipe
Storage and Reheating
Proper storage keeps your pumpkin pie fresh and safe to eat, while gentle reheating methods preserve its texture and flavor.
How to store your pumpkin pie:
- Refrigerator – Cover the cooled pie loosely with plastic wrap or aluminum foil and refrigerate for up to 4 days
- Room temperature – Homemade pumpkin pie should not sit at room temperature for more than 2 hours due to the egg content
- Freezer – Wrap the completely cooled pie tightly in plastic wrap, then aluminum foil, and freeze for up to 1 month
- To thaw – Transfer frozen pie to the refrigerator and let it thaw slowly overnight
- Reheating – Warm individual slices in a 300°F (150°C) oven for 10 to 15 minutes, or microwave for 20 to 30 seconds
- Serving cold – Many people prefer pumpkin pie chilled straight from the refrigerator, especially with whipped cream
This pairs beautifully with Classic French Toast for a holiday brunch spread.
Nutritional Facts
Understanding the nutritional content helps you make informed choices and plan your holiday menu accordingly.
Per serving (based on 8 servings):
- Calories: 285
- Total Fat: 11g
- Saturated Fat: 4g
- Cholesterol: 85mg
- Sodium: 280mg
- Total Carbohydrates: 41g
- Dietary Fiber: 2g
- Sugars: 26g
- Protein: 6g
- Vitamin A: 170% DV
- Calcium: 12% DV
- Iron: 8% DV
Note: Nutritional values are approximate and will vary based on specific brands used and crust type.
Health Benefits of Key Ingredients
While pumpkin pie is certainly a dessert, its main ingredients offer surprising nutritional benefits that make it a bit more wholesome than many other sweet treats.
Pumpkin is loaded with beta-carotene, which your body converts to vitamin A for eye health, immune function, and skin health. Just one slice provides more than your daily vitamin A needs.
Additional nutritional highlights:
- Rich in antioxidants – The cinnamon, ginger, and nutmeg provide powerful antioxidants that fight inflammation
- Good source of fiber – Pumpkin contains dietary fiber that supports digestive health
- Protein from eggs – Eggs add quality protein and essential amino acids
- Calcium from evaporated milk – Contributes to bone health and muscle function
- Iron content – Both pumpkin and spices provide iron for healthy blood cells
- Lower in fat than many pies – Compared to pecan or chocolate cream pies, pumpkin pie is relatively light
For more wholesome dessert options, try this Easy Carrot Cake Recipe with Cake Mix.
Frequently Asked Questions
1. Can I use fresh pumpkin instead of canned?
Yes, you can use fresh pumpkin puree, though canned is actually preferred by most bakers for its consistency. If using fresh, roast sugar pie pumpkins, puree the flesh, and drain excess moisture through cheesecloth. Fresh pumpkin can have varying water content, which may affect the texture of your finished pie.
2. Why did my pumpkin pie crack?
Cracks usually occur when the pie is overbaked or cooled too quickly. Remove the pie when the center still jiggles slightly, and let it cool gradually at room temperature rather than refrigerating it immediately. The residual heat will finish cooking the center without overdoing it.
3. How do I know when my pumpkin pie is done?
Gently shake the pie pan. The edges should be completely set, and the center should jiggle slightly like gelatin, about the size of a quarter. Alternatively, insert a knife 1 inch from the center; it should come out mostly clean with just a bit of filling on it.
4. Can I make pumpkin pie ahead of time?
Absolutely! Pumpkin pie actually tastes better the next day as the flavors meld together. Bake it up to 2 days ahead, let it cool completely, cover it loosely, and refrigerate until serving time.
5. Do I need to blind bake the crust?
No, you don’t need to blind bake (pre-bake) the crust for this recipe. The high initial oven temperature of 425°F helps set the crust quickly, and the filling doesn’t release enough moisture to make the bottom soggy.
Another favorite: Baked Mac and Cheese
Classic Pumpkin Pie
Equipment
- 9-inch deep-dish pie pan
- Large mixing bowl
- Medium mixing bowl
- Whisk
- Measuring cups and spoons
- Rubber spatula
- Cooling rack
- Aluminum foil - for tenting the crust
Ingredients
For the Crust
- 1 unbaked 9-inch pie crust - homemade or store-bought
For the Filling
- 15 ounces pure pumpkin puree - 425g, not pumpkin pie filling
- 0.75 cups granulated sugar - 150g
- 1 teaspoon ground cinnamon
- 0.5 teaspoon ground ginger
- 0.5 teaspoon salt
- 0.25 teaspoon ground nutmeg
- 0.25 teaspoon ground cloves
- 3 large eggs
- 12 ounces evaporated milk - 354ml
For Serving (Optional)
- whipped cream - freshly whipped, sweetened with sugar and vanilla
- toasted pecans - chopped, for garnish
- vanilla ice cream - for serving
- cinnamon - for dusting
- fresh cranberries - for garnish
- caramel - for drizzling
Instructions
- Preheat oven to 425°F (220°C). If using a frozen pie crust, let it soften at room temperature for 10 minutes. Crimp or flute the edges of your crust, then refrigerate while you make the filling.
- In a medium bowl, whisk together the granulated sugar, cinnamon, ginger, salt, nutmeg, and cloves until evenly combined and no clumps remain.
- Crack the 3 eggs into a large mixing bowl and whisk vigorously for about 30 seconds until well beaten and slightly frothy.
- Add the pumpkin puree and the spice-sugar mixture to the beaten eggs. Whisk together until completely smooth and uniform in color with no lumps.
- Gradually pour in the evaporated milk while whisking constantly. Continue whisking until the filling is completely smooth and pourable, similar to heavy cream.
- Remove the chilled pie crust from the refrigerator. Place the pie pan on the oven rack, then carefully pour the filling into the unbaked crust. Gently tap the pan on the counter once or twice to release air bubbles.
- Bake at 425°F (220°C) for exactly 15 minutes. Do not open the oven door during this time.
- Reduce the oven temperature to 350°F (175°C) without removing the pie. Continue baking for 40 to 50 minutes. If the crust edges brown too quickly, tent them loosely with aluminum foil.
- Check for doneness by gently shaking the pie pan. The edges should be set and firm while the center jiggles slightly (about the size of a quarter). A knife inserted 1 inch from the center should come out mostly clean.
- Remove the pie from the oven and place it on a wire cooling rack. Cool at room temperature for at least 2 hours (preferably 3-4 hours) to allow the filling to set completely before slicing.
Notes
- Pure pumpkin puree is essential – Do not use pumpkin pie filling, which already contains sugar and spices and will throw off the recipe’s balance.
- Don’t overbake – The center should still jiggle slightly when you remove it from the oven; it will set as it cools. Overbaking leads to cracks and a rubbery texture.
- Prevent a soggy bottom – Make sure your oven is fully preheated before baking, and don’t skip the high-heat initial bake at 425°F.
- Avoid cracks – Let the pie cool gradually at room temperature rather than rushing it into the refrigerator. Sudden temperature changes cause cracking.
- Use fresh spices – Old, stale spices lose their potency and will result in a less flavorful pie. Replace ground spices every 6-12 months for best results.
- Storage – Cover cooled pie loosely with plastic wrap or aluminum foil and refrigerate for up to 4 days. Do not leave homemade pumpkin pie at room temperature for more than 2 hours.
- Make ahead – Pumpkin pie actually tastes better the next day as the flavors meld together. Bake it up to 2 days ahead, cool completely, and refrigerate until serving.
- Freezing instructions – Wrap the completely cooled pie tightly in plastic wrap, then aluminum foil, and freeze for up to 1 month. Thaw overnight in the refrigerator before serving.
- Reheating – Warm individual slices in a 300°F oven for 10-15 minutes or microwave for 20-30 seconds. Many people also enjoy pumpkin pie chilled straight from the refrigerator.
- Bourbon variation – Add 2 tablespoons of bourbon to the filling for a sophisticated depth of flavor that complements the warm spices beautifully.
Final Thoughts
This classic pumpkin pie recipe proves that sometimes the simplest recipes are the most satisfying. With just a handful of everyday ingredients and straightforward techniques, you can create a dessert that brings smiles to every face at your holiday table.
The beauty of mastering this classic version is that it becomes your foundation for endless creativity. Once you’re comfortable with the basic technique, you can experiment with different spice blends, crusts, and toppings to make it uniquely yours.
So grab your pie pan and give this recipe a try. Your kitchen will fill with the warm, inviting aromas of cinnamon and nutmeg, and you’ll have a beautiful, delicious pie to show for your efforts. Don’t forget to snap a photo and share your success!
Recommended:
- Easy Shepherds Pie
- Classic Shepherds Pie
- Classic Tiramisu
- Easy Tiramisu
- Classic Guacamole
- Easy Guacamole
- Classic Chicken Pot Pie
- Easy Chicken Pot Pie
- Classic Egg Salad
- Easy Egg Salad