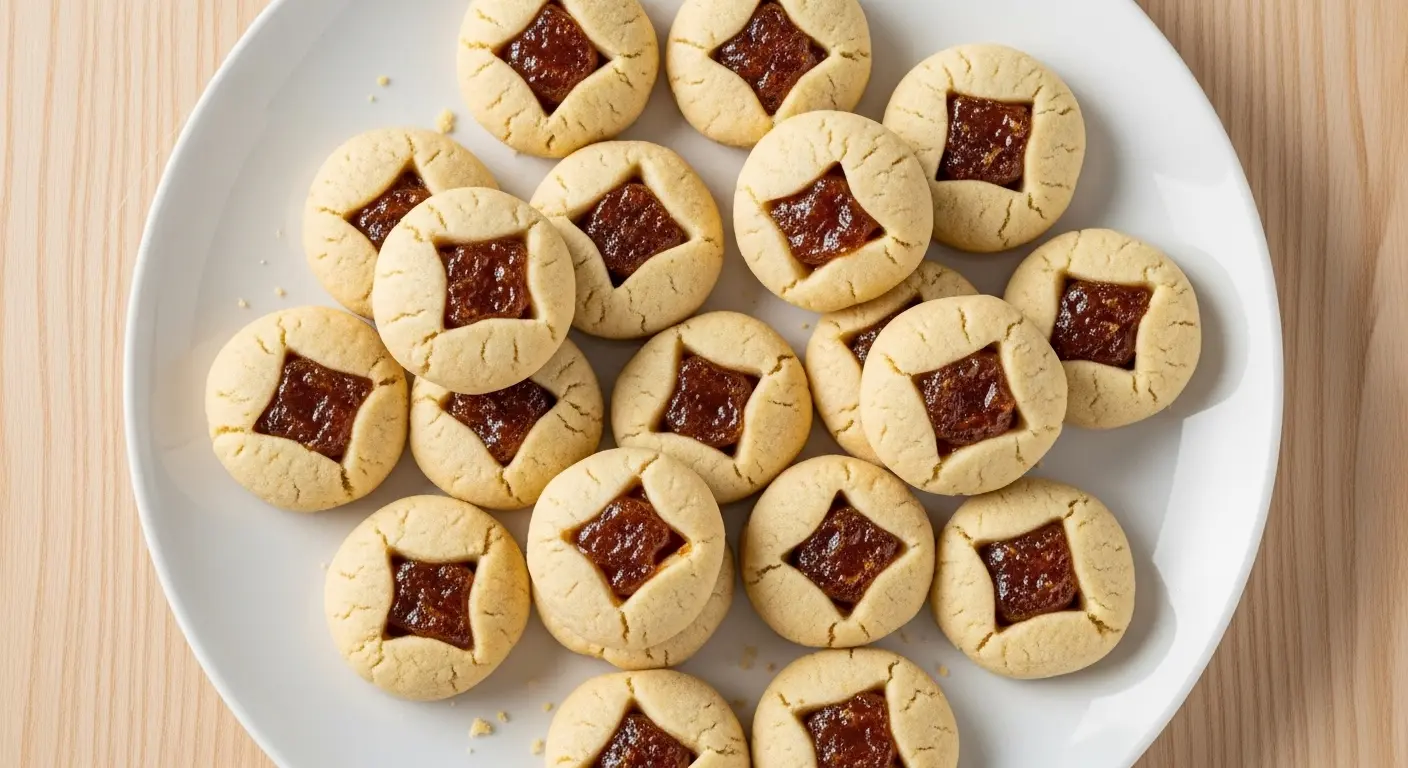
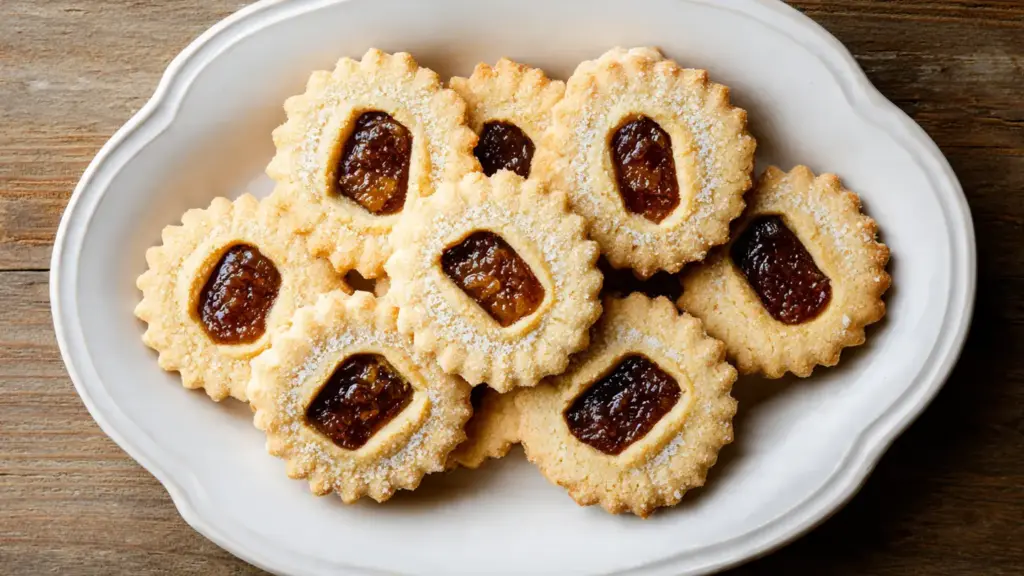
Soft, tender cookies sandwiched with a sweet, caramelized date filling create the ultimate nostalgic treat. This date filled cookie recipe delivers a perfect balance of buttery shortbread and rich, jammy dates that will transport you straight to grandma’s kitchen.
These old-fashioned cookies have been bringing joy to family gatherings for generations. The delicate sugar cookie dough encases a luscious filling made from chopped dates, creating pockets of sweetness in every bite.
Making these cookies is easier than you might think. The simple dough comes together quickly, while the date filling cooks in just minutes on the stovetop.
The result is a cookie that looks impressive but doesn’t require advanced baking skills. Kids and adults alike love the contrast between the crisp edges and the soft, sweet center.
These date filled cookies store beautifully, making them perfect for holiday cookie exchanges or care packages. They actually taste even better after a day or two, as the flavors meld together.
This pairs wonderfully with classic sugar cookies for a complete cookie spread.

Why You’ll Love This Date Filled Cookie Recipe
This recipe strikes the perfect balance between simplicity and special occasion appeal. You can make these cookies ahead and freeze them, which is a lifesaver during the busy holiday season.
The ingredient list is straightforward, with no hard-to-find items. Most of what you need is probably already in your pantry.
Here’s what makes these cookies irresistible:
- Tender, melt-in-your-mouth texture that comes from the combination of butter and shortening in the dough
- Naturally sweet filling made from dates that provides deep caramel notes without refined sugar overload
- Make-ahead friendly so you can bake them days in advance without losing quality
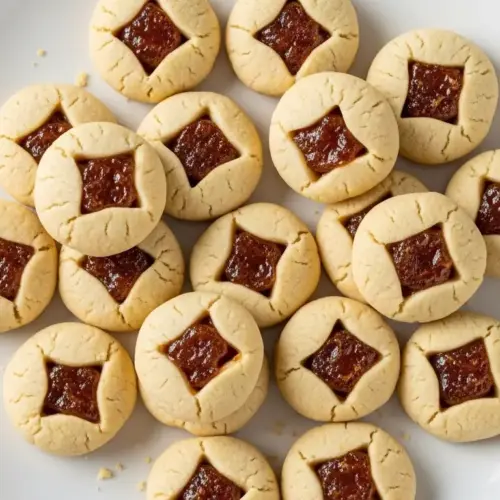
- Impressive presentation with the cut-out top revealing the beautiful date filling beneath
- Nostalgic flavor that reminds you of simpler times and family traditions
- Versatile serving options perfect for afternoon tea, holiday platters, or everyday treats
Ingredients
These cookies come together with two components: the tender cookie dough and the sweet date filling. Each ingredient plays a specific role in creating the perfect texture and flavor balance.
For the Cookie Dough:
- 1 cup (226g) unsalted butter, softened
- 1 1/2 cups (300g) granulated sugar
- 2 large eggs
- 1 teaspoon vanilla extract
- 3 cups (375g) all-purpose flour
- 1 teaspoon baking powder
- 1/2 teaspoon salt
For the Date Filling:
- 2 cups (340g) chopped pitted dates
- 1/2 cup (100g) granulated sugar
- 1/2 cup (120ml) water
- 1 tablespoon fresh lemon juice
- Pinch of salt
You might also enjoy: Almond Macaroon Cookie Recipe
Kitchen Equipment Needed
Having the right tools makes the cookie-making process smooth and enjoyable. You likely have most of these items already, but a few key pieces make a real difference in the final result.
Here’s what you’ll need:
- Stand mixer or hand mixer for creaming butter and sugar
- Large mixing bowls for combining ingredients
- 2-quart saucepan for cooking the date filling
- Rolling pin for rolling out the dough
- 2.5-inch round cookie cutter for cutting the dough circles
- 1-inch round cutter or thimble for creating the window in the top cookies
- Baking sheets (ungreased)
- Parchment paper or silicone baking mats (optional but recommended)
- Cooling rack for finished cookies
- Fork for sealing cookie edges
- Wooden spoon for stirring the filling
Recommended Products for This Recipe
These carefully selected products will help you achieve bakery-quality results and make the baking process more enjoyable.
1. KitchenAid Stand Mixer
A quality stand mixer makes creaming butter and sugar effortless, ensuring your cookie dough has the perfect light and fluffy texture. The hands-free operation lets you prep other ingredients while it works. This is an investment that will serve you well for countless baking projects.
2. Medjool Dates, Pitted
Premium Medjool dates create the richest, most flavorful filling with their natural caramel notes. Look for soft, plump dates that will blend easily into a smooth paste. The extra quality makes a noticeable difference in the final cookie.
3. French Rolling Pin
A tapered French rolling pin gives you better control when rolling cookie dough to an even thickness. The design allows you to feel the dough’s resistance and adjust pressure accordingly. This produces more uniform cookies that bake evenly.
4. Round Cookie Cutter Set
A nested set of round cutters gives you options for different sized cookies and the perfect smaller cutter for creating the window. Sharp edges cut cleanly through dough without dragging. Stainless steel sets last for years.
Read Also: Sicilian Fig Cookies Recipe
Step-by-Step Instructions
Follow these detailed steps to create perfect date filled cookies every time. Take your time with each stage, and you’ll be rewarded with bakery-quality results.
1. Prepare the Date Filling
- Place the chopped dates, sugar, and water in your 2-quart saucepan
- Set the pan over medium heat and stir the mixture occasionally as it comes to a boil
- Once boiling, reduce the heat to low and let the mixture simmer
- Continue stirring frequently to prevent sticking or burning on the bottom of the pan
- Cook for about 10-15 minutes until the dates have completely softened and the mixture has thickened to a paste-like consistency
- Remove from heat and stir in the lemon juice and pinch of salt
- Transfer the filling to a small bowl and let it cool completely to room temperature (this is crucial, as hot filling will melt the cookie dough)
- The filling will thicken more as it cools, reaching the perfect spreadable consistency
2. Make the Cookie Dough
- In your stand mixer bowl fitted with the paddle attachment, or in a large bowl with a hand mixer, add the softened butter and granulated sugar
- Beat on medium speed for 3-4 minutes until the mixture is light, fluffy, and pale in color (this incorporates air for tender cookies)
- Add the eggs one at a time, beating well after each addition and scraping down the sides of the bowl
- Pour in the vanilla extract and mix until fully incorporated
- In a separate bowl, whisk together the flour, baking powder, and salt
- Add the dry ingredients to the butter mixture in three additions, mixing on low speed just until combined after each addition (don’t overmix or the cookies will be tough)
- The dough will be soft but should hold together when pressed
3. Chill the Dough
- Divide the dough into two equal portions for easier handling
- Flatten each portion into a disk about 1 inch thick
- Wrap each disk tightly in plastic wrap or place in an airtight container
- Refrigerate for at least 1 hour or up to 24 hours (chilled dough is easier to roll and produces cookies that hold their shape better)
- If you chill the dough for more than 2 hours, let it sit at room temperature for 10 minutes before rolling to make it more pliable
4. Roll and Cut the Dough
- Preheat your oven to 375°F (190°C) and line your baking sheets with parchment paper if desired
- Remove one disk of dough from the refrigerator and unwrap it
- Generously flour your work surface and rolling pin to prevent sticking
- Roll the dough to about 1/8 inch thickness, working from the center outward and rotating the dough frequently
- Dip your 2.5-inch round cookie cutter in flour and cut out circles, placing them close together to minimize scraps
- Transfer half of the circles to your prepared baking sheet using a spatula (these will be your cookie bottoms)
- On the remaining circles still on your work surface, use the 1-inch cutter or thimble to cut out a small hole from the center (these will be your cookie tops)
- Carefully transfer the cut-out rounds to a separate area, as you’ll place these on top after filling
5. Fill and Assemble the Cookies
- Place the solid cookie rounds (bottoms) on your ungreased baking sheet, spacing them about 2 inches apart
- Spoon 1 generous teaspoon of the cooled date filling onto the center of each bottom cookie
- Spread the filling slightly, leaving a 1/4-inch border around the edges
- Carefully place a cut-out cookie round on top of each filled bottom
- Use your fingertips or the tines of a floured fork to gently press the edges together all around each cookie to seal them completely (this prevents the filling from leaking during baking)
- Make sure the seal is complete but don’t press so hard that you squeeze out the filling
6. Bake the Cookies
- Place the baking sheet on the center rack of your preheated oven
- Bake for 10-12 minutes, or until the cookies are just beginning to turn light golden brown around the edges
- The tops should remain pale, and the centers should look set but not browned
- Watch carefully during the last few minutes, as these cookies can go from perfect to overdone quickly
- Remove from the oven and let the cookies cool on the baking sheet for 2-3 minutes to firm up
- Use a spatula to transfer the cookies to a wire cooling rack
- Allow them to cool completely before serving or storing (about 30 minutes)
7. Repeat with Remaining Dough
- Gather any dough scraps, press them together, and roll out again to cut more cookies
- Repeat the rolling, cutting, filling, and baking process with the second disk of dough
- You can reuse the same baking sheets, but let them cool completely between batches for even baking
Another favorite: Cherry Chip Cookie Recipe
Tips for Success
These expert tips ensure your date filled cookies turn out perfectly every single time. Small details make a big difference in the final result.
- Use room temperature butter – Butter that’s too cold won’t cream properly, and butter that’s too warm will make the dough greasy. The ideal temperature is 65-68°F (it should give slightly when pressed but still hold its shape).
- Don’t skip chilling the dough – This step is crucial for cookies that hold their shape and don’t spread too much. The cold butter creates steam in the oven, leading to a better texture.
- Roll dough evenly – Use rolling pin rings or guide sticks to maintain consistent thickness. Uneven dough means some cookies will burn while others underbake.
- Keep the date filling thick – If your filling seems too runny after cooling, return it to the pan and cook for a few more minutes. It should be spreadable but not liquid.
- Seal edges thoroughly – Press firmly enough to create a good seal but gently enough not to squeeze filling out. A proper seal prevents leaking during baking.
- Watch baking time carefully – These cookies continue baking on the hot pan after you remove them from the oven, so pull them when they’re just barely golden on the edges.
- Cool completely before storing – Warm cookies will create condensation in containers, making them soggy. Full cooling takes about 30-45 minutes.
Serving Suggestions
These versatile cookies shine in many different settings and pair beautifully with various beverages and accompaniments. The sweet date filling and tender cookie create a complete treat on their own, but thoughtful pairings elevate the experience.
Try serving these date filled cookies alongside a pot of hot tea or coffee for an afternoon pick-me-up. The cookies’ sweetness balances perfectly with the slight bitterness of coffee.
Create an impressive dessert board by arranging these cookies with classic deviled eggs for a sweet and savory spread. The contrast in flavors makes both items more appealing.
Here are more delicious serving ideas:
- With tea service – Arrange on a pretty platter with Earl Grey, chamomile, or mint tea for an elegant afternoon treat
- Ice cream sandwiches – Use two cookies (without the cut-out tops) to sandwich vanilla or cinnamon ice cream
- Breakfast pastry – Serve warm alongside french toast casserole for a special brunch
- Cookie gift boxes – Layer in decorative tins with parchment paper for beautiful homemade gifts
- Dessert platters – Combine with chocolate chip cookies and sugar cookies for variety
- With cheese – Pair with mild cheeses like brie or goat cheese for an unexpected appetizer
- Crumbled over yogurt – Break into pieces and sprinkle over Greek yogurt with honey for breakfast
For a lighter option, try: Easy Granola Recipe
Variations to Try
Once you’ve mastered the basic recipe, these creative variations let you customize the cookies to your taste preferences or use what you have on hand. Each variation brings something special to the table.
- Walnut Date Filling – Stir 1/2 cup finely chopped walnuts or pecans into the cooled date filling for added crunch and nuttiness
- Spiced Cookies – Add 1/2 teaspoon cinnamon and 1/4 teaspoon nutmeg to the cookie dough for warm, cozy flavors
- Orange Date Filling – Replace the lemon juice with fresh orange juice and add 1 teaspoon orange zest to the filling for bright citrus notes
- Oatmeal Cookie Version – Replace 1 cup of the all-purpose flour with old-fashioned rolled oats for a heartier texture
- Brown Sugar Dough – Swap half the granulated sugar in the dough with packed brown sugar for deeper molasses flavor
- Fig Filling – Substitute dried figs for the dates to create a different but equally delicious filling
- Cardamom Spice – Add 1/2 teaspoon ground cardamom to the date filling for an exotic, aromatic twist
- Honey Sweetened – Replace the sugar in the filling with 1/3 cup honey for a different sweetness profile
Read Also: Old Fashioned Chocolate Chip Cookie Recipe
Storage and Reheating
Proper storage keeps these cookies fresh and delicious for days or even months. The good news is that date filled cookies actually improve with age as the flavors meld together.
- Room temperature – Store completely cooled cookies in an airtight container at room temperature for up to 5 days. Layer them with parchment paper to prevent sticking.
- Refrigerator – For longer storage, keep cookies in an airtight container in the refrigerator for up to 2 weeks. Bring to room temperature before serving for the best texture.
- Freezer – These cookies freeze beautifully. Place cooled cookies in a single layer on a baking sheet and freeze until solid (about 1 hour). Transfer to freezer bags or containers with parchment paper between layers. Freeze for up to 3 months.
- Thawing – Remove frozen cookies from the container and let them thaw at room temperature for 1-2 hours. They’ll taste freshly baked.
- Refreshing – To crisp up cookies that have gone soft, place them in a 300°F (150°C) oven for 3-5 minutes. Let cool before serving.
- Freezing dough – You can also freeze the assembled, unbaked cookies. Place them on a baking sheet until solid, then transfer to freezer bags. Bake directly from frozen, adding 2-3 minutes to the baking time.
Nutritional Facts
Based on a batch of 24 cookies (serving size: 1 cookie)
- Calories: 185
- Total Fat: 7g
- Saturated Fat: 4g
- Cholesterol: 30mg
- Sodium: 85mg
- Total Carbohydrates: 29g
- Dietary Fiber: 1.5g
- Sugars: 18g
- Protein: 2g
- Vitamin A: 4% DV
- Calcium: 2% DV
- Iron: 5% DV
- Potassium: 3% DV
Note: Nutritional values are approximate and may vary based on specific ingredients used.
This technique works wonderfully in homemade granola as well.
Health Benefits of Key Ingredients
While these are definitely a treat cookie, they contain some surprisingly nutritious ingredients. Understanding the health benefits helps you feel a bit better about enjoying them in moderation.
Dates are nutritional powerhouses that provide natural sweetness along with important nutrients. They’re rich in fiber, which supports digestive health and helps you feel satisfied.
Here are the key health benefits:
- Dates provide natural energy – High in natural sugars and carbohydrates that give you a quick energy boost without the crash of refined sugar
- Rich in fiber – One serving contains about 1.5g of fiber, supporting digestive health and promoting feelings of fullness
- Good source of potassium – Dates contain potassium, which helps regulate blood pressure and supports heart health
- Contains antioxidants – Dates are loaded with flavonoids and carotenoids that fight free radicals and reduce inflammation
- Provides minerals – Including magnesium, copper, and manganese that support bone health and metabolism
- Natural sweetener – Using dates means less refined sugar in the filling compared to many cookie recipes
- Supports brain health – The antioxidants in dates have been linked to improved cognitive function and reduced inflammation
Frequently Asked Questions
1. Can I use a different type of dried fruit instead of dates?
Yes, you can substitute dried figs, apricots, or prunes for the dates. Each fruit will bring its own unique flavor profile. Figs create a slightly nuttier taste, while apricots add tartness. You may need to adjust the sugar amount depending on how sweet your chosen fruit is. Follow the same cooking method, simmering until the fruit breaks down into a thick, spreadable paste.
2. Why are my cookies spreading too much during baking?
Cookie spreading usually happens when the dough is too warm or the butter was overly softened. Make sure your dough is properly chilled before rolling, and if your kitchen is very warm, pop the cut cookies back in the refrigerator for 10 minutes before baking. Also check that you’re measuring flour correctly by spooning it into the measuring cup and leveling off, rather than scooping directly from the bag.
3. How do I prevent the filling from leaking out during baking?
The key is sealing the edges thoroughly and not overfilling. Use only about 1 teaspoon of filling per cookie and leave a good border around the edges. Press the top and bottom edges together firmly with your fingers or a fork, making sure there are no gaps. If you notice any openings, pinch them closed before baking.
4. Can I make these cookies gluten-free?
Yes, you can substitute a 1:1 gluten-free flour blend for the all-purpose flour. Look for a blend that contains xanthan gum for the best texture. The cookies may be slightly more delicate, so handle them gently when transferring to and from baking sheets. Everything else in the recipe remains the same.
5. Do I have to cut a hole in the top cookies?
No, the hole is purely decorative and traditional. You can absolutely make these cookies without the cut-out window. Simply seal two solid rounds together with the filling in between. They’ll taste exactly the same, though you won’t see the pretty date filling peeking through.
Read Also: Single Serving Sugar Cookie Recipe
Date Filled Cookies
Equipment
- Stand mixer or hand mixer - For creaming butter and sugar
- Large mixing bowls
- 2-quart saucepan - For cooking the date filling
- Rolling Pin - French tapered rolling pin recommended for even thickness
- 2.5-inch round cookie cutter - For cutting dough circles
- 1-inch round cutter or thimble - For creating the decorative window in top cookies
- Baking sheets - Ungreased
- Parchment paper or silicone baking mats - (optional) Recommended for easy cleanup
- Cooling rack - For finished cookies
- Fork - For sealing cookie edges
- Wooden spoon - For stirring the filling
Ingredients
For the Cookie Dough
- 1 cup unsalted butter - 226g, softened to 65–68°F
- 1.5 cups granulated sugar - 300g
- 2 large eggs
- 1 tsp vanilla extract
- 3 cups all-purpose flour - 375g, spooned and leveled
- 1 tsp baking powder
- 0.5 tsp salt
For the Date Filling
- 2 cups chopped pitted dates - 340g; Medjool dates recommended for richest flavor
- 0.5 cup granulated sugar - 100g
- 0.5 cup water - 120ml
- 1 tbsp fresh lemon juice
- salt - Pinch
Instructions
- Combine chopped dates, sugar, and water in a 2-quart saucepan over medium heat. Bring to a boil, then reduce to low and simmer for 10–15 minutes, stirring frequently, until thickened to a paste-like consistency.
- Remove from heat and stir in the lemon juice and a pinch of salt. Transfer to a bowl and cool completely to room temperature before using — the filling will thicken further as it cools.
- Beat softened butter and granulated sugar in a stand mixer on medium speed for 3–4 minutes until light, fluffy, and pale. Add eggs one at a time, beating well after each, then mix in vanilla extract.
- Whisk flour, baking powder, and salt in a separate bowl, then add to the butter mixture in three additions, mixing on low just until combined after each. Do not overmix.
- Divide dough into two disks, wrap tightly in plastic wrap, and refrigerate for at least 1 hour or up to 24 hours. If chilled more than 2 hours, let sit at room temperature for 10 minutes before rolling.
- Preheat oven to 375°F (190°C) and line baking sheets with parchment paper. On a floured surface, roll one dough disk to 1/8-inch thickness, then cut out circles with a 2.5-inch round cutter.
- Transfer half the circles (bottoms) to the baking sheet. Use a 1-inch cutter or thimble to cut a hole in the center of the remaining circles (tops), then set those aside on your work surface.
- Spoon 1 teaspoon of cooled date filling onto each bottom cookie, spreading slightly and leaving a 1/4-inch border. Top with a cut-out round and press edges together firmly with fingertips or a floured fork to seal completely.
- Bake on the center rack for 10–12 minutes, until the edges are just beginning to turn light golden. The tops should remain pale — watch carefully during the last few minutes.
- Cool cookies on the baking sheet for 2–3 minutes, then transfer to a wire rack to cool completely (about 30 minutes). Repeat rolling, filling, and baking with the second dough disk and any scraps.
Notes
- Use room temperature butter (65–68°F) for the best creaming results — it should give slightly when pressed but still hold its shape.
- Do not skip chilling the dough; this is critical for cookies that hold their shape and develop a better texture during baking.
- Keep the date filling thick — if it seems too runny after cooling, return to the pan and cook a few more minutes until spreadable but not liquid.
- Seal cookie edges thoroughly by pressing firmly with your fingers or a floured fork to prevent filling from leaking during baking.
- These cookies actually taste better after a day or two as the flavors meld — perfect for making ahead for holidays or gifting.
- Store in an airtight container at room temperature for up to 5 days, in the refrigerator for up to 2 weeks, or freeze for up to 3 months.
- To freeze unbaked cookies, place assembled cookies on a baking sheet until solid, then transfer to freezer bags. Bake from frozen, adding 2–3 minutes to the bake time.
- For a walnut variation, stir 1/2 cup finely chopped walnuts or pecans into the cooled filling for added crunch and nuttiness.
- For a spiced version, add 1/2 teaspoon cinnamon and 1/4 teaspoon nutmeg to the dough, or 1/2 teaspoon cardamom to the filling.
- The decorative hole in the top cookie is optional — you can seal two solid rounds together and the cookies will taste exactly the same.
Final Thoughts
These date filled cookies bring a touch of old-fashioned charm to any occasion. The tender, buttery dough paired with the sweet, caramelized date filling creates a perfect balance that keeps you reaching for just one more.
Making these cookies from scratch might seem time-consuming, but the process is actually quite simple and even relaxing. The hands-on work of rolling, cutting, and filling connects you to generations of bakers who made these same treats for their loved ones.
Give this date filled cookie recipe a try and discover why it’s been a treasured family favorite for so long. We’d love to hear how your cookies turned out! Share your baking adventures in the comments below, or tag us on social media with your beautiful cookie photos.
Recommended:
- Buttermilk Pancake Recipe
- Easy Waffle Recipe
- Belgian Waffle Recipe
- Classic French Toast Recipe
- Easy French Toast Recipe
- Breakfast Casserole Recipe
- Chewy Chocolate Chip Cookies Recipe
- Easy Sugar Cookie Recipe
- Classic Tiramisu Recipe
- Best Carrot Cake Recipe


