Date Filled Cookies
Soft, tender cookies sandwiched with a sweet, caramelized date filling create the ultimate nostalgic treat. This date filled cookie recipe delivers a perfect balance of buttery shortbread and rich, jammy dates — a timeless classic that has been bringing joy to family gatherings for generations.
Equipment
- Stand mixer or hand mixer - For creaming butter and sugar
- Large mixing bowls
- 2-quart saucepan - For cooking the date filling
- Rolling Pin - French tapered rolling pin recommended for even thickness
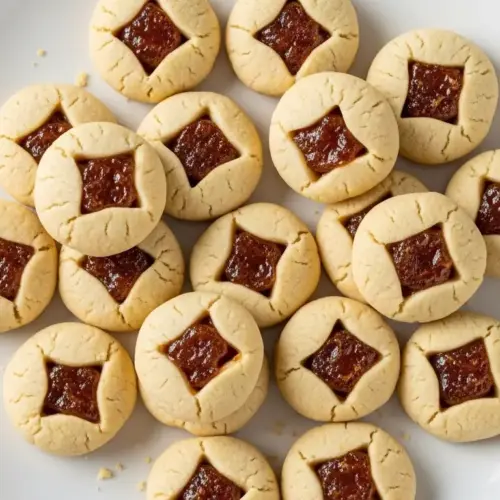
- 2.5-inch round cookie cutter - For cutting dough circles
- 1-inch round cutter or thimble - For creating the decorative window in top cookies
- Baking sheets - Ungreased
- Parchment paper or silicone baking mats - (optional) Recommended for easy cleanup
- Cooling rack - For finished cookies
- Fork - For sealing cookie edges
- Wooden spoon - For stirring the filling
Ingredients
For the Cookie Dough
- 1 cup unsalted butter - 226g, softened to 65–68°F
- 1.5 cups granulated sugar - 300g
- 2 large eggs
- 1 tsp vanilla extract
- 3 cups all-purpose flour - 375g, spooned and leveled
- 1 tsp baking powder
- 0.5 tsp salt
For the Date Filling
- 2 cups chopped pitted dates - 340g; Medjool dates recommended for richest flavor
- 0.5 cup granulated sugar - 100g
- 0.5 cup water - 120ml
- 1 tbsp fresh lemon juice
- salt - Pinch
Instructions
- Combine chopped dates, sugar, and water in a 2-quart saucepan over medium heat. Bring to a boil, then reduce to low and simmer for 10–15 minutes, stirring frequently, until thickened to a paste-like consistency.
- Remove from heat and stir in the lemon juice and a pinch of salt. Transfer to a bowl and cool completely to room temperature before using — the filling will thicken further as it cools.
- Beat softened butter and granulated sugar in a stand mixer on medium speed for 3–4 minutes until light, fluffy, and pale. Add eggs one at a time, beating well after each, then mix in vanilla extract.
- Whisk flour, baking powder, and salt in a separate bowl, then add to the butter mixture in three additions, mixing on low just until combined after each. Do not overmix.
- Divide dough into two disks, wrap tightly in plastic wrap, and refrigerate for at least 1 hour or up to 24 hours. If chilled more than 2 hours, let sit at room temperature for 10 minutes before rolling.
- Preheat oven to 375°F (190°C) and line baking sheets with parchment paper. On a floured surface, roll one dough disk to 1/8-inch thickness, then cut out circles with a 2.5-inch round cutter.
- Transfer half the circles (bottoms) to the baking sheet. Use a 1-inch cutter or thimble to cut a hole in the center of the remaining circles (tops), then set those aside on your work surface.
- Spoon 1 teaspoon of cooled date filling onto each bottom cookie, spreading slightly and leaving a 1/4-inch border. Top with a cut-out round and press edges together firmly with fingertips or a floured fork to seal completely.
- Bake on the center rack for 10–12 minutes, until the edges are just beginning to turn light golden. The tops should remain pale — watch carefully during the last few minutes.
- Cool cookies on the baking sheet for 2–3 minutes, then transfer to a wire rack to cool completely (about 30 minutes). Repeat rolling, filling, and baking with the second dough disk and any scraps.
Notes
- Use room temperature butter (65–68°F) for the best creaming results — it should give slightly when pressed but still hold its shape.
- Do not skip chilling the dough; this is critical for cookies that hold their shape and develop a better texture during baking.
- Keep the date filling thick — if it seems too runny after cooling, return to the pan and cook a few more minutes until spreadable but not liquid.
- Seal cookie edges thoroughly by pressing firmly with your fingers or a floured fork to prevent filling from leaking during baking.
- These cookies actually taste better after a day or two as the flavors meld — perfect for making ahead for holidays or gifting.
- Store in an airtight container at room temperature for up to 5 days, in the refrigerator for up to 2 weeks, or freeze for up to 3 months.
- To freeze unbaked cookies, place assembled cookies on a baking sheet until solid, then transfer to freezer bags. Bake from frozen, adding 2–3 minutes to the bake time.
- For a walnut variation, stir 1/2 cup finely chopped walnuts or pecans into the cooled filling for added crunch and nuttiness.
- For a spiced version, add 1/2 teaspoon cinnamon and 1/4 teaspoon nutmeg to the dough, or 1/2 teaspoon cardamom to the filling.
- The decorative hole in the top cookie is optional — you can seal two solid rounds together and the cookies will taste exactly the same.