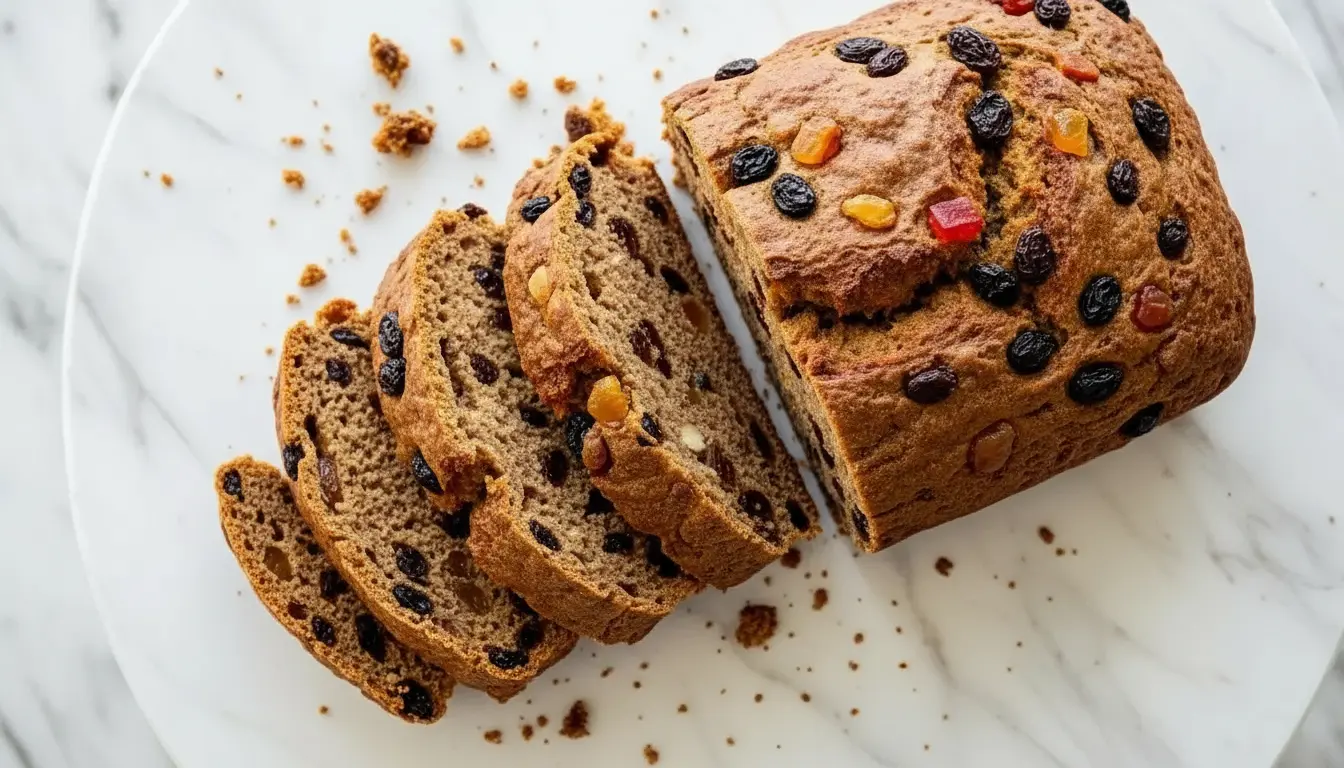
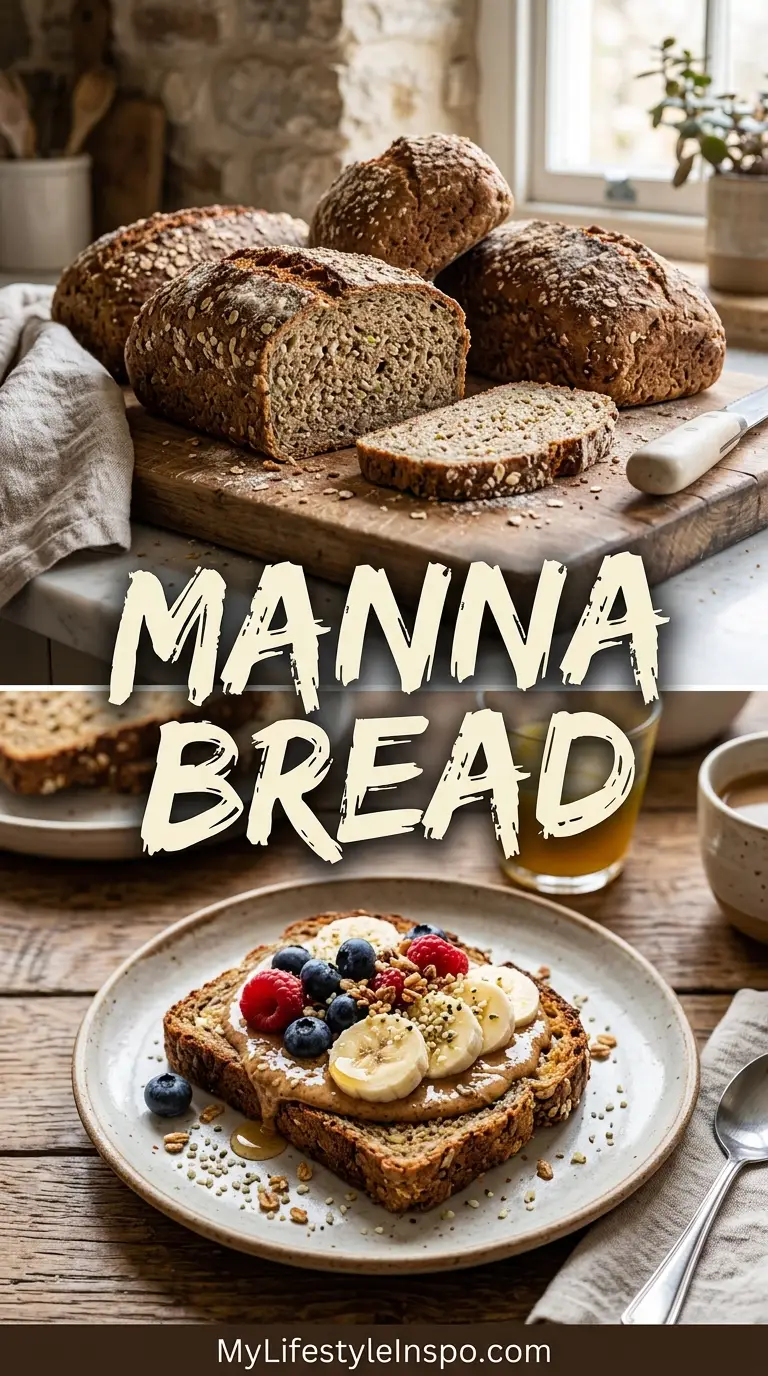
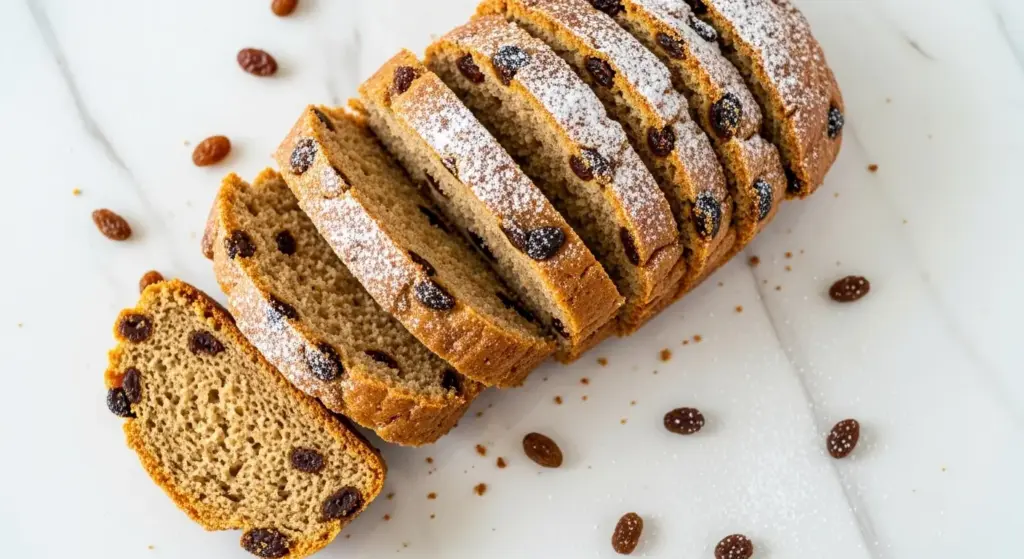
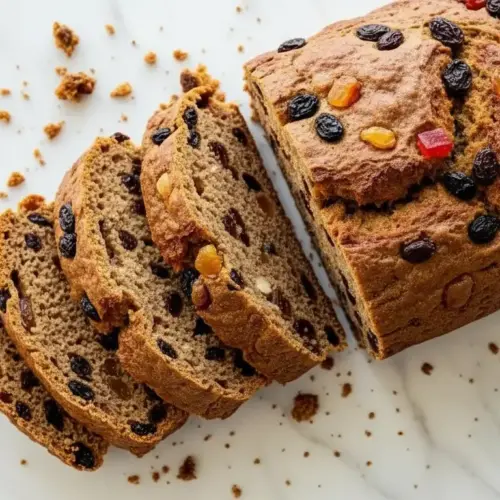
If you’ve been searching for an ancient, wholesome bread that’s packed with nutrition and requires just a few simple ingredients, this manna bread recipe is exactly what you need. This sprouted grain bread, also known as Essene bread, dates back thousands of years and offers a unique, dense texture with a naturally sweet, nutty flavor.
Unlike traditional breads made with flour and yeast, this manna bread recipe uses whole sprouted wheat berries that are ground into a paste and baked at low temperatures. The sprouting process transforms the grain, making it more digestible and increasing its nutritional value significantly.
Making manna bread does require some planning ahead since the wheat berries need 3-4 days to sprout properly. However, the hands-on work is minimal, and the results are absolutely worth the wait.
The final loaf has a moist, cake-like texture that’s perfect for toasting and spreading with honey, nut butter, or enjoying plain as a satisfying snack.
For a variation on traditional breads, you might also enjoy this einkorn bread made with an ancient grain.
Why You’ll Love This Manna Bread Recipe
This manna bread recipe stands out for its simplicity and nutritional benefits. With just sprouted wheat berries and a few optional ingredients, you’ll create a bread that’s completely free from commercial flour, added sugars, and preservatives.
The sprouting process is what makes this bread truly special. As the wheat berries sprout, enzymes break down the grain’s starches into simple sugars, proteins into amino acids, and neutralize phytic acid that can interfere with mineral absorption.
Here’s what makes this recipe irresistible:
- Incredibly nutritious with enhanced vitamins, minerals, and enzymes from the sprouting process
- Naturally sweet without any added refined sugar
- Flour-free and yeast-free making it easier to digest for many people
- Dense and satisfying so a small slice keeps you full for hours
- Flexible flavor options from sweet cinnamon-raisin to savory herb variations
- Ancient and authentic connecting you to bread-making traditions from thousands of years ago
- Freezer-friendly allowing you to make multiple loaves at once
- Minimal ingredients requiring just sprouted wheat and your choice of add-ins
Ingredients
This traditional manna bread recipe uses sprouted wheat berries as the foundation, with optional sweet additions that enhance flavor without overwhelming the natural taste of the grain. The ingredient list is remarkably simple, which is part of what makes this ancient bread so special.
- 2 cups organic wheat berries (hard red winter wheat works best)
- 1/2 teaspoon sea salt
- 1 cup raisins (optional, for sweet version)
- 1 teaspoon ground cinnamon (optional, for sweet version)
- Water for sprouting (filtered water recommended)
For Savory Version:
- 2 cups organic wheat berries
- 1 teaspoon sea salt
- 2-3 tablespoons fresh rosemary or other herbs, finely chopped (optional)
- 1/4 cup chopped walnuts or sunflower seeds (optional)
Kitchen Equipment Needed
Having the right equipment makes the process of creating manna bread much simpler and more efficient. While you don’t need specialized baking tools, a few key items will ensure your sprouted wheat is processed properly and baked evenly.
- Wide-mouth glass jar (quart-sized) or sprouting jar
- Cheesecloth or fine mesh lid for sprouting
- Rubber band
- Food processor or high-powered blender
- Baking sheet or loaf pan
- Parchment paper
- Large bowl for rinsing sprouts
- Wire cooling rack
Recommended Products for This Recipe
These specially selected products will help you achieve the best results with your manna bread and make the process smoother from start to finish.
1. Organic Hard Red Winter Wheat Berries
High-quality, organic wheat berries are essential for successful sprouting. These berries have not been treated with any chemicals or herbicides that would prevent germination, ensuring you get healthy, vigorous sprouts packed with nutrients.
2. Wide-Mouth Mason Jar Sprouting Kit
A dedicated sprouting kit with a mesh lid makes the daily rinsing process effortless. The angled stand allows excess water to drain completely, preventing mold and ensuring perfectly sprouted grains every time.
3. Cuisinart Food Processor
A powerful food processor is crucial for grinding sprouted wheat berries into a smooth, sticky dough. This model has the motor strength needed to handle the dense, moist sprouts without overheating or stalling.
4. Nordic Ware Natural Aluminum Baking Sheet
The even heat distribution of this commercial-grade baking sheet ensures your manna bread bakes uniformly at the low temperature required. The natural aluminum prevents hot spots that could cause uneven browning.
Step-by-Step Instructions
Making manna bread is a multi-day process, but each step is straightforward and requires minimal active time. The key to success is patience during the sprouting phase and attention to detail when processing the grains.
1. Start the Sprouting Process
- Measure 2 cups (480g) of dry wheat berries into your wide-mouth glass jar
- Rinse the berries thoroughly under cool running water to remove any debris
- Fill the jar with cool filtered water, using about twice the volume of the berries
- Secure the cheesecloth or mesh lid over the top with a rubber band
- Let the berries soak for 8-12 hours or overnight at room temperature
- After soaking, you’ll notice the berries have absorbed water and swollen slightly
2. Begin Daily Rinsing
- Drain off all the soaking water through the mesh lid (save this nutrient-rich water for soups or smoothies if desired)
- Rinse the berries thoroughly with cool water, swishing them around in the jar
- Drain completely by inverting the jar at a 45-degree angle in a dish rack or bowl
- Place the jar in a dark cupboard or cover with a kitchen towel
- The darkness and moisture create ideal sprouting conditions
- Repeat this rinsing and draining process twice daily, morning and evening
3. Monitor Sprout Development
- Check the berries after 24 hours for the first signs of tiny white tails emerging
- Continue the twice-daily rinsing for 2-3 more days
- The sprouts are ready when the tails are about the same length as the berry itself (approximately 1/4 inch or 6mm)
- Taste a few sprouts at this stage—they should be sweet and slightly crunchy, not bitter
- If the tails grow too long, the bread will have a more pronounced, grassy flavor
- Skip the final rinse before processing so the sprouts aren’t too wet
4. Process the Sprouted Wheat
- Transfer the sprouted wheat berries to your food processor
- Add the sea salt and any optional ingredients (raisins and cinnamon for sweet version, or herbs for savory)
- Process on high speed for 3-5 minutes, scraping down the sides every minute
- The mixture will transform from chunky to a smooth, sticky, dough-like paste
- You may hear the motor strain a bit—this is normal due to the density of the sprouts
- The final consistency should be similar to thick cookie dough, holding together when pressed
- If the mixture is too dry and crumbly, add 1-2 tablespoons of water and process again
5. Shape the Loaf
- Line your baking sheet with parchment paper and lightly oil it
- Turn the sprouted wheat dough out onto the prepared sheet
- Wet your hands with water to prevent sticking
- Shape the dough into a flattened loaf about 1 to 1.5 inches (2.5-4cm) thick
- You can form it into a round disc, an oval, or a rectangular shape
- Keep the thickness uniform for even baking
- The loaf will not rise during baking, so shape it to your desired final form
6. Bake Low and Slow
- Preheat your oven to 275°F (135°C)
- Place the shaped loaf on the center rack
- Bake for 2.5 to 3 hours, checking after 2 hours
- The bread is done when the exterior is firm and slightly browned
- A toothpick inserted in the center should come out mostly clean
- The internal temperature should reach about 180°F (82°C)
- For a crustier exterior, increase the oven temperature to 300°F (150°C) for the last 30 minutes
- Remove from the oven and let cool on the baking sheet for 10 minutes
7. Cool and Store
- Transfer the loaf to a wire cooling rack using a spatula
- Allow it to cool completely before slicing, at least 1 hour
- The bread will firm up considerably as it cools
- Once cool, slice with a sharp serrated knife using a gentle sawing motion
- The texture should be dense and moist, similar to a heavy quick bread or fruit cake
- Store according to the storage instructions below
Tips for Success
Following these tips will help you achieve the perfect manna bread every time, with properly sprouted grains and ideal texture. Pay special attention to the sprouting phase, as this is where most issues can occur.
- Use organic wheat berries since conventional wheat may be treated with herbicides that prevent sprouting
- Maintain consistent rinsing twice daily at roughly the same times to establish a routine
- Don’t over-sprout the wheat as longer tails will result in a more bitter, grassy flavor
- Drain thoroughly after each rinse to prevent mold growth in the sprouting jar
- Process in batches if your food processor struggles with the full amount of sprouts
- Check oven temperature with an oven thermometer as the low temperature is crucial
- Line your pan well as the bread can stick without proper preparation
- Slice when completely cool to prevent crumbling and achieve clean slices
- Make multiple loaves since the sprouting time is the same whether you make one or three
- Adjust sweetness by varying the amount of raisins or adding dates instead
This technique also works beautifully with sweet potato bread for another nutritious option.
Serving Suggestions
Manna bread’s dense, nutritious texture makes it incredibly versatile for breakfast, snacks, or even light meals. The naturally sweet version pairs beautifully with both sweet and savory toppings.
Perfect pairings and serving ideas:
- Toast slices lightly and spread with almond butter or cashew butter for a protein-rich breakfast
- Drizzle with raw honey and sprinkle with hemp seeds for extra nutrition
- Serve alongside easy hummus with fresh vegetables for a wholesome lunch
- Top with cream cheese, smoked salmon, and capers for an elegant brunch option
- Crumble into homemade granola for added texture
- Cube and toast to make croutons for salads and soups
- Spread with coconut oil and cinnamon sugar, then toast until crispy
- Serve with soft goat cheese and fresh figs for a sophisticated appetizer
- Use as a base for avocado toast with everything bagel seasoning
- Pair with warm soup like carrot soup for a comforting meal
Variations to Try
The basic sprouted wheat foundation of manna bread welcomes endless flavor combinations. These variations keep the traditional method while introducing exciting new tastes.
- Date and walnut version by replacing raisins with chopped dates and adding 1/2 cup toasted walnuts
- Apple cinnamon bread with 1/2 cup finely diced dried apples and an extra teaspoon of cinnamon
- Carrot raisin loaf by adding 1 cup finely shredded carrots to the food processor with the sprouts
- Multigrain version using 1 cup wheat berries, 1/2 cup spelt berries, and 1/2 cup rye berries all sprouted together
- Savory herb bread with fresh rosemary, thyme, and a tablespoon of nutritional yeast
- Sun-dried tomato and basil adding 1/2 cup chopped sun-dried tomatoes and fresh basil
- Banana bread twist by mashing 1 ripe banana into the processed sprouts before shaping
- Chocolate chip version mixing in 1/2 cup dark chocolate chips after processing
- Seed-topped loaf pressing pumpkin seeds and sunflower seeds onto the top before baking
- Orange cranberry bread with dried cranberries and 2 teaspoons of orange zest
Read Also: Chocolate Chip Bread Recipe
Storage and Reheating
Proper storage is essential for manna bread since it lacks the preservatives found in commercial breads. The high moisture content means it needs careful handling to prevent spoilage.
- Room temperature storage for 3-4 days wrapped tightly in parchment paper inside a sealed plastic bag
- Refrigerate for up to 4 weeks in an airtight container or wrapped well in plastic wrap
- Freeze individual slices separated by parchment paper in a freezer bag for up to 6 months
- Freeze whole loaves wrapped tightly in plastic wrap and then aluminum foil
- Thaw frozen slices at room temperature for 30 minutes or toast directly from frozen
- Refresh refrigerated bread by toasting or warming in a 300°F oven for 5-7 minutes
- Prevent mold by ensuring the bread is completely cool before storing
- Check regularly for any signs of mold, especially in humid climates
- Portion before freezing so you can thaw only what you need
- Toast from frozen for the best texture and flavor revival
Nutritional Facts
Per serving (1 slice, approximately 2 oz or 56g):
- Calories: 140
- Total Fat: 1g
- Saturated Fat: 0g
- Cholesterol: 0mg
- Sodium: 95mg
- Total Carbohydrates: 30g
- Dietary Fiber: 4g
- Sugars: 8g (from raisins)
- Protein: 5g
- Vitamin B6: 15% DV
- Iron: 10% DV
- Magnesium: 12% DV
- Manganese: 20% DV
Nutritional values are approximate and will vary based on specific ingredients and portion sizes. Sweet version with raisins will have higher sugar content.
Health Benefits of Key Ingredients
The sprouting process transforms wheat berries into a nutritional powerhouse, making manna bread one of the most nutrient-dense breads you can eat. Each ingredient contributes specific health benefits that make this ancient bread remarkably good for you.
Sprouted wheat berries deliver exceptional nutritional value:
- Enhanced nutrient bioavailability as sprouting increases vitamins B and C significantly while making minerals more absorbable
- Improved digestibility through enzyme activation that breaks down complex starches and proteins
- Reduced anti-nutrients since sprouting neutralizes phytic acid that blocks mineral absorption
- Higher antioxidant content with sprouting increasing antioxidant activity by up to 300%
- Complete protein source providing all essential amino acids in more digestible forms
- Stable blood sugar due to the complex carbohydrates and fiber that prevent glucose spikes
- Gut health support from the naturally occurring enzymes and resistant starch
- Lower gluten content as sprouting reduces gluten by approximately 47% compared to flour-based bread
- Heart-healthy compounds including plant sterols and omega-3 fatty acids concentrated in the germ
- Anti-inflammatory properties from the increased levels of folate, tocopherols, and phenolic compounds
You might also enjoy the benefits of fresh milled flour bread for another wholesome option.
Frequently Asked Questions
1. Can I use other grains besides wheat berries for manna bread?
Yes, you can absolutely use other grains. Spelt berries, rye berries, and kamut all sprout well and create delicious variations of manna bread.
However, keep in mind that different grains have different sprouting times and may produce slightly different textures. Wheat berries remain the most traditional choice and generally produce the most reliable results.
2. How do I know when my wheat berries are properly sprouted?
Properly sprouted wheat berries will have small white tails emerging from the grain that are about the same length as the berry itself, typically 1/4 inch long. This usually takes 3-4 days with twice-daily rinsing.
The sprouts should taste sweet and fresh, not bitter or sour. If they develop an off smell or the tails are excessively long, they’ve over-sprouted.
3. Why is my manna bread too crumbly or dry?
Crumbly manna bread usually results from one of three issues: the sprouts were not processed long enough into a smooth paste, the wheat berries were too dry after sprouting, or the bread was overbaked. Process the sprouts for a full 5 minutes until very sticky and paste-like.
Make sure your sprouts still have some moisture when you process them by skipping the final rinse. Also, check your bread at 2.5 hours rather than waiting the full 3 hours.
4. Can I make manna bread without a food processor?
A food processor is strongly recommended for the best texture, but you can use a high-powered blender or even a manual grain mill set to a very fine grind. Some people have success with an old-fashioned meat grinder.
Whatever method you use, the goal is to create a smooth, sticky paste from the sprouted berries. Manual methods will take significantly more time and effort.
5. Is manna bread gluten-free?
No, manna bread is not gluten-free as it’s made from wheat, which contains gluten. However, the sprouting process does reduce the gluten content by nearly half compared to traditional flour-based breads.
Some people with mild gluten sensitivity find sprouted grain breads easier to digest, but anyone with celiac disease or severe gluten intolerance should avoid manna bread entirely.
For more nutritious bread options, check out this gluten free dairy free bread.
Manna Bread (Essene Bread)
Equipment
- Wide-mouth glass jar (quart-sized) - Or sprouting jar with mesh lid
- Cheesecloth or fine mesh lid - For covering the sprouting jar
- Rubber band - To secure cheesecloth over jar
- Food processor - High-powered recommended for grinding sprouts into paste
- Baking sheet - Or loaf pan
- Parchment paper - For lining the baking sheet
- Large bowl - For rinsing sprouts
- Wire cooling rack - For cooling the loaf after baking
- Oven thermometer - (optional) Recommended to verify low baking temperature accuracy
Ingredients
Sweet Version
- 2 cups organic wheat berries - 480g; hard red winter wheat works best; must be organic to ensure germination
- 1/2 tsp sea salt
- 1 cup raisins - optional; for sweet version
- 1 tsp ground cinnamon - optional; for sweet version
- filtered water - for sprouting; approximately 4 cups for soaking
Savory Version
- 2 cups organic wheat berries - 480g; hard red winter wheat works best
- 1 tsp sea salt
- 2-3 tbsp fresh rosemary or mixed herbs - optional; finely chopped
- 1/4 cup chopped walnuts or sunflower seeds - optional; about 30g
Instructions
- Place 2 cups of wheat berries in a wide-mouth quart jar, rinse well, then fill with cool filtered water (about twice the volume of berries). Secure a cheesecloth or mesh lid with a rubber band and soak at room temperature for 8–12 hours or overnight.
- Drain all soaking water through the mesh lid, rinse berries thoroughly, then drain completely by inverting the jar at a 45-degree angle. Place in a dark cupboard and repeat this rinse-and-drain process twice daily, morning and evening.
- Continue rinsing for 2–3 more days until small white tails emerge that are roughly the same length as the berry (about 1/4 inch or 6mm). Sprouts should taste sweet and fresh — skip the final rinse before processing so they aren’t too wet.
- Transfer sprouted berries to a food processor, add sea salt and any optional ingredients, then process on high for 3–5 minutes, scraping down sides every minute, until the mixture forms a smooth, sticky paste resembling thick cookie dough.
- Line a baking sheet with parchment paper and lightly oil it, then turn dough out and shape with wet hands into a flat oval or rectangle about 1 to 1.5 inches (2.5–4cm) thick, keeping the thickness uniform for even baking.
- Preheat oven to 275°F (135°C) and bake the loaf on the center rack for 2.5 to 3 hours, until the exterior is firm and lightly browned and an internal temperature of about 180°F (82°C) is reached. For a crustier finish, raise temperature to 300°F (150°C) for the final 30 minutes.
- Let the loaf rest on the baking sheet for 10 minutes, then transfer to a wire cooling rack and cool completely for at least 1 hour before slicing with a sharp serrated knife — the bread firms up considerably as it cools.
Notes
- Use organic wheat berries only — conventionally grown berries may be treated with herbicides that prevent germination.
- Rinse sprouts at consistent times twice daily (morning and evening) to establish a routine and avoid mold.
- Don’t over-sprout: tails longer than the berry itself result in a bitter, grassy flavor — aim for 1/4 inch tails.
- Skip the final rinse before processing so sprouts retain enough moisture for proper dough consistency.
- If the dough is too dry or crumbly after processing, add 1–2 tablespoons of water and process again.
- Use an oven thermometer to verify your oven’s temperature — the low baking temperature is critical to proper texture.
- Store at room temperature for 3–4 days wrapped in parchment inside a sealed bag, refrigerate for up to 4 weeks, or freeze individual slices for up to 6 months.
- Make multiple loaves at once since the sprouting time is the same whether you sprout for one or three loaves.
- This recipe also works with spelt berries, rye berries, or kamut — sprouting times may vary slightly by grain.
- Manna bread is not gluten-free; those with celiac disease should avoid it, though the sprouting process reduces gluten content by approximately 47% compared to flour-based bread.
Final Thoughts
This manna bread recipe connects you to an ancient tradition of bread-making that prioritizes nutrition, simplicity, and the natural transformation of grains through sprouting. While it requires patience and planning, the hands-on work is minimal, and the results are truly special.
The dense, naturally sweet texture and incredible nutritional profile make this bread worth every day of sprouting. Once you taste the difference that whole, sprouted grains make, you’ll understand why this bread has been treasured for thousands of years.
Give this recipe a try and discover the satisfying, wholesome goodness of homemade manna bread. I’d love to hear about your experience—share your results in the comments below or tag me on social media with your beautiful loaves!
Recommended:
- Sweet Sourdough Bread Recipe
- Einkorn Bread Recipe
- Fresh Milled Flour Bread Recipe
- Seeded Miso Sweet Potato Bread Recipe
- Amish Banana Bread Recipe
- Blackberry Bread Recipe
- Sweet Potato Bread Recipe
- Same Day Sourdough Bread Recipe
- Old Fashioned Pumpkin Bread Recipe
- Chocolate Chip Bread Recipe


