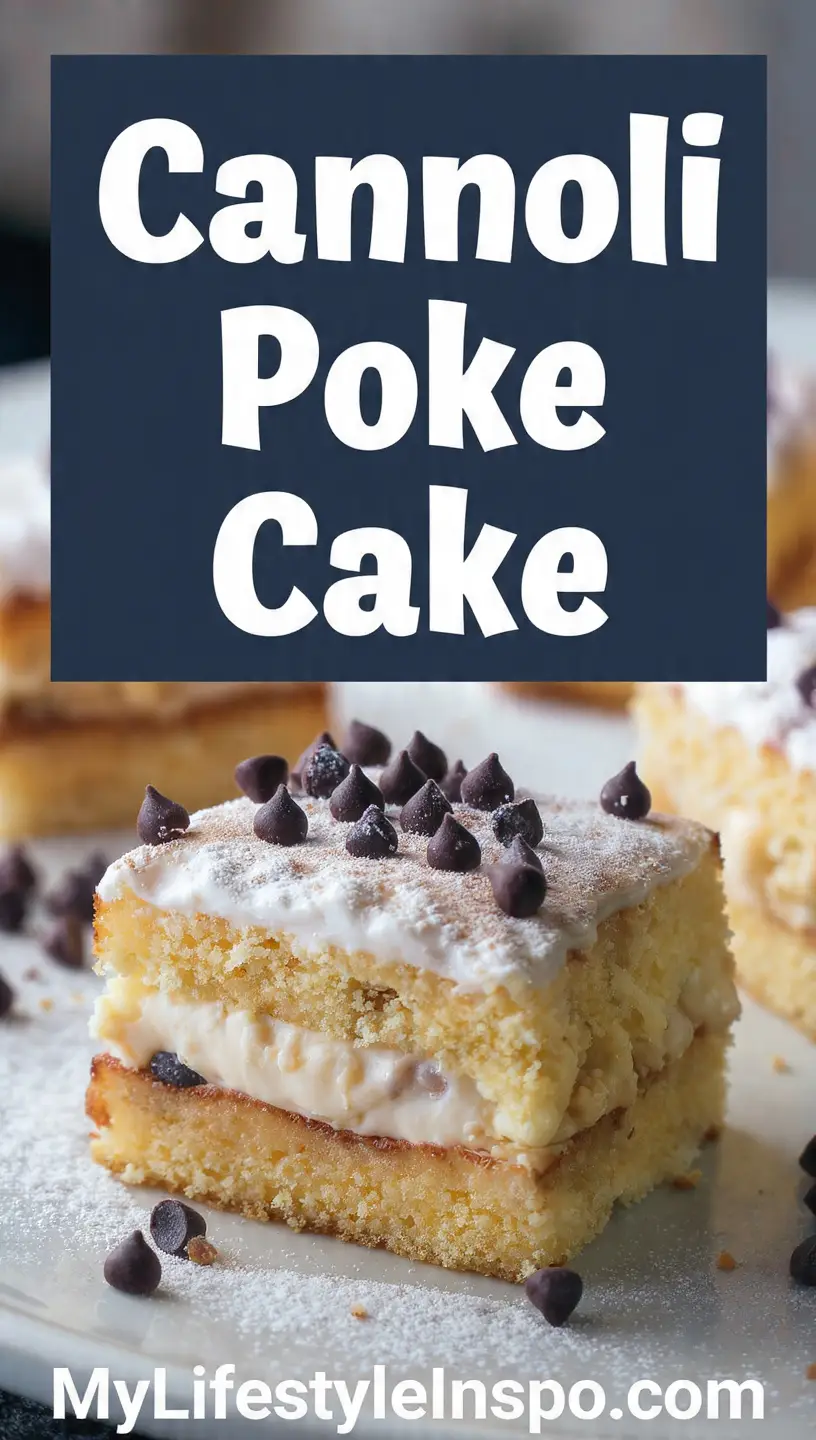
If you’ve been craving the delicious flavors of an Italian bakery cannoli but want something easier to serve at your next gathering, this cannoli poke cake recipe is exactly what you need. This dessert brings together the creamy ricotta filling and chocolate chips of traditional cannoli with the simplicity of a poke cake format.
The beauty of this recipe lies in how it transforms classic cannoli flavors into a shareable dessert that feeds a crowd. Instead of filling individual pastry shells, you’ll pour a luscious cannoli cream directly into a tender vanilla cake, allowing those signature flavors to soak into every bite.
The ricotta cheese provides that authentic cannoli taste while keeping the filling light and not overly sweet. Mini chocolate chips scattered throughout add the perfect touch of sweetness and texture. A dusting of powdered sugar on top gives it that bakery-fresh appearance.
This dessert works beautifully for potlucks, holiday gatherings, or any time you want to impress without spending hours in the kitchen. The poke cake method means the filling seeps into the cake, creating pockets of creamy goodness in every forkful.
Why You’ll Love This Cannoli Poke Cake Recipe
This cannoli poke cake recipe combines convenience with authentic Italian flavor. The poke cake method eliminates the need for piping individual cannoli shells, saving you time while delivering the same beloved taste. You’ll love how the creamy ricotta filling soaks into the tender cake, creating a dessert that’s moist and flavorful in every bite. The combination of sweet vanilla cake, rich cannoli cream, and chocolate chips offers a perfect balance of textures and flavors that appeals to both cannoli lovers and cake enthusiasts.
- Easy preparation that doesn’t require pastry skills or special equipment
- Make-ahead friendly since the cake actually improves as it chills and the flavors meld
- Serves a crowd with minimal effort compared to individual cannoli
- Authentic Italian flavors from ricotta cheese and traditional cannoli ingredients
- Customizable sweetness that you can adjust to your preference
- Perfect texture contrast between soft cake and creamy filling with chocolate chip crunch
If you enjoy Italian-inspired desserts, you might also love this strawberry cheesecake for another crowd-pleasing option.
Ingredients
This recipe uses simple ingredients that work together to create authentic cannoli flavor in cake form. The ricotta cheese provides the signature cannoli cream base, while the chocolate chips add traditional sweetness and texture.
For the Cake:
- 1 box (15.25 oz/432g) white or vanilla cake mix, plus ingredients listed on box
- Cooking spray or butter for greasing the pan
For the Cannoli Filling:
- 2 cups (480g) whole milk ricotta cheese, drained if watery
- 1 cup (240ml) heavy whipping cream, cold
- 1 cup (120g) powdered sugar
- 1 teaspoon pure vanilla extract
- 1 teaspoon almond extract
- 1 cup (170g) mini chocolate chips, divided
- Zest of 1 orange (optional but traditional)
For Topping:
- Additional powdered sugar for dusting
- Extra mini chocolate chips for garnish
Kitchen Equipment Needed
Having the right tools makes this recipe come together smoothly and ensures professional-looking results. The wooden spoon handle is key for creating those signature poke holes.
- 9×13-inch baking dish
- Large mixing bowls
- Electric hand mixer or stand mixer
- Wooden spoon handle or similar round tool for poking holes
- Rubber spatula
- Measuring cups and spoons
- Fine mesh sieve for dusting powdered sugar
Read Also: Pumpkin Roll Recipe
Recommended Products for This Recipe
These carefully selected products will help you achieve the best results with your cannoli poke cake.
1. Full-Fat Ricotta Cheese
Full-fat ricotta creates the authentic, creamy texture that defines a true cannoli filling. Low-fat versions can be grainy and lack the richness needed for this dessert. Quality ricotta makes all the difference in achieving that bakery-style taste.
2. Ghirardelli Mini Semi-Sweet Chocolate Chips
Mini chocolate chips distribute more evenly throughout the filling than regular-sized chips. Ghirardelli chips offer superior flavor and don’t sink to the bottom of the filling. Their smaller size means you get chocolate in every bite without overwhelming the delicate ricotta cream.
3. Nordic Ware 9×13 Cake Pan
This heavy-duty aluminum pan ensures even baking without hot spots that can dry out your cake. The reinforced edges prevent warping, and the light color promotes gentle browning. A quality pan is essential for a perfectly baked base that can hold all that creamy filling.
4. Nielsen-Massey Pure Vanilla Extract
Pure vanilla extract elevates the filling with complex, authentic flavor that imitation versions simply can’t match. Nielsen-Massey’s cold extraction process preserves over 250 flavor compounds. The depth of flavor enhances the ricotta without competing with it.
Step-by-Step Instructions
Follow these detailed instructions for a perfect cannoli poke cake every time. Taking your time with each step ensures the best texture and flavor distribution.
1. Prepare and Bake the Cake
- Preheat your oven according to the cake mix package directions, typically 350°F (175°C).
- Grease your 9×13-inch baking dish thoroughly with cooking spray or butter, making sure to coat the corners and sides to prevent sticking.
- Prepare the cake batter according to package directions, typically combining the cake mix with eggs, oil, and water as specified.
- Pour the batter into your prepared pan and spread it evenly with a rubber spatula, ensuring the batter reaches all corners.
- Bake for the time specified on the package, usually 28-33 minutes, until a toothpick inserted in the center comes out clean or with just a few moist crumbs.
- Remove the cake from the oven and let it cool in the pan for exactly 15 minutes; this timing is crucial because the cake needs to be slightly warm for the filling to soak in properly.
2. Poke the Holes
- Using the handle of a wooden spoon (about 1/2-inch diameter), poke holes all over the cake surface, spacing them about 1 inch apart in a grid pattern.
- Push the spoon handle down until it nearly reaches the bottom of the pan, but don’t push all the way through.
- Make sure to poke holes evenly across the entire cake, including near the edges, as this ensures even filling distribution.
- You should have approximately 40-50 holes when finished; the more holes you make, the more filling will penetrate the cake.
- Gently twist the spoon handle slightly as you remove it to widen the holes just a bit, allowing more filling to seep in.
3. Prepare the Cannoli Filling
- If your ricotta seems watery, place it in a fine-mesh strainer over a bowl and let it drain for 10-15 minutes, pressing gently to remove excess moisture.
- In a large mixing bowl, beat the heavy whipping cream with an electric mixer on high speed for 2-3 minutes until stiff peaks form; the cream should hold its shape when you lift the beaters.
- In a separate large bowl, combine the drained ricotta, powdered sugar, vanilla extract, and almond extract.
- Using the mixer on medium speed, beat the ricotta mixture for 1-2 minutes until smooth and creamy with no lumps remaining.
- Gently fold the whipped cream into the ricotta mixture using a rubber spatula, using a figure-eight motion to maintain the airiness; fold just until no white streaks remain.
- Reserve 2 tablespoons of mini chocolate chips for garnish, then fold the remaining chocolate chips into the filling along with the orange zest if using.
- Work quickly once the filling is mixed so the whipped cream doesn’t deflate.
4. Fill and Chill the Cake
- Working while the cake is still slightly warm, pour about half of the cannoli filling over the cake surface.
- Using a rubber spatula or the back of a spoon, gently spread the filling and push it down into the holes, encouraging it to seep into the cake.
- Add the remaining filling and spread it evenly across the entire surface, making sure to cover all areas completely.
- Use the spatula to smooth the top, creating an even layer that reaches all the edges.
- Cover the pan tightly with plastic wrap, making sure the wrap touches the filling surface to prevent a skin from forming.
- Refrigerate for at least 4 hours, but preferably overnight (8-12 hours); this chilling time allows the filling to firm up and the flavors to meld beautifully.
5. Garnish and Serve
- Just before serving, remove the plastic wrap carefully.
- Using a fine-mesh sieve, dust the top generously with powdered sugar, creating an even white layer.
- Sprinkle the reserved mini chocolate chips over the top for visual appeal and extra chocolate flavor.
- Cut into squares using a sharp knife, wiping the knife clean between cuts for neat edges.
- Use a spatula to carefully lift each piece from the pan, supporting it from underneath to keep the layers intact.
- Serve chilled for the best texture and flavor; the cake can sit at room temperature for up to 30 minutes before serving.
This pairs wonderfully with classic tiramisu when you’re serving multiple Italian desserts.
Tips for Success
These professional tips will help you achieve bakery-quality results with your cannoli poke cake. Small details make a big difference in the final texture and presentation.
- Drain your ricotta thoroughly to prevent a watery filling that won’t set properly; pat it dry with paper towels if needed for best results.
- Don’t skip chilling time as the filling needs several hours to firm up and the flavors need time to develop fully.
- Poke holes while cake is warm because the slightly softened cake accepts the filling more readily than a completely cooled cake.
- Use cold heavy cream straight from the refrigerator, as warm cream won’t whip to stiff peaks.
- Fold gently when combining the whipped cream with ricotta to maintain airiness and prevent deflating.
- Wipe knife between cuts to keep slices looking clean and professional.
- Store properly covered to prevent the cake from absorbing refrigerator odors and to maintain moisture.
Another fantastic make-ahead dessert option is this no bake cheesecake.
Serving Suggestions
This cannoli poke cake serves beautifully as a standalone dessert, but these accompaniments take it to the next level. Consider the occasion and your guests’ preferences when choosing serving options.
- Serve with a small cup of strong espresso or cappuccino for an authentic Italian experience
- Add fresh berries like strawberries or raspberries on the side for a pop of color and tartness
- Drizzle individual slices with chocolate sauce for extra indulgence
- Pair with a scoop of vanilla gelato for a temperature contrast
- Garnish each plate with a mint sprig and a few extra chocolate chips
- Serve alongside Italian wedding soup for a complete Italian feast
Variations to Try
Experimenting with different flavors and add-ins keeps this recipe exciting while maintaining the core cannoli essence. These variations offer something for everyone’s taste preferences.
- Chocolate Cannoli Cake: Use chocolate cake mix instead of vanilla and add 2 tablespoons of cocoa powder to the filling for double chocolate decadence.
- Pistachio Version: Replace almond extract with pistachio extract and fold in 1/2 cup chopped pistachios for authentic Sicilian flavor.
- Cherry Cannoli: Fold in 1 cup of diced maraschino cherries, drained and patted dry, for a fruity twist.
- Espresso Enhancement: Add 2 tablespoons of instant espresso powder to the cake batter and 1 tablespoon to the filling for coffee lovers.
- Lemon Ricotta: Replace almond extract with lemon extract and add 2 tablespoons of fresh lemon zest for a bright, citrusy version.
- Cannoli Chip Addition: Crush cannoli shells and sprinkle on top before serving for added crunch and authenticity.
For another creative cake variation, try this tres leches cake.
Storage and Reheating
Proper storage keeps your cannoli poke cake fresh and maintains the perfect texture throughout the week. This dessert actually improves after the first day as flavors continue to develop.
- Refrigerator: Cover tightly with plastic wrap or aluminum foil and store for up to 5 days; the filling may weep slightly after day 3 but remains safe and delicious.
- Freezing: Not recommended as the ricotta filling separates upon thawing, creating an unpleasant grainy texture.
- Individual portions: Cut into squares and store in airtight containers with parchment paper between layers to prevent sticking.
- Serving from cold: Remove from refrigerator 10-15 minutes before serving to take the chill off, but keep it cold enough that the filling stays firm.
- Re-dusting: If the powdered sugar absorbs into the cake, add a fresh dusting just before serving for the best presentation.
You can also make this pumpkin cheesecake ahead of time for another make-ahead dessert option.
Nutritional Facts
Per serving (1 slice, based on 15 servings):
- Calories: 340
- Total Fat: 18g
- Saturated Fat: 10g
- Cholesterol: 65mg
- Sodium: 280mg
- Total Carbohydrates: 39g
- Dietary Fiber: 1g
- Sugars: 28g
- Protein: 6g
- Calcium: 8% DV
- Iron: 4% DV
Note: Nutritional values are approximate and will vary based on specific brands used and portion sizes. Values calculated using standard white cake mix and full-fat dairy products.
Health Benefits of Key Ingredients
While this is certainly an indulgent dessert, several ingredients offer nutritional benefits that make it slightly more wholesome than typical cakes. Understanding these benefits helps you appreciate what you’re eating.
Ricotta cheese provides high-quality protein and calcium essential for bone health, with about 14% of your daily calcium needs per serving. The whey protein in ricotta supports muscle maintenance and helps you feel satisfied longer. Unlike many desserts, ricotta contains beneficial probiotics that support digestive health. Heavy cream, while calorie-dense, provides fat-soluble vitamins A, D, E, and K that your body needs for various functions. The almond extract contains trace amounts of beneficial compounds from almonds, including vitamin E and healthy fats. Dark chocolate chips offer antioxidants called flavonoids that support heart health when consumed in moderation.
- Rich in protein from ricotta cheese for muscle health and satiety
- Good source of calcium supporting bone density and strength
- Contains probiotics from ricotta that aid digestive health
- Provides vitamin A from dairy for eye health and immune function
- Offers antioxidants from chocolate chips that may support heart health
- Includes healthy fats necessary for vitamin absorption and hormone production
Consider balancing rich desserts with lighter meals like this mediterranean lentil soup.
Frequently Asked Questions
1. Can I use low-fat ricotta for this recipe?
You can, but full-fat ricotta produces far better results. Low-fat ricotta tends to be watery and grainy, which affects both the texture and flavor of your cannoli filling. The fat content in whole milk ricotta creates that creamy, luxurious mouthfeel that’s characteristic of authentic cannoli.
2. Why is my filling runny even after chilling?
The most common cause is excess moisture in the ricotta or under-whipped cream. Make sure to drain your ricotta thoroughly and whip your heavy cream to stiff peaks before folding. If your filling seems thin, you can stabilize it by adding 2-3 tablespoons of powdered sugar or 1 teaspoon of unflavored gelatin dissolved in 2 tablespoons of warm water.
3. Can I make this cake ahead of time?
Absolutely, and it actually tastes better when made ahead. Prepare the cake 1-2 days before you plan to serve it, keeping it covered in the refrigerator. Wait to add the powdered sugar garnish until just before serving to prevent it from dissolving into the filling.
4. What can I substitute for almond extract?
If you’re allergic to nuts or simply don’t like almond flavor, you can use additional vanilla extract, lemon extract, or orange extract. Each will provide a different but equally delicious flavor profile. For the most authentic cannoli taste, stick with almond extract as it’s traditional in cannoli filling.
5. How do I prevent the cake from becoming soggy?
The key is timing and technique. Poke the holes while the cake is slightly warm but not hot, and don’t make the holes too large. Using a cake that’s completely cooled can prevent proper absorption, while poking holes in a hot cake can cause it to fall apart. The 15-minute cooling period is optimal for achieving the right texture.
For more Italian-inspired dishes, explore this pasta fagioli for a savory option.
Cannoli Poke Cake
Equipment
- 9×13-inch baking dish
- Large mixing bowls
- Electric hand mixer or stand mixer
- Wooden spoon - Use the handle end (about 1/2-inch diameter) to poke holes
- Rubber spatula
- Measuring cups and spoons
- Fine-mesh sieve - For dusting powdered sugar on top
- Fine-mesh strainer - For draining ricotta if watery
Ingredients
For the Cake
- 1 box white or vanilla cake mix - 15.25 oz / 432g; plus eggs, oil, and water as listed on box
- cooking spray or butter - for greasing the pan
For the Cannoli Filling
- 2 cups whole milk ricotta cheese - 480g; drained if watery
- 1 cup heavy whipping cream - 240ml; cold
- 1 cup powdered sugar - 120g
- 1 tsp pure vanilla extract
- 1 tsp almond extract
- 1 cup mini chocolate chips - 170g; divided — reserve 2 tbsp for garnish
- 1 orange - zested; optional but traditional
For Topping
- powdered sugar - for dusting
- mini chocolate chips - extra, for garnish
Instructions
- Preheat oven to 350°F (175°C). Grease a 9×13-inch baking dish, prepare the cake batter according to package directions, pour into the pan, and bake 28–33 minutes until a toothpick comes out clean.
- Let the cake cool in the pan for exactly 15 minutes, then use the handle of a wooden spoon to poke 40–50 holes evenly across the surface, pushing nearly to the bottom and twisting slightly to widen each hole.
- If ricotta is watery, drain it through a fine-mesh strainer for 10–15 minutes. In a large bowl, beat cold heavy cream on high speed for 2–3 minutes until stiff peaks form.
- In a separate bowl, beat ricotta, powdered sugar, vanilla extract, and almond extract on medium speed until smooth, then gently fold in the whipped cream, chocolate chips, and orange zest (if using) until just combined.
- While the cake is still slightly warm, pour half the filling over the surface and press it into the holes with a spatula, then spread the remaining filling evenly on top.
- Cover tightly with plastic wrap (pressing it against the filling surface) and refrigerate for at least 4 hours, or preferably overnight.
- Just before serving, dust the top with powdered sugar through a fine-mesh sieve and sprinkle reserved mini chocolate chips on top, then cut into squares and serve chilled.
Notes
- Drain ricotta thoroughly before using — excess moisture will make the filling runny and prevent it from setting properly. Pat dry with paper towels if needed.
- Do not skip the 15-minute cooling window before poking holes. Poking a hot cake can cause it to fall apart; a fully cooled cake won’t absorb the filling as well.
- Use cold heavy cream straight from the refrigerator — warm cream will not whip to stiff peaks.
- Fold whipped cream into the ricotta gently using a figure-eight motion to maintain airiness and prevent deflating.
- This cake tastes even better the next day — make it 1–2 days ahead and keep covered in the refrigerator until ready to serve.
- If the filling is still runny after chilling, it likely needs more drained ricotta or stiffer whipped cream. You can stabilize it by adding 2–3 tablespoons of powdered sugar or 1 teaspoon of unflavored gelatin dissolved in 2 tablespoons of warm water.
- Add the powdered sugar dusting just before serving — it will absorb into the filling if applied too early.
- Store covered in the refrigerator for up to 5 days. Freezing is not recommended as the ricotta filling separates and becomes grainy upon thawing.
- For a nut-free version, replace almond extract with additional vanilla extract, lemon extract, or orange extract.
- Try variations like using chocolate cake mix, adding pistachios, folding in drained maraschino cherries, or stirring espresso powder into the batter for a coffee twist.
Final Thoughts
This cannoli poke cake recipe brings the beloved flavors of Italian bakery cannoli into an easy-to-serve dessert format that’s perfect for any gathering. The combination of moist vanilla cake and creamy ricotta filling creates a dessert that’s both impressive and accessible.
The beauty of this recipe lies in its simplicity and make-ahead convenience. You get all the delicious flavors of traditional cannoli without the hassle of frying shells or piping individual pastries. Give this recipe a try for your next celebration, and don’t forget to share your results in the comments below!
Recommended:
- Oreo Cheesecake Recipe
- Japanese Cheesecake Recipe
- Mini Cheesecake Recipe
- Churro Cheesecake Recipe
- Basque Cheesecake Recipe
- Lemon Cheesecake Recipe
- Banana Cream Pie Recipe
- Chocolate Pie Recipe
- Easy Tiramisu Recipe
- Fruit Tart Recipe


