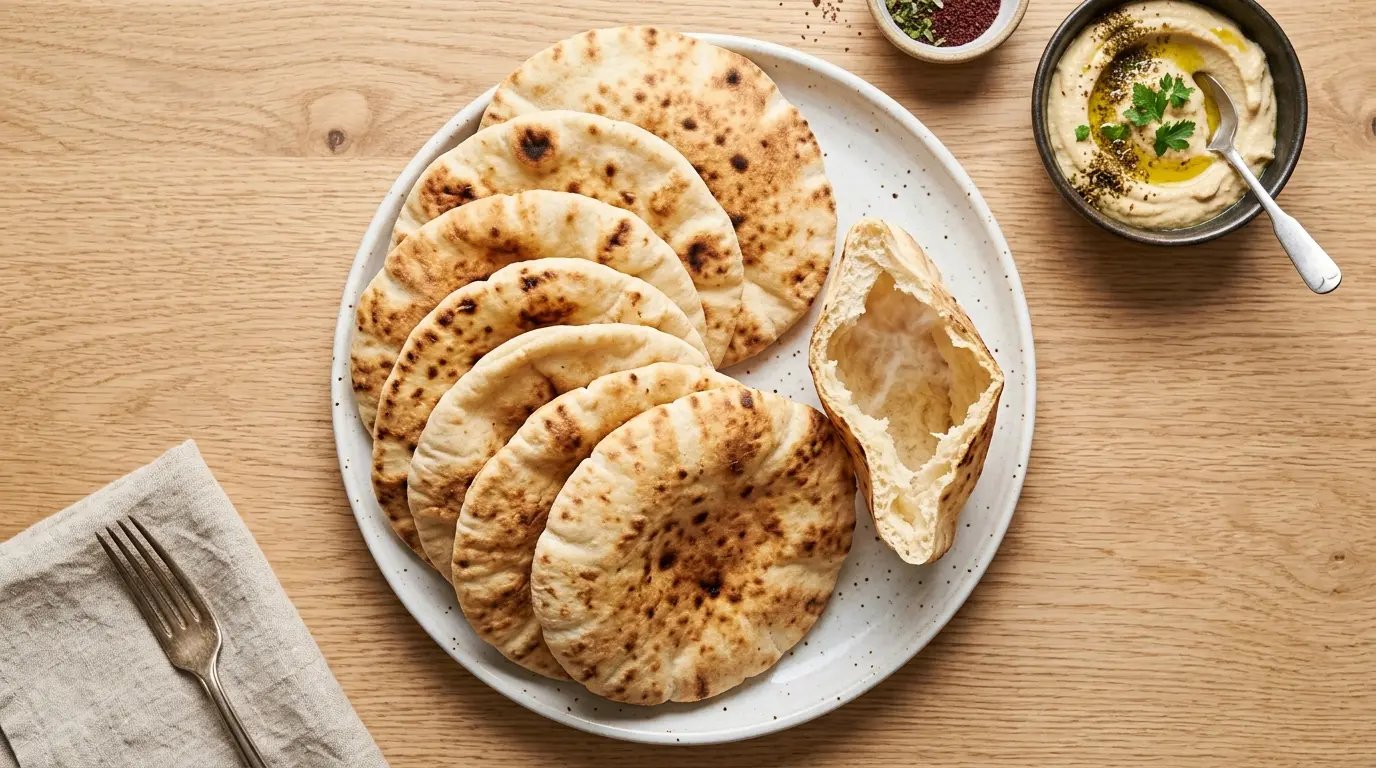
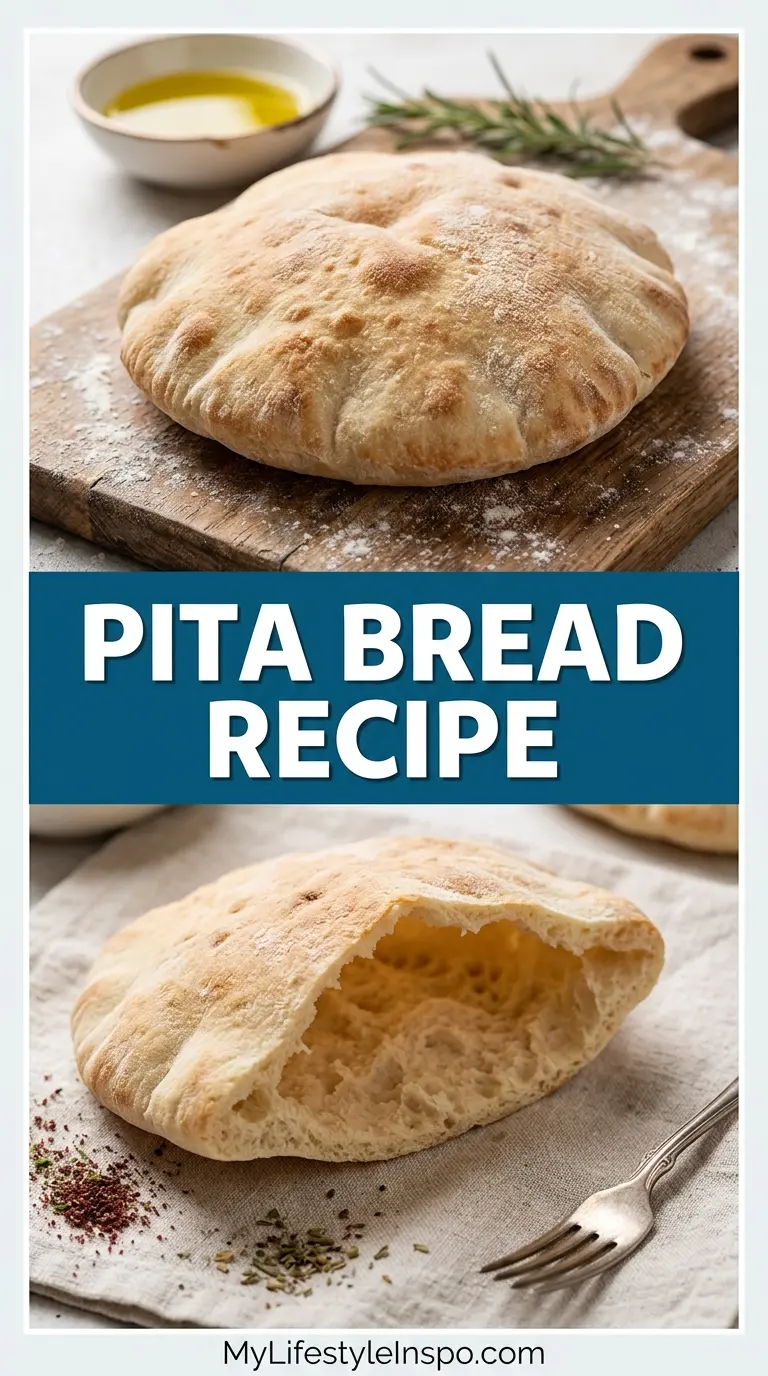
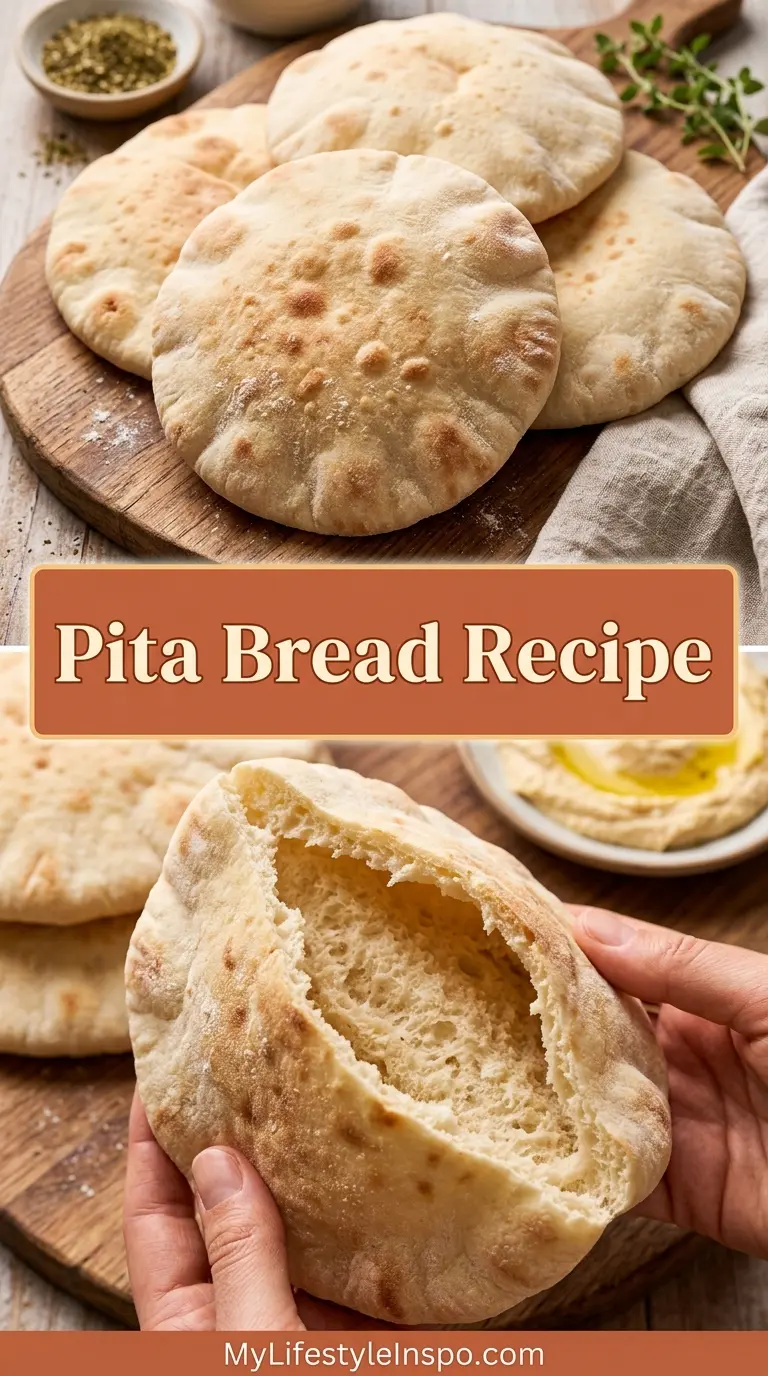
Pita Bread Recipe is one of those kitchen projects that looks intimidating until you actually try it, and then you realize it’s basically just flour, water, and patience.
This soft, pillowy bread puffs up into those perfect pockets right before your eyes in the oven, and once you’ve made it from scratch, store-bought pita just doesn’t compare.
I started making this recipe years ago after getting tired of paying too much for a few sad, dry pitas at the grocery store. The first time mine puffed up like little balloons, I literally cheered out loud in my kitchen.
If you’ve ever wanted to make restaurant-quality flatbread at home without any fancy equipment, this is your sign to give it a try.
Why You’ll Love This Pita Bread Recipe
This recipe uses simple pantry ingredients you probably already have on hand, and it comes together faster than most yeast breads.
The dough is forgiving, so even if you’re new to working with yeast, you’ll likely get great results on your first attempt.
Watching the pita puff up in the oven is honestly one of the most satisfying things you’ll see happen in your kitchen.
Here’s what makes this recipe a winner:
- Beginner-friendly: No special bread-making skills required, just basic mixing and rolling
- Fast turnaround: Ready in under two hours, including rise time
- Versatile: Works for sandwiches, dipping, wraps, and pizza bases
- Customizable: Easy to make whole wheat, add herbs, or adjust thickness
- Better than store-bought: Softer texture and fresher flavor than packaged versions
- Great for meal prep: Freezes beautifully for quick lunches later
This dough also happens to be the same basic formula used in Easy Naan Bread, so once you get comfortable with this technique, you’ll have two flatbread recipes in your back pocket.
Ingredients
You only need a handful of ingredients for authentic pita bread, and most of them are pantry staples.
The combination of yeast, warm water, and a touch of sugar creates the rise that gives pita its signature pocket, while the resting time lets the gluten relax enough for that dramatic puff in the oven.
- 1 cup (240ml) warm water (about 110°F/43°C)
- 2 ¼ teaspoons (7g) active dry yeast (1 packet)
- 1 teaspoon (4g) granulated sugar
- 3 cups (375g) all-purpose flour, plus more for dusting
- 1 teaspoon (6g) fine sea salt
- 2 tablespoons (30ml) olive oil, plus extra for the bowl
That’s it. No eggs, no milk, no complicated leavening agents. Just simple, classic ingredients that create that chewy, pillowy texture pita is known for.
For dipping once your pita is ready, this bread pairs perfectly with Classic Hummus.
Kitchen Equipment Needed
You don’t need anything fancy to make great pita bread at home, which is part of why this recipe is so approachable.
A few key tools will make the process smoother and help you get that classic pocket every single time.
- Large mixing bowl
- Stand mixer with dough hook (optional, hand mixing works fine)
- Kitchen scale (optional, but more accurate than measuring cups)
- Rolling pin
- Baking stone or heavy baking sheet
- Clean kitchen towel
- Bench scraper (helpful but not required)
If you decide to upgrade your setup at all, a baking stone genuinely makes a noticeable difference here, since it holds intense heat and helps the dough puff dramatically the moment it hits the surface.
This same equipment list works well if you ever want to branch out into Easy Pizza Dough, since the technique and tools overlap quite a bit.
Recommended Products for This Recipe
These are products I genuinely recommend based on how much they improve the texture, consistency, and overall ease of making pita bread at home.
None of these are required, but each one solves a specific pain point that home bakers often run into with flatbreads.
1. Baking Stone for Oven
A baking stone holds onto intense heat and transfers it directly into the dough the second it touches down, which is exactly what creates that dramatic pocket in pita bread. Without one, you can still get decent results from a preheated baking sheet, but the puff tends to be less consistent. This is one of the simplest upgrades you can make if you plan to bake bread regularly.
2. Stand Mixer with Dough Hook
Kneading pita dough by hand is completely doable, but a stand mixer with a dough hook saves your arms and produces a more consistently smooth dough in less time. This is especially helpful if you plan on doubling or tripling the recipe for meal prep. It’s a worthwhile investment for anyone who bakes bread more than occasionally.
3. Digital Kitchen Scale
Measuring flour by weight instead of volume removes a lot of the guesswork from bread baking. Scooping flour with a measuring cup can pack in extra flour without you realizing it, which leads to dry, dense pita. A scale takes thirty seconds to use and gives you bakery-level consistency every time.
4. Bench Scraper
A bench scraper makes dividing the dough into even portions so much easier, and it helps lift sticky dough off your work surface without tearing it. It’s a small, inexpensive tool that ends up being surprisingly useful for almost every bread recipe you’ll make. Once you have one, you’ll wonder how you managed without it.
You might also enjoy: Garlic Naan Bread
Step-by-Step Instructions
1. Activate the Yeast
- Pour the warm water into a large mixing bowl or the bowl of your stand mixer
- Sprinkle the active dry yeast evenly over the surface of the water
- Add the granulated sugar and stir gently to combine
- Let the mixture sit undisturbed for 5 to 10 minutes
- Look for a foamy, bubbly layer on top, which means the yeast is active and ready to use
- If the mixture doesn’t foam at all, the yeast may be expired, so it’s best to start over with a fresh packet
2. Mix the Dough
- Add the flour and salt to the yeast mixture
- Pour in the olive oil
- If using a stand mixer, attach the dough hook and mix on low speed for about 1 minute until everything starts coming together
- If mixing by hand, use a wooden spoon to stir until a rough, shaggy dough forms
- The dough should look slightly sticky but hold together in a single mass
- If it seems too dry and crumbly, add water one tablespoon at a time until it comes together
3. Knead the Dough
- Turn the dough out onto a lightly floured surface
- Knead by hand for 8 to 10 minutes, or let the stand mixer continue on low to medium speed for 6 to 8 minutes
- The dough is ready when it feels smooth, elastic, and slightly tacky but not sticky to the touch
- Press your finger into the dough. If it slowly springs back, the gluten has developed enough
- Shape the dough into a smooth ball
4. First Rise
- Lightly oil a clean large bowl
- Place the dough ball into the bowl and turn it to coat all sides with oil
- Cover the bowl tightly with plastic wrap or a damp kitchen towel
- Set the bowl in a warm, draft-free spot, such as an unheated oven with the light on
- Let the dough rise for 1 to 1.5 hours, or until it has doubled in size
- You’ll know it’s ready when poking it with a floured finger leaves an indent that doesn’t spring all the way back
5. Divide and Shape
- Punch down the risen dough gently to release the air
- Transfer it to a lightly floured surface
- Divide the dough into 8 equal pieces using a bench scraper or knife
- Roll each piece into a smooth ball, tucking the edges underneath as you go
- Cover the shaped balls with a towel and let them rest for 10 minutes, which relaxes the gluten and makes rolling much easier
6. Roll Out the Pitas
- Preheat your oven to 475°F (245°C) with a baking stone or heavy baking sheet inside, allowing it to heat for at least 20 minutes
- On a lightly floured surface, roll each dough ball into a circle about 6 to 7 inches wide and ¼ inch thick
- Try to roll evenly so the dough puffs uniformly in the oven
- Avoid rolling too thin, since this can prevent the signature pocket from forming
- Let the rolled rounds rest for 5 minutes before baking, uncovered, on the counter
7. Bake the Pita
- Carefully transfer one or two rounds at a time onto the hot baking stone using a pizza peel or the back of a baking sheet
- Bake for 2 to 3 minutes, watching closely as the pita puffs up dramatically into a balloon shape
- The pita is done when it’s lightly golden in spots and has fully puffed
- Remove with tongs or a spatula and transfer to a plate
- Repeat with the remaining dough rounds, working in batches
8. Cool and Store
- Stack the warm pitas and cover them with a clean kitchen towel
- This traps steam and keeps the bread soft as it cools, preventing it from becoming crisp or brittle
- Let cool for about 10 minutes before slicing open or serving
- The pocket will naturally form as the steam escapes during cooling, so resist cutting into them too early
For another satisfying baking project once you’ve mastered this technique, check out Sourdough Discard Flatbread.
Tips for Success
Getting that perfect pita pocket comes down to a few small details that make a big difference in the final result.
Pay close attention to oven temperature and rolling thickness, since these two factors affect the puff more than anything else.
- Preheat thoroughly: A properly hot baking stone is essential for the dramatic puff, so don’t rush this step
- Roll evenly: Uneven thickness causes uneven puffing, so take your time rolling each round
- Don’t overwork the dough: Over-kneading can make the pita tough instead of tender
- Watch closely while baking: Pita bakes incredibly fast, so stay near the oven during those final minutes
- Use a pizza peel: This makes transferring rounds to a hot stone much safer and easier
- Rest before rolling: Skipping the 10-minute rest makes the dough spring back and harder to shape
Read Also: Easy Sourdough Bread
Serving Suggestions

Pita bread is incredibly versatile, working equally well as a wrap, a dipping vessel, or a base for a quick flatbread pizza.
Its sturdy yet soft texture holds up to hearty fillings without falling apart, which makes it a favorite for casual lunches and dinners alike.
Here are some of my favorite ways to serve it:
- Stuffed with Chicken Shawarma and fresh vegetables
- Sliced into wedges and served alongside Classic Hummus
- Topped with toppings for a quick personal pizza, similar to Hummus Pizza
- Paired with Tzatziki Sauce for a refreshing dip
- Cut into triangles and toasted for crunchy chips
- Used as a base for breakfast sandwiches with eggs and cheese
Another favorite: Chicken Tikka Masala
Variations to Try
Once you’ve nailed the basic recipe, there are plenty of fun ways to switch things up depending on your mood or what you have on hand.
These variations keep the same base technique while changing the flavor profile or texture slightly.
- Whole wheat pita: Substitute up to half the flour with whole wheat flour for a heartier, nuttier flavor
- Garlic herb pita: Knead in minced garlic and dried herbs like oregano or rosemary
- Sourdough pita: Use a portion of active starter in place of commercial yeast, similar to this Sourdough Discard Pita Bread
- Whole wheat naan style: Add a touch of yogurt to the dough for extra softness, much like in Garlic Naan Bread
- Stuffed pita: Add a small amount of cheese or za’atar inside before rolling for a flavor surprise
- Mini pita: Divide the dough into 12 pieces instead of 8 for smaller, snack-sized rounds
For another flatbread project that uses a similar dough base, this Sourdough Discard Naan is also worth trying.
Storage and Reheating
Pita bread stores well, which makes it a great option for batch baking and meal prep throughout the week.
Proper storage keeps the texture soft and prevents the bread from drying out or going stale too quickly.
- Room temperature: Store in a sealed bag or airtight container for up to 2 days
- Refrigerator: Keep in an airtight bag for up to 5 days
- Freezer: Stack pitas with parchment paper between each one and freeze in a sealed bag for up to 3 months
- Reheating on the stove: Warm in a dry skillet over medium heat for 30 seconds per side
- Reheating in the oven: Wrap in foil and heat at 350°F (175°C) for about 10 minutes
- Reheating in the microwave: Wrap in a damp paper towel and heat for 15 to 20 seconds
For another bread that freezes just as well, you might like Sourdough Starter as your next baking project.
Nutritional Facts
This nutritional information is calculated per pita (based on 8 servings) and is meant as a general estimate.
Actual values may vary slightly depending on the specific brands and measurements used.
| Nutrient | Amount per Pita |
|---|---|
| Calories | 165 |
| Carbohydrates | 30g |
| Protein | 5g |
| Fat | 3g |
| Fiber | 1g |
| Sodium | 220mg |
| Sugar | 1g |
These numbers can shift if you swap in whole wheat flour or adjust the size of each portion.
This recipe pairs nicely as a side with Chicken Tinola for a more complete meal.
Health Benefits of Key Ingredients
While pita bread is often thought of as a simple side, several of its ingredients offer real nutritional value worth mentioning.
Understanding what each ingredient contributes can help you feel good about including this bread in your regular meal rotation.
- Flour: Provides carbohydrates for energy and, in whole wheat form, adds fiber that supports digestion
- Olive oil: Contains heart-healthy monounsaturated fats that may support cardiovascular health
- Yeast: A natural leavening agent that also contributes small amounts of B vitamins
- Salt: Essential in small amounts for nerve and muscle function, though it should be used in moderation
- Water: Plays a key role in dough hydration and overall digestion when consumed throughout the day
Swapping in whole wheat flour boosts the fiber content significantly, making this an easy way to add more whole grains to your diet without sacrificing taste.
If you’re interested in more wholesome bread options, Whole Wheat Bread is another great recipe to explore.
Frequently Asked Questions
1. Why didn’t my pita bread puff up?
This usually happens when the oven or baking stone wasn’t fully preheated before baking. A cool surface doesn’t create enough steam fast enough to form the pocket.
Rolling the dough unevenly can also cause partial puffing, so try to keep the thickness as consistent as possible across the whole round.
2. Can I make pita bread without a stand mixer?
Absolutely, this dough comes together easily by hand with about 8 to 10 minutes of kneading. A stand mixer just saves time and effort, but it’s not required for great results.
Many bakers actually prefer hand kneading since it gives more control over the dough’s texture.
3. Why is my pita bread tough instead of soft?
Overworking the dough during kneading is the most common cause of tough pita. Stick to the recommended kneading time and avoid adding too much extra flour while rolling.
Storing the baked pita uncovered also dries it out quickly, so always wrap or cover it while it cools.
4. Can I use whole wheat flour instead of all-purpose flour?
Yes, you can substitute up to half the all-purpose flour with whole wheat flour without major changes to the technique. Using all whole wheat flour will result in a denser texture, so a partial swap usually gives the best balance.
You may need to add a touch more water since whole wheat flour absorbs more liquid.
5. How do I get the pocket without a baking stone?
A heavy baking sheet preheated in the oven for at least 20 minutes can work as a substitute. The key is making sure the surface is as hot as possible before the dough touches it.
Results may be slightly less dramatic than with a baking stone, but you should still get a good pocket with this method.
You might also enjoy: Easy Naan Bread
Final Thoughts
Homemade pita bread is one of those recipes that feels like a small kitchen victory every single time you make it.
There’s nothing quite like pulling a perfectly puffed pita out of the oven and tearing into it while it’s still warm.
Once you’ve made a batch, I’d bet you’ll never want to go back to the store-bought version again.
Give this recipe a try this week, and let me know in the comments how your pita turned out. I’d love to hear if you tried any of the variations too.
Recommended:
- Easy Naan Bread
- Classic Hummus
- Tzatziki Sauce
- Chicken Shawarma
- Sourdough Starter
- Easy Pizza Dough
- Chicken Tikka Masala
- Classic Bruschetta
- Whole Wheat Bread
- Sourdough Discard Pita Bread