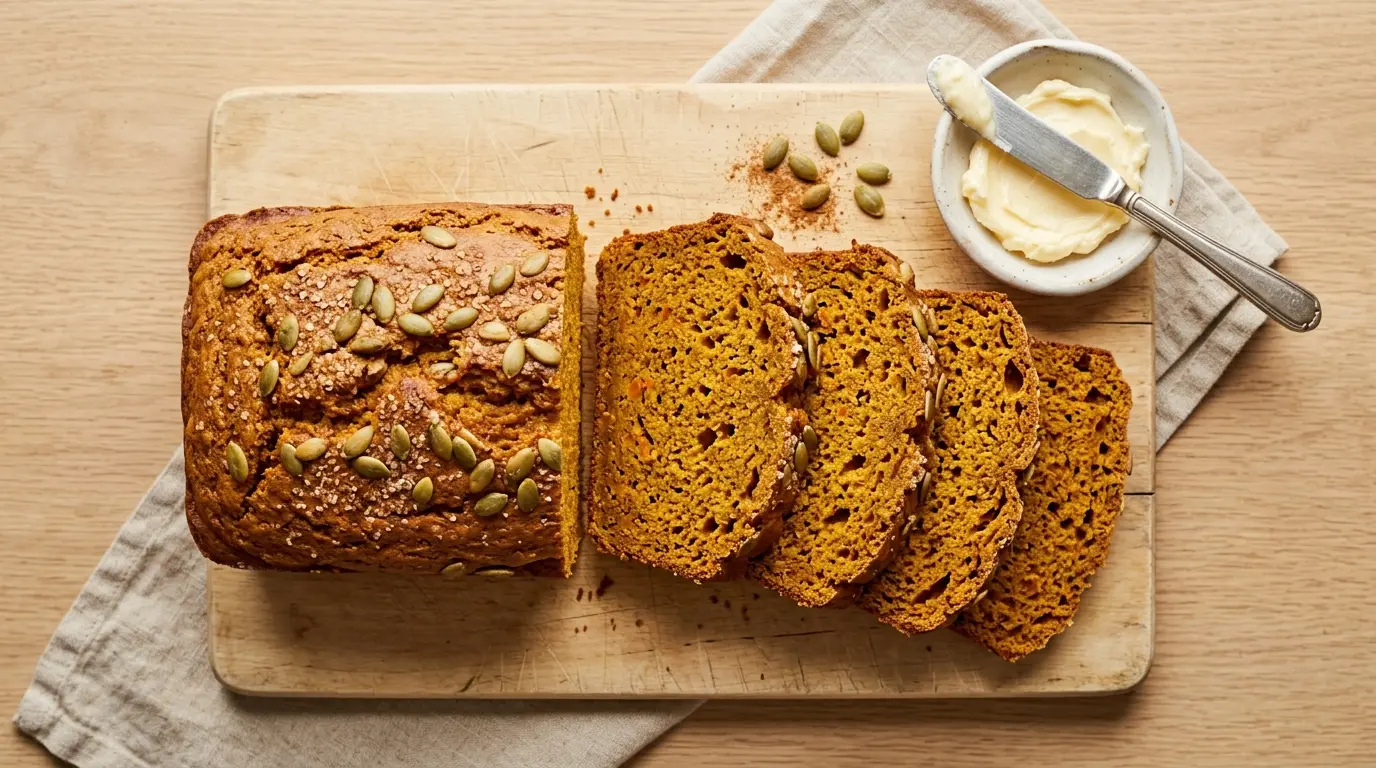
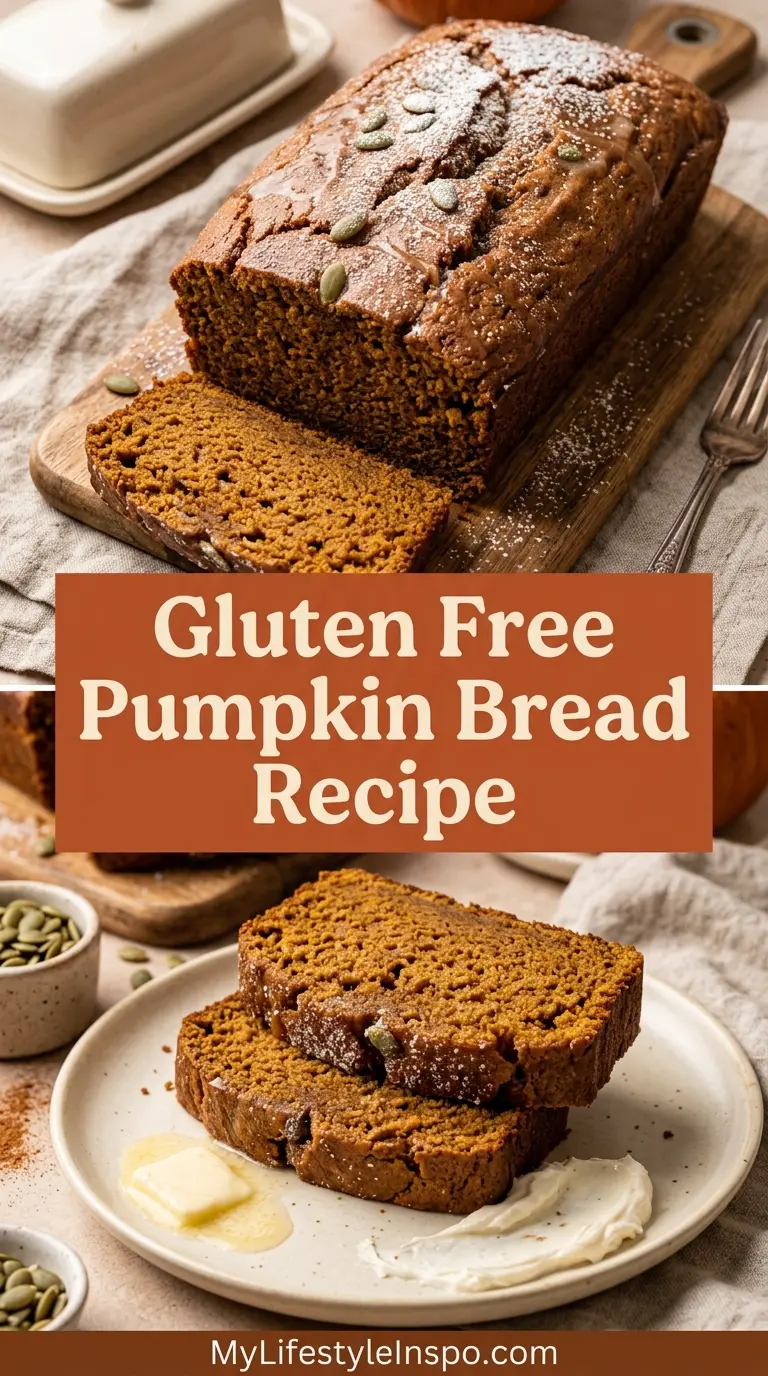
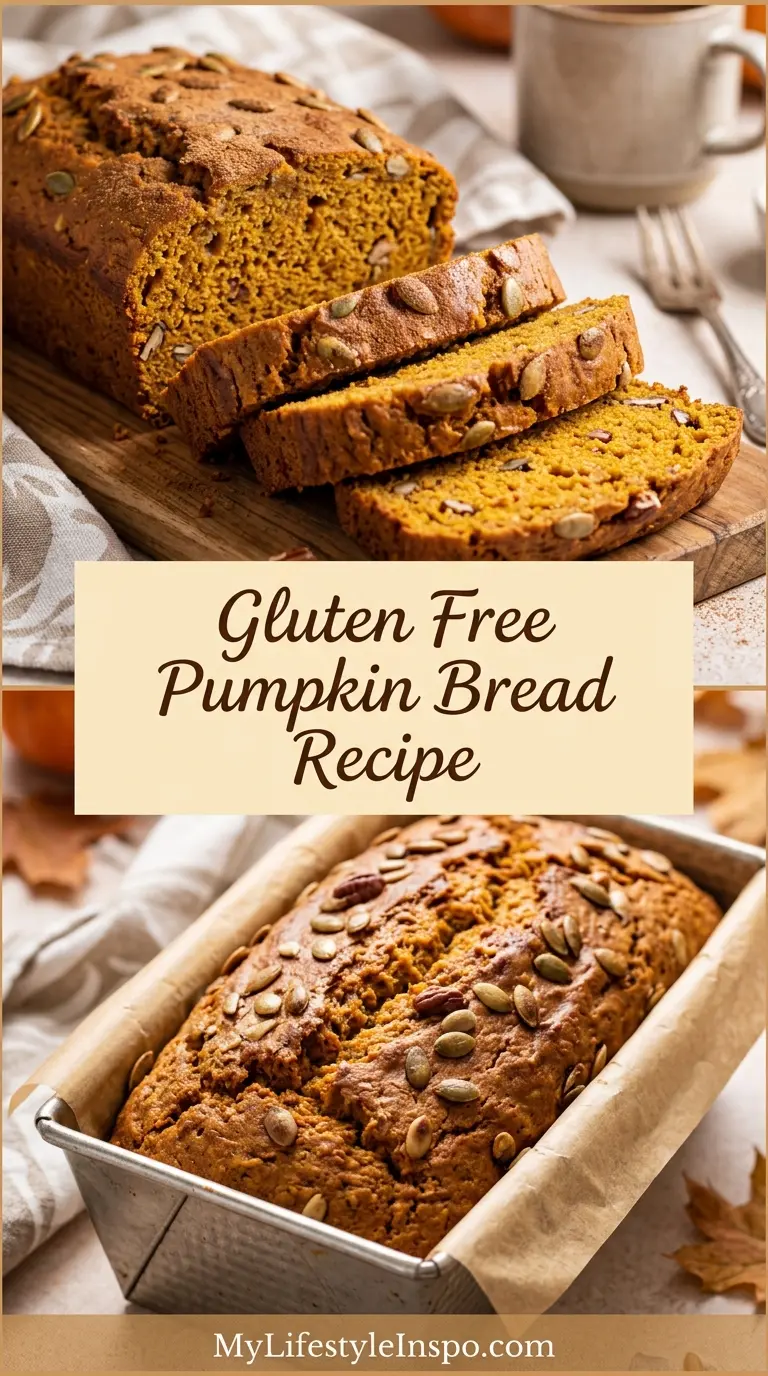
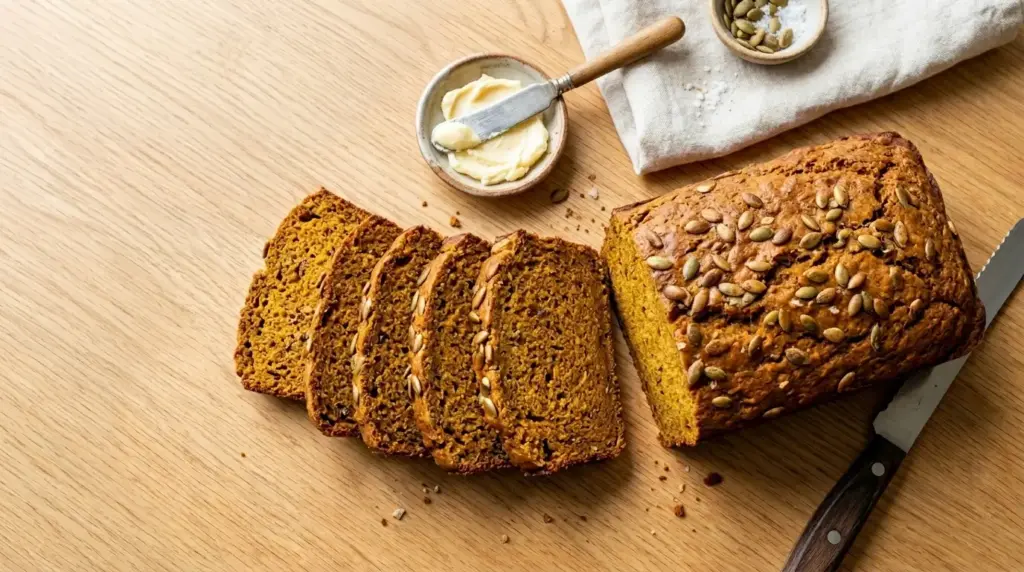
If you’ve been searching for the perfect gluten free pumpkin bread recipe, you can stop looking right here. This loaf is everything fall baking should be: deeply moist, warmly spiced, and tender all the way through with a beautifully golden crackled top.
What makes gluten free pumpkin bread special is how forgiving and simple it really is. You don’t need a stand mixer, you don’t need any fancy techniques, and the batter comes together in two bowls in under 15 minutes.
Pumpkin puree is actually one of the best ingredients you can use in gluten free baking because it adds natural moisture and acts as a binder, which helps compensate for the lack of gluten. This is the secret behind a crumb that stays soft for days without turning gummy or dry.
The spice blend here is a classic combination of cinnamon, nutmeg, ginger, and cloves, bringing that cozy, familiar warmth that makes every slice feel like October in the best possible way.
Whether you’re new to gluten free baking or you’ve been doing it for years, this recipe works reliably every single time. Let’s get into it.
If you love pumpkin bakes, you’ll also want to check out this Sourdough Discard Pumpkin Bread for a fun tangy twist.
Why You’ll Love This Gluten Free Pumpkin Bread Recipe
This isn’t just a “good enough for gluten free” loaf. It’s genuinely one of the most satisfying quick breads you’ll ever make, and even gluten-eating family members won’t know the difference.
The texture is where this recipe truly shines. Because the recipe uses oil rather than butter, the fat coats the gluten free flour crumb more evenly, creating a consistently soft, tender interior that doesn’t dry out or turn crumbly.
The pumpkin spice ratio is balanced, not overpowering. Each slice tastes warmly spiced without being one-dimensional or perfumey.
It keeps beautifully at room temperature for several days, meaning you can make it ahead of a cozy weekend breakfast or holiday gathering without any stress.
Here’s what makes this recipe stand out:
- Uses a reliable 1:1 gluten free flour blend, so there’s no complex flour blending involved
- Two-bowl method keeps cleanup simple and the process approachable for beginners
- Stays moist for 3 to 4 days at room temperature thanks to the oil and pumpkin puree
- Naturally dairy free, making it a great option if you’re also managing dairy sensitivities
- Versatile enough to serve as a breakfast loaf, afternoon snack, or even a holiday gift
- Easy to customize with mix-ins like chocolate chips, pecans, or a cream cheese swirl
You might also enjoy: Old Fashioned Pumpkin Bread
Ingredients
Here’s what you’ll need to make one standard 9×5 inch (23×13 cm) loaf. All ingredients should be at room temperature before you begin, which helps them blend together evenly.
- 1 3/4 cups (220g) gluten free 1:1 baking flour (such as Bob’s Red Mill or King Arthur, must include xanthan gum)
- 1 tsp baking soda
- 1/2 tsp baking powder
- 1/2 tsp fine salt
- 1 1/2 tsp ground cinnamon
- 1/2 tsp ground nutmeg
- 1/4 tsp ground ginger
- 1/4 tsp ground cloves
- 1 cup (200g) granulated white sugar
- 1/4 cup (55g) light brown sugar, packed
- 2 large eggs, room temperature
- 1 cup (240g) pure pumpkin puree (not pumpkin pie filling)
- 1/2 cup (120ml) neutral oil (vegetable, grapeseed, or light olive oil)
- 1/4 cup (60ml) milk (dairy or non-dairy both work)
- 1 tsp pure vanilla extract
The choice of gluten free flour makes a big difference here. A 1:1 or cup-for-cup blend that already contains xanthan gum is essential because xanthan gum acts as the structural binder that replaces gluten, giving the bread lift and preventing it from crumbling. Avoid single-ingredient flours like almond flour or coconut flour for this recipe as they require entirely different ratios.
Read Also: Gluten Free Banana Bread Recipe
Kitchen Equipment Needed
You don’t need anything fancy for this recipe. Here’s what to have ready before you start:
- 9×5 inch (23×13 cm) loaf pan
- Parchment paper
- Large mixing bowl
- Medium mixing bowl
- Whisk
- Rubber spatula or wooden spoon
- Measuring cups and spoons (or a kitchen scale for precise weight measurements)
- Wire cooling rack
Having your loaf pan lined with parchment paper before you begin is key. Leave a few inches of overhang on the long sides so you can lift the finished loaf out cleanly without any risk of it sticking or breaking apart.
For the most accurate results, especially when baking gluten free, weighing your ingredients with a digital kitchen scale is highly recommended. Small over-measurements of flour can easily lead to a dense or dry loaf.
Read Also: Gluten Free Sourdough Bread Recipe
Recommended Products for This Recipe
These are products that genuinely make a difference in the quality of your gluten free pumpkin bread, based on performance and consistency.
1. Bob’s Red Mill Gluten Free 1-to-1 Baking Flour
This flour blend is one of the most tested and widely trusted 1:1 gluten free flour replacements available. It contains xanthan gum already blended in, which means you don’t need to purchase it separately. The result is a loaf with a soft, consistent crumb that mimics traditional all-purpose flour beautifully.
2. USA Pan 9×5 Inch Loaf Pan
A quality loaf pan makes all the difference in how evenly your pumpkin bread bakes. USA Pan’s aluminized steel construction distributes heat evenly, preventing overly dark edges while the center finishes cooking. The non-stick coating also makes removal seamless.
3. OXO Digital Kitchen Scale
Measuring gluten free flours by weight rather than volume is one of the most reliable upgrades you can make to your baking. Overpacking flour is a common issue with cup measurements, and it leads to dense, dry loaves. A digital scale eliminates that variable entirely.
4. Libby’s 100% Pure Pumpkin Puree
Not all canned pumpkin is created equal. Libby’s pure pumpkin is consistently thick, smooth, and well-draining, which means you get reliable moisture in every loaf without the excess liquid that thinner purées can introduce. Always double check the label to make sure it says “pure pumpkin” and not “pumpkin pie filling.”
Another great fall bake to try after this one: Pumpkin Muffin Recipe
Step-by-Step Instructions
Step 1: Preheat the Oven and Prepare the Pan
- Preheat your oven to 350°F (175°C). Give the oven at least 15 to 20 minutes to fully preheat, as a fully hot oven is important for proper rise and structure.
- Grease your 9×5 inch (23×13 cm) loaf pan lightly with cooking spray or a small amount of oil.
- Cut a piece of parchment paper long enough to line the bottom and both long sides of the pan, with about 2 inches (5 cm) of overhang on each side. This overhang acts as handles for lifting the bread out later.
- Press the parchment paper snugly into the pan and set it aside on the counter.
Step 2: Mix the Dry Ingredients
- In a medium bowl, add the 1 3/4 cups (220g) gluten free 1:1 baking flour.
- Add the 1 tsp baking soda, 1/2 tsp baking powder, and 1/2 tsp fine salt.
- Add the 1 1/2 tsp ground cinnamon, 1/2 tsp ground nutmeg, 1/4 tsp ground ginger, and 1/4 tsp ground cloves.
- Whisk all the dry ingredients together thoroughly for about 30 seconds, making sure the spices, leaveners, and flour are completely combined with no streaks. This step ensures even distribution throughout the batter so you don’t end up with pockets of baking soda or concentrated spice in any single slice.
- Set the dry ingredient bowl aside.
Step 3: Mix the Wet Ingredients
- In a large mixing bowl, add the 1 cup (200g) granulated white sugar and 1/4 cup (55g) packed light brown sugar.
- Crack in the 2 large eggs. Make sure they are at room temperature so they incorporate more smoothly.
- Whisk the eggs and sugars together vigorously for about 1 to 2 minutes until the mixture looks slightly pale and feels a little thicker. This step dissolves the sugar crystals and adds a touch of airiness to the batter.
- Add the 1 cup (240g) pure pumpkin puree. Be sure you’re using plain pumpkin puree, not pumpkin pie filling, which already contains spices and sweetener and will throw off the flavor balance of the recipe.
- Add the 1/2 cup (120ml) neutral oil, 1/4 cup (60ml) milk, and 1 tsp pure vanilla extract.
- Whisk everything together until fully combined and smooth, about 30 seconds. The batter should look glossy and uniform at this point.
Step 4: Combine Wet and Dry Ingredients
- Pour the dry ingredient mixture into the large bowl with the wet ingredients.
- Using a rubber spatula, gently fold the two together. Stir just until no dry flour streaks remain, usually around 15 to 20 folds.
- Do not overmix. Gluten free batters can become gummy and dense if overworked. A few small lumps are perfectly acceptable and will bake out.
- The finished batter should be thick but pourable, similar in consistency to a very thick pancake batter.
Step 5: Fill the Pan and Add Optional Toppings
- Pour the batter into your prepared loaf pan and use your rubber spatula to spread it into an even layer, smoothing the top gently.
- If you’d like a decorative cracked top, run a thin bead of melted butter or oil down the center of the loaf lengthwise using a spoon. This scores the top slightly and encourages a natural split as the bread rises.
- Optional: Sprinkle a light layer of raw (turbinado) sugar over the top for a slightly crunchy, sparkly crust.
- Optional: Press a few pecan halves or pumpkin seeds into the top of the batter for visual appeal and added texture.
Step 6: Bake the Bread
- Place the loaf pan on the center rack of your fully preheated oven.
- Bake for 60 to 70 minutes, or until a toothpick or thin skewer inserted into the very center of the loaf comes out with just a few moist crumbs attached. If it comes out with wet batter, the bread needs more time.
- Check the loaf at the 50 minute mark. If the top is browning too quickly while the center is still undercooked, loosely tent a piece of aluminum foil over the top of the pan and continue baking.
- Gluten free breads can be deceptive because the exterior may look done while the interior still needs more time. Always rely on the toothpick test rather than just the color of the crust.
Step 7: Cool Before Slicing
- Remove the pan from the oven and set it on a wire cooling rack.
- Allow the bread to cool in the pan for 15 to 20 minutes before lifting it out by the parchment paper overhang.
- Transfer the loaf directly onto the wire rack and allow it to cool for at least another 30 to 45 minutes before slicing.
- Slicing too early can cause the crumb to tear and look gummy. Patience here genuinely pays off. The interior continues to set as it cools, and the texture improves significantly once fully cooled.
This loaf pairs beautifully as a companion to Pumpkin Pancakes for a full fall-themed breakfast spread.
Tips for Success
A few key techniques make the difference between a great loaf and a truly exceptional one.
- Use a kitchen scale. Gluten free flours are especially sensitive to over-measuring. Packing the flour into a measuring cup can result in using up to 20% more flour than intended, which leads to a dense, dry loaf. Weighing ingredients eliminates this risk entirely.
- Don’t skip the room temperature step. Cold eggs or cold milk can cause the oil in the batter to seize and clump rather than blending smoothly. Room temperature ingredients create a more uniform, emulsified batter.
- Check your flour blend. Not all gluten free flour blends perform the same. For this recipe, you need a 1:1 or cup-for-cup blend that already contains xanthan gum. Blends labeled “almond flour,” “coconut flour,” or “oat flour” without xanthan gum will produce very different results and are not suitable substitutions here.
- Measure pumpkin correctly. Use a dry measuring cup and scrape the top level. Too much pumpkin can make the batter overly wet and result in a loaf that never fully sets in the center.
- Oven thermometers matter. Home ovens are frequently 25 to 50 degrees off from what the dial reads. An inexpensive oven thermometer can help you identify and correct this, which is especially important for baking.
- Tent with foil if needed. If the top is getting dark before the interior is done, a loose foil tent slows down the browning while allowing the center to finish baking through.
Read Also: Gluten Free Dairy Free Bread Recipe
Serving Suggestions
This loaf is genuinely delicious on its own, but a few simple pairings take it from everyday snack to a memorable moment.
A thick spread of softened butter, honey butter, or cream cheese is the most classic pairing. The richness of the fat balances the sweetly spiced bread perfectly, and a drizzle of honey on top adds a gentle floral sweetness that complements the pumpkin beautifully.
For a cozy autumn breakfast, serve warm slices alongside a Pumpkin Spice Latte or an iced version on warmer days.
Here are more ideas for serving and pairing this bread:
- Slice and toast individual pieces, then top with almond butter and sliced bananas for a filling morning snack
- Serve alongside a bowl of Pumpkin Soup for a full autumn lunch
- Use thicker slices as the base for a decadent French toast, cooked in a buttered skillet and dusted with powdered sugar
- Spread with Cream Cheese Frosting for a more dessert-forward presentation
- Package slices in cellophane bags tied with twine for a thoughtful homemade gift during the holiday season
Variations to Try
Once you’ve made the classic version and fallen in love with it, there are so many fun directions you can take this recipe.
Each variation below uses the same base batter, so the process remains familiar and easy even as the flavors shift.
- Chocolate Chip Pumpkin Bread: Fold 3/4 cup (130g) of semi-sweet chocolate chips into the finished batter before pouring it into the pan. The chocolate adds bursts of richness that contrast beautifully with the warm spice.
- Pumpkin Pecan Bread: Stir 1/2 cup (55g) of coarsely chopped toasted pecans into the batter and sprinkle a few extra over the top before baking. The nutty crunch in every bite adds great textural interest.
- Cream Cheese Swirl: Beat 4 oz (115g) of softened cream cheese with 2 tbsp sugar and 1 egg yolk until smooth. Pour half the pumpkin batter into the pan, spread the cream cheese mixture over it, then top with the remaining batter and use a skewer to swirl gently.
- Maple Glazed Pumpkin Bread: Whisk together 1/2 cup (60g) powdered sugar with 2 tbsp pure maple syrup and a pinch of cinnamon. Drizzle over the fully cooled loaf for a sweet, glossy finish.
- Mini Loaf Version: Divide the batter between two 8×4 inch loaf pans or four mini loaf pans. Reduce the bake time to approximately 40 to 50 minutes for standard mini loaves, checking with a toothpick for doneness.
- Dairy Free Friendly: This recipe is already naturally dairy free as written when you use a non-dairy milk such as almond, oat, or coconut milk. Just ensure any add-ins like chocolate chips are dairy free as well.
You might also love: Sourdough Discard Pumpkin Muffins
Storage and Reheating
This pumpkin bread stores exceptionally well, making it a great make-ahead option for the week.
Store the bread properly and it will stay moist and flavorful far longer than many other baked goods.
- Room temperature: Wrap the cooled loaf tightly in plastic wrap or place it in an airtight container. It will keep at room temperature for 3 to 4 days.
- Refrigerator: Wrapped well, the bread will last in the refrigerator for up to 7 days. The cold can slightly firm up the crumb, so let slices come to room temperature for about 10 minutes before eating or warm briefly in the microwave.
- Freezer: This bread freezes beautifully. Wrap the whole loaf or individual slices in plastic wrap, then place in a freezer-safe zip bag. It will keep for up to 3 months. Thaw overnight in the refrigerator or at room temperature for a few hours.
- Reheating: To warm individual slices, microwave for 20 to 30 seconds. Alternatively, toast slices lightly for a slightly crispier exterior with a soft, warm interior.
Read Also: Healthy Banana Bread Recipe
Nutritional Facts
The following is an approximate nutritional breakdown per slice, based on a loaf cut into 10 equal slices. These values can vary depending on the specific gluten free flour blend and milk used.
| Nutrient | Per Slice (Approx.) |
|---|---|
| Calories | 285 kcal |
| Total Fat | 12g |
| Saturated Fat | 1g |
| Carbohydrates | 43g |
| Sugars | 28g |
| Dietary Fiber | 2g |
| Protein | 3g |
| Sodium | 195mg |
| Potassium | 105mg |
| Vitamin A | 70% DV |
These values are estimates. Using a sugar substitute, reducing the sugar quantity, or swapping oil for unsweetened applesauce will alter the calorie count. For precise tracking, enter your specific ingredients into a nutrition calculator.
For a fun pumpkin dessert variation, try this Pumpkin Cheesecake Recipe
Health Benefits of Key Ingredients
Beyond being delicious, several of the core ingredients in this recipe offer real nutritional value that’s worth appreciating.
Pumpkin puree is one of the most nutrient-dense ingredients you can bake with.
Just a single cup provides an impressive amount of vitamin A (as beta-carotene), which supports healthy vision, immune function, and skin health. Pumpkin is also a natural source of potassium, vitamin C, and dietary fiber, making it far more nutritious than many other quick bread add-ins.
Here are the standout health contributions from the key ingredients:
- Pumpkin puree: Rich in beta-carotene (converted to vitamin A in the body), potassium, vitamin C, and antioxidants. Also adds moisture and fiber with minimal fat.
- Eggs: Provide high-quality complete protein, B vitamins, and healthy fats. In baking, eggs also contribute to structure and richness in ways that improve the texture of gluten free loaves.
- Cinnamon: Contains cinnamaldehyde, an active compound with anti-inflammatory and antioxidant properties. Some research also suggests cinnamon may support healthy blood sugar balance.
- Ginger: A natural anti-inflammatory spice that has been used for centuries to support digestion and reduce nausea.
- Neutral oil: Provides essential fatty acids and helps carry fat-soluble vitamins through the digestive system. Using oil instead of butter also keeps the recipe naturally dairy free.
- Gluten free flour blend: Suitable for anyone with celiac disease or non-celiac gluten sensitivity, making this recipe inclusive for a wide range of dietary needs.
Another delicious gluten free option to try: 4 Ingredient Gluten Free Bread Recipe
Frequently Asked Questions
1. Can I use almond flour instead of a gluten free 1:1 baking flour?
Almond flour cannot be substituted 1:1 in this recipe. Almond flour is much denser, has a higher fat content, and lacks the starchy structure that a blend flour provides. If you substitute almond flour directly, the bread will likely not rise properly and may be very dense or underbaked in the center. If you’d like to make a nut flour version, look specifically for almond flour pumpkin bread recipes, which are formulated with the different ratios and binding agents that almond flour requires.
2. How do I know if my pumpkin bread is fully baked?
The most reliable test is the toothpick method. Insert a thin wooden skewer or toothpick into the very center of the loaf. It should come out with a few moist crumbs attached but no wet batter. The top of the loaf should feel set and spring back lightly when pressed. The internal temperature of a fully baked quick bread should be around 200 to 205°F (93 to 96°C), which you can verify with an instant-read thermometer if you want extra certainty.
3. Why did my gluten free pumpkin bread sink in the middle?
A sunken center is one of the most common quick bread issues and usually points to one of a few things. The bread may have been underbaked, meaning the structure hadn’t fully set before you removed it from the oven. It could also be a result of too much liquid in the batter (overmeasured pumpkin or milk), too much leavening, or opening the oven door too early in the bake. Always bake until the toothpick test passes, and resist opening the oven door in the first 45 minutes.
4. Can I make this recipe egg free?
You can try substituting flax eggs (1 tbsp ground flaxseed mixed with 3 tbsp water per egg, left to gel for 5 minutes) as an egg replacement. Because gluten free baking already lacks the structural support of gluten, eggs play an important role in binding. An egg-free version may be slightly denser or more fragile in texture, but it is doable. Chia eggs (same ratio as flax eggs) can also work.
5. Can I make pumpkin muffins with this batter?
Yes! This batter is perfectly suited for muffins. Line a standard 12-cup muffin tin with paper liners and divide the batter evenly, filling each cup about two-thirds full. Bake at 350°F (175°C) for 22 to 26 minutes, checking with a toothpick at the 22-minute mark. The shorter bake time means you’ll have individual portions ready much faster than the full loaf.
Read Also: Pumpkin Roll Recipe
Final Thoughts
Gluten free baking has a reputation for being complicated or disappointing, but this loaf is proof that it doesn’t have to be either. When you use the right flour blend and let pumpkin do what it does naturally, the result is a bread that’s genuinely moist, warmly spiced, and satisfying in every way.
This gluten free pumpkin bread is the kind of recipe you’ll find yourself making again and again throughout fall and beyond, not just because it’s easy, but because it consistently delivers.
Give it a try this week, and when you do, drop a comment below to share how it turned out. Tag us if you post a photo, and let us know if you tried any of the variation ideas. Nothing is better than hearing how these recipes land in real kitchens.
Recommended:
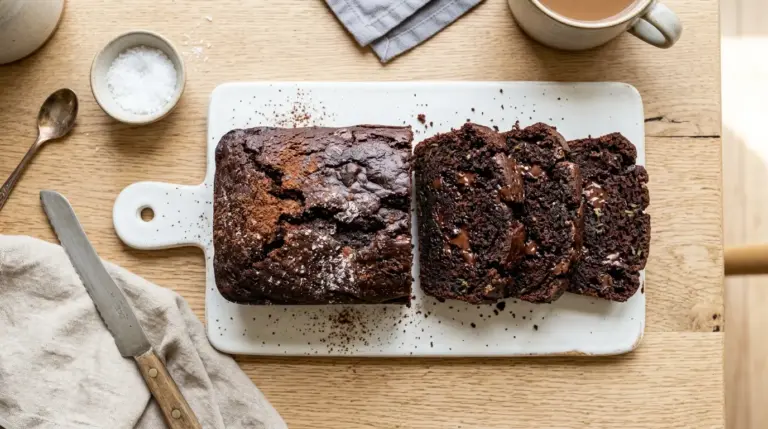
- Sourdough Discard Zucchini Bread
- Gluten Free Pancake Recipe
- Almond Flour Banana Bread
- Pumpkin Bar Recipe
- Classic Zucchini Bread
- Pumpkin Pie Cheesecake
- Sweet Potato Bread Recipe
- From Scratch Pumpkin Pie
- Iced Pumpkin Spice Latte
- Sourdough Discard Carrot Cake