If you’ve been on the hunt for a show-stopping Chicken Biryani Recipe that delivers the deep, aromatic flavors of the real deal, you’ve found it.
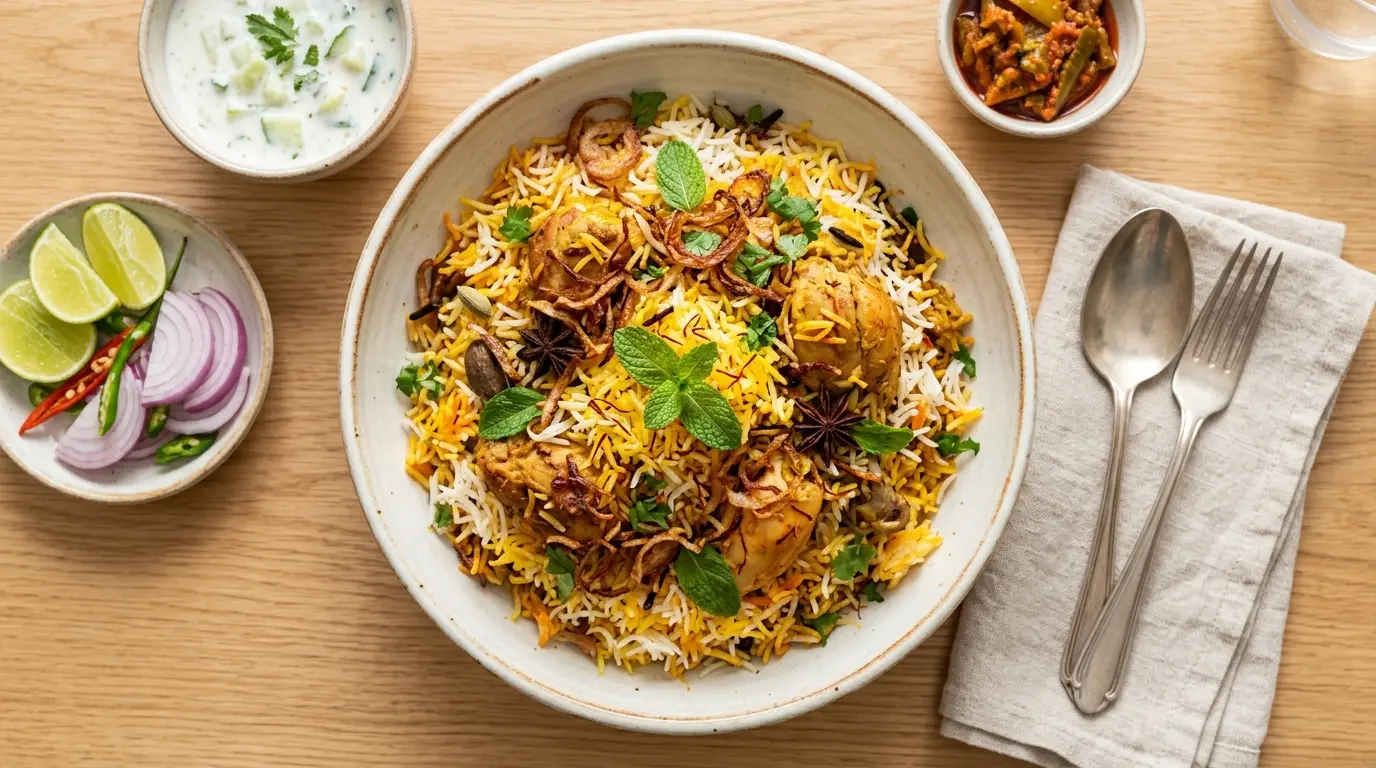
This is the layered, slow-cooked Hyderabadi-style biryani that most people think of when they picture a classic chicken biryani. It’s the kind of dish that fills your kitchen with the irresistible scent of whole spices, saffron-soaked rice, and golden caramelized onions.
Making biryani from scratch might seem intimidating at first. But once you break it down into steps, the process is incredibly rewarding.
The real magic is in the layers. Marinated chicken, par-cooked basmati rice, fried onions, and fragrant saffron milk are assembled together and finished in a technique called “dum” cooking, where everything steams together until perfectly cooked. The result is rice that’s fluffy, separate, and infused with the most incredible depth of flavor.
This recipe has been designed to guide you through every detail, from the marinade to the final dum, so even if it’s your first time making biryani, you’ll feel confident the whole way through.
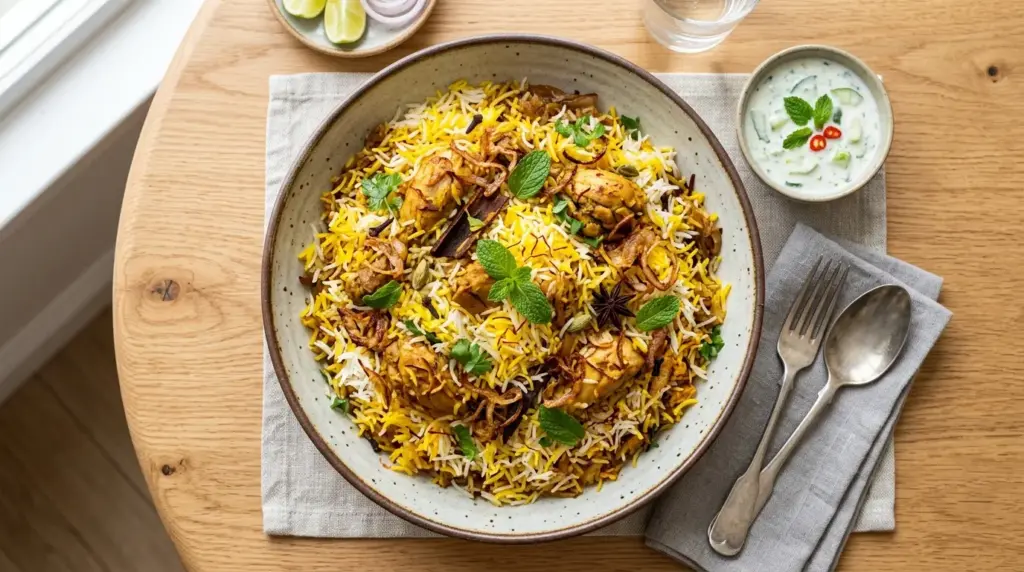
Serve it with a cool cucumber raita and a crisp Indian onion salad on the side, and you’ve got a meal that feels like a celebration.
Why You’ll Love This Chicken Biryani Recipe
This dish is one of the most beloved rice dishes in the world, and once you make it at home, you’ll immediately understand why.
The layering technique creates an experience that no one-pot rice dish can match. Each bite gives you something slightly different, a piece of tender spiced chicken here, a saffron-perfumed grain of rice there.
It’s deeply satisfying without feeling heavy. The yogurt-based marinade tenderizes the chicken beautifully and keeps it juicy even after the dum cooking.
The whole spices used in this recipe, things like cardamom, cloves, and bay leaves, bloom in the cooking fat and release oils that perfume every single grain of rice.
Fried onions are a key ingredient and not just a garnish. They add a sweet, savory caramel note that runs through the whole dish.
You can make the marinade and fried onions ahead of time, which breaks up the work across two days if needed.
It’s a dish that genuinely impresses at dinner parties, family gatherings, or any time you want to make something truly special.
Another great Indian chicken dish to try alongside this is the rich and fragrant chicken korma.
Ingredients
The ingredients in chicken biryani each play a specific role. Don’t skip or substitute the whole spices, as they are the backbone of the dish’s complex flavor profile.
For the Chicken Marinade:
- 2 lbs (900g) bone-in, skinless chicken pieces (legs and thighs work best)
- 1 cup (240ml) full-fat plain yogurt
- 2 tablespoons biryani masala
- 1 tablespoon ginger-garlic paste
- 1 teaspoon red chili powder
- 1 teaspoon turmeric powder
- 1 teaspoon garam masala
- 1 teaspoon salt
- 2 tablespoons fried onions (from the batch below)
- 2 tablespoons fresh lemon juice
- 2 tablespoons neutral oil
For the Fried Onions (Birista):
- 3 large yellow onions, thinly sliced
- Oil for deep frying (about 2 cups / 480ml)
For the Rice:
- 2 cups (400g) aged basmati rice
- 1 bay leaf
- 4 green cardamom pods, lightly crushed
- 2 black cardamom pods
- 4 whole cloves
- 1-inch cinnamon stick
- 1 teaspoon cumin seeds
- 1 tablespoon salt
- Water for boiling
For the Saffron Milk:
- A generous pinch of saffron threads
- 4 tablespoons warm whole milk
For the Layering:
- 3 tablespoons ghee, divided
- Remaining fried onions
- A small handful of fresh mint leaves
- A small handful of fresh cilantro, roughly chopped
- 1 tablespoon rose water (optional, but traditional)
- 2 tablespoons warm water (for the dum steam)
If you love cooking with aromatic basmati rice, check out this simple and foolproof basmati rice recipe for a basic preparation guide.
Kitchen Equipment Needed
Having the right equipment makes the biryani process much smoother. The most critical piece is the pot you’ll use for the dum cooking.
- Heavy-bottomed pot or Dutch oven (at least 5-quart / 4.7L capacity, with a tight-fitting lid)
- Large wide pan or kadai for frying onions
- Large pot for par-boiling the rice
- Fine mesh strainer or colander
- Mixing bowls (large and medium)
- Sharp knife and cutting board
- Measuring cups and spoons
- Small bowl for saffron milk
- Aluminum foil (for sealing the dum)
- Slotted spoon or spider strainer
- Kitchen tongs
- Flat griddle or tawa (optional, to place under the pot during dum cooking to diffuse heat)
Recommended Products for This Recipe
These are products I genuinely recommend based on quality and performance, specifically for making a great chicken biryani at home.
1. Aged Basmati Rice (Extra Long Grain)
The quality of your basmati rice makes a huge difference in biryani. Aged basmati has lower moisture content, which means the grains cook up longer, fluffier, and more separate, exactly what you want for layered biryani. It also has that signature nutty, floral fragrance you can’t get from regular rice.
2. Biryani Masala Spice Blend
A good quality biryani masala is a blend of 20+ whole spices that have been perfectly balanced for this dish. Using a trusted blend takes the guesswork out of the spice mix and gives you consistent results every time. Look for one with good reviews that lists whole spice ingredients.
3. Pure Saffron Threads
Saffron is what gives biryani its signature golden hue and delicate floral aroma. A small pinch goes a long way. Pure saffron threads (not powder) steeped in warm milk release their color and flavor more gradually, which means beautifully streaked rice rather than an even yellow color.
4. Heavy-Bottomed Dutch Oven
The dum cooking stage requires gentle, even heat distribution all around the pot. A heavy-bottomed Dutch oven with a tight-fitting lid creates the perfect enclosed steam environment, meaning moist, perfectly cooked chicken and rice that steams through together without burning on the bottom.
5. Ghee (Clarified Butter)
Ghee adds a rich, nutty depth to biryani that neutral oil simply cannot replicate. It’s used in the layering and drizzled on top before dum cooking. A good quality pure ghee made from grass-fed butter is worth keeping in your pantry if you love Indian cooking.
For a rich, saucy Indian chicken dish to make alongside or on another night, this chicken tikka masala recipe is an absolute must-try.
Step-by-Step Instructions
1. Make the Fried Onions (Birista)
- Heat about 2 cups (480ml) of oil in a large wide pan over medium-high heat until the oil reaches approximately 350°F (175°C). You can test it by dropping in a sliver of onion. It should sizzle immediately.
- Add the thinly sliced onions to the hot oil in batches if necessary. Do not overcrowd the pan, as this causes the onions to steam rather than fry.
- Fry the onions, stirring occasionally, for 15 to 20 minutes until they turn deep golden brown and slightly crispy. Watch them carefully in the last few minutes, as they can go from golden to burnt very quickly.
- Remove the onions with a slotted spoon and spread them out on a paper towel-lined plate. They will crisp up further as they cool.
- Reserve the frying oil. You can use 2 tablespoons of this fragrant onion oil in the marinade and for sautéing.
- Set aside about one-third of the fried onions for the marinade. Reserve the remaining two-thirds for layering.
2. Marinate the Chicken
- In a large mixing bowl, combine the yogurt, biryani masala, ginger-garlic paste, red chili powder, turmeric, garam masala, salt, lemon juice, 2 tablespoons of oil (or the reserved onion oil), and the one-third portion of fried onions.
- Mix the marinade thoroughly until all the spices are well incorporated and the yogurt is uniform in color.
- Add the chicken pieces to the marinade. Use your hands to make sure every piece is thoroughly coated, including under any loose skin edges or between bone and meat.
- Cover the bowl with plastic wrap or a lid and refrigerate for a minimum of 2 hours. For best results, marinate overnight. The yogurt acts as a tenderizer, and the longer it sits, the more deeply the spices penetrate the chicken.
3. Soak and Prepare the Rice
- Place the basmati rice in a large bowl and cover it with cold water. Gently swish the rice around with your hands, then carefully pour off the cloudy water. Repeat this process 3 to 4 times until the water runs mostly clear. This removes excess starch so the grains cook up separate and fluffy.
- After the final rinse, cover the rice with fresh cold water and let it soak for 30 minutes. Soaking allows the grains to hydrate, which means they cook more evenly and elongate beautifully during boiling.
- After soaking, drain the rice completely through a fine mesh strainer.
4. Prepare the Saffron Milk
- Place a generous pinch of saffron threads (about 20 to 25 threads) into a small bowl.
- Pour 4 tablespoons of warm (not boiling) whole milk over the saffron. The milk should be warm enough to extract the color, roughly 130°F (55°C).
- Let the saffron steep for at least 15 minutes. You’ll see the milk gradually turn a deep golden-orange color. Set this aside.
5. Par-Cook the Rice
- Fill a large pot with water and bring it to a rolling boil over high heat. Use a generous amount of water, at least 8 to 10 cups (2 to 2.5 liters), as the rice needs room to move freely.
- Add 1 tablespoon of salt to the boiling water. The water should taste noticeably salty, similar to pasta water. This is the only time you season the rice directly.
- Add the whole spices to the boiling water: the bay leaf, green cardamom pods, black cardamom pods, cloves, cinnamon stick, and cumin seeds. These spices perfume the rice from the outside as it cooks.
- Gently add the drained basmati rice to the boiling water. Stir once to prevent sticking.
- Cook the rice for exactly 5 to 6 minutes, stirring gently once or twice. The goal is 70 percent cooked, meaning the grains are mostly cooked through but still have a visible white center when you press one between your fingers. It should still have a slight bite in the middle.
- Immediately drain the rice through a fine mesh strainer and spread it out on a large baking tray to stop it from overcooking in its own steam. Remove and discard the whole spices.
6. Cook the Chicken Base
- Heat 1 tablespoon of ghee in your heavy-bottomed pot over medium-high heat.
- Add the marinated chicken pieces to the hot pot in a single layer. Do not add any extra water. The chicken will release its own juices and the yogurt will cook down into a thick, concentrated sauce.
- Cook the chicken undisturbed for 4 to 5 minutes until the bottom gets some color, then stir and cook for another 3 to 4 minutes.
- Reduce the heat to medium-low, cover the pot, and cook the chicken for 10 to 12 minutes, stirring occasionally, until the chicken is about 80 percent cooked through and the marinade has thickened into a glossy, reduced sauce that coats the chicken. You want some moisture remaining in the pot, not a dry pan, as this steam will help finish cooking the chicken during the dum stage.
- Spread the chicken pieces evenly across the bottom of the pot.
7. Layer the Biryani
- Once the chicken is in the pot, immediately begin layering.
- Drizzle 1 tablespoon of ghee evenly over the chicken layer.
- Spread half the par-cooked rice in an even layer over the chicken. Try to cover all the chicken completely.
- Scatter half the remaining fried onions over the rice layer.
- Add half the fresh mint leaves and half the fresh cilantro over the onions.
- Drizzle about half the saffron milk in streaks over this rice layer.
- Add the remaining rice as the final layer, spreading it evenly.
- Top with the remaining fried onions, fresh mint, and cilantro.
- Drizzle the remaining saffron milk in streaks over the top. The saffron milk does not need to be mixed in. The streaking effect gives you patches of golden, fragrant rice when you serve it.
- Add the rose water (if using) evenly across the top.
- Drizzle the remaining 1 tablespoon of ghee over everything.
- Add 2 tablespoons of warm water around the edges of the pot (not on top of the rice) to create the initial steam for the dum.
8. Dum Cooking (Final Steam)
- Place a piece of aluminum foil over the pot, pressing it tightly against the rim. Then place the lid firmly on top of the foil. This double seal traps all the steam inside and creates the dum environment that cooks the rice through and allows all the layers to meld together.
- Place the sealed pot over high heat for 3 to 4 minutes until you can see or hear steam building (a little steam may escape from the edges, which is perfectly normal).
- Reduce the heat to the lowest possible setting on your stove. If you have a gas stove, you can place a flat griddle or tawa under the pot at this stage to further diffuse the heat and prevent the bottom from burning.
- Cook on the lowest heat for 20 to 25 minutes. Do not lift the lid during this time. The steam trapped inside is doing all the work.
- After 25 minutes, turn off the heat and let the biryani rest, still sealed, for an additional 10 minutes. This resting stage is important as it allows the moisture to redistribute and the grains to firm up.
9. Serve
- After the resting period, carefully remove the foil and lid. Be cautious of the hot steam that will escape.
- Use a large flat spoon or spatula to gently mix the layers from the sides down, folding rather than stirring aggressively, to keep the grains intact.
- Serve the biryani directly from the pot or transfer to a large serving platter, making sure to get chicken and rice in every scoop.
Tips for Success
A few key techniques separate a good biryani from a truly great one. Keep these in mind and you’ll be rewarded with stunning results.
- Don’t skip the marinating time. A minimum of 2 hours is required, but overnight marination gives you noticeably more tender and flavorful chicken. The yogurt acids work slowly, and the spices need time to fully permeate the meat.
- Your par-cooked rice must be underdone. If the rice is fully cooked before the dum stage, it will turn mushy in the pot. Aim for 70 percent done, with a small white dot still visible in the center when you press a grain.
- Watch your fried onions carefully. They go from golden to burnt in less than a minute. Start checking them around the 12-minute mark. The moment they turn deep golden, remove them immediately. They will continue to darken slightly as they cool.
- Seal the pot properly. The foil-and-lid method is what creates true dum. A loose lid means escaping steam, which means uneven cooking and dry rice.
- Use the lowest possible heat during the dum stage. The goal is a gentle, sustained steam, not active bubbling. If your stove runs hot, a tawa under the pot is a huge help.
- Let it rest before opening. Those final 10 minutes off the heat are not optional. Opening the pot too early disrupts the steam and affects the texture of the top layers.
Read Also: Chicken Curry Recipe
Serving Suggestions
Chicken biryani is a complete meal on its own but shines even brighter with the right accompaniments.
It’s traditionally served with sides that contrast and complement the rich, spiced rice. Cool, creamy, and tangy sides work best.
- Cucumber raita is the most classic pairing. The yogurt-based condiment cools down the palate and balances the heat. Serve it alongside a fresh Indian onion salad for a traditional spread.
- A simple green salad with lemon dressing adds freshness and lightness.
- Samosas make a fantastic starter before a biryani dinner.
- Sliced hard-boiled eggs are a classic garnish in many biryani traditions, particularly in Hyderabadi style.
- A wedge of lemon or lime on the side lets diners add extra brightness to their plate.
- Mirchi ka salan (green chili curry) is a traditional Hyderabadi side dish that pairs beautifully with the biryani if you want to go the full route.
Variations to Try
Once you’ve nailed the classic version, there are plenty of ways to explore different regional styles and techniques.
- Kolkata-style biryani is made with potatoes added in the chicken layer and is slightly lighter in spice, often with a hint of kewra water (screwpine essence) instead of or alongside rose water.
- Vegetable biryani swaps the chicken for a medley of vegetables like potatoes, cauliflower, peas, and carrots. Use the same marinade base with paneer added for protein.
- Sindhi biryani uses a tangier, tomato-based gravy with dried plums and is spicier than the Hyderabadi version.
- Slow cooker biryani is a more hands-off approach that layers everything into a slow cooker and cooks on low for 4 to 5 hours, though it produces a slightly different texture than traditional dum.
- Stovetop “dum” with a pressure cooker lid is a shortcut method where a pressure cooker lid (without using pressure) is used to seal tightly for a strong dum effect.
- Leftover biryani rice cake: Press leftover biryani into a pan, drizzle with ghee, and cook covered until a golden crust forms on the bottom, then flip for a delicious crispy cake.
For a comforting, saucy Indian chicken dish that makes a wonderful weeknight alternative, try this chicken curry recipe.
Storage and Reheating
Biryani stores beautifully and many people argue it tastes even better the next day as the flavors continue to develop.
- Refrigerator: Transfer cooled biryani to an airtight container and refrigerate within 2 hours of cooking. It keeps well for up to 3 to 4 days.
- Freezer: Portion the biryani into freezer-safe containers and freeze for up to 2 months. Thaw overnight in the refrigerator before reheating.
- Reheating on the stovetop: Place the biryani in a pot with 2 to 3 tablespoons of water. Cover tightly and reheat on low heat for 8 to 10 minutes, stirring gently once. The steam rehydrates the rice without making it mushy.
- Reheating in the microwave: Transfer to a microwave-safe bowl, sprinkle 1 to 2 tablespoons of water over the top, and cover with a damp paper towel. Microwave on medium power in 90-second intervals, stirring gently between each, until heated through.
- Do not reheat more than once. For food safety and quality, reheat only the portion you plan to eat.
You might also enjoy: Jeera Rice Recipe
Nutritional Facts
The following values are based on one serving of chicken biryani (approximately one-quarter of the full recipe), including bone-in chicken.
| Nutrient | Per Serving |
|---|---|
| Calories | ~620 kcal |
| Protein | ~38g |
| Carbohydrates | ~62g |
| Fat | ~22g |
| Saturated Fat | ~7g |
| Fiber | ~3g |
| Sodium | ~780mg |
| Cholesterol | ~120mg |
Please note that these values are estimates and can vary based on the specific cut of chicken used, amount of ghee, and exact portion size.
Read Also: Palak Paneer Recipe
Health Benefits of Key Ingredients
Chicken biryani is not just delicious. The ingredients in this recipe each bring meaningful nutritional value to the dish.
This is a satisfying, protein-rich meal built on whole spices that have been used in traditional medicine for centuries. Here’s a closer look at what’s working in your favor.
- Bone-in chicken is an excellent source of complete protein, niacin, vitamin B6, and phosphorus. Cooking on the bone adds collagen to the cooking liquid, which supports joint and gut health.
- Turmeric contains curcumin, a compound with well-documented anti-inflammatory and antioxidant properties. The fat in ghee actually helps improve curcumin absorption.
- Ginger and garlic paste together deliver antimicrobial, digestive, and cardiovascular benefits. Gingerols in ginger help settle the stomach, while allicin in garlic is associated with immune support.
- Whole cardamom aids digestion, helps reduce bloating, and contains compounds linked to improved blood pressure.
- Saffron is a powerful antioxidant that contains crocin and safranal, compounds associated with mood support and anti-inflammatory effects.
- Yogurt (in the marinade) provides probiotics, calcium, and protein, and its lactic acid content helps the digestive system handle a heavier, spiced meal.
- Basmati rice has a lower glycemic index than regular white rice, meaning it causes a more gradual rise in blood sugar.
- Ghee provides fat-soluble vitamins A, D, E, and K, and contains butyrate, a short-chain fatty acid associated with gut health.
For another warming Indian dish that’s packed with plant-based nutrition, this palak paneer recipe is a perfect companion.
Frequently Asked Questions
1. Can I use boneless chicken for this biryani?
Yes, you can use boneless thighs if you prefer. Boneless chicken cooks faster than bone-in pieces, so you should reduce the initial cooking time in Step 6 by about 5 minutes. Keep a close eye during the dum stage to make sure it doesn’t dry out. Bone-in chicken is still recommended for maximum flavor, as the bone marrow enriches the sauce considerably.
2. Why is my biryani rice turning out mushy?
Mushy rice in biryani is almost always caused by overcooking during the par-boiling stage. Remember, the goal is 70 percent cooked rice with a visible white center still in each grain. The rice finishes cooking during the dum stage. If you boil it until fully tender before layering, it will overcook under the steam and turn soft.
3. Can I make biryani without saffron?
Yes, you can omit saffron. The dish will still taste fantastic, since the flavor of saffron in biryani is subtle. To achieve a similar visual effect (the golden streaks in the rice), you can dissolve a small pinch of turmeric in warm milk and use that instead. It gives you the golden color without the floral note of saffron.
4. What is the best way to get the chicken to the bottom without it burning?
The key is making sure there is enough residual sauce from the cooked marinade to create a moist layer at the bottom of the pot. If you find the marinade has reduced too much in Step 6, add 2 to 3 tablespoons of water before layering. You can also place a flat tawa or griddle under the pot during dum cooking to further protect the bottom layer from direct heat.
5. How do I know the biryani is done during dum cooking?
You’ll know the biryani is ready when the steam is no longer vigorously escaping from the edges of the foil seal, and the kitchen smells deeply of toasted spices and cooked rice. If you gently press the top of the rice layer through the pot lid, it should feel firm, not wet or soupy. After the 25-minute dum cook and 10-minute rest, the biryani will always be done.
Read Also: Tandoori Chicken Recipe
Final Thoughts
Making chicken biryani at home is one of those cooking experiences that feels genuinely special from start to finish.
From the moment you crush the whole spices to the second you lift the lid and the steam hits you with that cloud of saffron and cardamom, the whole process is deeply satisfying.
Don’t be intimidated by the steps. Once you’ve made it once, you’ll wonder why you ever hesitated.
Give this Chicken Biryani Recipe a try this weekend and let the kitchen fill up with those incredible aromas. Drop a comment below to tell me how it turned out, share your photos, or let me know your own biryani tips!
Recommended:
- Palak Paneer Recipe
- Samosa Recipe
- Cucumber Raita Recipe
- Chicken Curry Recipe
- Jeera Rice Recipe
- Chicken Tikka Masala Recipe
- Basmati Rice Recipe
- Authentic Butter Chicken Recipe
- Easy Butter Chicken Recipe
- Tandoori Chicken Recipe


