If you’ve been searching for a peanut butter fudge recipe that actually delivers on its promise of creamy, melt-in-your-mouth perfection, this is the one.
This is the classic, old-fashioned stovetop version that has been passed down through generations. No marshmallow cream, no sweetened condensed milk — just sugar, whole milk, butter, creamy peanut butter, and vanilla coming together into something truly magical.
It’s the kind of fudge you find in small-town candy shops and remember from your grandmother’s kitchen at the holidays.
What makes this recipe work is the simple science behind it. Cooking the sugar and milk mixture to the soft-ball stage (around 234-236°F / 112-113°C) is what gives the fudge its signature texture — firm enough to slice, but soft and creamy when it hits your tongue.
You don’t need to be a candy expert to pull this off. With a candy thermometer and a little patience, this recipe is absolutely beginner-friendly.
It comes together in under 30 minutes of active time, and the results are spectacular every single time.
Also, if you love no-cook peanut butter candy, be sure to check out this Original Fantasy Fudge for a marshmallow cream-based variation that’s equally crowd-pleasing.
Why You’ll Love This Peanut Butter Fudge Recipe
This recipe hits all the right notes for a homemade candy that feels special but doesn’t require hours of effort.
Here are all the reasons to make it today:
- Only 5 core ingredients — Everything you need is probably already in your pantry.
- No specialty candy equipment required — A basic candy thermometer is the only tool that matters, and it’s inexpensive.
- Perfectly creamy texture — The stovetop method gives you that classic fudge consistency that sets firmly but stays soft.
- Crowd-pleaser every time — This is consistently the first item to disappear at holiday parties, potlucks, and bake sales.
- Great for gifting — Fudge slices beautifully into neat squares and holds up well in a tin or gift box for days.
- Customizable — Once you master the base recipe, the variations are endless.
You might also enjoy: Peanut Butter Cookie Recipe
Ingredients
This peanut butter fudge recipe keeps things beautifully simple. The key is using the right type of peanut butter — always go with a shelf-stable, commercial creamy peanut butter like Jif or Skippy. Natural peanut butter tends to separate and can result in greasy, grainy fudge that won’t set properly.
Here’s what you’ll need for approximately 36 pieces (one 8×8-inch pan):
- 2 cups (400g) granulated white sugar
- ½ cup (120ml) whole milk
- 1 cup (260g) creamy peanut butter (Jif or Skippy recommended)
- 4 tablespoons (57g) salted butter, cut into pieces
- 1 teaspoon pure vanilla extract
- ¼ teaspoon fine salt (omit if using salted butter and salt-sensitive)
For a slightly richer, more old-fashioned flavor, you can swap ¼ cup (60ml) of the milk for heavy cream. This isn’t traditional in all versions but adds a wonderful depth.
Read Also: Buckeyes Recipe
Kitchen Equipment Needed
You don’t need a professional candy kitchen to make this fudge. The most important piece of equipment is a reliable candy thermometer — it removes all the guesswork and gives you perfect fudge every single time. A heavy-bottomed saucepan is also essential because it distributes heat evenly and prevents the sugar mixture from scorching on the bottom.
Here’s everything you’ll need:
- Candy thermometer (clip-on style that attaches to the pot)
- Heavy-bottomed saucepan (2–3 quart capacity)
- 8×8-inch (20x20cm) square baking pan (a metal baking pan works best)
- Parchment paper or aluminum foil (to line the pan)
- Wooden spoon or silicone spatula
- Measuring cups and spoons
Another favorite for peanut butter treats: Peanut Butter Blossom Cookies Recipe
Recommended Products for This Recipe
These products are recommended based on quality and performance, and will genuinely help you achieve the best results with this recipe.
1. Polder Digital Candy Thermometer
An accurate candy thermometer is the single most important tool for making this recipe correctly. The right temperature is what determines your fudge’s final texture, and a digital model gives you precise, instant readings so you never miss the soft-ball stage. This one is clip-on, easy to read, and built to last.
2. Jif Creamy Peanut Butter
The brand of peanut butter truly matters in this recipe. Jif is consistently recommended by candy makers because its stable oil content ensures the fudge sets smoothly and doesn’t separate. It also delivers that classic, rich peanut butter flavor that makes this fudge so addictive.
3. USA Pan Bakeware 8×8-Inch Square Baking Pan
A quality metal baking pan with straight, even sides gives your fudge a uniform shape and makes it easy to lift out and slice cleanly. This pan heats and cools evenly, which helps your fudge set at the same rate throughout. It’s a simple but meaningful upgrade.
4. Silicone Spatula Set
When working with hot candy mixtures, a heat-resistant silicone spatula is essential for scraping down the pan and spreading fudge without burning or damaging equipment. A good set is also useful for hundreds of other kitchen tasks.
This pairs beautifully with other peanut butter classics — check out this Peanut Butter Pie Recipe for your next dessert table.
Step-by-Step Instructions
Read through all the steps before you begin. Once you start cooking the sugar mixture, things move quickly and you’ll want to be prepared. Pre-measure all your ingredients before turning on the stove.
Step 1: Prepare Your Pan
- Line your 8×8-inch (20x20cm) baking pan with parchment paper or aluminum foil, leaving a few inches of overhang on two sides to act as handles for easy removal.
- If using foil, lightly butter the surface so the fudge won’t stick.
- Set the prepared pan on a flat, heat-safe surface near the stove so it’s ready when you need it.
Step 2: Combine Sugar and Milk
- Pour 2 cups (400g) of granulated sugar and ½ cup (120ml) of whole milk into your heavy-bottomed saucepan.
- Stir them together briefly to combine before placing the pan on the burner.
- At this stage, do not add the butter or peanut butter yet — they go in later.
Step 3: Cook the Mixture to Soft-Ball Stage
- Clip your candy thermometer to the side of the saucepan, making sure the tip is submerged in the liquid but not touching the bottom of the pot.
- Place the saucepan over medium heat, stirring constantly as the mixture heats up.
- Once the mixture comes to a full, rolling boil, reduce stirring frequency but keep watching the temperature.
- Continue cooking and stirring gently until the candy thermometer reads 234–236°F (112–113°C), which is the soft-ball stage. This typically takes 5–8 minutes from the point of boiling.
- Do not rush this step by cranking up the heat — cooking too fast can cause the sugar to burn or crystallize unevenly.
- If you don’t have a thermometer, you can test using the cold water method: drop a small amount of the hot mixture into a glass of cold water. It should form a soft, pliable ball you can flatten between your fingers.
Step 4: Remove from Heat and Add Remaining Ingredients
- As soon as the mixture reaches 234–236°F (112–113°C), remove the saucepan from the heat immediately.
- Add the 4 tablespoons (57g) of salted butter, cut into small pieces, and stir until fully melted.
- Add the 1 cup (260g) of creamy peanut butter and stir vigorously until the mixture is completely smooth and uniform. Work quickly because the mixture will begin to thicken as it cools.
- Add 1 teaspoon of vanilla extract and ¼ teaspoon of salt (if using), and stir to incorporate everything evenly.
- The mixture at this stage should look thick and smooth, similar to cookie dough in consistency. If it looks too wet or pourable, stir for another 30–60 seconds — it will thicken quickly as it cools.
Step 5: Pour into the Prepared Pan
- Working quickly, pour the hot fudge mixture into your prepared, lined baking pan.
- Use your spatula to spread it into an even layer, reaching all the corners.
- Give the pan a gentle shake or tap on the counter to help the fudge settle evenly.
- Do not try to smooth it too much once it starts setting — overworking the fudge at this stage can cause it to become grainy.
Step 6: Let the Fudge Set
- Allow the fudge to cool at room temperature for at least 2 hours, or until it feels completely firm when you press lightly in the center.
- Do not place it in the refrigerator to speed up the cooling process — rapid chilling can cause the fudge to become crumbly or develop an uneven texture.
- Once fully set, use the parchment or foil overhang to lift the fudge block out of the pan and onto a cutting board.
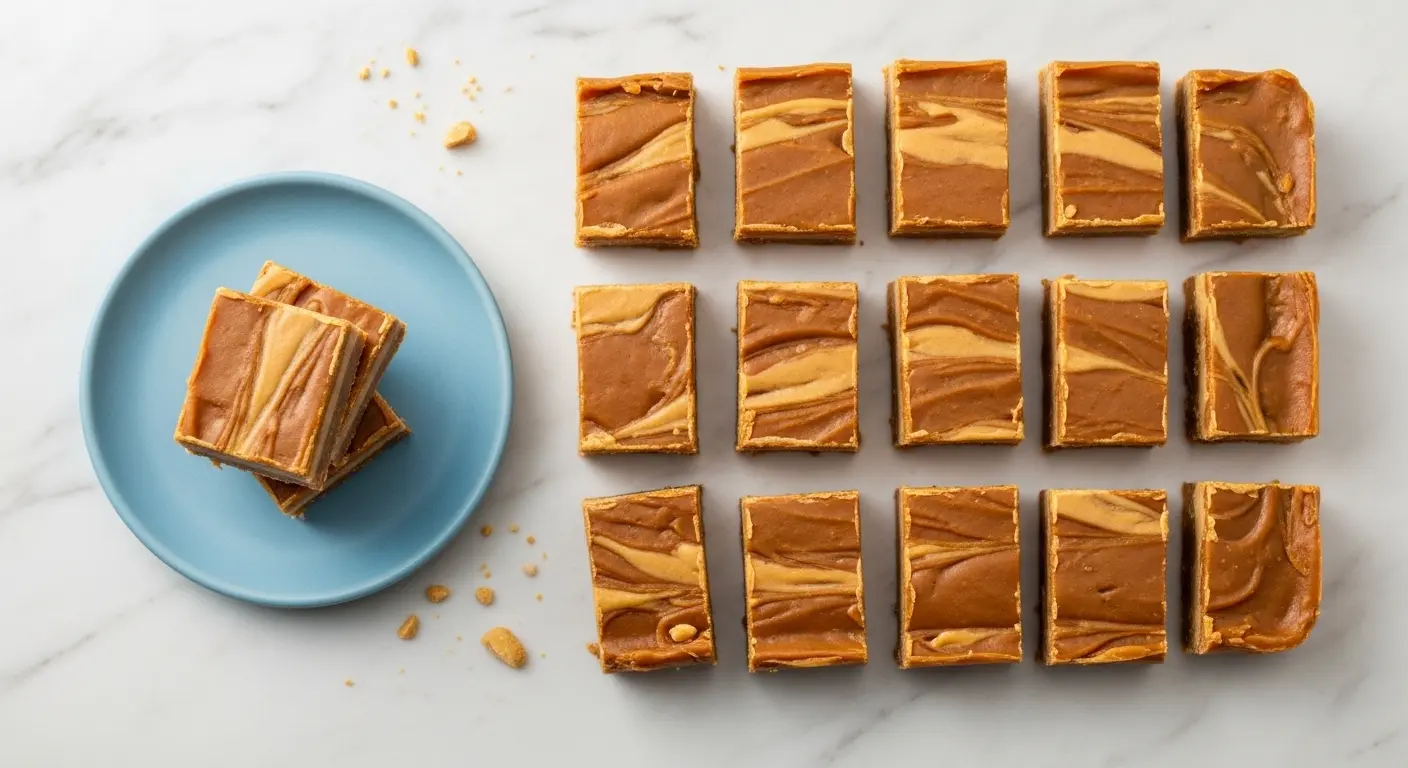
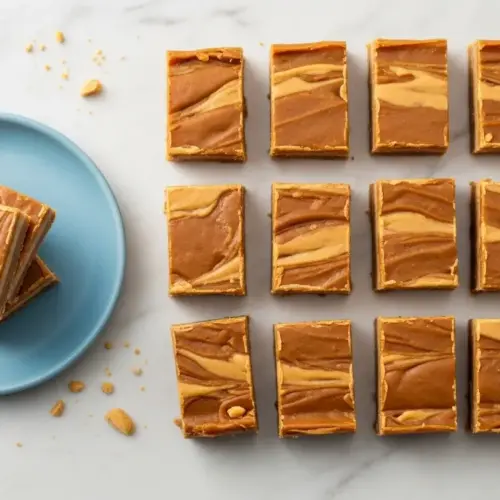
Step 7: Cut and Serve
- Use a sharp knife to cut the fudge into 1-inch (2.5cm) squares or your preferred size.
- For clean, professional-looking cuts, wipe the blade with a damp cloth between each cut.
- Arrange on a serving plate or transfer to an airtight container for storage.
For another classic no-bake peanut butter candy idea, check out this Peanut Butter Rice Krispie Treat Recipe.
Tips for Success
Making fudge is a bit of a dance between heat, timing, and technique. These tips will help you nail it on your first try and every time after.
Keep these key points in mind:
- Use a candy thermometer. Guessing the temperature is the number one reason fudge fails. A thermometer takes the mystery out of it completely.
- Don’t scrape the sides of the pot when pouring the fudge into the pan. Sugar crystals that cling to the sides can cause the entire batch to turn grainy.
- Use creamy, shelf-stable peanut butter like Jif or Skippy. Natural peanut butter is too oily and will result in greasy fudge that doesn’t set properly.
- Stir constantly while the mixture heats to prevent scorching on the bottom of the pan, but avoid excessive stirring once it boils.
- Don’t double the recipe. Candy recipes rely on precise temperature changes, and a larger volume of liquid takes much longer to heat, increasing the risk of burning.
- Work quickly after removing from heat. Fudge begins to set fast once you add the peanut butter and butter, so have your pan ready and your spatula within reach.
Read Also: No Bake Cookie Recipe
Serving Suggestions
Peanut butter fudge is delicious on its own, but it’s even better when it becomes part of a bigger dessert spread. Its rich, nutty sweetness pairs well with lighter treats that balance out the richness.
Here are some ideas for serving and presenting your fudge:
- Holiday dessert trays: Arrange fudge squares alongside Bourbon Balls, chocolate clusters, and shortbread for a stunning holiday candy platter.
- Gift boxes and tins: Stack fudge squares in a decorative tin with parchment paper between layers. Add a ribbon and a handwritten tag for a heartfelt homemade gift.
- Crumbled over ice cream: Break fudge into small crumbles and sprinkle over vanilla or chocolate ice cream for a next-level sundae topping.
- Served with coffee or hot chocolate: A square of fudge alongside a warm mug is a simple, satisfying treat on a cold afternoon.
- On a dessert board: Pair it with fresh fruit slices, cookies, and nut clusters for a beautiful grazing-style dessert presentation.
For a festive holiday candy board, Toffee makes an excellent addition alongside this fudge.
Variations to Try
Once you’ve made the classic version and have the technique down, there are so many ways to customize this recipe. These are all tested approaches that work beautifully with the base recipe.
Here are some fun variations:
- Chocolate Peanut Butter Fudge: Make a separate batch of chocolate fudge and layer it with the peanut butter fudge in a 9×13-inch pan, or swirl the two together for a stunning marbled effect.
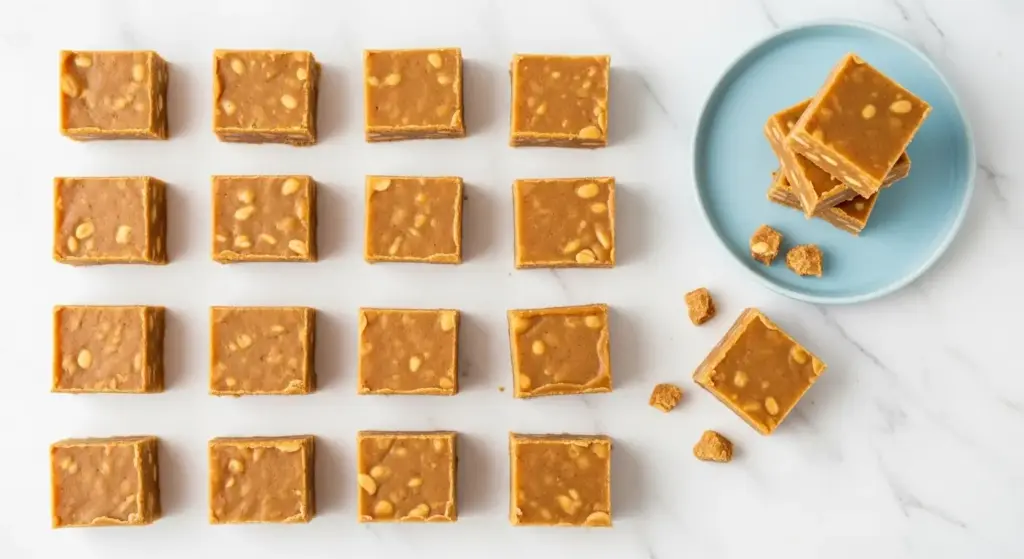
- Crunchy Peanut Butter Fudge: Stir in ½ cup (70g) of chopped roasted peanuts after removing the mixture from heat. You can also use chunky peanut butter for a more subtle texture variation.
- Chocolate Chip Peanut Butter Fudge: Sprinkle ½ cup (85g) of mini chocolate chips over the top of the fudge immediately after pouring it into the pan, pressing them in gently before it sets.
- Honey Peanut Butter Fudge: Substitute 2 tablespoons of the sugar with honey for a slightly floral, more complex sweetness.
- Peanut Butter and Jelly Fudge: After spreading the fudge into the pan, dollop 2–3 tablespoons of strawberry jam on top and use a toothpick to swirl it through the surface before it sets.
Another fun peanut butter treat you might love: Peanut Butter Jelly Smoothie
Storage and Reheating
Peanut butter fudge stores remarkably well, which makes it a fantastic make-ahead treat for the holidays. Proper storage keeps it fresh, creamy, and delicious for days or even weeks.
Here’s how to store your fudge:
- Room temperature: Store in an airtight container at room temperature for up to 2 weeks. Keep it away from direct sunlight or heat sources, which can cause it to soften.
- Refrigerator: Fudge can be refrigerated for up to 3–4 weeks, but it may dry out slightly. Store it in an airtight container with parchment paper between layers to prevent sticking.
- Freezer: For longer storage, place fudge pieces in a single layer on a baking sheet and freeze until solid, then transfer to a freezer-safe zip bag or airtight container. Frozen fudge keeps well for up to 3 months. Thaw at room temperature for 30–60 minutes before serving.
- Between layers: Always place a sheet of parchment or wax paper between stacked layers to prevent pieces from sticking together.
Note: Fudge does not need to be reheated to serve. Simply bring it to room temperature and enjoy.
You might also love this Fudge Brownie Recipe as another option for your dessert rotation.
Nutritional Facts
The following nutritional information is an estimate per piece, based on 36 equal squares cut from one 8×8-inch pan.
| Nutrient | Per Piece (approx.) |
|---|---|
| Calories | ~95 kcal |
| Total Fat | 4.5g |
| Saturated Fat | 1.2g |
| Carbohydrates | 12.5g |
| Sugars | 11.8g |
| Protein | 2g |
| Sodium | 55mg |
| Fiber | 0.3g |
Values are estimates and will vary based on specific brands and ingredients used.
Read Also: Hot Fudge Sauce Recipe
Health Benefits of Key Ingredients
While peanut butter fudge is certainly a treat, its main ingredient — peanut butter — does bring some real nutritional value to the table. Enjoy it as an occasional indulgence knowing there’s something genuinely good packed inside.
Here’s a look at what the key ingredients contribute:
- Peanut butter is an excellent source of plant-based protein, providing about 7–8 grams per two-tablespoon serving. It also contains healthy monounsaturated fats that support heart health.
- Peanuts (the base of peanut butter) are rich in niacin, magnesium, and vitamin E, all of which play roles in energy metabolism and cell protection.
- Peanut butter also contains resveratrol and other antioxidants that have been linked to reduced inflammation in research studies.
- Butter supplies fat-soluble vitamins including A, D, E, and K2, which are important for bone health, immune function, and vision.
- Whole milk adds small amounts of calcium, phosphorus, and B vitamins that support bone density and energy production.
For a fun peanut butter beverage pairing, try this Chocolate Peanut Butter Banana Smoothie alongside your fudge as a snack.
Frequently Asked Questions
1. Why did my peanut butter fudge turn out grainy?
Grainy fudge is almost always caused by sugar crystallization. This can happen if the mixture was stirred too vigorously after it started boiling, if sugar crystals on the sides of the pan fell back into the mixture, or if the fudge was overcooked.
To prevent it, avoid scraping the sides of the pot, use a damp pastry brush to wash down any crystals that form, and remove the pan from heat the moment the thermometer reads 234°F (112°C).
2. Why didn’t my fudge set properly?
Soft fudge that won’t firm up is almost always the result of undercooking. The mixture needs to reach the soft-ball stage (234–236°F / 112–113°C) for the sugar to crystallize correctly during cooling.
If your fudge is too soft after cooling, you can try returning it to the saucepan, adding a tablespoon or two of milk, and recooking to the proper temperature — then re-pour and let it set again.
3. Can I use natural peanut butter?
It’s best to avoid natural peanut butter for this recipe. The oils in natural peanut butter tend to separate during the cooking process, which can result in greasy, grainy fudge that doesn’t hold its shape well.
Stick with shelf-stable, commercial creamy peanut butter like Jif or Skippy for the smoothest, most consistent results.
4. How do I know when the fudge is done without a candy thermometer?
You can use the cold water test as a reliable alternative. Drop a small spoonful of the hot mixture into a glass of cold water — if it forms a soft ball that you can pick up and flatten between your fingers, the fudge has reached soft-ball stage and is ready.
That said, a candy thermometer is highly recommended since it removes all guesswork and makes the process repeatable every time.
5. Can I make peanut butter fudge ahead of time?
Absolutely — peanut butter fudge is one of the best make-ahead candies there is. It stays fresh at room temperature for up to 2 weeks in an airtight container, and can be frozen for up to 3 months.
This makes it perfect for holiday baking and gifting, since you can make it days or even weeks before you need it.
Read Also: Hot Fudge Cake Recipe
Classic Peanut Butter Fudge
Equipment
- Candy thermometer - Clip-on digital style recommended for accurate soft-ball stage reading
- Heavy-bottomed saucepan - 2–3 quart capacity for even heat distribution
- 8×8-inch square baking pan - 20x20cm; metal pan preferred
- Parchment paper or aluminum foil - For lining the pan
- Wooden spoon or silicone spatula - Heat-resistant silicone preferred
- Measuring cups and spoons
Ingredients
- 2 cups granulated white sugar - 400g
- 0.5 cup whole milk - 120ml; may substitute ¼ cup with heavy cream for richer flavor
- 1 cup creamy peanut butter - 260g; Jif or Skippy recommended — do not use natural peanut butter
- 4 tablespoons salted butter - 57g; cut into small pieces
- 1 teaspoon pure vanilla extract
- 0.25 teaspoon fine salt - Omit if using salted butter and you are salt-sensitive
Instructions
- Line an 8×8-inch (20x20cm) baking pan with parchment paper or buttered foil, leaving a few inches of overhang on two sides to act as handles. Set near the stove on a flat, heat-safe surface.
- Pour the sugar and whole milk into a heavy-bottomed saucepan and stir briefly to combine. Do not add the butter or peanut butter yet.
- Clip a candy thermometer to the saucepan and cook over medium heat, stirring constantly, until the mixture reaches a full rolling boil; then stir gently until the thermometer reads 234–236°F (112–113°C), about 5–8 minutes from boiling.
- Remove from heat immediately and stir in the butter until melted, then add the peanut butter and stir vigorously until completely smooth.
- Stir in the vanilla extract and salt until evenly incorporated; the mixture should look thick and smooth, similar to cookie dough.
- Working quickly, pour the fudge into the prepared pan and spread into an even layer with a spatula; give the pan a gentle tap on the counter to settle it.
- Allow fudge to cool at room temperature for at least 2 hours until completely firm — do not refrigerate to speed cooling as this can cause a crumbly texture.
- Use the parchment overhang to lift the fudge onto a cutting board, then slice into 1-inch (2.5cm) squares with a sharp knife, wiping the blade between cuts for clean edges.
Notes
- A candy thermometer is essential — guessing the temperature is the most common reason fudge fails. The soft-ball stage (234–236°F) is what determines the final texture.
- Use only shelf-stable creamy peanut butter like Jif or Skippy. Natural peanut butter separates during cooking and produces greasy, grainy fudge that won’t set.
- Do not scrape the sides of the pot when pouring the fudge into the pan — sugar crystals clinging to the sides can cause the entire batch to turn grainy.
- Stir constantly while heating to prevent scorching, but avoid excessive stirring once the mixture reaches a rolling boil.
- No candy thermometer? Use the cold water test: drop a small spoonful of the hot mixture into cold water — it should form a soft, pliable ball you can flatten between your fingers.
- Do not double the recipe. Larger volumes take much longer to heat and significantly increase the risk of burning or uneven cooking.
- For a richer flavor, substitute ¼ cup (60ml) of the milk with heavy cream.
- Store in an airtight container at room temperature for up to 2 weeks, or refrigerate for up to 4 weeks. Freeze in a single layer for up to 3 months and thaw at room temperature before serving.
- Variations: stir in ½ cup chopped roasted peanuts after removing from heat, press mini chocolate chips into the top before setting, or swirl 2–3 tablespoons of strawberry jam through the surface.
- Place parchment paper between stacked layers when storing to prevent pieces sticking together.
Final Thoughts
Making homemade peanut butter fudge is one of those simple kitchen projects that delivers an outsized amount of joy for the effort involved.
It’s the kind of recipe that feels both nostalgic and exciting every single time you make it — because the results are always that good.
Whether you’re making a batch for a holiday gift tin, bringing it to a potluck, or simply treating yourself to a few squares with a cup of tea, this classic stovetop peanut butter fudge recipe never disappoints.
Give it a try this week and see for yourself. Drop a comment below to let us know how it turned out, or share a photo with us on social media!
Recommended:
- The Original Fantasy Fudge Recipe
- Fudge Stripe Cookies Recipe
- Fudge Brownie Recipe
- Hot Fudge Sundae
- Toffee Recipe
- Bourbon Balls Recipe
- Monster Cookie Recipe
- Chocolate Pudding Recipe
- Caramel Sauce Recipe
- Peanut Butter Cookie Recipe


