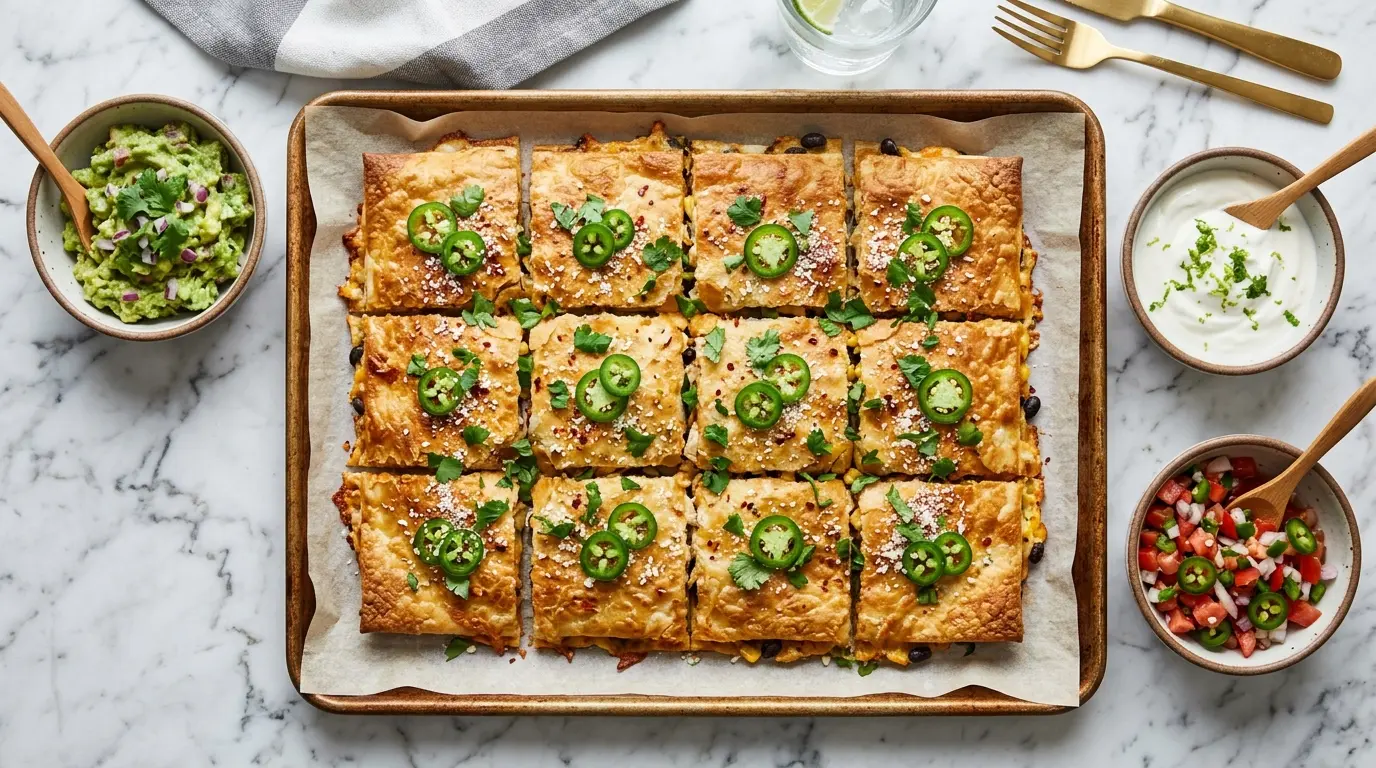
If you have been searching for a stress-free way to make quesadillas for a group without standing over a hot skillet for an hour, this sheet pan quesadilla recipe is the answer. One giant, cheesy, crispy quesadilla baked right in the oven, loaded with seasoned chicken, black beans, corn, colorful peppers, and mountains of melty cheese. It feeds a crowd effortlessly, and the best part? No flipping, no babysitting, and no cold quesadillas because you were too busy cooking the next batch.
This method is a complete revelation for busy weeknights and game day spreads alike. The oven does all the heavy lifting, using a second sheet pan as a press to keep everything flat and perfectly golden. You get crispy edges, melted cheese in every bite, and a filling hearty enough to satisfy even the hungriest crowd.
The secret to this recipe is in how the tortillas are arranged. Large flour tortillas are layered around the edges of the pan with half hanging over the side, and then folded back over the filling like a giant envelope. This creates a sealed, uniform quesadilla that bakes up with beautiful golden tops and a molten, cheesy interior. It is clever, practical, and honestly a little bit fun to make.
Why You’ll Love This Sheet Pan Quesadilla Recipe
This recipe is genuinely one of the most satisfying crowd-feeding meals you can make.
- Zero flipping required. The oven handles everything, so you can step away and prep your toppings while it bakes.
- Ready in about 40 minutes. From prepping the filling to pulling a golden quesadilla out of the oven, you are done in well under an hour.
- Feeds 8 to 12 people easily. One 18×13-inch sheet pan produces a quesadilla that can be sliced into 12 generous squares.
- Customizable to everyone’s taste. Swap the protein, change the cheese, add more heat, or keep it mild for the kids.
- Perfect for meal prep. The filling can be made a day ahead, making weeknight assembly lightning fast.
- Kid-friendly and crowd-pleasing. With familiar flavors and satisfying textures, this is the kind of meal that gets people coming back for seconds.
For another fun Tex-Mex option to add to your rotation, the Black Bean Quesadilla is a fantastic vegetarian-friendly choice that comes together just as quickly.
Ingredients
You only need simple, widely available ingredients for this recipe. Use rotisserie chicken to save time, and reach for a Mexican cheese blend for the ideal melt and flavor.
- 8 to 10 large (10-inch) flour tortillas
- 3 cups (340 g) shredded cooked chicken (rotisserie works great)
- 2 cups (226 g) shredded Mexican cheese blend (divided)
- 1 cup (170 g) canned black beans, drained and rinsed
- 1 cup (165 g) frozen or canned corn, thawed or drained
- 1 medium red bell pepper, diced (about 1 cup / 150 g)
- 1 medium green bell pepper, diced (about 1 cup / 150 g)
- 1 small yellow onion, diced (about 3/4 cup / 115 g)
- 3 cloves garlic, minced
- 2 tablespoons (30 ml) olive oil
- 1 teaspoon (2.5 g) chili powder
- 1 teaspoon (2.5 g) ground cumin
- 1/2 teaspoon (1.5 g) smoked paprika
- 1/2 teaspoon (1.5 g) garlic powder
- 1/2 teaspoon (3 g) salt, plus more to taste
- 1/4 teaspoon (0.5 g) black pepper
- Cooking spray, for the pan
- 1 tablespoon (15 ml) olive oil or melted butter, for brushing the tops
For serving: sour cream, fresh salsa, guacamole, pico de gallo, sliced jalapeños
The Taco Seasoning you use matters more than you might think. A well-balanced blend with chili powder, cumin, and smoked paprika gives the filling that deep, savory Tex-Mex flavor.
Kitchen Equipment Needed
Nothing fancy required here. A large rimmed sheet pan is the most important tool, and a second one to use as a press makes all the difference for crispiness.
- Large rimmed half sheet pan (18×13 inches / 46×33 cm), 2 needed
- Large skillet or sauté pan
- Cutting board and sharp knife
- Measuring cups and spoons
- Pastry brush (for brushing oil or butter on top)
- Cooking spray
- Aluminum foil (optional, for easy cleanup)
- Oven mitts
- Pizza cutter or sharp chef’s knife (for slicing the finished quesadilla)
Read Also: Sheet Pan Tacos Recipe
Recommended Products for This Recipe
These are products that have been vetted for quality and performance, and they genuinely make a difference in your final result.
1. Nordic Ware Natural Aluminum Half Sheet Pan
A quality sheet pan is the backbone of this recipe. Thin, warped pans won’t give you even heat distribution, which means uneven crispiness. Nordic Ware’s heavy-gauge aluminum pan heats evenly, resists warping, and is the right 18×13-inch size for this recipe. You’ll want two of these for the press technique.
2. Organic Mexican Cheese Blend
Pre-shredded cheese is coated in anti-caking agents that can affect how smoothly it melts. Block cheese that you shred yourself melts more cleanly and gives you that gloriously gooey pull everyone loves. A good organic Mexican blend with cheddar, Monterey Jack, and queso quesadilla is ideal for this recipe.
3. OXO Good Grips Silicone Pastry Brush
Brushing the tops of the tortillas with oil or butter before baking is what gives you that deep golden color and slight crunch on the exterior. A silicone pastry brush is heat-safe, easy to clean, and doesn’t shed bristles into your food.
4. Mezzetta Roasted Red Bell Peppers
When you want even more smoky, tender pepper flavor without the extra prep, a jar of roasted red bell peppers is a great shortcut. They are already soft, deeply flavored, and ready to layer right into the filling.
Another sheet pan dinner worth bookmarking: the Ranch Chicken Sheet Pan Dinner is a weeknight staple that comes together on a single pan with minimal cleanup.
Step-by-Step Instructions
Step 1: Preheat the Oven and Prepare the Pan
- Preheat your oven to 425°F (218°C). Allow it to fully come to temperature before placing anything inside, as a hot oven is what gives you crispy, golden tortillas rather than soft and pale ones.
- Line your 18×13-inch (46×33 cm) rimmed sheet pan with aluminum foil if desired for easier cleanup, then spray it generously with cooking spray. Make sure to spray the sides and corners too, as cheese can drip into those areas.
- Set the prepared pan aside and gather your filling ingredients while the oven heats.
Step 2: Cook the Filling
- Heat 2 tablespoons (30 ml) of olive oil in a large skillet over medium-high heat until shimmering.
- Add the diced yellow onion and both the diced red and green bell peppers to the skillet. Cook, stirring occasionally, for 3 to 4 minutes until the onion becomes translucent and the peppers begin to soften slightly.
- Add the 3 cloves of minced garlic and stir it into the vegetables. Cook for 30 to 60 seconds until fragrant, being careful not to let the garlic burn.
- Add the 3 cups (340 g) of shredded cooked chicken to the skillet along with the chili powder, cumin, smoked paprika, garlic powder, salt, and black pepper.
- Stir everything together well and cook for 2 to 3 minutes until the chicken is heated through and fully coated in the spices.
- Add the drained black beans and the corn. Stir gently to combine and cook for another 2 minutes just to warm the beans and corn through. Taste the mixture and adjust salt and pepper as needed.
- Remove the skillet from the heat and allow the filling to cool for 5 to 10 minutes. A slightly cooled filling prevents the bottom tortillas from becoming soggy before they hit the oven.
Step 3: Arrange the Tortillas on the Pan
- Take 6 to 7 large flour tortillas and arrange them around the edges of the prepared sheet pan, allowing approximately half of each tortilla to hang off the edge of the pan. Position them so they overlap each other slightly at the corners, creating a complete “border” all the way around.
- Place 1 to 2 more tortillas in the center of the pan to cover the bottom completely. You want every inch of the pan’s surface covered with tortilla so the filling has a solid base.
- It is completely fine for the tortillas to overlap each other. The goal is full coverage of the pan’s interior surface.
Step 4: Add the Cheese and Filling
- Sprinkle 1 cup (113 g) of the shredded Mexican cheese blend evenly across the tortilla base. This first layer of cheese acts as a “glue” that helps the tortillas bond to the filling as the cheese melts.
- Spoon the chicken, vegetable, bean, and corn filling evenly over the cheese layer. Spread it all the way to the edges so every slice of the final quesadilla has a hearty amount of filling.
- Sprinkle the remaining 1 cup (113 g) of shredded cheese evenly over the top of the filling. This top layer of cheese will melt down and bond the folded-over tortillas to the filling, creating that sealed quesadilla effect.
Step 5: Fold the Tortillas and Brush with Oil
- Working your way around the pan, fold each overhanging tortilla up and over the filling, toward the center of the pan. Press each one down gently so it lays flat against the filling. The folded tortillas should cover the filling completely, overlapping in the center.
- If there are any small gaps in the center, use an additional half or whole tortilla to cover them completely. You want a fully sealed top with no exposed filling.
- Using a pastry brush, brush the entire top surface of the folded tortillas with 1 tablespoon (15 ml) of olive oil or melted butter. This is what gives the tops their beautiful golden color and a satisfying crunch when baked.
Step 6: Press and Bake
- Spray the bottom of the second 18×13-inch sheet pan with cooking spray, then place it directly on top of the assembled quesadilla. Press it down gently and firmly so the tortillas are compressed against the filling. This pressing technique is what makes the sheet pan method unique: it ensures even contact between the tortillas and filling throughout baking, creating uniform crispiness on both sides.
- Place the sheet pan setup (with both pans stacked) into the preheated oven.
- Bake for 15 minutes with the top pan in place.
- After 15 minutes, carefully remove the top sheet pan using oven mitts. The quesadilla should be set and lightly golden on top at this point.
- Return the pan to the oven and bake for an additional 5 to 8 minutes, or until the top of the quesadilla is deeply golden and the edges are visibly crispy.
- For extra crispiness, you can switch the oven to broil for the final 1 to 2 minutes. Watch it carefully as the tortillas can go from golden to burned very quickly under the broiler.
Step 7: Slice and Serve
- Remove the sheet pan from the oven and allow the quesadilla to rest for 3 to 5 minutes before cutting. This brief resting period allows the cheese to set slightly so the slices hold together better.
- Using a pizza cutter or a sharp chef’s knife, cut the quesadilla into 12 equal squares (4 cuts across, 3 cuts down is a good guideline).
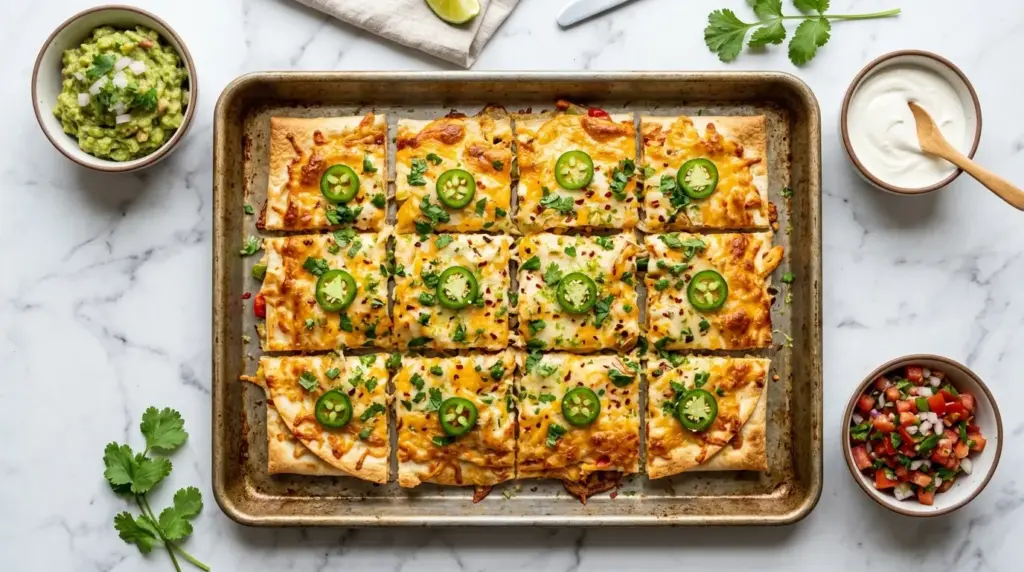
- Serve immediately with your favorite toppings: sour cream, salsa, guacamole, pico de gallo, and sliced jalapeños.
You might also enjoy: Birria Quesadilla Recipe
Tips for Success
Small adjustments make a big difference in the final result. Keep these tips in mind every time you make this recipe.
- Use large tortillas. The 10-inch (25 cm) flour tortillas are ideal. Smaller tortillas mean more seams, more gaps, and a less unified quesadilla. The large ones are more forgiving and give you better coverage.
- Don’t skip the top pan. Pressing the second sheet pan down on top is what gives you that even, flat, crispy surface. Without it, the tortillas dome up and the filling shifts around.
- Cool the filling slightly before assembling. Hot filling can soften the bottom tortillas too quickly, leading to a soggy base. Letting it cool for 5 to 10 minutes before layering prevents this.
- Brush generously with oil. Don’t be stingy with the oil or butter on the top tortillas. A well-oiled surface is what turns pale tortillas into golden, crackling perfection.
- Use freshly shredded cheese. Pre-shredded cheese contains anti-caking starches that prevent smooth melting. Block cheese that you shred yourself melts more evenly and creates that irresistible pull.
- Watch it closely under the broiler. If you want extra crispiness and switch to broil at the end, don’t walk away. Tortillas go from perfectly golden to burnt in under a minute under direct broiler heat.
Read Also: Air Fryer Quesadilla Recipe
Serving Suggestions
This giant quesadilla is a complete meal on its own, but a few simple accompaniments turn it into an unforgettable spread.
Serve it with classics like Easy Guacamole, sour cream, and Pico de Gallo for dipping, along with a squeeze of fresh lime over everything to brighten the flavors.
- Corn Salsa for a sweet, smoky complement to the cheesy filling
- Mexican Rice to round out the meal into a full Tex-Mex dinner
- Refried Beans on the side for a hearty, protein-rich pairing
- Cilantro Lime Rice for a bright, fresh contrast to the rich, cheesy quesadilla
- Seven Layer Dip alongside for a full party spread
- Homemade Tortilla Chips for extra crunch at the table
- A crisp green salad with avocado and lime vinaigrette to balance the richness
Variations to Try
This recipe is a starting point. Once you have the technique down, there are endless ways to make it your own.
- Beef sheet pan quesadilla: Swap the shredded chicken for seasoned ground beef. Brown 1 pound (450 g) of ground beef with taco seasoning, drain the fat, and use it in place of the chicken filling. It is hearty, deeply savory, and incredibly satisfying.
- Vegetarian version: Skip the meat entirely and double up on the black beans and corn. Add sautéed zucchini, mushrooms, or roasted sweet potato for a filling, plant-based option that doesn’t feel like it’s missing anything.
- BBQ chicken sheet pan quesadilla: Toss your shredded chicken with your favorite BBQ Sauce before adding it to the filling. Swap in Monterey Jack or smoked gouda for the cheese and add thinly sliced red onion.
- Breakfast quesadilla: Fill it with scrambled eggs, cooked sausage or bacon, shredded cheddar, and diced green onions. Bake exactly as directed for a showstopping breakfast spread.
- Spicy version: Add 1 to 2 finely diced jalapeños to the filling and use pepper jack cheese instead of the standard Mexican blend. A drizzle of hot sauce over the finished quesadilla takes the heat even further.
- Cheese quesadilla (simple version): Skip the filling entirely and simply load the pan with cheese for a kid-friendly version. The Best Cheese Quesadilla technique can be adapted to the sheet pan for ultra-cheesy, crowd-pleasing simplicity.
Storage and Reheating
This recipe stores beautifully, making it an excellent option for meal prep or next-day lunches.
- Refrigerator: Allow the quesadilla to cool completely before storing. Place leftover slices in an airtight container or wrap them individually in plastic wrap. They will keep in the refrigerator for up to 4 days.
- Freezer: Wrap individual slices tightly in plastic wrap, then place them in a zip-lock freezer bag. Freeze for up to 2 months. Thaw in the refrigerator overnight before reheating.
- Reheating in the oven (best method): Place slices on a baking sheet and bake at 375°F (190°C) for 8 to 10 minutes, flipping halfway through. This restores the crispiness that the microwave cannot replicate.
- Reheating in a skillet: Heat a dry skillet over medium heat and warm the slices for 2 to 3 minutes per side until heated through and crispy again.
- Microwave: While this is the quickest option, it does make the tortillas softer. Wrap a slice in a damp paper towel and microwave for 60 to 90 seconds. Best for when speed is the priority over texture.
Another great make-ahead option the whole family will love: Chicken Tortilla Soup is a perfect pairing dish that also stores and reheats like a dream.
Nutritional Facts
Approximate values per serving, based on 12 servings. Values will vary based on specific brands and ingredients used.
| Nutrient | Per Serving |
|---|---|
| Calories | 310 kcal |
| Total Fat | 13 g |
| Saturated Fat | 5 g |
| Cholesterol | 55 mg |
| Sodium | 520 mg |
| Total Carbohydrates | 28 g |
| Dietary Fiber | 3 g |
| Sugars | 2 g |
| Protein | 22 g |
| Calcium | 200 mg |
| Iron | 2 mg |
Note: Nutritional values are estimates and do not include toppings or dipping sauces.
For another crowd-sized Mexican-inspired meal with similar nutritional balance, the Enchilada Casserole Recipe is worth adding to your menu rotation.
Health Benefits of Key Ingredients
This recipe isn’t just delicious. It is also built on a solid foundation of nutritious, whole-food ingredients.
Each key ingredient contributes something meaningful to your meal beyond just flavor.
- Chicken: Shredded cooked chicken is one of the leanest, most protein-dense ingredients you can use. A single serving of this quesadilla delivers over 20 grams of protein, which supports muscle repair, satiety, and sustained energy throughout the day.
- Black beans: Black beans are a nutritional powerhouse. They are rich in plant-based protein, dietary fiber, and resistant starch, which supports healthy blood sugar levels and gut health. One half-cup serving delivers around 7 grams of fiber and 7 grams of protein.
- Bell peppers: Red and green bell peppers are exceptional sources of vitamin C, with red peppers containing nearly three times the vitamin C of oranges by weight. They are also rich in antioxidants like beta-carotene, which supports immune function and eye health.
- Corn: While often dismissed as a simple grain, corn provides meaningful amounts of fiber, B vitamins, and lutein, an antioxidant that supports eye health. It also adds a natural sweetness that balances the savory spices in the filling.
- Garlic: Beyond its bold flavor, garlic contains allicin, a sulfur compound with demonstrated antimicrobial and anti-inflammatory properties. Regular consumption of garlic is associated with cardiovascular benefits and improved immune resilience.
- Olive oil: Used to sauté the vegetables and brush the tops of the tortillas, olive oil is a heart-healthy fat rich in oleocanthal, a natural compound with anti-inflammatory properties similar to ibuprofen.
Read Also: Chicken Fajita Recipe
Frequently Asked Questions
1. Can I use corn tortillas instead of flour tortillas?
Corn tortillas can technically be used, but they are significantly more prone to cracking and breaking during folding, especially when cold. Flour tortillas are far more pliable and hold up much better to the folding and pressing process. If you prefer corn tortillas for dietary reasons, warm them briefly in a dry skillet or microwave before assembling to make them more flexible and less likely to crack.
2. Do I really need two sheet pans?
The second sheet pan is not strictly mandatory, but it makes a very noticeable difference. Without it, the tortillas can dome and separate from the filling during baking, resulting in an uneven, less crispy quesadilla. If you do not have a second sheet pan, cover the top tightly with aluminum foil and press it down firmly. Remove the foil during the last 5 minutes of baking to allow the top to brown and crisp up.
3. Can I make the filling ahead of time?
Yes, and it is highly recommended if you are making this for a party or event. The chicken filling can be made up to 2 days in advance and stored in an airtight container in the refrigerator. When you are ready to bake, simply assemble the quesadilla and pop it in the oven. This makes the day-of preparation extremely quick.
4. What cheese melts best for quesadillas?
The best melting cheeses for quesadillas are Monterey Jack, Oaxacan cheese (quesillo), Colby Jack, and a well-balanced Mexican blend. Avoid cheeses with very low fat content, as they tend to seize up rather than melt smoothly. Sharp cheddar works but melts less evenly than Monterey Jack, so blending the two gives you good flavor and excellent melt.
5. How do I prevent the bottom from getting soggy?
There are a few key steps that prevent a soggy bottom. First, allow the filling to cool for at least 5 minutes before assembling, as a very hot filling will start softening the tortillas before they even go in the oven. Second, make sure the oven is fully preheated before baking. Third, avoid over-filling: too much wet filling creates excess steam. Finally, do not skip the cooking spray on the pan, which creates a slight barrier that helps the bottom tortillas crisp rather than steam.
For more Tex-Mex inspiration to round out your menu, try the Easy Nachos Recipe as a starter before serving this quesadilla.
Final Thoughts
If you have been on the fence about trying the sheet pan method, this recipe is the one to convince you.
It is genuinely one of the most satisfying ways to feed a hungry group with minimal effort. One pan, one oven, and about 40 minutes stand between you and a table full of golden, cheesy, crowd-pleasing quesadilla squares.
The technique is flexible enough to work with whatever you have on hand, and the results are consistently impressive.
Give this sheet pan quesadilla recipe a try the next time you are hosting or just need a reliable weeknight dinner that everyone will actually eat. Leave a comment below and let me know how it turned out, what fillings you used, or any creative twists you came up with. Your ideas might just inspire someone else’s next family dinner.
Recommended:
- Birria Quesadilla Recipe
- Chicken Enchiladas Recipe
- Street Tacos Recipe
- Fish Tacos Recipe
- Chicken Tacos Recipe
- BBQ Chicken Sheet Pan Dinner
- Honey Mustard Chicken Sheet Pan Dinner
- Smashed Chicken Caesar Tacos Recipe
- Chicken Tortilla Soup Recipe
- Mexican Street Corn Recipe


