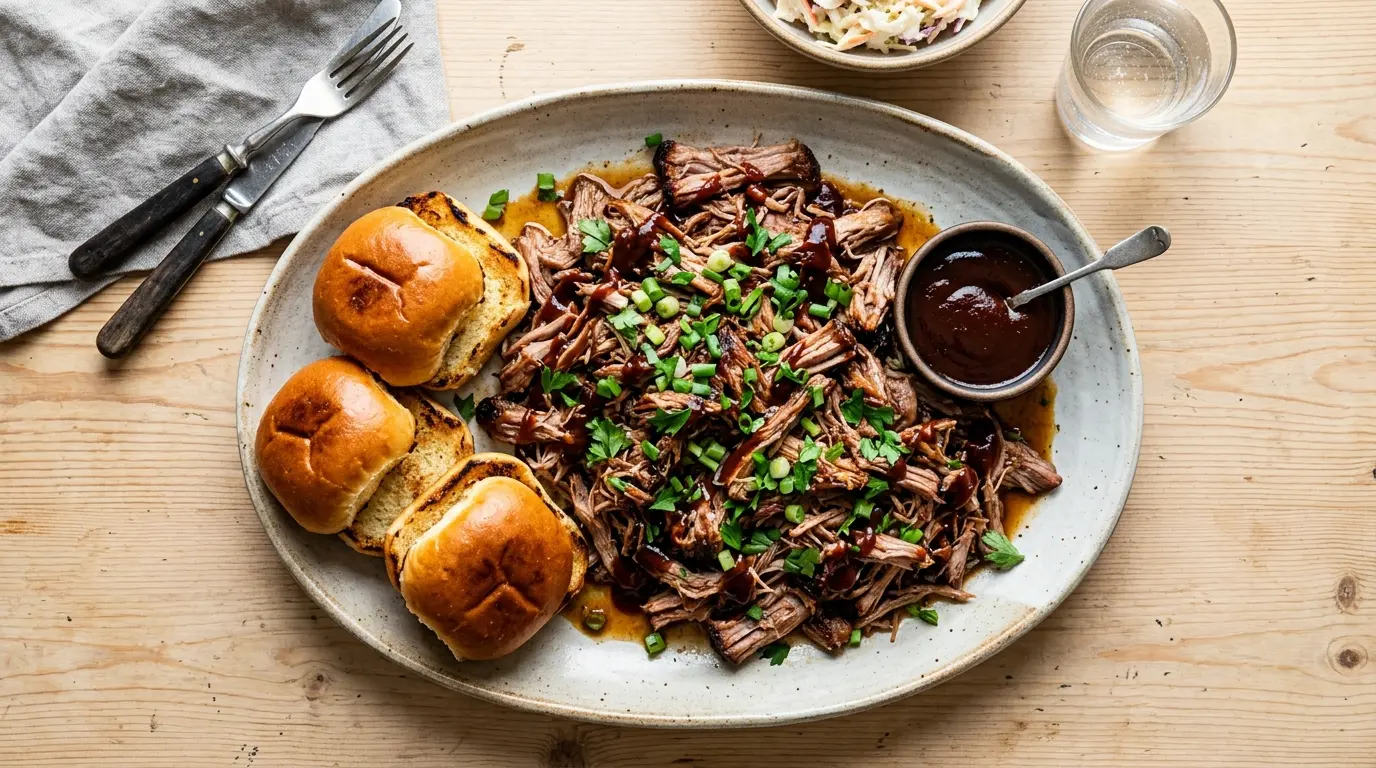
If you’ve been searching for a method that delivers fall-apart, deeply flavorful pulled pork without a smoker or grill, this oven-braised pulled pork recipe is exactly what you need.
Braising in the oven is one of the oldest and most reliable techniques for transforming a tough, inexpensive cut like pork shoulder into something extraordinary. The low, steady heat breaks down the collagen and connective tissue over several hours, producing meat so tender it practically shreds itself.
Unlike the slow cooker method, oven braising allows you to sear the pork first, which adds a deep, caramelized crust and an extra layer of flavor that no slow cooker can replicate. The braising liquid, made with chicken broth, apple cider vinegar, and BBQ sauce, circulates around the meat as it cooks, infusing every strand with savory, tangy, smoky goodness.
This is the kind of recipe that fills your whole kitchen with an incredible aroma for hours. It’s perfect for weekend cooking, feeding a crowd, or meal prepping a big batch to use throughout the week.
The same low-and-slow approach also works beautifully for Crockpot Beef Stew if you’re looking for another hearty braised meal.

Why You’ll Love This Oven-Braised Pulled Pork Recipe
This recipe checks every box for a truly great pulled pork. It’s hands-off once the pot goes into the oven, giving you hours of free time while the magic happens.
The dry rub creates a beautifully seasoned bark on the outside of the pork, adding texture and depth alongside the juicy, tender interior. Every bite has layers of flavor, from the smoky-sweet crust to the savory braising juices soaked into every strand.
It’s also incredibly versatile. You can pile it on buns for sandwiches, roll it into tacos, stir it into mac and cheese, or serve it alongside classic BBQ sides for a full spread.
Here’s why this recipe stands out:
- Budget-friendly cut. Pork shoulder is one of the most affordable proteins you can buy, and braising turns it into something that tastes restaurant-quality.
- No special equipment needed. All you need is a Dutch oven or a heavy roasting pan with a tight-fitting lid or foil.
- Deep, complex flavor. The combination of a dry rub, searing, and a layered braising liquid gives this pulled pork flavor that’s hard to beat.
- Perfect for a crowd. A 4 to 5-pound shoulder feeds 8 to 10 people generously.
- Great for meal prep. The cooked pork stores well in the fridge or freezer and reheats beautifully for meals all week long.
Read Also: Slow Cooker Pulled Pork Recipe
Ingredients
The ingredient list is straightforward, focused on pantry staples and a few high-impact additions that make a real difference. The pork shoulder (also called Boston butt) is the ideal cut for braising because its fat content keeps it incredibly moist through the long cook time.
- 4 to 5 lbs (1.8 to 2.3 kg) bone-in pork shoulder (Boston butt), or boneless
- 2 tablespoons olive oil or neutral cooking oil
- 1 cup (240 ml) low-sodium chicken broth
- 1/2 cup (120 ml) BBQ sauce, plus more for serving
- 3 tablespoons apple cider vinegar
For the Dry Rub:
- 2 tablespoons brown sugar
- 1 tablespoon smoked paprika
- 1 teaspoon garlic powder
- 1 teaspoon onion powder
- 1 teaspoon ground cumin
- 1 teaspoon kosher salt
- 1/2 teaspoon black pepper
- 1/2 teaspoon chili powder
- 1/2 teaspoon dry mustard powder
Another favorite: Smoked BBQ Pulled Pork
Kitchen Equipment Needed
You don’t need a lot of specialty equipment for this recipe, but a few key pieces will make the process much easier and produce better results. A heavy-bottomed Dutch oven is the gold standard for oven braising because it holds and distributes heat evenly throughout the long cook time.
- 6-quart Dutch oven with a tight-fitting lid (or a heavy roasting pan with aluminum foil)
- Instant-read meat thermometer
- Large cutting board
- Two forks (for shredding)
- Small mixing bowl (for the dry rub)
- Tongs
- Measuring cups and spoons
- Cast iron skillet (optional, for searing if your Dutch oven is small)
- Paper towels (for patting the pork dry)
- Aluminum foil (if using a roasting pan instead of a Dutch oven)
Read Also: Baked Pork Chops with Cream of Mushroom Soup
Recommended Products for This Recipe
These are products I genuinely recommend based on quality, performance, and how much of a difference they make in the final result.
1. Lodge 6-Quart Enameled Cast Iron Dutch Oven
A quality Dutch oven is the most important tool for this recipe. The Lodge enameled cast iron version heats evenly, retains temperature beautifully during the long oven braise, and the tight-fitting lid locks in moisture so the pork stays incredibly juicy. It transitions seamlessly from stovetop searing to oven braising, meaning fewer dishes to clean.
2. ThermoPro Instant-Read Meat Thermometer
Knowing the exact internal temperature of your pork is the difference between good and perfect results. Pulled pork needs to hit 195 to 205°F (90 to 96°C) for the connective tissue to fully break down and become pull-apart tender. The ThermoPro reads in seconds and takes the guesswork completely out of it.
3. Smoked Paprika (Sweet or Hot)
The right paprika makes a noticeable difference in the flavor depth of the dry rub. A good-quality smoked paprika adds a subtle smokiness that mimics the flavor of wood-smoked BBQ, even though you’re cooking indoors. Look for Spanish smoked paprika (Pimentón de la Vera) for the best results.
4. Apple Cider Vinegar
Adding apple cider vinegar to the braising liquid brightens the flavor and balances the richness of the pork. A good raw, unfiltered apple cider vinegar adds a mild tang that keeps the dish from feeling heavy. It’s a subtle but important detail.
5. Quality BBQ Sauce
A well-made BBQ sauce as part of the braising liquid adds a rich, smoky-sweet base that you just can’t replicate with individual ingredients alone. Look for one with a balanced flavor, not too sweet, with real smoke flavor rather than artificial additives.
This technique works wonderfully for other low-and-slow pork dishes too, like Slow Cooker Pot Roast.

Step-by-Step Instructions
1. Prepare the Dry Rub
- In a small mixing bowl, combine 2 tablespoons brown sugar, 1 tablespoon smoked paprika, 1 teaspoon garlic powder, 1 teaspoon onion powder, 1 teaspoon ground cumin, 1 teaspoon kosher salt, 1/2 teaspoon black pepper, 1/2 teaspoon chili powder, and 1/2 teaspoon dry mustard powder.
- Stir everything together thoroughly until the spices are evenly combined. The brown sugar will help form a caramelized crust on the pork during searing.
- Set the rub aside while you prepare the pork.
2. Prep the Pork Shoulder
- Remove the pork shoulder from its packaging and pat it completely dry on all sides using paper towels. This step is crucial. A dry surface sears instead of steams, which is what creates that deep brown crust.
- If your pork has a very thick, hard fat cap (more than 1/2 inch / 1.2 cm), use a sharp knife to trim it down slightly, leaving about 1/4 inch (0.6 cm) of fat. The fat keeps the meat moist and adds flavor, so don’t remove it entirely.
- Sprinkle the dry rub all over the pork on every surface. Use your hands to press and massage the rub firmly into the meat, getting into any crevices and folds.
- If you have time, let the seasoned pork sit uncovered at room temperature for 30 minutes, or cover it loosely and refrigerate it overnight. Resting the rub allows the salt and spices to penetrate the surface more deeply.
3. Preheat the Oven
- Set your oven to 300°F (150°C). This low temperature is key for braising. A hotter oven would cook the outside before the inside has time to become tender, and a lower temperature would make the cook time impractically long.
- Position your oven rack in the lower third of the oven, which allows for more even heat distribution around the Dutch oven.
4. Sear the Pork
- Place your Dutch oven on the stovetop over medium-high heat. Add 2 tablespoons of olive oil and let it heat until it shimmers and just starts to smoke lightly.
- Carefully lower the pork shoulder into the hot oil, fat-side down. You should hear a strong sizzle immediately. If it doesn’t sizzle, your oil isn’t hot enough, so wait a moment before adding the pork.
- Sear the pork, without moving it, for 3 to 4 minutes per side. You’re looking for a deep golden-brown to mahogany crust. Resist the urge to move the pork around. It will release naturally from the pan when it’s properly seared.
- Use tongs to rotate the pork and sear all sides, including the ends. Total searing time will be around 12 to 15 minutes.
- Once all sides are seared, transfer the pork to a large plate and set it aside temporarily.
5. Build the Braising Liquid
- With the Dutch oven still on the stovetop over medium heat, pour in 1 cup (240 ml) of chicken broth. Use a wooden spoon or heat-proof spatula to scrape up all the browned bits stuck to the bottom of the pot. These bits (called “fond”) are packed with flavor and will enrich the braising liquid enormously.
- Stir in 1/2 cup (120 ml) of BBQ sauce and 3 tablespoons of apple cider vinegar. Let the liquid come to a gentle simmer, stirring to combine everything.
- Taste the braising liquid and adjust if needed. It should be tangy, slightly smoky, and balanced.
6. Braise in the Oven
- Return the seared pork shoulder to the Dutch oven, nestling it into the braising liquid. The liquid should come about one-quarter to one-third of the way up the sides of the pork. You’re braising, not boiling, so you don’t want the pork fully submerged.
- Secure the lid tightly on the Dutch oven. If using a roasting pan, cover it tightly with two layers of heavy-duty aluminum foil, pressing it firmly around the edges to create a good seal.
- Transfer the covered Dutch oven to the preheated oven and braise for 3.5 to 4.5 hours, depending on the size of the roast.
- At the halfway point (around 1.75 to 2 hours), carefully open the oven and use tongs to flip the pork over in the braising liquid. This ensures even cooking on all sides. Re-cover tightly and continue cooking.
7. Check for Doneness
- Begin checking for doneness at the 3.5-hour mark. Insert an instant-read thermometer into the thickest part of the pork, avoiding the bone. You’re looking for an internal temperature of 195 to 205°F (90 to 96°C).
- At this temperature range, the collagen in the pork has fully converted to gelatin, which is what gives the meat that signature silky, pull-apart texture.
- The pork should also feel very loose and jiggly when you insert the tongs. If it still has some resistance, cover it back up and continue cooking in 30-minute increments.
8. Rest and Shred
- Once the pork has reached temperature, carefully remove the Dutch oven from the oven. Use tongs to transfer the pork to a large cutting board.
- Let the pork rest for at least 15 to 20 minutes before shredding. Resting allows the juices to redistribute throughout the meat rather than all pouring out onto the cutting board.
- If the pork has a bone, it should slide out effortlessly at this point. Simply grasp it with tongs and pull. Discard any large chunks of pure fat as well.
- Using two forks (or your hands if using heat-resistant gloves), shred the pork by pulling it apart in opposite directions. It should fall apart with very little effort.
9. Season with the Pan Juices
- Pour the braising liquid from the Dutch oven through a fine mesh strainer or ladle out the top layer into a bowl, skimming off as much fat as possible (a fat separator works great here).
- Drizzle the strained braising liquid over the shredded pork, a little at a time, tossing as you go. This keeps the meat moist and adds a huge punch of flavor.
- Taste and add more BBQ sauce, a pinch of salt, or a splash of apple cider vinegar as needed to balance the flavors to your liking.
For another easy weeknight approach, try this Homemade Worcestershire Sauce to add even more depth to your braising liquid.
Tips for Success
Getting pull-apart, juicy results every time comes down to a handful of key details. These tips address the most common mistakes people make with oven-braised pork.
- Don’t skip the sear. Searing isn’t just about looks. The Maillard reaction creates hundreds of new flavor compounds that you simply don’t get from braising alone. It’s one of the most important steps in the recipe.
- Pat the pork completely dry before seasoning. Even a small amount of surface moisture will cause the pork to steam rather than sear in the pan. Dry meat, hot oil, and high heat are your three tools for a great crust.
- Use a Dutch oven with a tight-fitting lid. Moisture loss during braising leads to dry, stringy pork. A good seal keeps the steam inside, where it continues to cook and tenderize the meat.
- Cook to temperature, not to time. Oven temperatures vary, and the size of your pork shoulder will affect cook time. A meat thermometer is the only reliable way to know when it’s truly done.
- Don’t rush the rest. Skipping the resting period means all those juices run out when you start shredding. Twenty minutes of patience makes a noticeable difference in the final texture and juiciness.
- Skim the fat from the braising liquid. Pouring the raw pan drippings over your shredded pork can make it overly greasy. Take a couple of extra minutes to skim or strain the liquid before adding it back.
- Season to taste at the end. The braising liquid concentrates as it cooks, so it can get saltier than expected. Always taste your shredded pork before serving and adjust seasoning accordingly.
You might also love: Collard Greens as a rich, flavorful Southern side alongside your pulled pork.
Serving Suggestions
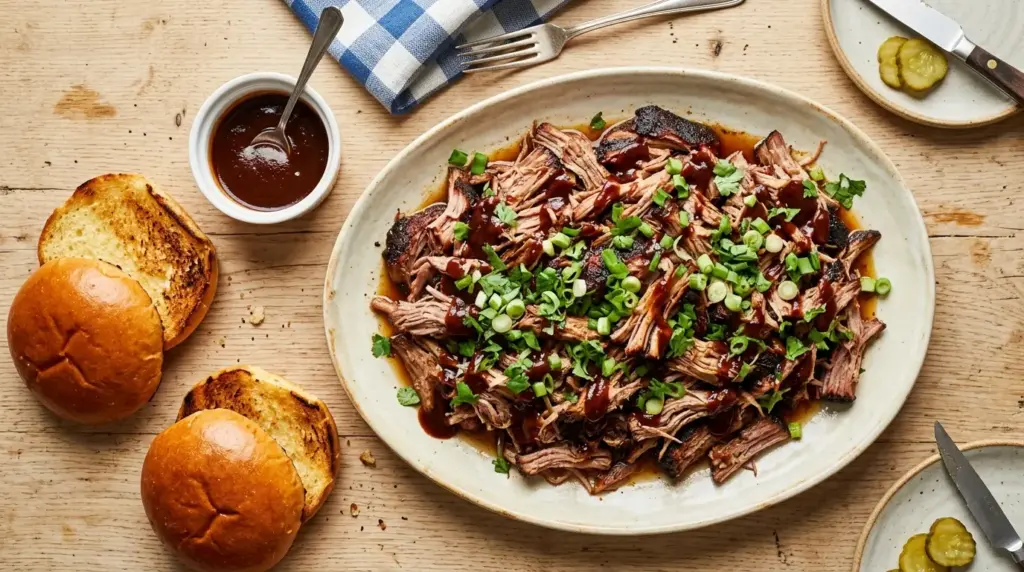
Oven-braised pulled pork is one of the most versatile proteins you can make. The rich, savory-smoky flavor plays well with all kinds of sides and formats.
Here are some of the best ways to serve it:
- Classic pulled pork sandwiches. Pile the pork high on soft Dinner Rolls, toasted brioche buns, or Sourdough Sandwich Bread. Top with extra BBQ sauce and creamy coleslaw.
- BBQ plates. Serve alongside Baked Beans, Potato Salad, and Corn on the Cob for a full Southern BBQ spread.
- Pulled pork tacos. Serve in warm corn or flour tortillas with pickled red onions, diced jalapeños, and a squeeze of lime.
- Loaded baked potatoes. Pile shredded pork onto a fluffy Baked Potato, top with shredded cheddar, sour cream, and chives.
- Mac and cheese topper. Stir pulled pork into creamy Southern Mac and Cheese for an incredibly satisfying comfort meal.
- Broccoli Salad on the side. The crunch and freshness of a well-made broccoli salad balances the richness of the braised pork beautifully.
Read Also: Fried Pickles Recipe
Variations to Try
Once you’ve mastered the classic version of this oven-braised pulled pork, there are several delicious directions you can take it. Each variation uses the same core technique but swaps out a few ingredients for a completely different flavor profile.
- Honey Chipotle Pulled Pork. Replace the BBQ sauce with a mixture of honey, chipotle peppers in adobo sauce, and a splash of lime juice. This version has a sweet-smoky heat that’s amazing in tacos.
- Carolina-Style. Swap the BBQ sauce in the braising liquid for a tangy vinegar-based sauce made with apple cider vinegar, brown sugar, red pepper flakes, and a touch of ketchup. Serve it on buns with tangy slaw.
- Cuban Mojo Style. Replace the BBQ sauce with a mojo marinade made from fresh orange juice, lime juice, garlic, oregano, and cumin. Serve the shredded pork in sandwiches with Swiss cheese, mustard, and pickles for a pulled pork Cuban.
- Beer-Braised. Replace the chicken broth with a dark beer like stout or porter, which adds a rich, malty depth to the braising liquid.
- Spicy Buffalo Pulled Pork. Toss the shredded pork in buffalo sauce and serve on buns with ranch dressing and celery for a game-day crowd pleaser.
Another variation to try: Pork Chop Stir Fry for a completely different way to enjoy pork on busy weeknights.
Storage and Reheating
One of the best things about oven-braised pulled pork is how well it keeps and reheats. It actually tastes even better the next day once the flavors have had more time to meld together.
Here’s how to store and reheat it properly:
- Refrigerator. Store the shredded pork in an airtight container with a small amount of the braising liquid to keep it moist. It will keep in the refrigerator for up to 4 days.
- Freezer. Pulled pork freezes exceptionally well. Transfer cooled pork and braising juices to freezer-safe zip-lock bags or airtight containers, pressing out as much air as possible. It will keep for up to 3 months.
- To reheat from refrigerator. Place the pork in a covered saucepan over low heat with a splash of chicken broth or water, stirring occasionally, until heated through. Alternatively, microwave it in a covered dish with a splash of broth for 1 to 2 minutes, stirring halfway through.
- To reheat from frozen. Thaw overnight in the refrigerator, then reheat using the stovetop method above. For a quick option, place the frozen pork directly into a covered saucepan with a few tablespoons of broth over low heat, stirring occasionally until fully heated.
- Avoid overheating. Reheating pulled pork over high heat dries it out quickly. Always reheat low and slow with added moisture.
Read Also: Mississippi Pot Roast
Nutritional Facts
The following nutritional estimates are based on a serving size of approximately 4 oz (113 g) of shredded pork, without the bun or additional toppings, based on 10 servings from a 4.5 lb roast.
| Nutrient | Per Serving (approx.) |
|---|---|
| Calories | 280 kcal |
| Total Fat | 16 g |
| Saturated Fat | 5 g |
| Cholesterol | 90 mg |
| Sodium | 420 mg |
| Total Carbohydrates | 6 g |
| Sugars | 5 g |
| Protein | 28 g |
| Iron | 1.8 mg |
| Potassium | 410 mg |
Note: Nutritional values are estimates and will vary based on the specific cut of pork, the amount of fat trimmed, the BBQ sauce used, and the amount of braising liquid added back to the shredded meat.
You might also enjoy making: Mexican Street Corn as a refreshing, lower-calorie accompaniment.
Health Benefits of Key Ingredients
While pulled pork is definitely a treat, several of its core ingredients bring genuine nutritional value to the table.
Here’s a closer look at what the key ingredients contribute:
- Pork shoulder. Pork is a rich source of complete protein, supplying all essential amino acids needed for muscle repair and maintenance. It’s also a good source of B vitamins, particularly B12, B6, and niacin, which support energy metabolism and nervous system function. Pork shoulder also provides zinc, which plays an important role in immune health.
- Smoked paprika. Paprika is rich in antioxidants, including beta-carotene, capsanthin, and zeaxanthin. These compounds help protect cells from oxidative stress and support eye and cardiovascular health. The capsaicin in chili-based spices like paprika has also been studied for its potential to support metabolism.
- Garlic powder. Garlic contains allicin, a sulfur compound with well-documented antibacterial and anti-inflammatory properties. Even in dried form, garlic powder retains many of these beneficial compounds. Regular garlic consumption is associated with cardiovascular support and immune system strengthening.
- Apple cider vinegar. Apple cider vinegar is commonly used in braising for its bright acidity, but it also has potential health benefits. Studies suggest it may support blood sugar regulation and digestive health. It also helps balance the richness of the pork in the dish.
- Cumin. Cumin is a strong source of iron and has traditionally been used to support digestion. Research also points to potential benefits for blood sugar control and cholesterol management.
Read Also: Garlic Mashed Potatoes
Frequently Asked Questions
1. What is the best cut of pork for oven-braised pulled pork?
Pork shoulder (also called Boston butt or pork butt) is the best cut for braised pulled pork. It has a high fat content and significant connective tissue, both of which render down during the long, slow braise to produce incredibly tender, juicy, shreddable meat. Leaner cuts like pork loin will dry out during the extended cook time and won’t produce the same pull-apart result.
2. Can I make this recipe without a Dutch oven?
Absolutely. A heavy-duty roasting pan covered tightly with two layers of aluminum foil works very well. The key is creating a good seal so that steam doesn’t escape during the long braise. Make sure your foil is pressed firmly around the edges of the pan, and avoid opening it unnecessarily during cooking.
3. How do I know when the pulled pork is done?
The most reliable indicator is internal temperature. Use an instant-read thermometer to check that the thickest part of the pork has reached 195 to 205°F (90 to 96°C). At this temperature, the collagen and connective tissue have fully broken down, giving you that signature tender, shreddable texture. If you insert a fork and the pork falls apart without resistance, that’s also a good sign.
4. Can I prepare this recipe ahead of time?
Yes, and it actually benefits from being made ahead. The flavors deepen overnight as the pork sits in its braising juices. You can braise the pork a day or two in advance, refrigerate it whole or shredded with the juices, and reheat gently on the stovetop before serving. Skim the solidified fat from the surface of the refrigerated liquid before reheating for cleaner, less greasy results.
5. Why is my pulled pork dry or tough?
There are two main causes. First, the pork may not have reached the target internal temperature. Even if it’s been in the oven for several hours, tough pork usually means it needs more time. Second, moisture may have escaped during the braise, either because the lid or foil didn’t seal tightly enough, or the oven temperature was too high. Always add back some of the braising liquid after shredding to restore moisture and flavor.
Read Also: Instant Pot Pulled Pork Recipe
Oven-Braised Pulled Pork

Equipment
- 6-quart Dutch oven with tight-fitting lid - or heavy roasting pan with foil
- Instant-read meat thermometer
- Large cutting board
- Two Forks - for shredding
- Small mixing bowl - for dry rub
- Tongs
- Measuring cups and spoons
- Cast iron skillet - optional, for searing if Dutch oven is small
- Paper towels - for patting pork dry
- Aluminum foil - if using roasting pan instead of Dutch oven
- Fine-mesh strainer - or fat separator
Ingredients
- 4 lbs pork shoulder (Boston butt) - 1.8-2.3 kg, bone-in or boneless
- 2 tablespoons olive oil or neutral cooking oil
- 1 cup low-sodium chicken broth - 240 ml
- 0.5 cup BBQ sauce - 120 ml, plus more for serving
- 3 tablespoons apple cider vinegar
For the Dry Rub
- 2 tablespoons brown sugar
- 1 tablespoon smoked paprika
- 1 teaspoon garlic powder
- 1 teaspoon onion powder
- 1 teaspoon ground cumin
- 1 teaspoon kosher salt
- 0.5 teaspoon black pepper
- 0.5 teaspoon chili powder
- 0.5 teaspoon dry mustard powder
Instructions
- Combine brown sugar, smoked paprika, garlic powder, onion powder, cumin, salt, pepper, chili powder, and mustard powder in a small bowl.
- Pat pork shoulder completely dry with paper towels. Trim fat cap to 1/4 inch if thicker. Coat all surfaces with dry rub, pressing firmly.
- Preheat oven to 300°F (150°C) with rack in lower third.
- Heat oil in Dutch oven over medium-high heat. Sear pork on all sides until deep golden-brown, 3-4 minutes per side. Transfer to a plate.
- Add chicken broth to the pot and scrape up browned bits. Stir in BBQ sauce and apple cider vinegar, bringing to a gentle simmer.
- Return pork to the pot, nestling into liquid (should come 1/4 to 1/3 up the sides). Cover tightly and braise in oven for 3.5-4.5 hours.
- At the halfway point, flip the pork in the braising liquid, re-cover, and continue cooking until internal temperature reaches 195-205°F (90-96°C).
- Transfer pork to a cutting board and rest for 15-20 minutes. Shred with two forks, discarding bone and large fat chunks.
- Strain braising liquid and skim off fat. Drizzle over shredded pork, tossing to moisten. Adjust seasoning with BBQ sauce, salt, or vinegar to taste.
Notes
- Don’t skip searing — it creates essential flavor through the Maillard reaction.
- Pat the pork completely dry before seasoning to ensure a proper sear.
- Use a Dutch oven with a tight-fitting lid to lock in moisture during the long braise.
- Cook to temperature, not time — an instant-read thermometer is essential for perfect results.
- Let the pork rest for 15-20 minutes before shredding to keep juices inside the meat.
- Skim fat from the braising liquid before adding back to avoid greasy results.
- Always taste and adjust seasoning at the end, as the braising liquid concentrates during cooking.
- Leftover pulled pork keeps in the fridge for up to 4 days or freezes for up to 3 months.
- Reheat gently with a splash of broth over low heat to avoid drying out the meat.
- Try variations: swap BBQ sauce with honey-chipotle, vinegar-based Carolina sauce, or mojo marinade for different flavor profiles.
Final Thoughts
This oven-braised pulled pork recipe is one of those dishes that rewards patience in the most satisfying way. A few hours of low, slow braising transforms a humble cut of pork into something genuinely spectacular, tender, juicy, smoky, and packed with flavor in every strand.
It’s the kind of meal that brings people together. Whether you’re loading up sandwiches for a backyard gathering, meal prepping for the week, or just treating yourself to a proper BBQ dinner at home without a smoker in sight, this recipe delivers every time.
Give it a try this weekend and enjoy the incredible smell that fills your kitchen for hours. If you make it, I’d love to hear how it turned out. Drop a comment below and share your experience, and feel free to share with anyone who loves a good pulled pork!
Recommended:
- Brunswick Stew
- Crack Chicken
- Cheesy Garlic Bread
- Creamy Mac and Cheese
- Classic Sloppy Joe
- Corn Casserole
- Taco Seasoning
- Alabama White Sauce
- Scalloped Potatoes
- Cowboy Stew



