I’m going to let you in on a little secret that changed my weeknight dinner routine forever. This mexican beef and rice skillet recipe is hands down one of the easiest, most satisfying meals I’ve thrown together in my kitchen.
I stumbled upon this gem during one of those crazy evenings when everyone was hungry, I had minimal groceries, and takeout just wasn’t an option. What I pulled together that night became an instant family favorite that we now make at least twice a month.
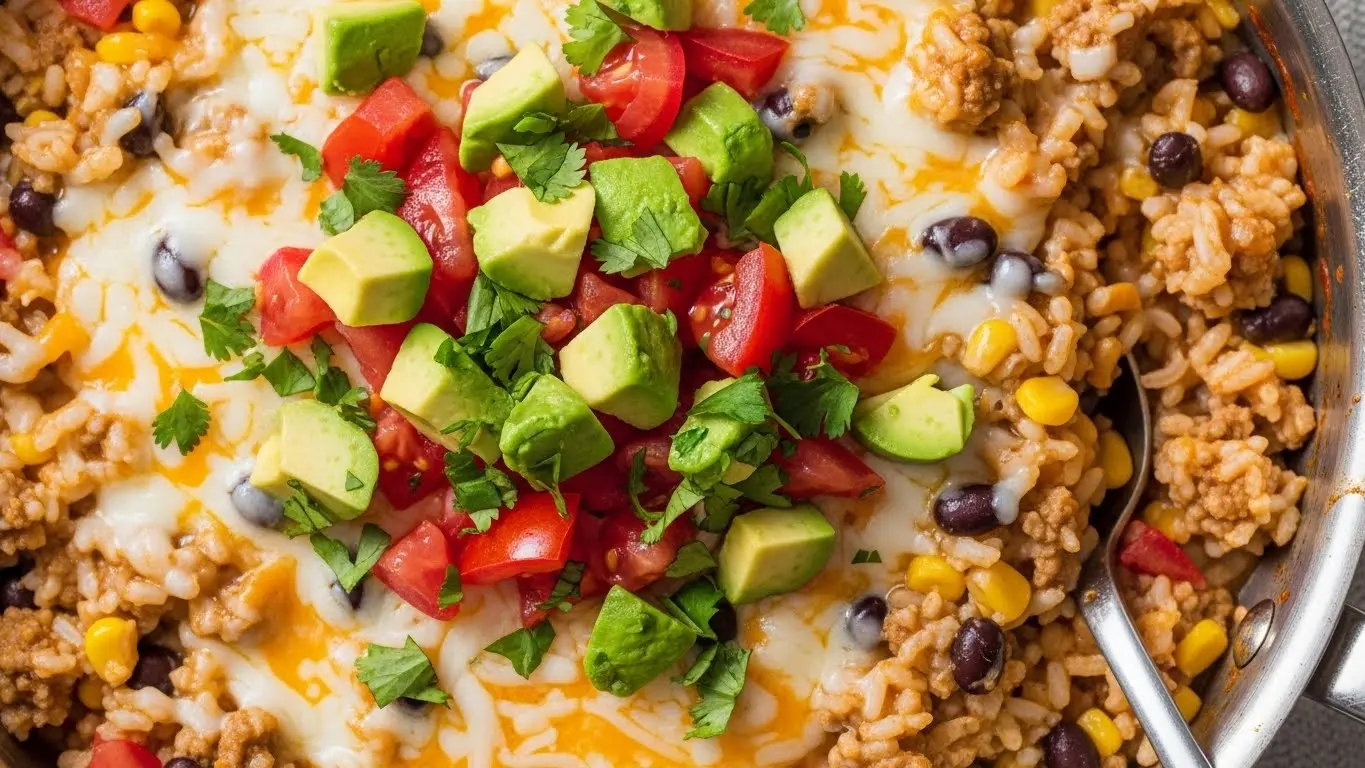
The beauty of this dish is that everything cooks in one pan. No juggling multiple pots, no endless cleanup, just simple, straightforward cooking that delivers big on flavor. Ground beef gets browned with aromatic spices, rice soaks up all those delicious juices, and everything comes together in about 30 minutes.
I love how the cumin and chili powder create this warm, earthy foundation while the tomatoes add just the right amount of tang. Add some melted cheese on top, and you’ve got yourself a meal that hits all the right notes.
This skillet is perfect for those nights when you need something hearty but don’t want to spend forever in the kitchen. My kids devour it every single time, and I always feel good knowing they’re getting a complete meal with protein, veggies, and grains all in one dish.
The leftovers (if there are any) taste even better the next day. Trust me on this one.
Why You’ll Love This Mexican Beef and Rice Skillet Recipe
This dish solves so many dinner dilemmas at once. It’s quick enough for busy weeknights but impressive enough when unexpected guests show up.
Everything cooks in a single skillet, which means minimal cleanup and maximum flavor. The rice absorbs all those savory beef juices and spices, creating layers of taste in every bite. My family especially loves how customizable it is—everyone can top their portion exactly how they like it.
Here’s what makes this recipe a keeper:
- One-pan simplicity: From start to finish, you’ll dirty exactly one skillet. No juggling pots or managing multiple cooking surfaces.
- Budget-friendly: Ground beef and rice are economical staples, and the rest of the ingredients are pantry basics you probably already have.
- Quick cooking time: You’ll have dinner on the table in 30-35 minutes, faster than most delivery options.
- Crowd-pleaser: Even picky eaters tend to love this. The familiar flavors and customizable toppings win everyone over.
- Meal prep friendly: This reheats beautifully, making it perfect for batch cooking or next-day lunches.
- Nutrition in every bite: You’re getting protein, whole grains, and vegetables all in one balanced dish.
- Easily adaptable: Swap proteins, adjust spice levels, or add extra veggies without changing the basic technique.
Another favorite: Taco Skillet
Ingredients
The ingredient list for this skillet is refreshingly short and straightforward. Most items are probably sitting in your pantry right now, which is exactly why this recipe works so well for last-minute dinners.
Here’s everything you’ll need:
- 1 pound ground beef (80/20 works best for flavor and moisture)
- 1 cup long-grain white rice, uncooked
- 1 medium yellow onion, diced
- 3 cloves garlic, minced
- 1 red bell pepper, diced
- 1 can (14.5 oz) diced tomatoes with juices
- 2 cups beef broth
- 1 tablespoon chili powder
- 1 teaspoon ground cumin
- 1 teaspoon paprika
- ½ teaspoon garlic powder
- Salt and black pepper to taste
- 1 cup shredded cheddar cheese
- 2 tablespoons olive oil
- Fresh cilantro for garnish
- Lime wedges for serving
Optional toppings:
- Sour cream
- Sliced jalapeños
- Diced avocado
- Salsa or pico de gallo
Kitchen Equipment Needed
You don’t need a fancy kitchen to make this recipe happen. The beauty of a one-pan meal is that your equipment list is just as simple as your ingredient list.
Essential tools:
- Large skillet with lid (12-inch works perfectly; cast iron or non-stick both work great)
- Wooden spoon or spatula
- Sharp knife
- Cutting board
- Measuring cups and spoons
- Can opener
Read Also: Mexican Skillet
Recommended Products for This Recipe
After making this skillet countless times, I’ve found a few products that genuinely make the process smoother and the results even better. These aren’t essential, but they’re investments that pay off every time you cook.
1. Lodge Cast Iron Skillet with Lid
A good cast iron skillet transforms this dish by distributing heat evenly and developing those beautiful browned bits that add so much flavor. The lid traps steam perfectly, ensuring your rice cooks through without drying out. Mine has lasted over a decade and just keeps getting better.
2. Better Than Bouillon Beef Base
This concentrated beef base delivers richer, more complex flavor than regular boxed broth. A little jar lasts forever, and you can control the intensity by adjusting how much you use. It’s been a total upgrade for all my savory dishes.
3. McCormick Mexican Spice Blend
While individual spices work great, this pre-mixed blend ensures consistent results every time and includes complementary spices you might not have thought to add. It simplifies the process without sacrificing flavor.
4. OXO Good Grips Wooden Spoon
Breaking up ground beef and stirring rice requires a sturdy tool that won’t scratch your cookware. This wooden spoon has the perfect edge for crumbling meat and is comfortable to hold during the entire cooking process.
Step-by-Step Instructions
Follow these detailed steps and you’ll have a perfectly cooked skillet every single time. Don’t rush through the browning stages—that’s where all the flavor develops.
1. Prep Your Ingredients
- Dice the onion and bell pepper into roughly ½-inch pieces so they cook evenly with the rice
- Mince the garlic finely—I usually press mine through a garlic press for the best distribution
- Measure out your rice and set aside; rinsing it isn’t necessary for this recipe
- Have your spices measured and ready in a small bowl; this makes the cooking process much smoother
- Shred your cheese if you bought a block; freshly shredded melts better than pre-shredded
2. Brown the Ground Beef
- Heat your skillet over medium-high heat and add the olive oil
- Once the oil shimmers, add the ground beef in an even layer
- Let it sit undisturbed for 2-3 minutes to develop a nice brown crust on the bottom
- Break up the meat with your wooden spoon into crumbles about the size of a nickel
- Continue cooking, stirring occasionally, until the beef is browned and no pink remains (about 6-7 minutes total)
- Drain excess fat if needed, leaving about 1-2 tablespoons in the pan for flavor
3. Sauté the Vegetables
- Add the diced onion and bell pepper directly to the browned beef
- Sauté for 4-5 minutes until the onion becomes translucent and the pepper softens slightly
- Toss in the minced garlic and stir constantly for about 30 seconds until fragrant
- The vegetables should start to pick up some of those brown bits from the bottom of the pan
4. Toast the Rice and Add Spices
- Pour the uncooked rice into the skillet and stir to coat with the beef and vegetable mixture
- Let the rice toast for 2-3 minutes, stirring frequently to prevent sticking
- Sprinkle in the chili powder, cumin, paprika, garlic powder, salt, and pepper
- Stir everything together for about 30 seconds until the spices become aromatic and coat the rice evenly
- This toasting step adds a subtle nutty flavor to the finished dish
5. Add Liquids and Simmer
- Pour in the beef broth and the can of diced tomatoes with all their juices
- Stir well to combine everything and scrape up any browned bits stuck to the bottom of the pan
- Bring the mixture to a full boil over medium-high heat
- Once boiling, reduce heat to low and place the lid on your skillet
- Set a timer for 18 minutes and resist the urge to peek—lifting the lid releases steam the rice needs to cook properly
6. Check for Doneness
- After 18 minutes, carefully remove the lid and check if the rice is tender and the liquid is absorbed
- If the rice needs more time but the liquid is gone, add ¼ cup more broth or water and cook for another 3-5 minutes
- If there’s excess liquid but the rice is done, leave the lid off and let it simmer for 2-3 more minutes
- Fluff the rice gently with a fork to separate the grains
7. Add Cheese and Finish
- Remove the skillet from heat and sprinkle the shredded cheddar cheese evenly over the top
- Cover with the lid again and let sit for 2-3 minutes until the cheese melts completely
- For a bubbly, golden cheese topping, place the uncovered skillet under the broiler for 1-2 minutes (watch carefully)
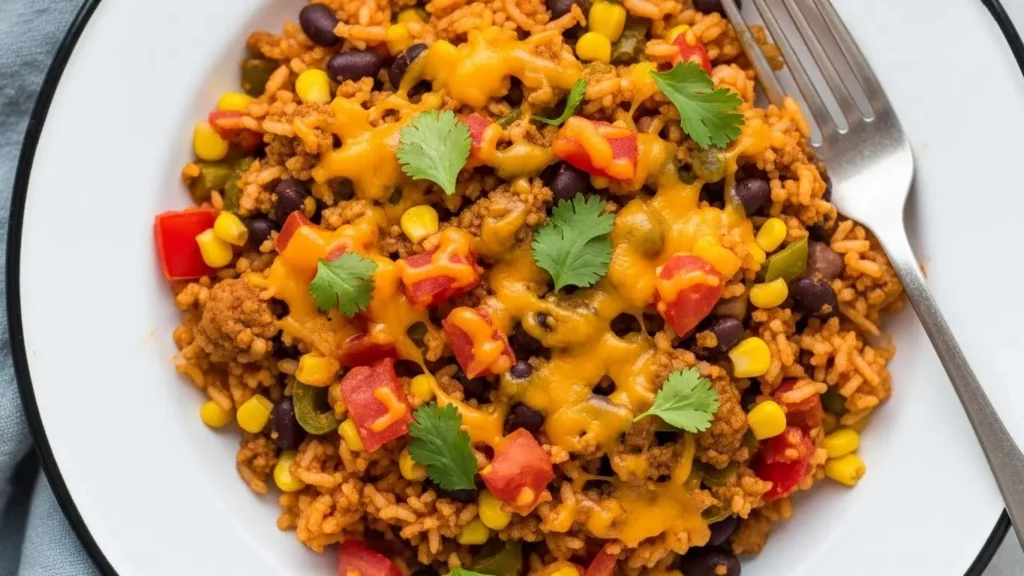
- Garnish with fresh cilantro and serve with lime wedges on the side
This pairs beautifully with my Enchilada Skillet for a complete Mexican-inspired meal spread.
Tips for Success
These little tricks have saved me from skillet disasters and helped me achieve perfect results every time. Pay special attention to the liquid ratio—that’s where most problems happen.
Here’s what I’ve learned through trial and error:
- Don’t skip the meat-browning step: Those caramelized bits add serious depth of flavor. If your beef releases a lot of water, increase the heat briefly to evaporate it before moving on.
- Use the right rice: Long-grain white rice works best for this recipe. Jasmine and basmati also work well. Avoid instant rice—it’ll turn mushy—and brown rice needs more liquid and time.
- Resist lifting the lid: Every time you peek, you release steam that the rice needs to cook through. Trust the timer and keep that lid on.
- Adjust liquid for altitude: If you’re cooking at high altitude, you may need an extra ¼ cup of broth since liquids evaporate faster.
- Test your rice: At the 18-minute mark, taste a few grains from the center. They should be tender with just a slight bite, not crunchy or mushy.
- Let it rest: Allowing the dish to sit off the heat for 5 minutes before serving lets the flavors meld and gives any remaining moisture time to absorb.
- Season in layers: I add salt when browning the beef, again with the spices, and do a final taste adjustment before serving. This builds more complex flavor than salting just once.
- Choose the right skillet size: A 12-inch skillet is ideal. Smaller pans will overcrowd the ingredients; larger ones may cause the liquid to evaporate too quickly.
Serving Suggestions
This skillet is hearty enough to stand on its own, but adding a few simple sides turns it into a complete fiesta. I usually keep things light since the main dish is already so filling.
The best accompaniments balance the richness of the beef and cheese with fresh, bright flavors. Think cool, crispy, or tangy elements that cut through the heartiness of the skillet.
Here’s how I typically serve it:
- Fresh toppings bar: Set out bowls of sour cream, diced avocado, sliced jalapeños, extra cilantro, and salsa so everyone can customize their plate. This is especially great when feeding kids or guests with different spice tolerances.
- Simple side salad: A crisp romaine lettuce salad with lime vinaigrette and pepitas provides the perfect contrast. Sometimes I’ll make my Broccoli Salad for extra crunch.
- Warm tortillas: Flour or corn tortillas warmed on a dry skillet let people scoop up the rice or even make impromptu tacos.
- Mexican street corn: Elote-style corn brings a sweet, creamy element that complements the savory skillet perfectly.
- Chips and guacamole: Keep it casual with tortilla chips and fresh guacamole on the side for scooping.
- Black beans: A simple pot of seasoned black beans adds extra protein and makes the meal even more substantial.
- Fresh pico de gallo: The bright acidity of fresh tomatoes, onions, and cilantro cuts through the richness beautifully.
You might also enjoy: Cabbage Roll Skillet
Variations to Try
One of my favorite things about this recipe is how easily it adapts to different tastes and dietary needs. I’ve experimented with countless variations, and here are the ones that worked brilliantly.
Feel free to mix and match these ideas based on what you have on hand or what your family prefers:
- Protein swaps: Replace ground beef with ground turkey, chicken, or pork for a lighter option. Plant-based ground “beef” also works surprisingly well—just reduce the cooking time slightly since it doesn’t need to brown as long.
- Different cheeses: Try pepper jack for extra heat, Monterey Jack for a milder flavor, or a Mexican cheese blend for authentic taste. A sprinkle of crumbled queso fresco on top adds a nice finishing touch.
- Add more vegetables: Throw in corn kernels, black beans, diced zucchini, or chopped spinach during the simmering stage. Frozen mixed peppers and onions are also a convenient shortcut.
- Spice it up or down: For heat lovers, add diced jalapeños with the bell pepper or stir in some hot sauce. To make it milder for kids, reduce the chili powder by half and skip the pepper entirely.
- Rice alternatives: Use brown rice (add 10 minutes to cooking time and ½ cup more liquid), cauliflower rice for low-carb (add it in the last 5 minutes), or quinoa following the same method as white rice.
- Mexican chorizo version: Replace half the ground beef with fresh Mexican chorizo for an intensely flavorful and slightly spicy variation.
- Tex-Mex twist: Add a can of Ro-Tel tomatoes instead of plain diced tomatoes, and stir in some ranch seasoning with your spices for that classic Tex-Mex taste.
Storage and Reheating
This skillet is one of those magical dishes that tastes even better the next day after all the flavors have had time to mingle. I actually make extra on purpose just to have leftovers for lunch.
Proper storage keeps this dish fresh and delicious for days:
- Refrigerator storage: Transfer cooled leftovers to an airtight container and refrigerate for up to 4 days. The rice will absorb more moisture as it sits, which actually makes the flavors more concentrated.
- Freezer storage: This freezes beautifully for up to 3 months. Portion into individual servings in freezer-safe containers, leaving some headspace for expansion. Label with the date and reheating instructions.
- Reheating on the stovetop: Add the leftover skillet to a pan with 2-3 tablespoons of water or broth. Cover and heat over medium-low, stirring occasionally, until warmed through (about 5-7 minutes).
- Microwave method: Place a portion in a microwave-safe dish, add a tablespoon of water, cover loosely, and heat on 50% power in 1-minute intervals, stirring between each, until hot.
- Oven reheating: Spread in an oven-safe dish, add a splash of broth, cover with foil, and bake at 350°F for 15-20 minutes. Remove the foil and top with fresh cheese in the last 5 minutes for a like-new texture.
- Add fresh elements: Refresh reheated portions with newly diced avocado, a squeeze of lime, and fresh cilantro to brighten up the flavors.
- Avoid over-reheating: The rice can get mushy if reheated too many times. Only reheat the portion you plan to eat immediately.
Read Also: Loaded Breakfast Skillet
Nutritional Facts
Understanding what’s in your food helps you make informed choices about portions and sides. This skillet provides a well-rounded mix of macronutrients that keeps you satisfied.
Per serving (based on 6 servings):
- Calories: 425
- Protein: 26g
- Carbohydrates: 38g
- Dietary Fiber: 3g
- Sugars: 4g
- Fat: 18g
- Saturated Fat: 8g
- Cholesterol: 75mg
- Sodium: 680mg
- Potassium: 520mg
- Vitamin A: 15% DV
- Vitamin C: 45% DV
- Calcium: 18% DV
- Iron: 20% DV
Keep in mind that these numbers can vary based on the exact brands you use and any modifications you make. Using lean ground beef (90/10) instead of 80/20 will reduce the fat and calories by about 80 per serving. Adding extra vegetables increases the fiber and vitamin content without adding many calories.
The serving size assumes this recipe makes 6 generous portions. If you’re serving it alongside other dishes or to lighter eaters, you could easily stretch it to 8 servings, which would reduce the calorie count to about 320 per serving.
Health Benefits of Key Ingredients
Beyond just tasting incredible, this skillet actually delivers some solid nutritional benefits. I feel good serving this to my family knowing it’s not just comfort food but nourishing food too.
Here’s what makes this dish more than just delicious:
Ground beef provides high-quality protein and is one of the best sources of heme iron, which your body absorbs more efficiently than plant-based iron. It also contains B vitamins, particularly B12, which supports energy metabolism and nervous system health. Choosing grass-fed beef when possible adds omega-3 fatty acids and conjugated linoleic acid (CLA).
Rice serves as the primary energy source, offering easily digestible carbohydrates that fuel your body and brain. White rice is enriched with folate and other B vitamins that were added back after processing. It’s also naturally gluten-free and gentle on the digestive system.
Bell peppers pack a serious vitamin C punch—one medium pepper contains more than 100% of your daily needs. They’re also rich in antioxidants like beta-carotene and quercetin, which support eye health and reduce inflammation. The bright red color indicates higher nutrient content than green peppers.
Tomatoes bring lycopene to the table, a powerful antioxidant associated with heart health and reduced cancer risk. Cooking tomatoes actually increases lycopene availability, making this dish a great way to absorb this beneficial compound. They also provide vitamins A and C, plus potassium.
Garlic and onions contain sulfur compounds that support immune function and may help regulate blood pressure and cholesterol levels. They also add prebiotic fiber that feeds beneficial gut bacteria, supporting overall digestive health.
The spices—cumin, chili powder, and paprika—aren’t just flavor enhancers. They contain anti-inflammatory compounds and have been used medicinally for centuries. Cumin aids digestion, while capsaicin in chili powder may boost metabolism.
Another favorite: Salmon Skillet
Frequently Asked Questions
1. Can I use instant rice instead of regular long-grain rice?
I don’t recommend using instant rice for this recipe. Instant rice is precooked and then dehydrated, which means it only needs a few minutes to rehydrate. If you use it with the full cooking time and liquid amounts in this recipe, you’ll end up with mushy, overcooked rice that breaks apart.
If instant rice is your only option, add it in the last 5 minutes of cooking with just ½ cup of liquid instead of the full amount called for in the recipe.
2. My rice turned out crunchy in the middle. What went wrong?
Crunchy rice usually means either not enough liquid or not enough cooking time. Check that you’re using the full 2 cups of broth plus the juices from the canned tomatoes—that liquid is crucial.
Also make sure your heat is low enough once you’ve covered the skillet. If the heat is too high, the liquid evaporates before the rice fully cooks. Next time, add an extra ¼ cup of liquid and give it a few more minutes covered.
3. Can I make this recipe in advance for meal prep?
Absolutely, this is one of my go-to meal prep recipes. Cook the complete dish as directed, then let it cool completely before portioning into containers.
It reheats beautifully throughout the week. I actually find the flavors develop even more after a day in the fridge. Just add a splash of water or broth when reheating to keep the rice from drying out.
4. How can I make this dish less spicy for my kids?
The spice level in this recipe is actually pretty mild, but you can easily adjust it. Reduce the chili powder to just 1 teaspoon or eliminate it entirely, and skip any fresh peppers like jalapeños in the mix.
You can also serve hot sauce on the side so adults can add heat to their own portions. My kids love this version with just cumin and paprika, which give flavor without heat.
5. What’s the best way to prevent the rice from sticking to the bottom?
Make sure your heat is set to low once you’ve covered the skillet—medium or high heat will cause sticking and burning. Also, don’t stir the rice after you’ve added the liquid and covered it; stirring releases starch and can make it gummy.
Using a well-seasoned cast iron skillet or a non-stick pan also helps. If you do get some stuck bits at the bottom, they usually add flavor rather than being a problem—just scrape them up when you fluff the rice at the end.
You might also enjoy: Summer Tortellini Skillet
Final Thoughts
This mexican beef and rice skillet recipe has earned its permanent spot in my weekly rotation, and I have a feeling it’ll do the same in yours. It’s the kind of recipe you’ll find yourself making without even looking at the instructions after a few times.
The combination of simplicity, flavor, and versatility makes it a true winner. I love knowing I can have a complete, satisfying dinner on the table in about 30 minutes with just one pan to clean. That’s the kind of cooking that actually fits into real life.
Give it a try this week and see how your family reacts. I’d love to hear what variations you come up with or what toppings become your favorites. Drop a comment below and let me know how it turns out!
Recommended:
- Breakfast Skillet
- Loaded Potato Soup
- Blueberry Cheesecake
- Basque Cheesecake
- Lemon Cheesecake
- Strawberry Cheesecake
- Chinese Chicken Salad
- Hot Chicken Salad
- Asian Chicken Salad
- Buffalo Chicken Salad


