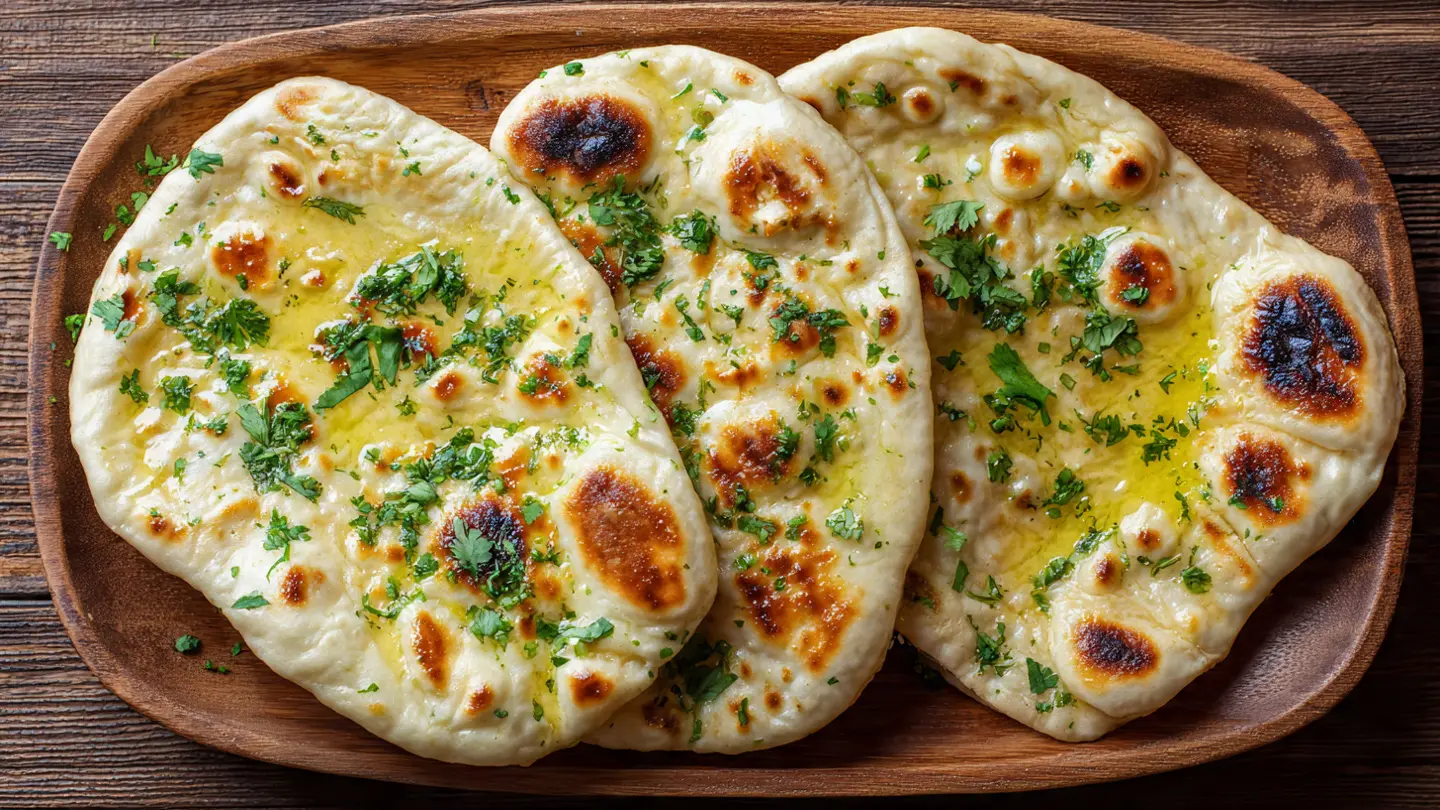
Homemade easy naan bread recipe brings restaurant-quality Indian flatbread right to your kitchen. This soft, pillowy bread with its signature charred bubbles is surprisingly simple to make with just a handful of basic ingredients. You don’t need a tandoor oven or any fancy equipment—just a hot skillet and about an hour of your time.
I started making naan at home because I was tired of the store-bought versions that never quite captured that fluffy, chewy texture I loved from my favorite Indian restaurant. After testing various recipes and techniques, I discovered that the secret lies in using yogurt for tenderness, proper yeast activation for those beautiful air bubbles, and cooking at the right temperature to get that perfect char without burning.
The beauty of this recipe is its versatility. You can keep it simple and plain, or brush it with garlic butter for extra flavor. It pairs beautifully with curries, dal, or even works as a wrap for grilled meats and vegetables.
Making naan from scratch might seem intimidating at first, but I promise it’s easier than you think. The dough comes together in minutes without any kneading required, and the rise time is relatively short compared to other bread recipes.
Once you taste homemade naan hot off the skillet, brushed with melted butter and sprinkled with a pinch of salt, you’ll understand why it’s worth the minimal effort. The aroma alone will transport you to an authentic Indian kitchen, and the taste is simply incomparable to anything you can buy at the store.
This recipe makes enough for 4-6 people, and it scales beautifully if you’re feeding a crowd. I often double the batch because leftover naan (if there is any) freezes wonderfully for quick weeknight meals.
For a heartier meal, serve this alongside Mediterranean Lentil Soup for a comforting dinner combination.
Why You’ll Love This Easy Naan Bread Recipe
This recipe transforms simple pantry staples into something truly special. Unlike store-bought versions that can be dry and lackluster, homemade naan has a tender crumb and delightful chewiness that makes every bite satisfying.
The process is forgiving for beginners yet delivers professional results. You don’t need any special skills or expensive equipment—just basic kitchen tools and a willingness to try something new.
- Quick and convenient: Ready in about 90 minutes, with only 30 minutes of active prep time
- Budget-friendly: Uses inexpensive ingredients you likely already have in your pantry
- No special equipment needed: A cast iron skillet or regular pan works perfectly
- Versatile: Serve plain, with garlic butter, or topped with herbs and seeds
- Freezer-friendly: Make a big batch and freeze for later
- Healthier than store-bought: No preservatives or artificial ingredients
- Impressive: Guests will think you spent hours in the kitchen
- Customizable: Easy to adapt with different toppings and flavors
You might also enjoy: Red Lentil Soup Recipe
Ingredients
This recipe relies on simple ingredients that work together to create soft, fluffy naan with authentic taste and texture. The combination of yogurt and yeast is what gives this bread its characteristic tenderness and beautiful air pockets.
- 2 ¼ teaspoons (7g) instant yeast (1 standard packet)
- 1 teaspoon granulated sugar
- ¾ cup (180ml) warm water (about 100-110°F/38-43°C)
- 2 ½ cups (315g) all-purpose flour, plus extra for dusting
- 1 teaspoon salt
- ½ cup (120g) plain yogurt (full-fat or low-fat, not Greek)
- 2 tablespoons olive oil, plus more for greasing
- 3 tablespoons melted butter or ghee, for brushing
- Optional: 2 cloves minced garlic, 2 tablespoons chopped fresh parsley or cilantro
Read Also: Turkish Lentil Soup Recipe
Kitchen Equipment Needed
Having the right tools makes the naan-making process smooth and enjoyable. While you don’t need anything fancy, a few key items will help you achieve the best results.
- Large mixing bowl for combining ingredients
- Cast iron skillet or heavy-bottomed pan (12-inch works best)
- Rolling pin for shaping the dough
- Clean kitchen towel or plastic wrap for covering dough
- Pastry brush for applying butter
- Measuring cups and spoons
- Small bowl for activating yeast
- Spatula or tongs for flipping
Another favorite: Greek Lentil Soup
Recommended Products for This Recipe
These carefully selected products will help you achieve bakery-quality naan with less effort and better results.
1. Lodge Cast Iron Skillet 12-Inch
A quality cast iron skillet distributes heat evenly and reaches the high temperatures needed for those signature charred bubbles on naan. Unlike regular pans, cast iron maintains consistent heat even when you add cold dough, ensuring perfect cooking every time. The 12-inch size is ideal for making naan that’s large enough to tear and share.
2. Premium Ghee
Authentic ghee brings an intensely buttery, nutty flavor that regular butter simply cannot match. It has a higher smoke point, so it won’t burn when you brush it on hot naan fresh off the skillet. A little goes a long way, and it transforms your naan from good to restaurant-quality.
3. King Arthur All-Purpose Flour
This flour has a higher protein content than many standard brands, which creates better structure and chewiness in your naan. The consistent quality means your dough will behave predictably every time, making it easier to achieve that perfect fluffy texture with beautiful air pockets.
4. Instant Read Thermometer
Getting your water temperature right is crucial for proper yeast activation. Too hot and you’ll kill the yeast; too cold and it won’t activate properly. An instant-read thermometer takes the guesswork out, ensuring your water is at the perfect 100-110°F every single time.
Try this comforting Moroccan Lentil Soup alongside your fresh naan.
Step-by-Step Instructions
Follow these detailed steps to create perfectly soft and bubbly naan bread. Take your time with each stage, and you’ll be rewarded with restaurant-quality results.
1. Activate the Yeast
The yeast activation is the foundation of fluffy, well-risen naan. This step ensures your yeast is alive and ready to create those beautiful air bubbles.
- In a small bowl, combine the warm water (100-110°F/38-43°C), sugar, and instant yeast
- Stir gently to dissolve the sugar
- Let the mixture sit for 8-10 minutes until it becomes foamy and bubbly on top
- If the mixture doesn’t foam, your yeast may be dead or the water temperature was incorrect—start over with fresh yeast
- The foam should be thick and creamy, indicating active, healthy yeast
2. Mix the Dry Ingredients
Properly combining the dry ingredients ensures even distribution throughout the dough.
- In a large mixing bowl, whisk together the all-purpose flour and salt
- Make sure there are no lumps in the flour
- Create a well in the center of the flour mixture, which will hold the wet ingredients
- This well method helps incorporate the wet and dry ingredients more evenly
3. Combine Wet Ingredients
The yogurt is key to achieving that signature tender texture in naan.
- In a medium bowl, whisk together the plain yogurt and olive oil until smooth
- Make sure the yogurt is at room temperature for easier mixing
- If using cold yogurt straight from the fridge, let it sit out for 15-20 minutes first
- The mixture should be completely smooth with no lumps
4. Form the Dough
This is where your naan dough comes to life.
- Pour the foamy yeast mixture into the well in the flour
- Add the yogurt and oil mixture to the well as well
- Using a wooden spoon or your hands, stir from the center outward, gradually incorporating the flour into the wet ingredients
- Continue mixing until a shaggy dough forms
- The dough should be soft and slightly sticky but manageable
- If the dough is too sticky to handle, add flour 1 tablespoon at a time
- If it’s too dry, add water 1 teaspoon at a time
5. Knead the Dough
A brief kneading develops just enough gluten for structure without making the naan tough.
- Lightly flour a clean work surface
- Turn the dough out onto the floured surface
- Knead the dough for 3-4 minutes using the heel of your hand
- Push the dough away from you, fold it back over itself, and rotate it a quarter turn
- Repeat this motion until the dough becomes smooth and elastic
- The dough should spring back slightly when poked
- Don’t over-knead—naan should be tender, not chewy like bagels
6. Let the Dough Rise
The rising period allows the yeast to work its magic, creating air pockets and developing flavor.
- Lightly grease your large mixing bowl with olive oil
- Shape the dough into a smooth ball
- Place the dough ball in the greased bowl, turning it to coat all sides with oil
- Cover the bowl tightly with plastic wrap or a damp kitchen towel
- Place the bowl in a warm, draft-free spot (75-85°F/24-29°C is ideal)
- Let rise for 60-90 minutes, or until doubled in size
- To create a warm environment, you can turn your oven to the lowest setting for 1 minute, then turn it off and place the bowl inside
- The dough should be puffy and soft when properly risen
7. Divide the Dough
Portioning the dough evenly ensures all your naan cook at the same rate.
- Once risen, punch down the dough to release excess gas
- Turn the dough out onto a lightly floured surface
- Divide the dough into 6-8 equal pieces (6 for larger naan, 8 for smaller ones)
- Roll each piece into a smooth ball
- Place the balls on a lightly floured surface and cover with a damp towel
- Let them rest for 10 minutes—this relaxes the gluten and makes rolling easier
8. Shape the Naan
The traditional teardrop shape is iconic, but any oval shape works beautifully.
- Work with one dough ball at a time, keeping the others covered
- On a lightly floured surface, use a rolling pin to roll each ball into an oval or teardrop shape
- Roll to about ¼ inch (6mm) thickness—not too thin or it won’t puff up
- The shape doesn’t need to be perfect; rustic naan has its own charm
- Gently stretch the dough with your hands if needed to achieve the desired shape
- If the dough resists or springs back, let it rest for another 5 minutes
9. Heat the Skillet
The right temperature is crucial for achieving those characteristic bubbles and char marks.
- Place your cast iron skillet or heavy-bottomed pan over medium-high heat
- Let it heat for at least 5 minutes until very hot
- To test if it’s ready, sprinkle a few drops of water on the surface—they should sizzle and evaporate immediately
- You don’t need to add any oil or butter to the skillet
- The pan should be hot enough that you feel heat radiating when you hold your hand 6 inches above it
10. Cook the Naan
This is where the magic happens as your dough transforms into fluffy, bubbled naan.
- Carefully place one rolled-out naan onto the hot, dry skillet
- Do not move it around—let it cook undisturbed
- Watch for large bubbles to form on the surface, which should happen within 1-2 minutes
- The bottom should develop golden-brown char spots
- Once you see bubbles forming and the edges starting to look dry, flip the naan using tongs or a spatula
- Cook the second side for 1-2 minutes until it also develops golden-brown spots
- The naan should puff up beautifully and feel light when done
- If it’s browning too quickly, reduce the heat slightly
- If it’s not getting char marks, increase the heat
11. Finish and Serve
The final butter brush is what makes homemade naan absolutely irresistible.
- As each naan comes off the skillet, immediately brush it generously with melted butter or ghee
- If using garlic, mix minced garlic into the melted butter before brushing
- Sprinkle with a small pinch of salt
- Add chopped fresh parsley or cilantro if desired
- Stack the finished naan on a plate and cover with a clean kitchen towel to keep warm
- The towel traps steam, keeping the naan soft and pliable
- Serve warm for the best texture and flavor
This pairs wonderfully with Mulligatawny Soup for an authentic Indian meal.
Tips for Success
These tried-and-tested tips will help you avoid common pitfalls and make perfect naan every time. Small details make a big difference in the final result.
- Check water temperature carefully: Use a thermometer to ensure your water is between 100-110°F. Too hot will kill the yeast, too cold won’t activate it properly.
- Don’t skip the yeast proofing: Even though instant yeast can be added directly to flour, proofing it first ensures it’s active and creates fluffier naan.
- Use the right flour: All-purpose flour with at least 10-12% protein content works best. King Arthur and Bob’s Red Mill are reliable brands.
- Don’t add too much flour: The dough should be soft and slightly sticky. Adding too much flour makes dense, tough naan.
- Give it enough rise time: Patience pays off. Don’t rush the rising process—the dough should truly double in size.
- Keep your skillet hot: A properly heated skillet is essential for those signature bubbles and char marks.
- Don’t overcrowd the pan: Cook one naan at a time for even cooking and proper puffing.
- Work quickly when shaping: Roll out one naan, cook it, then roll the next while the first one is cooking to maintain efficiency.
- Brush with butter immediately: Apply the butter while the naan is still hot so it melts into the surface.
- Use full-fat yogurt: Low-fat yogurt works, but full-fat creates the most tender results.
For another delicious pairing, try Udon Noodle Soup.
Serving Suggestions

Naan is incredibly versatile and complements a wide range of dishes. It’s perfect for scooping up sauces, wrapping around fillings, or simply enjoying on its own.
This Indian flatbread shines when served alongside rich, flavorful dishes that benefit from something to soak up delicious sauces. The soft, pillowy texture makes it ideal for dipping and scooping.
- Pair with curries: Chicken Tikka Masala, butter chicken, or lamb vindaloo
- Serve with soups and stews: Dal makhani, chana masala, or lentil soup
- Make wraps: Fill with grilled chicken, lamb kebabs, or falafel
- Create pizzas: Top with sauce, cheese, and your favorite toppings
- Enjoy with dips: Classic Hummus, baba ganoush, or raita
- Serve as an appetizer: Cut into strips and serve with yogurt sauce
- Make breakfast sandwiches: Use as a base for eggs and cheese
- Pair with salads: Healthy Chicken Salad wrapped in warm naan
Another favorite: Chicken Sopas
Variations to Try
Once you’ve mastered the basic recipe, these variations add exciting new flavors and textures. Don’t be afraid to get creative and make this recipe your own.
- Garlic Naan: Mix 3-4 cloves of minced garlic into the melted butter before brushing on the hot naan
- Herb Naan: Add 2 tablespoons of chopped fresh herbs (cilantro, parsley, or basil) to the dough
- Onion Kulcha: Knead finely chopped onions, green chilies, and cilantro into the dough before shaping
- Cheese Naan: Place a tablespoon of shredded mozzarella or paneer in the center of each portion before rolling out
- Whole Wheat Naan: Replace up to half the all-purpose flour with whole wheat flour for a nuttier flavor
- Seeded Naan: Sprinkle nigella seeds, sesame seeds, or poppy seeds on top before cooking
- Peshwari Naan: Fill with a mixture of coconut, raisins, and ground almonds for a sweet version
- Spicy Naan: Add ½ teaspoon of red chili flakes to the dough for a kick
This goes beautifully with Chicken Rice Soup.
Storage and Reheating
Proper storage keeps your naan fresh and delicious for days, making it perfect for meal prep. These methods preserve the soft texture and buttery flavor.
- Room temperature: Store in a zip-top bag for 1-2 days. Keep away from direct sunlight and heat.
- Refrigerator: Place in an airtight container or zip-top bag for 4-5 days. Separate layers with parchment paper to prevent sticking.
- Freezer: Wrap each naan individually in plastic wrap, then place in a freezer bag for up to 3 months. Label with the date.
- Reheating from frozen: Thaw at room temperature for 30 minutes, or microwave for 20-30 seconds.
- Reheating in skillet: Heat a dry skillet over medium heat and warm each side for 30-60 seconds.
- Reheating in oven: Wrap in aluminum foil and heat at 350°F (175°C) for 10 minutes.
- Microwave method: Wrap in a damp paper towel and microwave for 15-20 seconds.
- Avoid refrigeration if possible: Room temperature or frozen storage maintains better texture than refrigeration.
Perfect alongside Hamburger Soup for a complete meal.
Nutritional Facts
Per serving (1 naan, based on 6 servings):
- Calories: 245
- Total Fat: 8g
- Saturated Fat: 3g
- Cholesterol: 12mg
- Sodium: 410mg
- Total Carbohydrates: 36g
- Dietary Fiber: 1g
- Sugars: 3g
- Protein: 6g
- Calcium: 45mg
- Iron: 2mg
Nutritional information is approximate and may vary based on specific ingredients used.
Health Benefits of Key Ingredients
While naan is a treat food, the ingredients do offer some nutritional value. Understanding what each component contributes helps you make informed choices.
The combination of yogurt and flour provides a mix of macronutrients that fuel your body. These ingredients work together to create a satisfying food that can be part of a balanced diet.
- Yogurt: Provides probiotics for gut health, calcium for bone strength, and protein for muscle maintenance
- Whole wheat flour option: Adds dietary fiber, B vitamins, and minerals like magnesium and iron
- Olive oil: Contains heart-healthy monounsaturated fats and anti-inflammatory compounds
- Garlic: Offers immune-boosting properties and may help reduce blood pressure
- Yeast: Provides B vitamins, particularly B12, and trace minerals
You might also enjoy: Spinach Soup
Frequently Asked Questions
1. Can I make naan without yogurt?
Yes, you can substitute yogurt with an equal amount of sour cream or milk mixed with a tablespoon of lemon juice. The yogurt adds tenderness and tang, so the texture may be slightly different without it.
However, I highly recommend sticking with yogurt for the most authentic results. It creates that signature soft, pillowy texture that makes naan so special.
2. Why didn’t my naan puff up?
The most common reasons are insufficient heat in your skillet or rolling the dough too thin. Make sure your pan is very hot before adding the naan, and roll to about ¼ inch thickness.
Also check that your yeast was active and the dough rose properly. Dead yeast won’t create the air pockets needed for puffing.
3. Can I use active dry yeast instead of instant yeast?
Yes, but you’ll need to dissolve it in the warm water and let it sit for about 10 minutes until foamy before adding it to the other ingredients. The rising time may also be slightly longer.
Use the same amount of active dry yeast as called for with instant yeast. The final results will be virtually identical.
4. Can I make the dough ahead of time?
Absolutely! You can refrigerate the dough after the first rise for up to 24 hours. Let it come to room temperature for 30 minutes before shaping and cooking.
For longer storage, freeze the dough after the first rise. Thaw overnight in the refrigerator, then bring to room temperature before proceeding.
5. What’s the difference between naan and pita bread?
Naan contains yogurt and sometimes eggs, making it richer and more tender than pita. Pita is made with just flour, water, yeast, and salt.
Naan is traditionally cooked in a tandoor oven or on a skillet, while pita is baked in an oven. Pita typically has a pocket, whereas naan is solid throughout.
Try serving with Celery Soup for a lighter meal option.
Final Thoughts
Making easy naan bread recipe at home is one of those cooking experiences that feels both impressive and deeply satisfying. The process is simple enough for beginners, yet the results rival anything you’d find in a restaurant.
I hope this recipe inspires you to try making naan in your own kitchen. The soft, buttery bread fresh off the skillet is truly something special.
Once you master this basic recipe, feel free to experiment with different toppings and fillings. Share your creations in the comments below—I’d love to hear about your naan-making adventures and any variations you’ve tried!
Recommended:
- Corn Soup Recipe
- Chicken Tinola Recipe
- Lobster Bisque Recipe
- Curried Cauliflower Soup Recipe
- Roasted Cauliflower Soup Recipe
- Cauliflower Soup Recipe
- Roasted Carrot Soup Recipe
- Carrot Soup Recipe
- Vegetarian Split Pea Soup Recipe
- Black Eyed Pea Soup Recipe


