If you’ve ever wanted to make a dry brine turkey recipe that actually delivers on its promise, you’re in the right place. This method has become the go-to technique for home cooks and professional chefs alike, and once you try it, you’ll never go back to a plain roasted bird.
The idea is simple: a blend of kosher salt, baking powder, and savory spices gets rubbed all over the turkey, then the bird rests uncovered in the fridge for 24 to 72 hours before roasting.
That time in the refrigerator is where the magic happens. The salt draws moisture out of the meat, dissolves into it, and then gets pulled back in, seasoning the turkey from the inside out rather than just coating the surface.
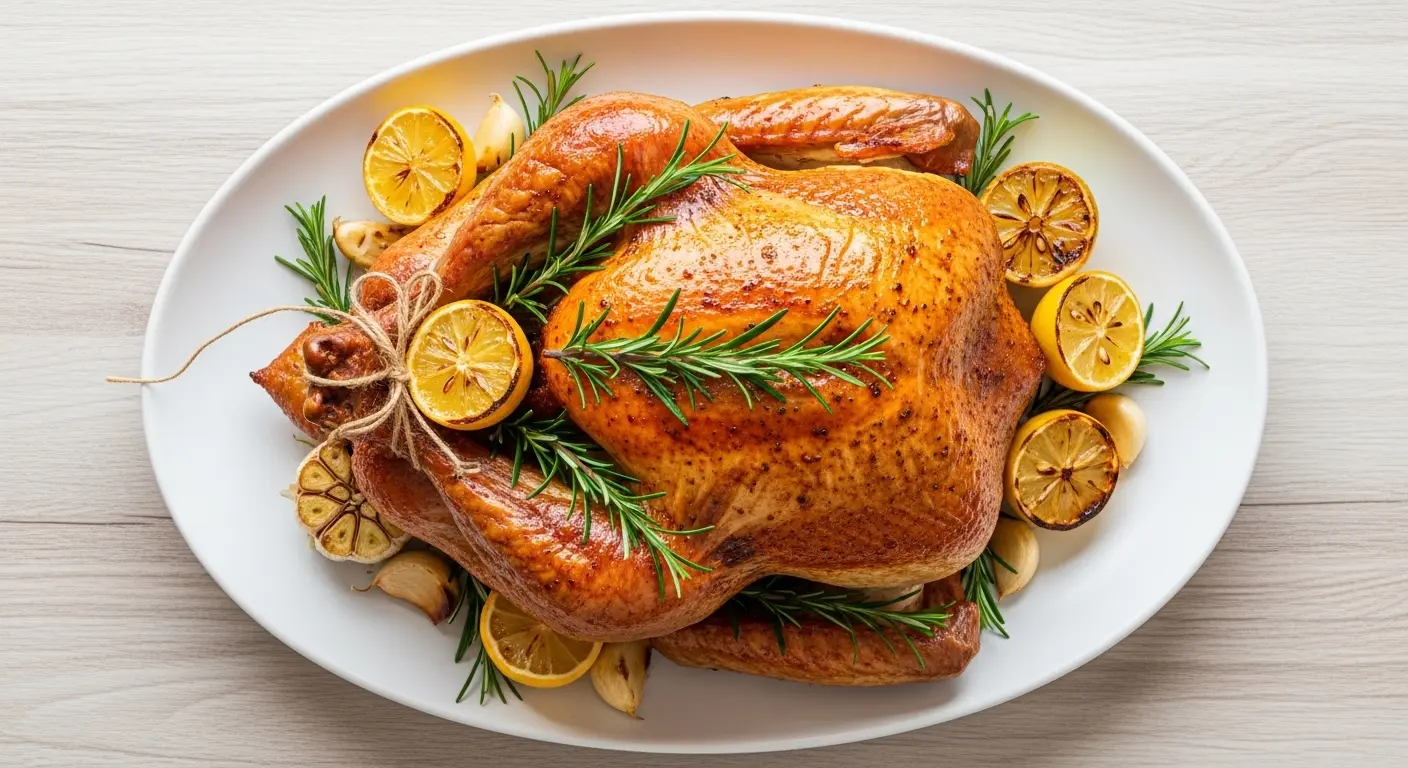
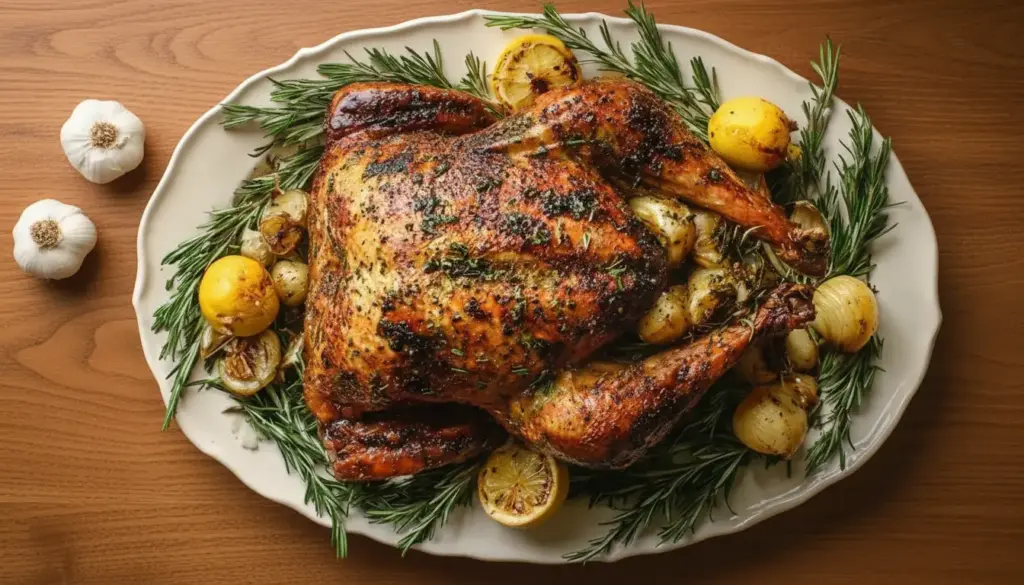
The result? Deeply flavorful meat that stays incredibly juicy throughout cooking, plus skin that crisps up beautifully in the oven without any extra fussing or basting.
No buckets. No gallons of liquid. No brining bags. Just a rack, a rimmed baking sheet, and a little patience.
You might also enjoy this classic Thanksgiving Turkey Recipe for another reliable approach to the holiday centerpiece.
Why You’ll Love This Dry Brine Turkey Recipe
This recipe takes most of the guesswork out of holiday cooking.
The dry brine does almost all the work for you, so you can focus on the rest of your meal instead of hovering over the oven.
It’s also far less stressful than a wet brine. You don’t need to find refrigerator space for a giant pot of liquid or figure out what to do with gallons of briny water when you’re done.
The flavor is also noticeably better. Because the salt and seasonings penetrate the meat rather than just sitting on the surface, every single bite is seasoned.
Here’s a quick look at why this approach stands out:
- Deeply seasoned meat from within, not just on the skin
- Crispy, golden skin thanks to the baking powder in the brine and the dry refrigerator air
- Juicy, tender texture that holds up beautifully even if you accidentally leave it in the oven a few extra minutes
- No special equipment needed, just a rimmed baking sheet and a wire rack
- Minimal hands-on time since most of the work happens while the turkey rests in the fridge
- Flexible timing as even 24 hours of brining makes a significant difference
Read Also: Turkey Gravy Recipe
Ingredients
The brine ingredients are simple, but each one plays a specific role. Kosher salt is the foundation, baking powder adds that extra crispy skin, and the spices layer in flavor that tastes like Thanksgiving in every bite.
- 1 whole turkey (12 to 14 pounds / 5.4 to 6.4 kg), thawed
- 3 tablespoons kosher salt (Diamond Crystal preferred; use 2 tablespoons if using Morton’s)
- 1 teaspoon baking powder
- 1 teaspoon freshly ground black pepper
- 1 teaspoon garlic powder
- 1 teaspoon onion powder
- 1 teaspoon smoked paprika
- 1 teaspoon dried thyme
- 1 teaspoon dried rosemary, crumbled
- 1 teaspoon lemon zest (from about half a lemon)
For roasting:
- 4 tablespoons (60 g) unsalted butter, softened
- 1 medium yellow onion, quartered
- 4 garlic cloves, smashed
- 1 lemon, halved
- 4 sprigs fresh thyme
- 2 sprigs fresh rosemary
- 1 cup (240 ml) low-sodium chicken broth or turkey stock
Another great option for the holidays: Sausage Stuffing Recipe
Kitchen Equipment Needed
Having the right setup makes the process smooth from start to finish.
- Heavy-duty roasting pan with rack
- Wire rack (fits inside the baking sheet or roasting pan)
- Small mixing bowl
- Paper towels
- Instant-read meat thermometer
- Pastry brush or spoon for spreading butter
- Aluminum foil (for tenting while resting)
- Kitchen twine for trussing (optional)
- Sharp carving knife and fork set
For a fun twist on leftover turkey: Turkey Skillet Recipe
Recommended Products for This Recipe
These are products I genuinely recommend based on performance and how much they improve the final result.
1. Diamond Crystal Kosher Salt
Not all kosher salts are the same. Diamond Crystal has a lighter, flakier grain than Morton’s, which means it distributes more evenly over the turkey and is less likely to over-salt your bird. Using the right salt makes a real difference with dry brining.
2. Heavy-Duty Roasting Pan with Rack
A quality roasting pan with a sturdy rack elevates the turkey so air can circulate underneath, which is key to getting crispy skin all the way around. It also makes it easy to collect the drippings for gravy.
3. Instant-Read Meat Thermometer
Guessing when a turkey is done is how you end up with a dry bird. A reliable instant-read thermometer takes the guesswork out completely and ensures the turkey hits the safe internal temperature of 165°F (74°C) without overcooking.
4. Turkey Baster
While this dry brine recipe doesn’t require basting, having a good baster on hand lets you use the pan drippings to deepen the color on the skin during the last stretch of roasting if needed.
5. Natural Kitchen Twine
A simple roll of natural kitchen twine lets you truss the legs easily, helping the turkey hold a compact, even shape in the oven for more uniform cooking.
For a classic holiday dessert to complete your feast: Classic Pumpkin Pie Recipe
Step-by-Step Instructions
Step 1: Thaw the Turkey Completely
- Remove the turkey from the freezer 3 to 5 days before cooking, depending on its size.
- Plan for approximately 24 hours of thawing time for every 4 to 5 pounds (1.8 to 2.3 kg) of turkey.
- Place the turkey breast-side up on a rimmed tray or in a container to catch any drips while it thaws in the refrigerator.
- Never thaw turkey at room temperature, as this creates unsafe conditions for bacterial growth.
- Once fully thawed, make sure the turkey is completely defrosted before brining, especially in the cavity and near the joints.
Step 2: Remove the Giblets and Prep the Turkey
- Reach inside the cavity and remove the bag of giblets and the neck, which are often tucked inside.
- Set aside the giblets and neck if you plan to use them for making turkey stock or gravy.
- Place the turkey on a clean work surface or large cutting board.
- Pat the entire surface of the turkey completely dry using paper towels, including the inside of the cavity.
- Getting the turkey very dry at this stage is critical; excess moisture will steam during roasting instead of allowing the skin to crisp.
Step 3: Make the Dry Brine Mixture
- Combine the kosher salt, baking powder, black pepper, garlic powder, onion powder, smoked paprika, dried thyme, crumbled dried rosemary, and lemon zest in a small bowl.
- Stir everything together until fully mixed.
- The baking powder is not just for flavor; it raises the pH of the skin, which promotes faster browning and a noticeably crunchier texture during roasting.
- If you’re using Morton’s kosher salt instead of Diamond Crystal, reduce the amount to 2 tablespoons, as Morton’s is significantly denser and saltier by volume.
Step 4: Apply the Dry Brine
- Set the turkey breast-side up on a wire rack set inside a rimmed baking sheet or roasting pan.
- Starting at the neck cavity, gently slide your hand between the skin and the breast meat to loosen the skin without tearing it.
- Rub about one-third of the dry brine mixture directly onto the breast meat underneath the skin, using your fingers to spread it as evenly as possible.
- Sprinkle the remaining brine all over the outside of the turkey, including the back, legs, thighs, and wings.
- Don’t forget the cavity; sprinkle a small amount inside there as well.
- Use your hands to gently pat the brine into the skin so it adheres.
Step 5: Refrigerate Uncovered
- Slide the entire baking sheet with the rack and turkey into the refrigerator.
- Leave the turkey completely uncovered throughout the entire brining period.
- Keeping it uncovered is intentional; the circulating refrigerator air dries out the skin progressively, which is what allows it to get so crispy during roasting.
- Refrigerate for a minimum of 24 hours and up to 72 hours; longer brining times yield more flavor and crispier skin.
- If you can only manage 24 hours, the results will still be dramatically better than an unbrined turkey.
Step 6: Prepare for Roasting
- Remove the turkey from the refrigerator 1 hour before roasting so it can come closer to room temperature, which promotes more even cooking.
- Preheat your oven to 425°F (220°C).
- Do not rinse the brine off the turkey; rinsing adds unwanted moisture back to the skin and wastes the seasoning that has been absorbed into the meat.
- In a small bowl, mash together the softened butter with a pinch of black pepper until smooth.
- Spread the softened butter all over the outside of the turkey, and tuck a little under the breast skin if possible.
Step 7: Prepare the Cavity and Aromatics
- Stuff the cavity loosely with the quartered onion, smashed garlic cloves, lemon halves, fresh thyme sprigs, and fresh rosemary sprigs.
- These aromatics don’t season the meat the way the brine does, but they release moisture and fragrant steam during roasting that perfumes the turkey from the inside.
- If desired, tie the legs together with kitchen twine to help the turkey maintain a compact, even shape in the oven.
- Pour 1 cup (240 ml) of chicken or turkey broth into the bottom of the roasting pan; this prevents the drippings from burning and creates a flavorful base for gravy.
Step 8: Roast the Turkey
- Place the prepared turkey breast-side up on the rack in the roasting pan.
- Roast at 425°F (220°C) for the first 30 minutes to quickly develop color on the skin.
- After 30 minutes, reduce the oven temperature to 325°F (165°C) and continue roasting.
- Plan for approximately 13 minutes per pound (about 28 minutes per kg) at 325°F as a rough guideline, but always use a thermometer rather than relying solely on timing.
- If the skin starts to get too dark before the turkey is done, tent it loosely with a piece of aluminum foil.
Step 9: Check the Internal Temperature
- Begin checking the internal temperature about 30 minutes before you expect the turkey to be done.
- Insert your instant-read thermometer into the thickest part of the thigh, making sure the probe is not touching the bone, which can give a falsely high reading.
- Also check the temperature in the thickest part of the breast.
- The turkey is ready to come out of the oven when the thigh reads 165°F (74°C) and the breast reads at least 155°F (68°C); the breast will continue rising 5 to 10 degrees as it rests.
- If the thigh is done but the breast isn’t quite there, you’re in good shape; continue checking every 10 minutes.
Step 10: Rest Before Carving
- Transfer the turkey carefully to a cutting board or large serving platter.
- Tent it loosely with aluminum foil and let it rest for at least 30 minutes before carving, and up to 45 to 60 minutes for a larger bird.
- Resting is non-negotiable; cutting into the turkey too soon allows all those carefully preserved juices to run out onto the board instead of staying in the meat.
- Use the resting time to finish your gravy using the drippings collected in the roasting pan.
- Carve and serve immediately.
The pan drippings from this turkey make incredible gravy, and the carved meat pairs beautifully with Cranberry Sauce on the table.
Tips for Success
A few extra details can take your turkey from great to outstanding.
- Use Diamond Crystal kosher salt if possible. It’s less dense than Morton’s, so you get more even coverage and less risk of an over-salted bird. If you can only find Morton’s, reduce the amount by about 25%.
- Don’t rush the brine. Twenty-four hours is the minimum, but 48 to 72 hours gives you noticeably better flavor and crispier skin.
- Keep the turkey uncovered in the fridge. This dries the skin progressively and is one of the main reasons the dry brine method produces such excellent texture.
- Don’t rinse. Rinsing adds moisture back to the skin and dilutes the seasoning you worked hard to apply.
- Rest generously. At least 30 minutes, ideally closer to 45, gives the juices time to redistribute throughout the meat.
- Use a thermometer every time. Oven temperatures vary, and turkey size affects cook time. A thermometer is the only reliable way to know when you’re done.
- Start hot, finish low. The initial blast at 425°F sets the skin color, and the lower temperature finishes the interior gently and evenly.
For a hearty vegetable side dish alongside your bird: Green Bean Casserole Recipe
Serving Suggestions
A beautifully dry-brined turkey deserves an equally beautiful spread.
The bird itself is the centerpiece, but the right accompaniments elevate the whole meal into something truly memorable.
- Sweet Potato Casserole for a sweet, buttery balance alongside the savory turkey
- Dinner Rolls for soaking up every last drop of gravy
- Corn Souffle for a lighter, airy side that contrasts beautifully with the rich turkey
- Garlic Mashed Potatoes for the ultimate comfort food pairing
- Collard Greens for a Southern-inspired touch
- Roasted Brussels Sprouts with Bacon for a crispy, savory green side
- Scalloped Potatoes for a creamy, indulgent potato dish
For a delicious use of holiday leftovers: Turkey Tetrazzini
Variations to Try
The classic dry brine is hard to beat, but there are a few easy ways to put your own stamp on it.
- Citrus herb brine: Add extra lemon zest, orange zest, and dried sage to the brine for a brighter, more aromatic flavor profile.
- Spicy brine: Mix in a teaspoon of cayenne pepper and a pinch of chipotle powder for a subtle heat that builds with each bite.
- Maple and brown sugar brine: Add a tablespoon of brown sugar and brush the turkey with a light coating of maple syrup in the last 20 minutes of roasting for a sweet, caramelized finish.
- Herb butter variation: After brining, spread compound butter loaded with fresh garlic, thyme, and parsley under the skin before roasting for an extra layer of richness.
- Spatchcock dry brine: Remove the backbone and flatten the turkey before brining. This speeds up roasting significantly and results in even crispier skin across the entire bird.
Read Also: Air Fryer Turkey Breast Recipe
Storage and Reheating
Leftover dry-brined turkey stores beautifully and works wonderfully in many follow-up meals.
- Refrigerator: Store carved turkey in an airtight container with a small amount of broth or drippings drizzled over the top to keep it moist. It will keep well for up to 4 days.
- Freezer: For longer storage, wrap carved turkey tightly in plastic wrap, then in a layer of aluminum foil, and freeze for up to 3 months. Label with the date.
- Reheating in the oven: Place turkey slices in a baking dish, add a splash of broth, and cover tightly with foil. Warm in a 300°F (150°C) oven for 15 to 20 minutes until heated through. This gentle method prevents the meat from drying out.
- Microwave reheating: For quick reheating, place a few slices on a plate, add a tiny splash of broth, cover loosely with a damp paper towel, and heat in 30-second intervals until warm.
For a warming leftover idea: Turkey Soup Recipe
Nutritional Facts
The following estimates are based on a 6-ounce (170 g) serving of roasted turkey breast meat (no skin) from a 13-pound dry-brined bird.
| Nutrient | Amount Per Serving |
|---|---|
| Calories | 210 |
| Total Fat | 4 g |
| Saturated Fat | 1 g |
| Cholesterol | 110 mg |
| Sodium | 620 mg |
| Total Carbohydrates | 0 g |
| Dietary Fiber | 0 g |
| Total Sugars | 0 g |
| Protein | 44 g |
| Potassium | 480 mg |
Sodium content reflects absorption from the dry brine and will vary based on brining time and turkey size. Values are approximate.
Read Also: Turkey Chili Recipe
Health Benefits of Key Ingredients
Turkey is genuinely one of the more nutritious proteins you can put on the table, and this preparation method keeps it that way.
Because the dry brine doesn’t require added fats or heavy sauces during cooking, the turkey stays relatively lean while still delivering incredible flavor.
- Turkey (lean protein): An excellent source of complete protein containing all essential amino acids, supporting muscle maintenance, immune function, and satiety.
- Garlic powder: Contains allicin, a compound with well-documented antimicrobial and anti-inflammatory properties that contributes to immune health.
- Smoked paprika: Rich in antioxidants including beta-carotene and capsanthin, which help fight cellular oxidative stress.
- Thyme and rosemary: Both herbs are packed with antioxidants and have been used for centuries in traditional medicine to support digestion and respiratory health.
- Lemon zest: Provides a concentrated hit of vitamin C and bioflavonoids that support immune function and collagen production.
- Black pepper: Contains piperine, which research suggests may enhance the absorption of other nutrients and has mild anti-inflammatory properties.
For a lighter turkey-based meal throughout the year: Turkey Wild Rice Soup
Frequently Asked Questions
1. What is the difference between dry brining and wet brining a turkey?
Wet brining involves submerging the turkey in a large container of saltwater solution for 12 to 24 hours. Dry brining skips the liquid entirely and instead applies a salt and spice rub directly to the meat and skin, then lets it rest uncovered in the refrigerator. Dry brining is less messy, requires no special equipment, produces crispier skin, and tends to deliver a more concentrated flavor.
2. How long should I dry brine a turkey?
A minimum of 24 hours gives you noticeable results, but 48 to 72 hours is where the real magic happens. The longer brine time allows the salt to penetrate deeper into the meat, and the extended refrigerator time dries out the skin more thoroughly, leading to even crispier results. If you’re short on time, even a 12-hour brine is better than no brine at all.
3. Do I need to rinse the dry brine off before cooking?
No, and in fact, you should not rinse it off. The salt has already been absorbed into the meat, so rinsing won’t remove the seasoning from the interior. All rinsing does is add surface moisture back to the skin, which works against the crispy skin you’ve been working toward during the entire brining period.
4. What size turkey works best for dry brining?
A 12 to 14 pound (5.4 to 6.4 kg) turkey is the sweet spot for most home cooks. It’s large enough to feed a crowd but small enough to cook evenly without the outside drying out before the interior is done. If you’re cooking a larger bird, increase the brine proportions accordingly, using roughly 1 tablespoon of kosher salt per 4 to 5 pounds of turkey.
5. Can I dry brine a turkey that has already been pre-basted or injected with solution?
Yes, but you need to be careful with the salt amount. Pre-basted or self-basting turkeys already contain added sodium, so using a full dry brine can result in an overly salty bird. Reduce the kosher salt to about half the usual amount, and skip adding any additional salt to the cavity. These turkeys still benefit from the herbs, baking powder, and spices in the brine, even with reduced salt.
Read Also: Turkey Pot Pie Recipe
Final Thoughts
Making a dry brine turkey recipe truly is one of those techniques that feels intimidating the first time and then becomes something you look forward to every year.
The result speaks for itself: juicy, deeply seasoned meat with that gorgeous crackly skin that everyone fights over at the table.
Give this method a try for your next Thanksgiving or holiday gathering, and I think you’ll find yourself wondering why you ever roasted turkey any other way.
If you make it, leave a comment below and let me know how it turned out! I’d love to hear what variations you tried or which sides you served it with. And if you think a friend or family member could use this recipe before the holidays, please share it.
Recommended:
- Turkey Barley Soup Recipe
- Air Fryer Turkey Legs Recipe
- Air Fryer Turkey Thighs Recipe
- Turkey Meatball Recipe
- Prime Rib Recipe
- Cornish Hen Recipe
- Meatloaf Recipe
- Sweet Potato Pie Recipe
- Roasted Potatoes Recipe
- Honey Roasted Carrots Recipe


