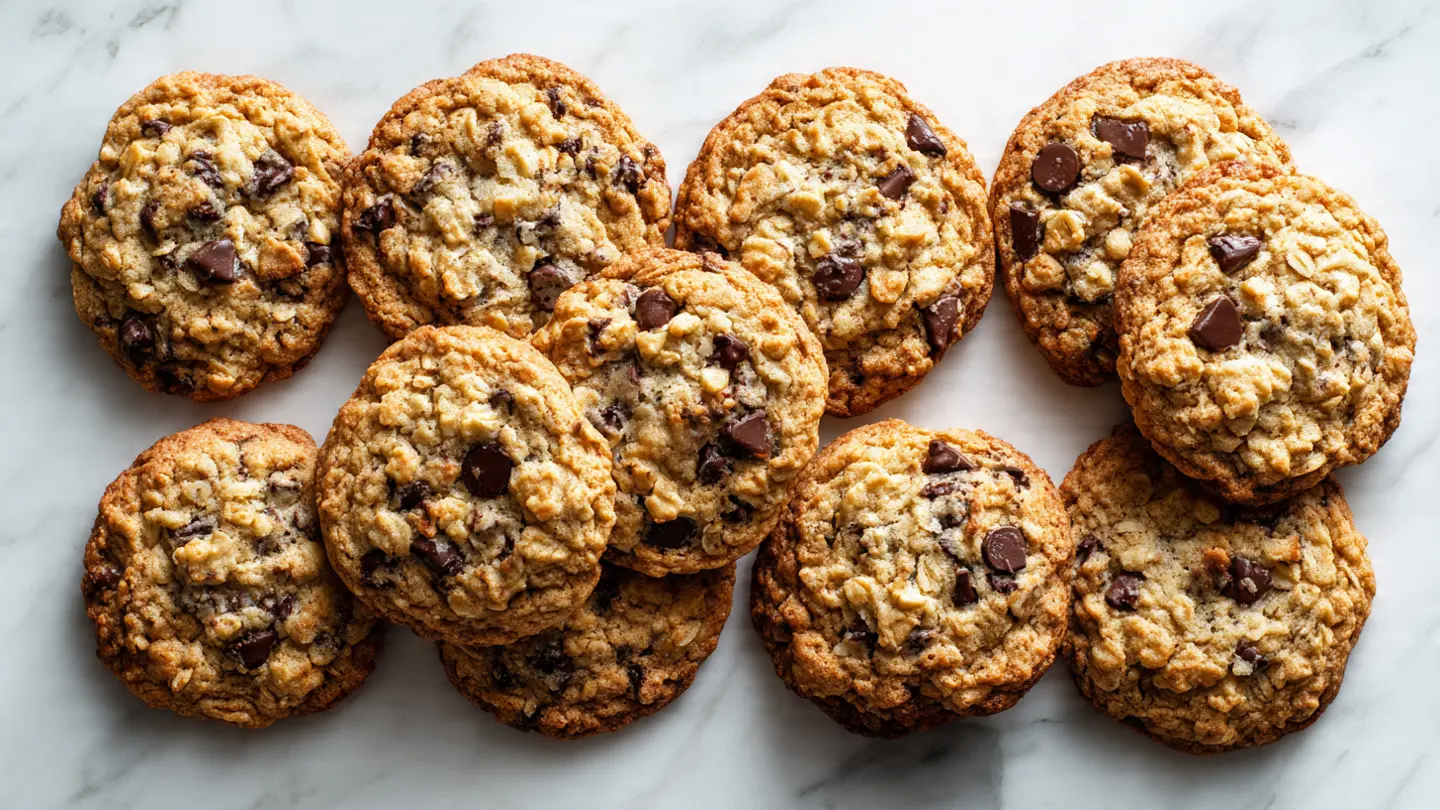
Nothing beats the irresistible combination of buttery oats and melty chocolate in this chewy oatmeal chocolate chip cookie recipe. These cookies deliver perfectly crisp edges and soft, gooey centers that stay fresh for days.
The magic happens when old-fashioned rolled oats meet rich brown sugar and pockets of chocolate in every bite.
Making these from scratch takes less than 30 minutes of active time. You’ll achieve bakery-quality results without any special equipment or technique.
The texture comes from a thoughtful balance of ingredients. Brown sugar creates moisture and chewiness, while the oats add heartiness without making the cookies heavy or dry.
Each cookie bakes up thick and substantial with those coveted caramelized edges. The centers stay tender long after they cool.
This recipe produces consistent results every single time. No chilling required, no guesswork, just reliably delicious cookies that disappear fast.
Why You’ll Love This Chewy Oatmeal Chocolate Chip Cookie Recipe
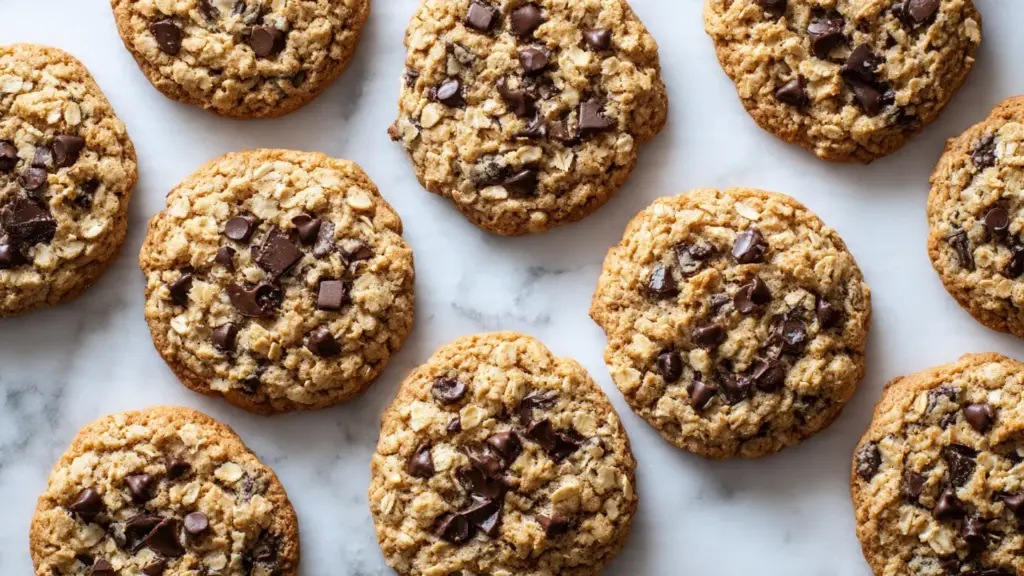
These cookies hit the sweet spot between wholesome and indulgent. The oats add texture and a subtle nutty flavor that complements the chocolate beautifully.
They stay soft for days when stored properly, unlike many oatmeal cookies that turn hard overnight. The combination of brown and white sugar locks in moisture while creating those crispy edges everyone loves.
- Perfect texture every time – crispy on the outside, chewy in the middle, never cakey or dry
- No mixer required – everything comes together with just a bowl and spatula
- Quick and easy – from start to finish in under an hour with no dough chilling
- Customizable – swap chocolate chips for your favorite mix-ins
- Great for sharing – makes 24 generous cookies that transport well
- Pantry-friendly ingredients – no specialty items needed
The recipe scales beautifully for gatherings. Double the batch and freeze half the dough for freshly baked cookies anytime.
Brown butter variations add an extra layer of nutty richness. The basic version already delivers incredible flavor that rivals any bakery.
If you love cookies with oats, try this easy granola recipe for another delicious way to enjoy them.
Ingredients
These ingredients work together to create the ideal chewy texture and rich flavor. Each component plays a specific role in the final result.
The combination of butter types and sugars creates moisture, while the oats provide structure without heaviness. Quality chocolate makes a noticeable difference in taste.
- 1 cup (2 sticks or 226g) unsalted butter, softened to room temperature
- 1 cup (200g) packed light brown sugar
- ½ cup (100g) granulated white sugar
- 2 large eggs, room temperature
- 2 teaspoons pure vanilla extract
- 1½ cups (190g) all-purpose flour
- 1 teaspoon baking soda
- 1 teaspoon ground cinnamon
- ½ teaspoon salt
- 3 cups (270g) old-fashioned rolled oats
- 2 cups (340g) semi-sweet chocolate chips
Kitchen Equipment Needed
Having the right tools makes the baking process smooth and ensures consistent results. Most of these items are standard kitchen staples.
A light-colored baking sheet prevents over-browning on the bottoms. Parchment paper eliminates sticking and makes cleanup effortless.
- Large mixing bowl for combining wet ingredients
- Medium mixing bowl for dry ingredients
- Whisk for blending dry ingredients
- Wooden spoon or rubber spatula for mixing dough
- Light-colored baking sheets (2-3 sheets)
- Parchment paper or silicone baking mats
- Cookie scoop (2-tablespoon size) for uniform cookies
- Wire cooling rack for proper cooling
- Measuring cups and spoons
- Kitchen scale (optional but recommended for precision)
The easiest way to enjoy breakfast treats is with this easy waffle recipe.
Recommended Products for This Recipe
These specific products elevate your baking results and make the process more enjoyable. Quality ingredients and tools produce noticeably better cookies.
1. Bob’s Red Mill Old Fashioned Rolled Oats
These oats maintain their texture during baking, creating the perfect chewy consistency without becoming mushy. The large flakes add visual appeal and satisfying bite to every cookie.
2. Ghirardelli Semi-Sweet Chocolate Chips
Premium chocolate makes a remarkable difference in flavor. These chips hold their shape beautifully while still delivering melty pockets of chocolate throughout each cookie.
3. Nordic Ware Natural Aluminum Baking Sheets
These commercial-grade sheets distribute heat evenly for perfect browning every time. The natural aluminum won’t warp at high temperatures, and the light color prevents bottom burning.
4. OXO Good Grips Cookie Scoop
This spring-loaded scoop creates perfectly uniform cookies that bake evenly. The comfortable grip makes portioning 24 cookies quick and effortless.
Read Also: Best Chocolate Chip Cookies Recipe
Step-by-Step Instructions
Follow these detailed steps for perfectly chewy cookies every time. Taking your time with each stage ensures the best texture and flavor.
1. Preheat and Prepare
- Preheat your oven to 350°F (175°C)
- Line two baking sheets with parchment paper or silicone baking mats
- Set the baking sheets aside while you prepare the dough
- Make sure your butter and eggs are at room temperature for easier mixing
2. Mix the Dry Ingredients
- In a medium bowl, whisk together the flour, baking soda, cinnamon, and salt
- Whisk for 30 seconds to ensure all ingredients are evenly distributed
- Add the oats to the flour mixture and stir with a spoon to combine
- Set this bowl aside while you work on the wet ingredients
3. Cream the Butter and Sugars
- In a large mixing bowl, add the softened butter, brown sugar, and granulated sugar
- Using a wooden spoon or rubber spatula, beat the mixture together for 2-3 minutes
- Continue mixing until the mixture becomes light, fluffy, and well combined
- Scrape down the sides of the bowl to ensure even mixing
- The mixture should look creamy and slightly pale in color
4. Add Eggs and Vanilla
- Crack the first egg into the butter-sugar mixture and stir vigorously until fully incorporated
- Add the second egg and mix again until the batter is smooth and creamy
- Pour in the vanilla extract and stir for 15-20 seconds until evenly distributed
- The mixture should now be smooth, glossy, and lighter in color
5. Combine Wet and Dry Ingredients
- Add half of the dry ingredient mixture (flour, oats, spices) to the wet ingredients
- Stir gently with a wooden spoon or spatula just until you no longer see dry flour streaks
- Add the remaining half of the dry ingredients
- Continue stirring until just combined, being careful not to overmix
- The dough should look thick and slightly shaggy
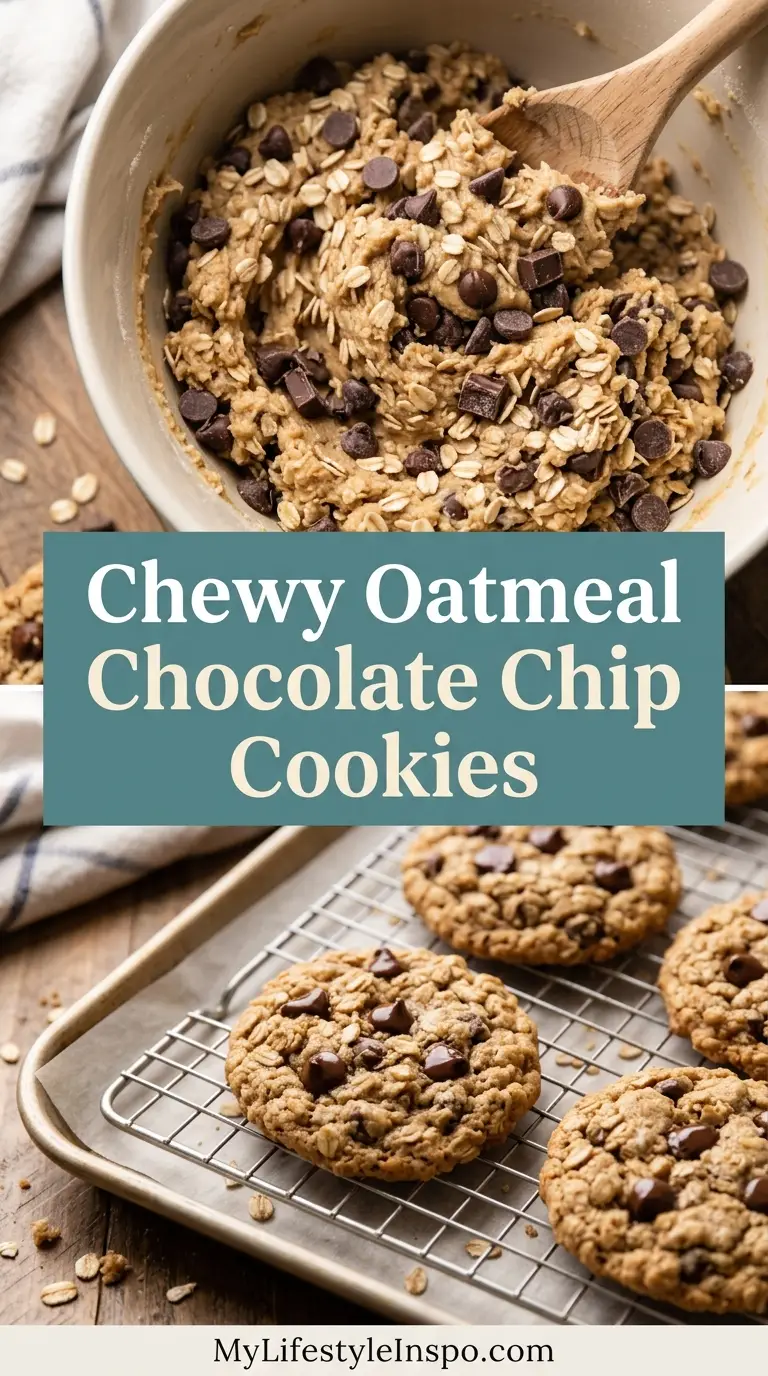
6. Fold in Chocolate Chips
- Pour all the chocolate chips into the cookie dough
- Using a sturdy spoon or spatula, fold the chips into the dough with broad strokes
- Continue folding until the chocolate chips are evenly distributed throughout
- You should see chocolate chips throughout the dough without any large chip-free sections
7. Portion the Cookie Dough
- Using a 2-tablespoon cookie scoop or measuring spoon, scoop out portions of dough
- Roll each portion lightly between your palms to create smooth balls
- Place the dough balls on the prepared baking sheets, spacing them 2-3 inches (5-7 cm) apart
- Each baking sheet should hold 8-12 cookies depending on size
- You can bake one sheet at a time or two sheets simultaneously by rotating them halfway through
8. Bake the Cookies
- Place the baking sheet on the center rack of your preheated oven
- Bake for 10-12 minutes, checking at the 10-minute mark
- The cookies are done when the edges are golden brown and set, but the centers still look slightly underdone and puffy
- The cookies will appear soft and may even look slightly gooey in the middle
- Do not wait for the centers to look fully cooked, as they will continue baking on the hot sheet
9. Cool and Store
- Remove the baking sheet from the oven and let cookies cool on the sheet for 5 minutes
- This resting time allows the cookies to set properly without overbaking
- After 5 minutes, use a spatula to transfer cookies to a wire cooling rack
- Let them cool completely on the rack for 15-20 minutes before storing
- Once cooled, the cookies will have a perfect chewy texture throughout
Another favorite treat to try is this chewy chocolate chip cookies recipe.
Tips for Success
These techniques ensure your cookies turn out perfectly every single time. Small details make a big difference in the final texture.
- Don’t overbake – Remove cookies when centers still look slightly underdone; they’ll continue cooking on the hot pan and firm up as they cool
- Use room temperature ingredients – Softened butter and room temperature eggs mix more easily and create better texture
- Measure flour correctly – Spoon flour into measuring cups and level off with a knife; scooping directly from the bag compacts flour and makes dry cookies
- Use old-fashioned oats only – Quick oats or instant oats will absorb too much moisture and create a different, less desirable texture
- Rotate baking sheets – If baking two sheets at once, swap their positions halfway through for even browning
- Let cookies rest on the pan – The 5-minute resting period after baking is crucial for achieving the perfect chewy texture
- Chill dough for thicker cookies – If you prefer very thick cookies, refrigerate the dough for 30 minutes before baking
- Press extra chips on top – Add a few chocolate chips to the top of each dough ball before baking for a more professional look
You might also enjoy: Old Fashioned Chocolate Chip Cookie Recipe
Serving Suggestions
These versatile cookies pair beautifully with various beverages and desserts. They’re perfect for any time of day.
Serve them warm with a cold glass of milk for the classic experience. The chocolate stays melty and the cookies are at their softest.
- Pair with cold milk, hot coffee, or tea for dunking
- Crumble over vanilla ice cream for a quick sundae
- Pack in lunchboxes for an afternoon treat
- Serve alongside homemade granola for a breakfast spread
- Stack between parchment paper for gift giving
- Warm slightly in the microwave (10-15 seconds) before serving
- Serve with fresh fruit and whipped cream for dessert
For a complete breakfast spread, include classic french toast on the side.
Variations to Try
The basic recipe welcomes endless creative variations. Experiment with different mix-ins and flavors to keep things interesting.
Each variation maintains the signature chewy texture while offering new taste experiences. Start with one change at a time to find your favorite combination.
- Raisin lovers – Replace chocolate chips with 1½ cups raisins or dried cranberries
- Nutty version – Add 1 cup chopped walnuts or pecans along with the chocolate chips
- White chocolate – Swap semi-sweet chips for white chocolate chips and add ½ cup dried cranberries
- Butterscotch – Use butterscotch chips instead of chocolate for a different sweetness
- Spice it up – Increase cinnamon to 2 teaspoons and add ¼ teaspoon nutmeg
- Brown butter upgrade – Brown your butter first, then cool before using for extra depth
- Salted caramel – Add ½ cup caramel chips and sprinkle with flaky sea salt before baking
- Trail mix cookies – Combine chocolate chips, dried cranberries, and chopped almonds
- Peanut butter chocolate – Add ½ cup peanut butter chips along with chocolate chips
Another favorite: Belgian Waffle Recipe
Storage and Reheating
Proper storage keeps these cookies fresh and chewy for days. Following these guidelines ensures you enjoy them at their best.
The cookies actually improve slightly after a day as flavors meld together. They’re just as delicious on day three as they were fresh from the oven.
- Room temperature – Store cooled cookies in an airtight container at room temperature for up to 5 days
- Keep them soft – Place a piece of bread in the container to maintain moisture
- Freezing baked cookies – Freeze completely cooled cookies in a freezer-safe container for up to 3 months; thaw at room temperature for 30 minutes
- Freezing cookie dough – Scoop dough into balls, freeze on a baking sheet until solid, then transfer to a freezer bag for up to 3 months
- Baking frozen dough – Bake frozen dough balls directly from the freezer, adding 2-3 minutes to the baking time
- Reheating – Warm individual cookies in the microwave for 10-15 seconds to restore that fresh-baked texture
- Avoid refrigeration – Refrigerating baked cookies can make them dry and hard
Read Also: Easy French Toast Recipe
Nutritional Facts
Per cookie (based on 24 cookies):
- Calories: 210
- Total Fat: 10g
- Saturated Fat: 6g
- Cholesterol: 30mg
- Sodium: 125mg
- Total Carbohydrates: 29g
- Dietary Fiber: 2g
- Sugars: 17g
- Protein: 3g
These values are approximate and may vary based on specific brands and measurements used. The oats provide beneficial fiber while the chocolate adds antioxidants.
For another nutritious breakfast option, try this buttermilk pancake recipe.
Health Benefits of Key Ingredients
While these are treats, several ingredients offer nutritional value. Enjoying cookies as part of a balanced diet brings both pleasure and some benefits.
The oats provide soluble fiber that supports heart health and digestion. Cinnamon contains antioxidants and may help regulate blood sugar levels.
- Oats – Rich in beta-glucan fiber that supports heart health, provides sustained energy, and aids digestion
- Cinnamon – Contains powerful antioxidants, has anti-inflammatory properties, and may improve insulin sensitivity
- Dark chocolate chips – Provides flavonoids that support heart health and contains minerals like iron, magnesium, and zinc
- Eggs – Deliver high-quality protein and essential nutrients including choline for brain health
- Butter – Supplies fat-soluble vitamins A, D, E, and K when consumed in moderation
You might also enjoy: Classic Tiramisu Recipe
Frequently Asked Questions
1. Can I use quick oats instead of old-fashioned oats?
Quick oats will absorb more moisture and create a denser, less chewy texture. For best results, stick with old-fashioned rolled oats.
If you only have quick oats, add 2 tablespoons more flour to compensate for the extra absorption.
2. Why are my cookies flat and spreading too much?
Flat cookies usually result from butter that’s too soft or warm, or from not measuring flour correctly. Make sure your butter is softened but still holds its shape.
Also ensure you’re spooning flour into measuring cups rather than scooping directly from the bag. Chilling the dough for 30 minutes helps prevent spreading.
3. Can I make these cookies dairy-free?
Yes, substitute the butter with an equal amount of vegan butter or coconut oil. Use dairy-free chocolate chips to make them completely dairy-free.
The texture may be slightly different but still delicious. Coconut oil creates a crisper cookie than vegan butter.
4. How do I know when the cookies are done baking?
The cookies are done when the edges are golden brown and set, but the centers still look slightly puffy and underdone. They should not look wet or raw.
Remember that cookies continue baking on the hot pan after removal from the oven. Underbaking slightly ensures a chewy center.
5. Can I add nuts to this recipe?
Absolutely! Add 1 cup of chopped walnuts, pecans, or almonds along with the chocolate chips. Toast the nuts first for deeper flavor.
Reduce chocolate chips to 1½ cups if you want a balance of nuts and chocolate. The nuts add great texture and nutritional value.
For more baking inspiration, check out this classic apple pie recipe.
Chewy Oatmeal Chocolate Chip Cookies
Equipment
- Large mixing bowl
- Medium mixing bowl
- Whisk
- Wooden spoon or rubber spatula
- Light-colored baking sheets - 2-3 sheets
- Parchment paper or silicone baking mats
- Cookie scoop - 2-tablespoon size, optional but recommended
- Wire cooling rack
- Measuring cups and spoons
- Kitchen scale - optional but recommended for precision
Ingredients
- 1 cup unsalted butter - 2 sticks or 226g, softened to room temperature
- 1 cup light brown sugar - 200g, packed
- 0.5 cup granulated white sugar - 100g
- 2 large eggs - room temperature
- 2 teaspoons pure vanilla extract
- 1.5 cups all-purpose flour - 190g
- 1 teaspoon baking soda
- 1 teaspoon ground cinnamon
- 0.5 teaspoon salt
- 3 cups old-fashioned rolled oats - 270g
- 2 cups semi-sweet chocolate chips - 340g
Instructions
- Preheat oven to 350°F (175°C). Line two baking sheets with parchment paper or silicone baking mats.
- In a medium bowl, whisk together flour, baking soda, cinnamon, and salt for 30 seconds. Add oats and stir to combine.
- In a large bowl, beat softened butter, brown sugar, and granulated sugar together for 2-3 minutes until light and fluffy.
- Add eggs one at a time, stirring vigorously after each until fully incorporated. Stir in vanilla extract until evenly distributed.
- Add half the dry ingredients to the wet mixture and stir just until flour streaks disappear. Add remaining half and stir until just combined, being careful not to overmix.
- Fold in chocolate chips using broad strokes until evenly distributed throughout the dough.
- Scoop 2-tablespoon portions of dough and roll into smooth balls. Place on prepared baking sheets, spacing 2-3 inches apart (8-12 cookies per sheet).
- Bake on center rack for 10-12 minutes until edges are golden brown and set but centers still look slightly underdone and puffy.
- Remove from oven and let cookies cool on baking sheet for 5 minutes. Transfer to a wire cooling rack and cool completely for 15-20 minutes before storing.
Notes
- Don’t overbake: Remove cookies when centers still look slightly underdone; they’ll continue cooking on the hot pan and firm up as they cool.
- Room temperature ingredients: Softened butter and room temperature eggs mix more easily and create better texture.
- Measure flour correctly: Spoon flour into measuring cups and level off with a knife; scooping directly from the bag compacts flour and makes dry cookies.
- Use old-fashioned oats only: Quick oats or instant oats will absorb too much moisture and create a different, less desirable texture.
- Chill dough for thicker cookies: If you prefer very thick cookies, refrigerate the dough for 30 minutes before baking.
- Press extra chips on top: Add a few chocolate chips to the top of each dough ball before baking for a more professional look.
- Storage: Store cooled cookies in an airtight container at room temperature for up to 5 days. Place a piece of bread in the container to maintain moisture.
- Freezing baked cookies: Freeze completely cooled cookies in a freezer-safe container for up to 3 months; thaw at room temperature for 30 minutes.
- Freezing cookie dough: Scoop dough into balls, freeze on a baking sheet until solid, then transfer to a freezer bag for up to 3 months. Bake frozen dough directly from the freezer, adding 2-3 minutes to baking time.
- Reheating: Warm individual cookies in the microwave for 10-15 seconds to restore that fresh-baked texture.
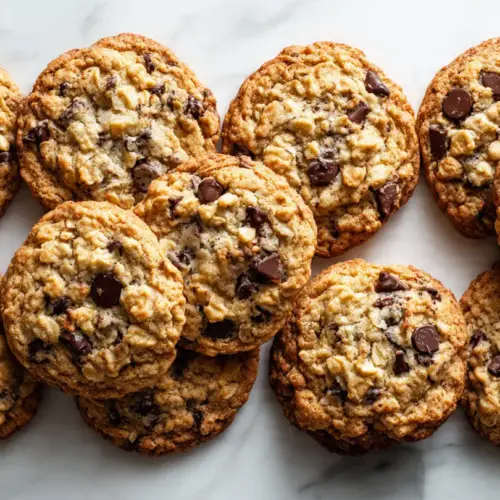
Final Thoughts
This chewy oatmeal chocolate chip cookie recipe delivers everything you want in a homemade cookie. The combination of crispy edges and soft centers creates irresistible texture.
Making these from scratch fills your kitchen with the most wonderful aroma. The recipe is forgiving enough for beginners yet produces results that impress everyone.
The balance of oats and chocolate hits that perfect sweet spot. These cookies prove that simple ingredients can create extraordinary results when combined thoughtfully.
Give this recipe a try and experience the joy of fresh-baked cookies. Share your results in the comments below or tell us about your favorite variation!
Recommended:
- Sweet Cornbread Recipe
- Skillet Cornbread Recipe
- Best Carrot Cake Recipe
- Cut Out Sugar Cookie Recipe
- Easy Sugar Cookie Recipe
- Classic Pumpkin Pie Recipe
- From Scratch Pumpkin Pie Recipe
- Dutch Apple Pie Recipe
- Carrot Cake With Cream Cheese Frosting Recipe
- Single Serving Sugar Cookie Recipe


