I grew up watching my grandmother make cherry pie every summer when the cherries were at their peak. The way she’d roll out the dough with such precision, and how the whole house would fill with that sweet, tart aroma as the pie baked—it’s one of those food memories that never leaves you.
Now I make this cherry pie recipe whenever I need something that feels like a warm hug. It’s got that perfect balance of sweet and tart, with a flaky, buttery crust that shatters when you cut into it.
The filling is rich and jammy, not too thick or gloppy like some store-bought versions. And honestly, once you make pie crust from scratch a couple of times, you’ll wonder why you ever bought the frozen stuff.
This recipe uses fresh or frozen cherries, so you can make it year-round. I’ve made it dozens of times now, tweaking little things here and there until I got it just right.
The result is a cherry pie that looks impressive but doesn’t require any fancy techniques or equipment. Just good ingredients, a little patience, and you’re golden.
Why You’ll Love This Cherry Pie Recipe
This cherry pie is the kind of dessert that makes people ask for seconds. The crust is buttery and flaky, with just enough structure to hold up against that luscious cherry filling without getting soggy.
The filling itself strikes that ideal balance—sweet enough to satisfy your dessert craving but with enough tartness from the cherries to keep it interesting. I love that you can taste the actual fruit instead of just sugar and cornstarch.
Here’s what makes this recipe stand out:
- Simple ingredients that you probably already have in your pantry
- Works with fresh or frozen cherries, so you’re not limited to cherry season
- Make-ahead friendly for stress-free entertaining
- Impressive presentation that looks like you spent all day in the kitchen
- Perfectly textured filling that’s thick but not gummy
- Buttery, flaky crust that doesn’t require any special skills
I’ve tested this recipe with my blueberry pie recipe techniques, and the methods translate beautifully across different fruit pies.
Ingredients
This cherry pie comes together with straightforward ingredients that deliver maximum flavor. I’ve broken everything down into what you’ll need for the crust and the filling.
For the Pie Crust:
- 2½ cups (300g) all-purpose flour
- 1 tablespoon granulated sugar
- 1 teaspoon salt
- 1 cup (226g) cold unsalted butter, cut into small cubes
- 6-8 tablespoons ice water
For the Cherry Filling:
- 5 cups (about 2 pounds) fresh or frozen pitted cherries
- 1 cup (200g) granulated sugar
- ¼ cup (30g) cornstarch
- 1 tablespoon fresh lemon juice
- 1 teaspoon vanilla extract
- ¼ teaspoon almond extract
- Pinch of salt
For Assembly:
- 1 egg, beaten (for egg wash)
- 1 tablespoon coarse sugar (for topping)
Kitchen Equipment Needed
Having the right tools makes pie-making so much smoother. You don’t need anything fancy, but these items will help you get professional-looking results.
- 9-inch pie dish (glass or ceramic works great)
- Large mixing bowls
- Pastry cutter or food processor
- Rolling pin
- Medium saucepan
- Plastic wrap
- Parchment paper
- Sharp knife or pizza cutter (for lattice strips)
- Pastry brush
Recommended Products for This Recipe
I’ve made countless pies over the years, and these are the products that consistently make the process easier and the results better.
1. Emile Henry Modern Classic Pie Dish
This ceramic pie dish conducts heat beautifully, giving you an evenly golden bottom crust every single time. The fluted edges make crimping easier, and it goes straight from oven to table looking gorgeous.
2. Oregon Fruit Dark Sweet Cherries
When fresh cherries aren’t in season, these are my go-to. They’re already pitted, which saves tons of time, and they have that deep cherry flavor without being overly sweet or mushy.
3. Ateco French Rolling Pin
This tapered rolling pin gives you so much more control than traditional rolling pins with handles. You can feel the dough under your hands and get it to an even thickness much more easily.
4. Nielsen-Massey Madagascar Bourbon Pure Vanilla Extract
High-quality vanilla extract makes a noticeable difference in baking. This one has a rich, complex flavor that enhances the cherries without overpowering them.
You might also enjoy: Banana Cream Pie Recipe
Step-by-Step Instructions
I’m walking you through every detail so you can nail this cherry pie on your first try. Take your time with the crust—it’s the foundation of a great pie.
1. Make the Pie Crust
- Combine the flour, sugar, and salt in a large bowl and whisk together.
- Add the cold butter cubes and use a pastry cutter to work the butter into the flour until the mixture resembles coarse crumbs with some pea-sized pieces of butter remaining.
- Drizzle in the ice water one tablespoon at a time, mixing gently with a fork after each addition until the dough just starts to come together.
- Turn the dough out onto a clean surface and divide it into two portions, one slightly larger than the other (for the bottom and top crusts).
- Shape each portion into a flat disk, wrap tightly in plastic wrap, and refrigerate for at least 1 hour or up to 2 days.
2. Prepare the Cherry Filling
- If using frozen cherries, thaw them completely and drain any excess liquid (but save ¼ cup of the juice).
- Combine the cherries, sugar, cornstarch, lemon juice, vanilla extract, almond extract, and salt in a medium saucepan.
- Cook over medium heat, stirring constantly, until the mixture comes to a boil and thickens noticeably, about 8-10 minutes.
- Remove from heat and let the filling cool to room temperature before using (this prevents a soggy bottom crust).
3. Roll Out the Bottom Crust
- Remove the larger disk of dough from the refrigerator and let it sit at room temperature for about 5 minutes to soften slightly.
- Lightly flour your work surface and rolling pin, then roll the dough out into a 12-inch circle, rotating the dough frequently and adding more flour as needed to prevent sticking.
- Carefully transfer the dough to your 9-inch pie dish by rolling it loosely around your rolling pin, then unrolling it over the dish.
- Gently press the dough into the bottom and sides of the dish, being careful not to stretch it.
- Trim any excess dough hanging over the edge, leaving about 1 inch of overhang all around.
Read Also: Sweet Potato Pie Recipe
4. Add the Filling
- Pour the cooled cherry filling into the prepared pie crust, spreading it evenly.
- Use a spatula to make sure the cherries are distributed evenly and there are no air pockets.
- Dot the top of the filling with a tablespoon of butter cut into small pieces (this adds richness and helps prevent the top crust from drying out).
5. Create the Top Crust or Lattice
- Roll out the second disk of dough into an 11-inch circle using the same technique as before.
- For a traditional top crust, drape the dough over the filling and trim the edges to match the bottom crust overhang.
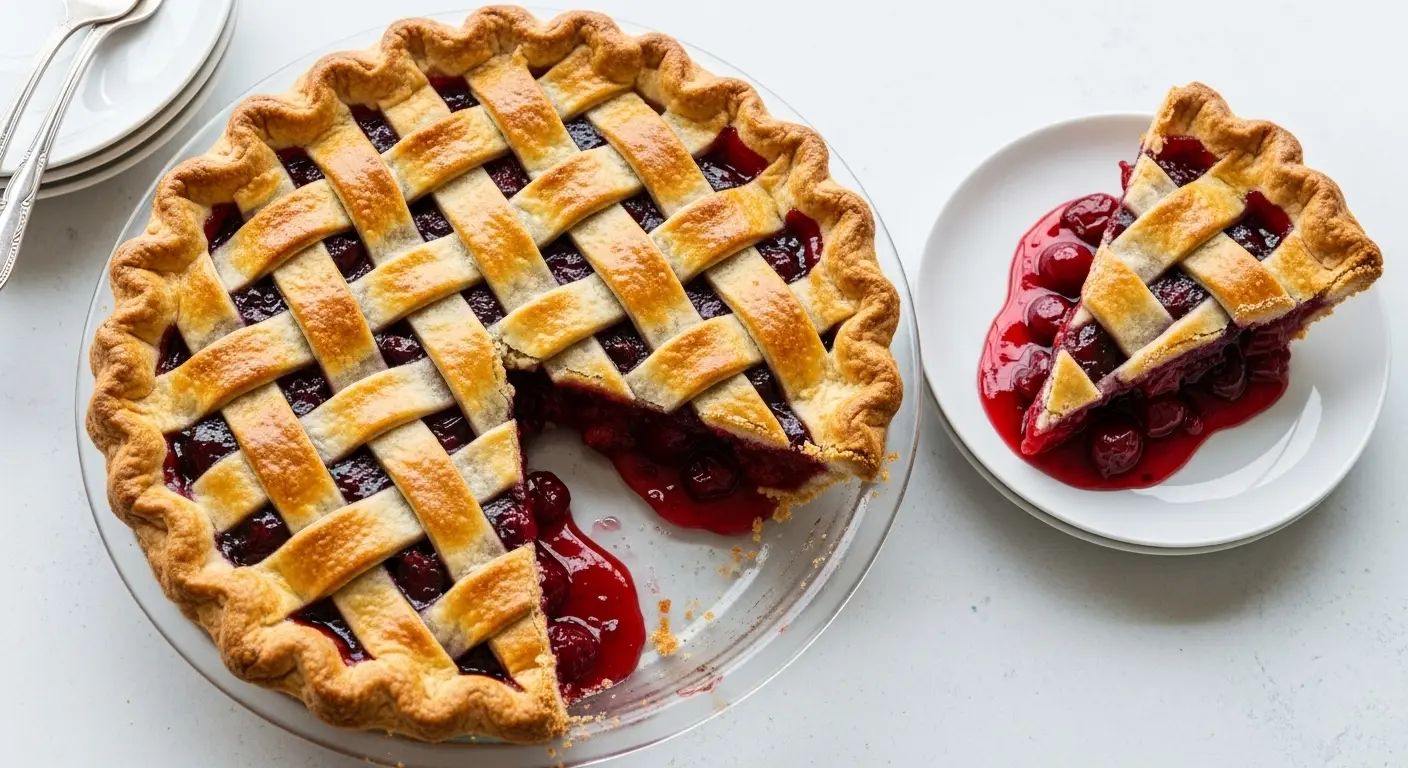
- For a lattice top, cut the dough into 10-12 strips about ¾ inch wide using a sharp knife or pizza cutter.
- Weave the strips over the filling, alternating over and under to create a lattice pattern.
- Once your top is in place, fold the overhanging bottom crust up over the edge of the top crust and crimp decoratively using your fingers or a fork.
6. Apply Egg Wash and Bake
- Preheat your oven to 400°F (200°C) and position a rack in the lower third of the oven.
- Brush the top crust with beaten egg and sprinkle with coarse sugar for a beautiful golden finish.
- Cut 4-5 small vents in the top crust if using a solid top (skip this step for lattice).
- Place the pie on a rimmed baking sheet to catch any drips, then bake for 25 minutes.
- Reduce the oven temperature to 350°F (175°C) and continue baking for 35-45 minutes more, until the crust is deeply golden and you can see the filling bubbling through the vents or lattice.
- If the edges brown too quickly, cover them with aluminum foil or a pie shield.
7. Cool Completely
- Remove the pie from the oven and place it on a wire rack to cool.
- Let the pie cool for at least 4 hours before slicing—this is crucial for the filling to set properly.
- The filling will be very liquidy when hot but will thicken perfectly as it cools.
- For the cleanest slices, wait until the pie is completely cool or even slightly chilled.
Tips for Success
These little tricks have saved me from pie disasters more times than I can count. Trust me, they make all the difference.
- Keep everything cold: Cold butter and ice water are essential for a flaky crust. I even chill my mixing bowl and pastry cutter in the freezer for 10 minutes before starting.
- Don’t overwork the dough: Mix just until it comes together. Overworking develops gluten, which makes the crust tough instead of tender.
- Let the filling cool completely: Hot filling will melt your bottom crust and make it soggy. I usually make my filling the night before and refrigerate it.
- Use a glass pie dish if possible: You can peek underneath to check if the bottom crust is browning properly.
- Don’t skip the egg wash: It creates that gorgeous golden color and gives the crust a nice sheen.
- Be patient with cooling: I know it’s tempting to cut into a warm pie, but the filling needs time to set up or it’ll be runny.
Another favorite: Key Lime Pie Recipe
Serving Suggestions
Cherry pie is stunning on its own, but these accompaniments take it to another level. I love serving it slightly warm with something cold and creamy on top.
Vanilla ice cream is the classic choice for a reason—the cold creaminess against the warm, tart cherries is unbeatable. Freshly whipped cream is another beautiful option, especially if you add a touch of vanilla or almond extract to complement the cherries.
For a more sophisticated presentation, try it with:
- A dollop of crème fraîche for tangy richness
- Vanilla custard for an extra-indulgent dessert
- Greek yogurt mixed with honey for a lighter option
- A drizzle of heavy cream poured right over the top
- Toasted sliced almonds sprinkled on top for added texture
Variations to Try
Once you’ve mastered the basic recipe, these variations keep things interesting. I rotate through them depending on what I’m in the mood for.
- Cherry Almond: Increase the almond extract to ½ teaspoon and add ½ cup of sliced almonds to the filling for extra flavor and texture.
- Cherry Berry: Replace 1 cup of cherries with fresh or frozen raspberries or blackberries for a more complex fruit flavor.
- Chocolate Cherry: Add ½ cup of dark chocolate chips to the filling for a decadent twist.
- Spiced Cherry: Add ½ teaspoon of cinnamon and ¼ teaspoon of cardamom to the filling for warmth.
- Bourbon Cherry: Stir in 2 tablespoons of bourbon to the filling before cooking for a grown-up version.
- Crumb Top: Skip the top crust and make a streusel topping with flour, butter, brown sugar, and oats instead.
Storage and Reheating
Proper storage keeps your cherry pie tasting fresh for days. Here’s how I handle leftovers, though they rarely last long around here.
- Room temperature: Cover loosely with foil and keep at room temperature for up to 2 days.
- Refrigerator: Wrap tightly in plastic wrap or aluminum foil and refrigerate for up to 5 days.
- Freezer: Wrap the whole pie or individual slices tightly in plastic wrap, then in foil, and freeze for up to 3 months.
- Reheating: Warm individual slices in a 350°F oven for 10-15 minutes, or microwave for 30-45 seconds.
- Unbaked freezing: You can freeze the assembled, unbaked pie for up to 3 months—just bake directly from frozen, adding 15-20 minutes to the baking time.
For a different take on classic pies, check out my Boston Cream Pie Recipe.
Nutritional Facts
Per serving (1 slice, based on 8 servings):
- Calories: 425
- Total Fat: 18g
- Saturated Fat: 11g
- Cholesterol: 55mg
- Sodium: 285mg
- Total Carbohydrates: 64g
- Dietary Fiber: 2g
- Sugars: 35g
- Protein: 5g
Health Benefits of Key Ingredients
While cherry pie is definitely a treat, the cherries themselves pack some impressive nutritional benefits. It’s nice to know you’re getting some good stuff along with your dessert.
Cherries are loaded with antioxidants, particularly anthocyanins, which give them their deep red color and have anti-inflammatory properties. They’re also a natural source of melatonin, which can help regulate sleep cycles.
Key health benefits include:
- Rich in vitamin C: Supports immune function and skin health
- Contains potassium: Helps maintain healthy blood pressure
- Anti-inflammatory compounds: May help reduce muscle soreness and joint pain
- Low glycemic index: Won’t spike blood sugar as dramatically as some other fruits
- Fiber content: Aids in digestion and promotes feelings of fullness
- May support heart health: The antioxidants in cherries have been linked to reduced risk of heart disease
Read Also: Apple Pie Biscuits Recipe
Frequently Asked Questions
1. Can I use canned cherry pie filling instead of making my own?
You can, but I don’t recommend it. Canned filling is usually too sweet and has a gummy texture that doesn’t compare to homemade.
Making your own filling from scratch only takes about 15 minutes and gives you complete control over the sweetness and consistency. Plus, you can actually taste the fruit.
2. Why is my bottom crust soggy?
Soggy bottom crust happens when the filling is too hot when you add it, or when the pie isn’t baked long enough. Always let your filling cool completely before pouring it into the crust.
Baking the pie on a lower oven rack helps the bottom crust cook through properly. You can also blind bake the bottom crust for 10 minutes before adding the filling if you want extra insurance.
3. Can I make the pie crust in advance?
Absolutely! The dough keeps perfectly in the refrigerator for up to 3 days, or you can freeze it for up to 3 months.
Just wrap it tightly in plastic wrap to prevent it from drying out. If freezing, let it thaw in the refrigerator overnight before using.
4. What’s the best way to prevent the edges from burning?
The edges brown faster than the center because they’re thinner and more exposed. I usually start checking around the 30-minute mark.
If the edges are getting too dark, cover them with strips of aluminum foil or use a pie shield. You can buy reusable silicone pie shields, or just make your own foil strips.
5. Do I have to use both vanilla and almond extract?
The almond extract really enhances the cherry flavor in a way that vanilla alone doesn’t, but you can skip it if you don’t have it on hand. Just use a full tablespoon of vanilla instead.
If you’re not a fan of almond flavor, stick with just vanilla. The pie will still be delicious.
Final Thoughts
There’s something deeply satisfying about pulling a homemade cherry pie out of the oven, with its golden crust and bubbling filling. It’s the kind of dessert that brings people together and creates lasting memories around the table.
This cherry pie recipe has become my go-to for holidays, potlucks, and just because. Once you try it, I think you’ll understand why.
The combination of buttery, flaky crust and sweet-tart cherry filling is simply timeless. Give it a try this weekend and let me know how it turns out in the comments below!
Recommended:
- Peach Cobbler Recipe
- Pear Cobbler Recipe
- Pumpkin Bar Recipe
- No Bake Cookie Recipe
- Oatmeal Raisin Cookie Recipe
- Oatmeal Cookie Recipe
- Peanut Butter Cookie Recipe
- Snickerdoodle Cookie Recipe
- Gingerbread Cookie Recipe
- Tres Leches Cake Recipe


