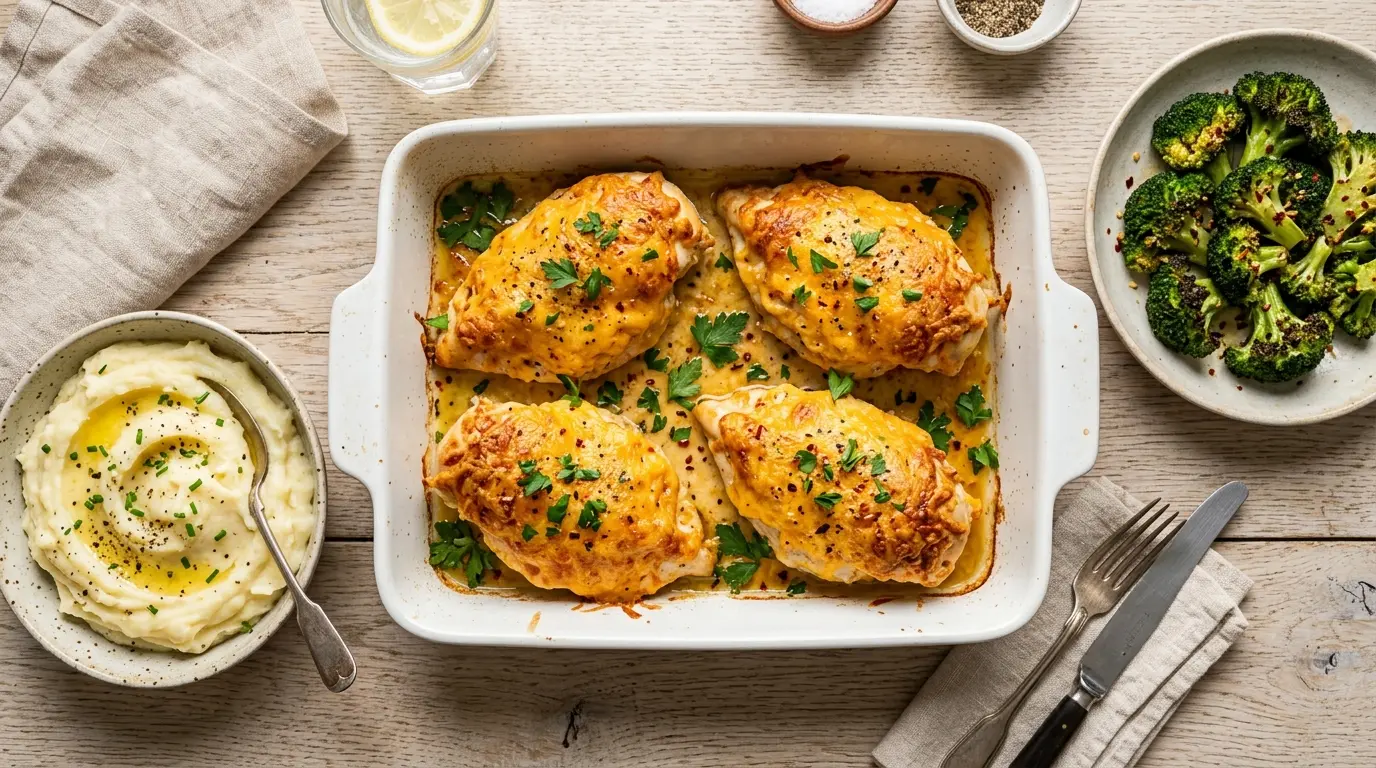
If you’ve been searching for a Cheddar Baked Chicken Recipe that actually delivers on flavor, look no further. This dish brings together juicy boneless chicken breasts, a golden cheddar and breadcrumb crust, and a buttery baked finish that rivals anything fried, without the mess or the oil.
It’s one of those weeknight dinners that feels a little special but comes together with pantry staples you probably already have on hand.
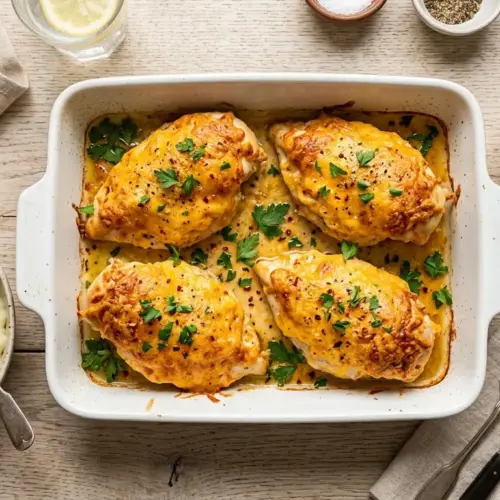
The technique is simple: a three-step coating of seasoned flour, egg wash, and a crunchy cheddar-breadcrumb mixture, then baked in a buttered dish until golden and cooked through. The butter in the pan creates steam underneath that keeps the chicken moist while the top gets beautifully crispy.
Sharp cheddar cheese is the star here. It melts into the breadcrumb coating during baking, giving you that savory, slightly salty, deeply cheesy crust that makes this recipe so hard to resist.
Even beginner cooks can nail this one on the first try.
Explore more easy chicken dinner ideas with this classic Baked Chicken Breast Recipe.

Why You’ll Love This Cheddar Baked Chicken Recipe
This recipe checks so many boxes, it’s hard to know where to start.
The crust comes out wonderfully crispy thanks to the combination of breadcrumbs and cheese, while the inside stays tender and juicy every single time.
It’s also incredibly family-friendly. Kids love the cheesy coating, and adults appreciate the real, bold flavors without anything complicated.
Prep takes only about 10 to 15 minutes, making it a realistic option even on busy weeknights.
You won’t need any specialty equipment or hard-to-find ingredients. Everything you need is likely already in your kitchen.
Here’s a quick look at all the reasons to love it:
- Cheesy, golden crust with a satisfying crunch in every bite
- Juicy chicken inside that doesn’t dry out in the oven
- Only 10 to 15 minutes of hands-on prep time
- Uses simple, everyday pantry ingredients
- Kid-approved and adult-loved, making it a true crowd-pleaser
- Easy to customize with different cheeses or seasonings
- Leftovers reheat beautifully, making it great for meal prep
For another family-friendly baked dinner, try this hearty Chicken Casserole that’s just as easy to put together.
Ingredients
This recipe keeps things simple and relies on a handful of quality ingredients that work together beautifully. Sharp cheddar is highly recommended over mild cheddar because it has a more pronounced flavor that holds up well during baking. Freshly grated cheese will also give you a better melt and crunch than pre-shredded.
- 4 boneless, skinless chicken breasts (about 6 to 8 oz / 170 to 225 g each)
- 1/2 cup (113 g) unsalted butter, divided
- 1/2 cup (65 g) all-purpose flour
- 1 tsp garlic powder
- 1 tsp onion powder
- 1/2 tsp smoked paprika
- 1/2 tsp salt
- 1/4 tsp black pepper
- 2 large eggs
- 2 tbsp whole milk
- 1 cup (115 g) sharp cheddar cheese, freshly grated
- 3/4 cup (75 g) plain dry breadcrumbs
- 1/4 cup (15 g) crushed cornflakes (optional, for extra crunch)
Another cheesy chicken recipe worth bookmarking is this Parmesan Crusted Chicken Sheet Pan Dinner for an equally crispy and satisfying meal.
Kitchen Equipment Needed
Having the right tools on hand makes the coating process smooth and cleanup much easier. Three shallow dishes for the dredging stations are essential, and a reliable meat thermometer takes all the guesswork out of knowing when your chicken is safely cooked through.
- 9×13 inch baking dish
- 3 shallow dishes or bowls (for the dredging stations)
- Box grater or rotary cheese grater
- Instant-read meat thermometer
- Small saucepan or microwave-safe bowl (for melting butter)
- Tongs or a fork (for dipping chicken)
- Cutting board
- Paper towels (for drying the chicken)
You might also enjoy: Air Fryer Chicken Breast Recipe if you’d like a quicker, no-batter alternative on a busy weeknight.
Recommended Products for This Recipe
These are products that genuinely make a difference in how this recipe turns out, selected based on quality and performance.
1. Sharp Cheddar Cheese Block
Using a block of sharp cheddar and grating it yourself makes a noticeable difference in the final texture and flavor of the crust. Pre-shredded cheese contains anti-caking agents that prevent it from melting as smoothly, so grating fresh gives you a creamier melt and better browning. Look for a high-quality aged sharp cheddar for the most pronounced cheesy flavor.
2. OXO Good Grips Glass Baking Dish 9×13
A good quality glass baking dish distributes heat evenly and lets you see the butter and juices as the chicken bakes, so you can monitor browning without opening the oven. The smooth interior also makes cleanup much easier after all that cheesy goodness. Glass retains heat well, keeping the chicken warm longer at the table.
3. ThermoPro Instant Read Meat Thermometer
Knowing exactly when your chicken hits 165°F (74°C) internally is the single best way to guarantee juicy, safe results every time. This thermometer gives you a reading in about 3 seconds and takes the anxiety out of baking chicken breasts of different sizes. It’s an inexpensive tool that makes every single chicken recipe you’ll ever make better.
4. Panko Breadcrumbs
While regular breadcrumbs work well in this recipe, panko breadcrumbs create an even lighter and crispier crust because of their coarser, airier texture. They absorb less moisture during baking, which means a crunchier coating that doesn’t go soggy. A canister of panko is a great pantry upgrade for any breaded dish.
5. Box Grater with Non-Slip Base
A sturdy box grater with a non-slip base makes the job of grating a block of cheddar quick, safe, and easy. The large holes on most box graters are perfect for cheese that will be used in a coating like this, giving you fluffy, even shreds that distribute well throughout the breadcrumb mixture.
Read Also: Chicken Broccoli Rice Casserole Recipe

Step-by-Step Instructions
Step 1: Preheat the Oven and Prep the Baking Dish
- Preheat your oven to 350°F (175°C) and allow it to fully come to temperature before baking.
- Take 1/4 cup (57 g) of the butter and melt it in a small saucepan over low heat or in a microwave-safe bowl in 20-second increments until fully melted.
- Pour the melted butter evenly across the bottom of your 9×13 inch baking dish, tilting it gently to coat the entire surface.
- Place the buttered dish in the oven for 2 to 3 minutes while you prepare the chicken and coating. This allows the butter to heat up slightly, which helps the bottom of the chicken crisp up as it bakes.
- Remove the dish from the oven carefully using oven mitts and set aside.
Step 2: Prepare the Chicken Breasts
- Pat each chicken breast dry thoroughly using paper towels. This step is important because moisture on the surface of the chicken prevents the flour and egg from adhering properly.
- If your chicken breasts are very thick (more than 1 inch / 2.5 cm), place them between two sheets of plastic wrap and use a meat mallet or rolling pin to gently pound them to a more even thickness. Even thickness ensures every part of the chicken cooks through at the same rate.
- Set the prepared chicken breasts aside on a clean plate or cutting board while you set up your dredging stations.
Step 3: Set Up the Three Dredging Stations
- Station 1 (Flour Mixture): In the first shallow dish, combine 1/2 cup (65 g) all-purpose flour, 1 tsp garlic powder, 1 tsp onion powder, 1/2 tsp smoked paprika, 1/2 tsp salt, and 1/4 tsp black pepper. Stir together with a fork until evenly mixed.
- Station 2 (Egg Wash): In the second shallow dish, crack 2 large eggs and add 2 tbsp whole milk. Beat together with a fork or small whisk until smooth and fully combined. The milk loosens the egg slightly so it coats the chicken more evenly.
- Station 3 (Cheese Coating): In the third shallow dish, combine 1 cup (115 g) freshly grated sharp cheddar cheese, 3/4 cup (75 g) plain dry breadcrumbs, and 1/4 cup (15 g) crushed cornflakes if using. Stir together until the cheese and breadcrumbs are well distributed. The cornflakes add an extra layer of crunch and a slightly buttery flavor that complements the cheese beautifully.
Step 4: Coat the Chicken
- Working with one chicken breast at a time, lay it in Station 1 and press gently to coat both sides in the flour mixture. Shake off any excess flour. A thin, even coating is what you’re after here. Too much flour will create a thick, pasty layer rather than a light, crispy one.
- Transfer the floured chicken to Station 2 and turn it to coat both sides in the egg wash. Let any excess egg drip off before moving to the next station.
- Lay the egg-coated chicken in Station 3 and press down firmly with your fingers, then flip and press the other side. The key is to press rather than just dip, so the cheese and breadcrumb mixture really adheres to the surface. You want a generous, even layer with no bare spots.
- Place the fully coated chicken breast gently into the buttered baking dish.
- Repeat with the remaining chicken breasts, placing them in the dish with a little space between each piece.
Step 5: Add Butter on Top and Bake
- Cut the remaining 1/4 cup (57 g) of cold butter into small pats or slices, roughly 4 to 6 pieces.
- Place one or two small pats of butter on top of each coated chicken breast. As the butter melts during baking, it bastes the top of the coating, helping it turn golden and crispy rather than dry.
- Place the baking dish in the center rack of the preheated oven and bake for 35 to 45 minutes, depending on the size of your chicken breasts.
- Start checking for doneness at the 35-minute mark by inserting your instant-read thermometer into the thickest part of the largest chicken breast. The chicken is done when it reads 165°F (74°C) internally. The coating should be deep golden in color and firm to the touch.
- If the crust begins to brown too quickly before the chicken is cooked through, tent the dish loosely with aluminum foil for the remaining baking time.
Step 6: Rest and Serve
- Once the chicken reaches 165°F (74°C), remove the baking dish from the oven and allow the chicken to rest for 5 minutes before serving.
- Resting allows the internal juices to redistribute through the meat, so the chicken stays moist and doesn’t release all its juices the moment you cut into it.
- Serve immediately while the crust is still crispy and the cheese is gooey and hot.
This cheddar baked chicken pairs wonderfully with this Baked Honey Mustard Chicken for comparison when you want to mix up your weekly baked chicken lineup.
Tips for Success
Getting this recipe right comes down to a few key techniques that make the difference between a soggy crust and a shatteringly crispy one. None of these tips are complicated, but each one matters.
- Dry the chicken thoroughly. Patting the chicken dry before dredging is one of the most important steps. Moisture is the enemy of a crispy crust. Even a little surface moisture will cause the flour to clump and the breadcrumbs to steam rather than crisp.
- Press the coating firmly. When you lay the chicken in the cheese-breadcrumb mixture, press down firmly on both sides rather than just rolling it around. A firm press ensures the coating bonds to the egg wash properly.
- Grate your own cheese. Pre-shredded cheese is coated in anti-caking agents like cellulose that prevent it from melting into the crust the way fresh-grated cheese does. Grating your own takes just a couple of extra minutes and makes a real difference in flavor and texture.
- Don’t skip the butter in the pan. The layer of melted butter on the bottom of the baking dish is what crisps the underside of the chicken. Without it, the bottom coating will be soft and pale rather than golden.
- Use an even thickness. Pound thicker chicken breasts to a more uniform thickness so they cook evenly. Thinner ends of uneven breasts will dry out before the thicker center is cooked through.
- Use a meat thermometer. Guessing by time alone isn’t reliable since chicken breasts vary so much in size. A thermometer is the only way to know for certain when your chicken is safely cooked and still juicy.
- Rest before cutting. Giving the chicken 5 minutes to rest before slicing keeps the juices inside the meat rather than running out onto the plate.
For another easy weeknight baked chicken with crispy, golden results, check out Crack Chicken for something rich, creamy, and incredibly satisfying.
Serving Suggestions
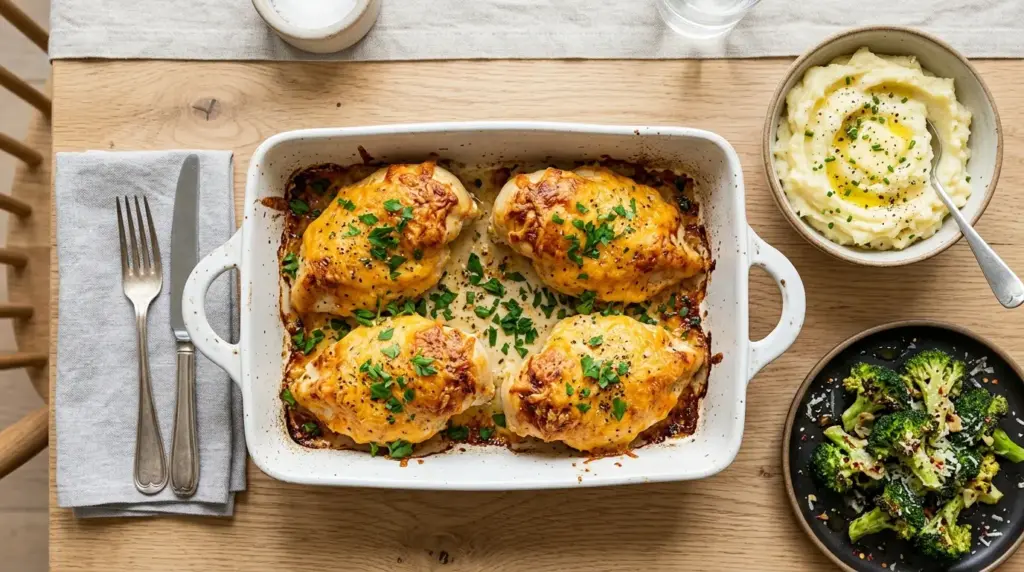
Cheddar baked chicken is hearty and flavorful enough to shine as the centerpiece of a plate, but the right sides turn it into a complete, satisfying meal. Simple, classic sides work best here so the cheesy, crispy chicken remains the star.
Rich, creamy sides like mashed potatoes or mac and cheese are natural pairings, while lighter vegetables like roasted broccoli or green beans provide a refreshing contrast to the buttery crust. This dish is also great alongside simple rice, which soaks up any buttery juices from the pan.
Here are some serving ideas to get you started:
- Garlic Mashed Potatoes for a classic, comforting combination
- Green Beans simply cooked with garlic and a splash of lemon
- Corn on the Cob brushed with herb butter for a summer-friendly side
- A crisp garden salad with a light vinaigrette to balance the richness
- Baked Beans for a heartier, more rustic pairing
- Cilantro Lime Rice for a bright, fresh contrast to the cheesy crust
- Steamed broccoli florets with a squeeze of lemon
Read Also: Chicken Cordon Bleu Casserole Recipe
Variations to Try
Once you have the base recipe down, it’s easy to switch things up and customize it to suit different tastes and occasions. The coating method stays the same, but swapping out the cheese or adding new spices can take this dish in a completely different direction.
- Spicy Cheddar: Add 1/2 tsp cayenne pepper and 1/2 tsp chili flakes to the flour mixture for a kick that pairs beautifully with the richness of the cheese.
- Parmesan and Cheddar Mix: Replace half the cheddar with freshly grated Parmesan for a deeper, nuttier flavor in the crust. Parmesan also crisps up more dramatically than cheddar, giving you extra crunch.
- Ranch-Seasoned Crust: Add 1 packet of dry ranch seasoning to the breadcrumb and cheese mixture for a tangy, herby flavor that’s especially popular with kids.
- Gluten-Free Version: Substitute the all-purpose flour with a gluten-free flour blend and use certified gluten-free breadcrumbs. The technique and results are exactly the same.
- Pepper Jack Cheddar: Swap half the sharp cheddar for pepper jack cheese for a melty, mildly spicy coating with a little extra punch.
- Herb and Garlic Crust: Add 1 tsp dried Italian herbs, such as oregano, thyme, and basil, to the breadcrumb mixture along with an extra 1/2 tsp garlic powder for a more aromatic, Mediterranean-inspired flavor.
- Chicken Thighs: Boneless, skinless chicken thighs work beautifully in this recipe. They’re slightly fattier than breasts, which makes them even more forgiving in the oven and less likely to dry out.
Baked Mac and Cheese is a natural pairing for any of these variations and makes a hearty, comforting meal out of the whole spread.
Storage and Reheating
This cheddar baked chicken stores well and reheats nicely with a few simple tips to keep the crust as crispy as possible.
- Refrigerator: Store leftovers in an airtight container in the refrigerator for up to 4 days.
- Freezer: Cooked chicken can be wrapped individually in plastic wrap and then stored in a zip-lock freezer bag for up to 2 months. Allow to thaw overnight in the refrigerator before reheating.
- Reheating in the oven: Place the chicken on a baking rack over a sheet pan and reheat at 375°F (190°C) for 12 to 15 minutes. Using a rack allows hot air to circulate around the chicken, re-crisping the crust rather than steaming it soft.
- Reheating in the air fryer: This is the best method for getting the crust crispy again. Reheat at 370°F (188°C) for 5 to 7 minutes.
- Microwave (last resort): The microwave will make the crust soft, but it works in a pinch. Heat on medium power in 60-second increments to avoid drying out the chicken.
- Make-Ahead Tip: You can coat the chicken breasts and refrigerate them (uncovered) on the baking sheet for up to 24 hours before baking. The coating will adhere even better after resting in the fridge.
Another favorite for the classics: Classic Chicken Parmesan
Nutritional Facts
The values below are approximate and based on 1 serving (1 chicken breast) out of 4 total servings.
| Nutrient | Amount Per Serving |
|---|---|
| Calories | 490 kcal |
| Protein | 38 g |
| Total Fat | 26 g |
| Saturated Fat | 15 g |
| Carbohydrates | 24 g |
| Fiber | 1 g |
| Sugar | 1 g |
| Sodium | 920 mg |
| Cholesterol | 195 mg |
| Calcium | 220 mg |
Note: Nutritional values will vary depending on the size of the chicken breasts and the specific brands of ingredients used.
You might also enjoy: Roasted Broccoli Recipe as a low-calorie, high-fiber side to balance out this hearty chicken dish.
Health Benefits of Key Ingredients
This Cheddar Baked Chicken Recipe isn’t just delicious, it also delivers real nutritional value from some of its core ingredients.
Baking rather than frying keeps the overall fat content significantly lower than traditional fried chicken, while still delivering that satisfying crunch.
Here’s a closer look at what the key ingredients bring to the table:
- Chicken breast: One of the leanest protein sources available. Protein supports muscle repair and growth, keeps you fuller longer, and plays a key role in nearly every biological function in the body. A single serving provides roughly 35 to 40 grams of protein, making it an excellent foundation for an active lifestyle.
- Sharp cheddar cheese: A good source of calcium, which supports bone density and muscle function. It also contains phosphorus and small amounts of zinc and vitamin B12. Because sharp cheddar has a more intense flavor than mild varieties, you can use a reasonable amount without needing to pile on extra.
- Eggs: The egg wash in this recipe adds high-quality complete protein, along with vitamin D, vitamin B12, choline, and lutein. Eggs are one of the most nutrient-dense whole foods available.
- Garlic powder: Derived from dried garlic, which contains allicin and other sulfur compounds linked to immune support and cardiovascular health. Even in small amounts in a spice blend, garlic contributes meaningful antioxidant activity.
- Smoked paprika: Contains vitamin A from carotenoids, as well as antioxidants like capsanthin and zeaxanthin. It adds flavor without adding sodium.
Read Also: Chicken Soup Recipe
Frequently Asked Questions
1. Can I use chicken thighs instead of chicken breasts?
Yes, absolutely. Boneless, skinless chicken thighs work wonderfully in this recipe. They have a slightly higher fat content, which actually makes them more forgiving in the oven and less prone to drying out. Adjust the baking time down slightly since thighs tend to be smaller, and always check for an internal temperature of 165°F (74°C).
2. What type of cheddar cheese works best?
Sharp cheddar gives the boldest, most pronounced cheesy flavor in the crust. Extra-sharp cheddar works well too if you want an even more intense flavor. Mild cheddar is fine but produces a more subtle taste. Yellow or white cheddar both work, so use whichever you prefer or have on hand.
3. Can I prepare this recipe ahead of time?
Yes, this is a great make-ahead dish. You can coat the chicken breasts and place them on the baking dish, then cover and refrigerate for up to 24 hours before baking. The coating actually adheres more firmly after a rest in the fridge. Simply pop it in the preheated oven when ready to cook.
4. How do I prevent the coating from falling off?
The most common reason the coating slides off is that the chicken was not dried properly before dredging. Pat the chicken thoroughly dry with paper towels before dipping in flour. Make sure to press the cheese-breadcrumb mixture firmly onto both sides rather than just rolling the chicken around. Also, avoid moving the chicken around too much in the pan once you’ve placed it.
5. Can I make this recipe without cornflakes?
Yes. The crushed cornflakes are optional and simply add extra crunch. The recipe works just as well with only breadcrumbs, and you can use panko instead of regular breadcrumbs if you want a crispier result without the cornflakes.
Read Also: Classic Chicken Salad Recipe
Cheddar Baked Chicken
Equipment
- 9×13-inch baking dish
- 3 shallow dishes or bowls - For the dredging stations
- Box grater or rotary cheese grater
- Instant-read meat thermometer
- Small saucepan or microwave-safe bowl - For melting butter
- Tongs or a fork - For dipping chicken
- Cutting board
- Paper towels - For drying the chicken
Ingredients
- 4 boneless, skinless chicken breasts - about 6 to 8 oz or 170 to 225 g each
- 1/2 cup unsalted butter - 113g, divided
- 1/2 cup all-purpose flour - 65g
- 1 tsp garlic powder
- 1 tsp onion powder
- 1/2 tsp smoked paprika
- 1/2 tsp salt
- 1/4 tsp black pepper
- 2 large eggs
- 2 tbsp whole milk
- 1 cup sharp cheddar cheese - 115g, freshly grated
- 3/4 cup plain dry breadcrumbs - 75g
- 1/4 cup crushed cornflakes - 15g, optional, for extra crunch
Instructions
- Preheat oven to 350°F (175°C). Melt 1/4 cup (57g) of butter and pour it evenly into a 9×13 inch baking dish. Place the dish in the oven for 2-3 minutes to heat the butter.
- Pat chicken breasts dry with paper towels. If very thick (over 1 inch), pound them to an even thickness between plastic wrap.
- In three shallow dishes, set up your stations: flour mixed with garlic powder, onion powder, smoked paprika, salt, and pepper; eggs beaten with milk; and cheddar cheese mixed with breadcrumbs and optional crushed cornflakes.
- Coat each chicken breast in flour, shaking off excess. Dip in egg wash, letting excess drip off. Press firmly into the cheese-breadcrumb mixture to adhere evenly, then place in the buttered baking dish.
- Top each coated breast with small pats of the remaining 1/4 cup (57g) cold butter. Bake for 35 to 45 minutes, until chicken reaches an internal temperature of 165°F (74°C) and the crust is golden.
- Remove from oven and let rest for 5 minutes before serving to keep the juices locked in.
Notes
- Dry the chicken thoroughly: Patting the chicken dry before dredging is one of the most important steps to achieve a crispy crust.
- Press the coating firmly: Press down firmly on both sides when adding the breadcrumb mixture rather than just rolling the chicken around.
- Grate your own cheese: Pre-shredded cheese contains anti-caking agents. Grating your own cheddar ensures a better melt and crispier crust.
- Don’t skip the butter in the pan: The melted butter on the bottom of the dish is key to crisping the underside of the chicken.
- Use an even thickness: Pound thicker chicken breasts to a uniform thickness so they cook evenly without drying out.
- Use a meat thermometer: This is the only way to guarantee juicy, safely cooked chicken every time.
- Rest before cutting: Let the chicken rest for 5 minutes after baking to allow the juices to redistribute.
- Make-Ahead Tip: Coat the chicken and refrigerate (uncovered) on the baking sheet for up to 24 hours before baking.
Final Thoughts
This Cheddar Baked Chicken Recipe has everything you want in a weeknight dinner: bold flavor, satisfying crunch, juicy chicken, and minimal cleanup.
It’s the kind of recipe you make once and immediately add to your regular rotation.
The combination of sharp cheddar, seasoned breadcrumbs, and a buttery baking dish creates a result that feels indulgent without being complicated or messy.
If you give this a try, leave a comment below and let me know how it turned out. Did you add any of your own twists? I’d love to hear what sides you paired it with, and don’t forget to share it with someone who could use a great new chicken dinner idea.
Recommended:
- Baked Chicken with Alfredo Sauce Recipe
- Honey Mustard Chicken Sheet Pan Dinner
- Chicken Parmesan Casserole Recipe
- Baked Salsa Chicken Recipe
- Chicken and Broccoli Recipe
- Stuffed Chicken Florentine Recipe
- Lemon Chicken Recipe
- Chipotle Chicken Recipe
- Chicken Tenders Recipe
- Grilled Lemon Pepper Chicken Recipe


