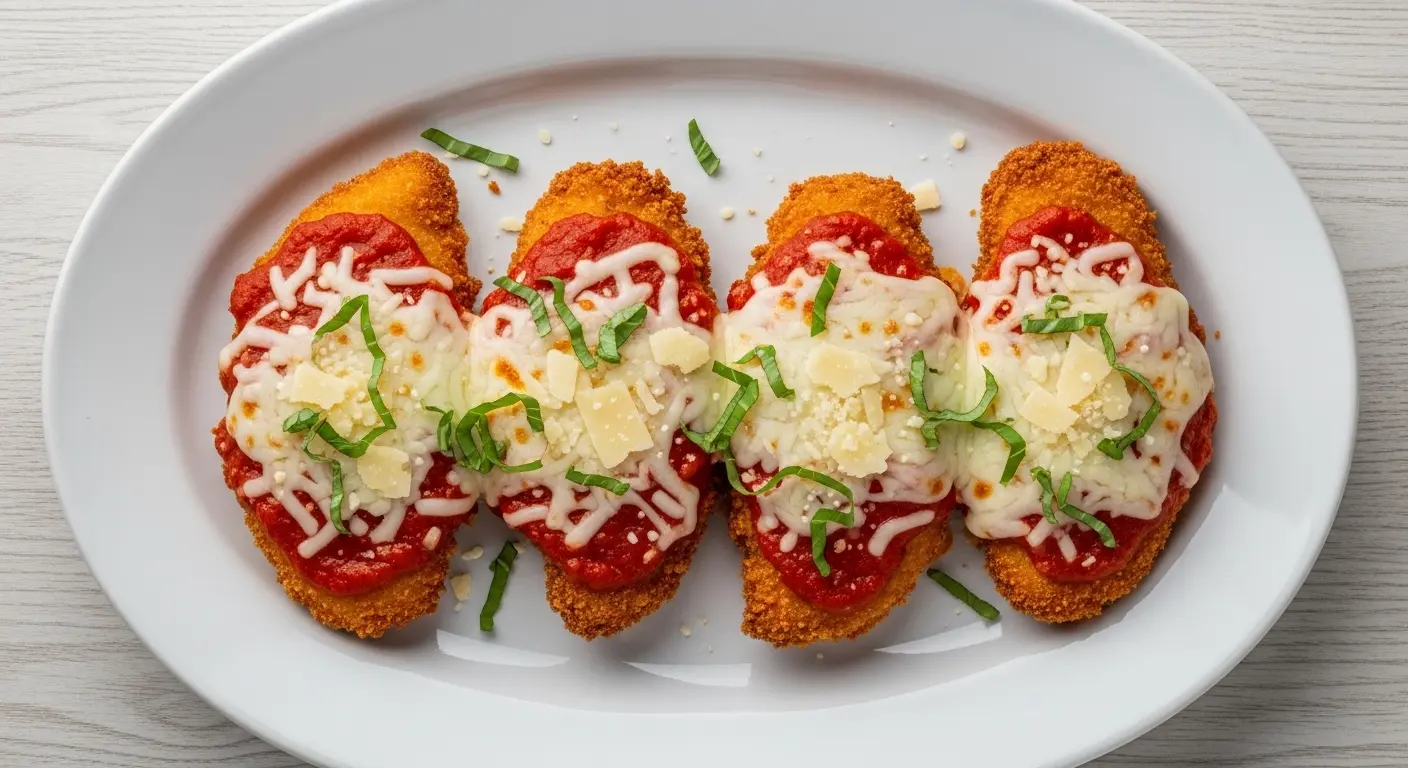
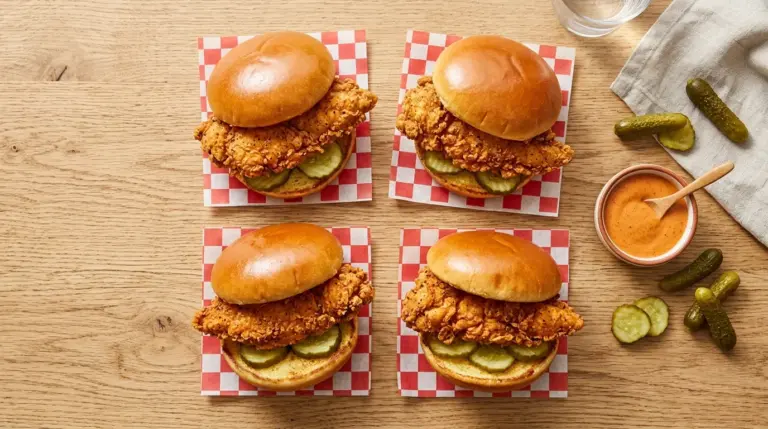
If you’ve been dreaming of the perfect Air Fryer Chicken Parmesan Recipe, this is the one you need to bookmark right now.
Golden, crispy panko-crusted chicken topped with rich marinara sauce and bubbling mozzarella cheese — it hits every note of the classic Italian-American comfort dish, without a drop of frying oil.
What makes this version stand out is the technique. Butterflying and pounding the chicken breast thin ensures even cooking all the way through, while a seasoned panko and Parmesan breading creates that irresistible crunch you’d expect from a restaurant plate.
The air fryer does all the heavy lifting here. In about 30 minutes, you get juicy chicken with a perfectly browned crust, melted cheese, and that deep, savory tomato flavor — all without heating up the whole kitchen.
Whether it’s a Tuesday night dinner rush or a weekend meal you want to feel proud of, this recipe delivers.
You might also enjoy this Classic Chicken Parmesan Recipe if you love the stovetop and oven version just as much.
Why You’ll Love This Air Fryer Chicken Parmesan Recipe
This is one of those weeknight dinners that genuinely feels special without demanding too much of your time or energy.
The air fryer cuts the cook time significantly compared to baking, and the result is a crispier crust than you’d get in the oven alone.
You also get to skip the splatter-fest that comes with pan-frying in oil, which means less cleanup and a much more relaxed cooking experience.
The seasoned panko breadcrumb coating — enhanced with grated Parmesan, Italian seasoning, garlic powder, and paprika — creates layers of flavor right in the crust itself, not just on top.
Butterflying the chicken breast means every piece cooks evenly, staying juicy on the inside while getting perfectly golden on the outside.
This recipe is also naturally lower in fat than the traditional deep-fried version, making it something you can feel good about putting on the dinner table regularly.
- Ready in about 30 minutes from start to finish
- No deep frying required — uses a light spray of cooking oil instead
- Crispy, golden panko crust that doesn’t go soggy
- Juicy, tender chicken inside every time
- Kid-friendly and crowd-pleasing
- Easy to customize with different cheeses, sauces, or toppings
- Perfect for meal prep and reheats beautifully in the air fryer
Another favorite for a similar crispy chicken experience: Air Fryer Chicken Cutlets Recipe
Ingredients
This recipe uses straightforward, easy-to-find ingredients that you likely already have in your pantry and fridge. The magic is all in how they’re layered together — each component plays a specific role in building that classic chicken parm flavor and texture.
- 2 large boneless, skinless chicken breasts (about 1.5 lbs / 680g total)
- 1/2 cup (60g) all-purpose flour
- 2 large eggs, beaten
- 1 cup (60g) panko breadcrumbs
- 1/2 cup (50g) freshly grated Parmesan cheese
- 1 teaspoon Italian seasoning
- 1/2 teaspoon garlic powder
- 1/2 teaspoon paprika
- 1/2 teaspoon salt
- 1/4 teaspoon black pepper
- Olive oil cooking spray
- 3/4 cup (180ml) marinara sauce (store-bought or homemade)
- 1 cup (115g) shredded mozzarella cheese
- Fresh basil or flat-leaf parsley, for garnish (optional)
Read Also: Air Fryer Chicken Breast Recipe
Kitchen Equipment Needed
You don’t need anything fancy beyond the air fryer itself. These are the tools that will make the process as smooth and mess-free as possible.
- Air fryer (basket-style or oven-style, at least 5-quart capacity)
- Meat mallet or rolling pin for pounding the chicken
- Instant-read meat thermometer
- 3 shallow bowls or dishes for the dredging station
- Cutting board and sharp knife
- Plastic wrap or parchment paper (for pounding the chicken)
- Tongs (for flipping the chicken in the air fryer)
- Small spoon or ladle (for adding marinara sauce)
The air fryer’s capacity is important here. If you’re making more than two chicken pieces, you’ll want a 5-quart or larger model to avoid overcrowding the basket, which can lead to steaming instead of crisping.
You might also love making Air Fryer French Fries as a side in the same appliance after the chicken is done!
Recommended Products for This Recipe
These are products I genuinely recommend based on quality and performance for this recipe specifically. They make a real difference in the final result.
1. COSORI 5.8-Quart Air Fryer
A larger-capacity air fryer basket gives you room to cook multiple chicken breasts without overlapping, which is key for getting that even, crispy crust every time. The COSORI model heats up fast and maintains consistent temperature throughout cooking.
2. Rao’s Homemade Marinara Sauce
Rao’s is consistently one of the best jarred marinara sauces available, made with high-quality Italian tomatoes and without added sugar or artificial flavors. Using a quality marinara makes a noticeable difference in the final flavor of the dish.
3. OXO Good Grips Stainless Steel Tongs
Silicone-tipped tongs let you flip the breaded chicken in the air fryer basket without scraping off the breading. These OXO tongs are a kitchen staple that handles everything from delicate fish to hot oven dishes.
4. Microplane Premium Classic Zester/Grater
Freshly grated Parmesan melts more evenly and tastes significantly better than the pre-grated stuff in a can. A Microplane grater makes it effortless to grate right over your bowl.
5. ThermoPro TP-03 Digital Instant Read Thermometer
Taking the guesswork out of chicken doneness is non-negotiable for food safety and juicy results. This thermometer reads in seconds and is inexpensive for the peace of mind it delivers.
For another air fryer chicken dinner idea, try this Air Fryer Chicken Tenders Recipe — it uses a very similar breading method and the whole family will love it.
Step-by-Step Instructions
Step 1: Prep and Pound the Chicken
- Place one chicken breast on a cutting board. Using a sharp knife, butterfly the breast by slicing it horizontally through the middle, stopping just before you cut all the way through, then open it like a book. Alternatively, slice it completely in half to create two separate thinner cutlets.
- Repeat with the second chicken breast so you end up with 4 thin cutlets total.
- Lay a sheet of plastic wrap or parchment paper over one cutlet to prevent tearing or splatter.
- Using a meat mallet or rolling pin, pound the chicken to an even thickness of about 1/2 inch (1.25cm). This ensures even cooking and a more tender final texture.
- Remove the plastic wrap and repeat with all cutlets.
- Pat each cutlet thoroughly dry with paper towels. This step is critical — excess moisture will steam the chicken in the air fryer instead of crisping it, leading to a soft, soggy crust.
Step 2: Set Up Your Dredging Station
- Set out three shallow bowls or dishes in a row on your counter.
- In the first bowl, add the 1/2 cup (60g) of all-purpose flour. Season lightly with a pinch of salt and pepper and stir to combine.
- In the second bowl, add the 2 beaten eggs. Whisk until fully blended with no streaks of yolk remaining.
- In the third bowl, combine the 1 cup (60g) of panko breadcrumbs, 1/2 cup (50g) of grated Parmesan, 1 teaspoon Italian seasoning, 1/2 teaspoon garlic powder, 1/2 teaspoon paprika, 1/2 teaspoon salt, and 1/4 teaspoon black pepper. Stir everything together until evenly mixed.
- Lightly spray the panko mixture with a thin coat of olive oil cooking spray, then toss to distribute. This helps the breadcrumbs brown more deeply and evenly in the air fryer.
Step 3: Bread the Chicken Cutlets
- Take one chicken cutlet and lay it into the flour, pressing gently so flour coats both sides. Shake off any excess — you want a thin, even dusting, not a thick layer.
- Transfer the floured cutlet to the egg bowl. Dip it, turning to coat both sides fully. Let any excess egg drip off before moving to the next station.
- Place the egg-coated chicken into the panko bowl. Press the breadcrumb mixture firmly onto both sides of the cutlet using your fingertips. The firm pressing is important — it helps the breading adhere and stay intact through the cooking process.
- Set the breaded cutlet aside on a clean plate or sheet pan. Repeat the flour-egg-panko process with the remaining cutlets.
- Do not stack the breaded chicken on top of each other, as this can cause the breading to stick together and pull off.
Step 4: Preheat the Air Fryer and Cook the Chicken
- Preheat your air fryer to 400°F (200°C) for 3 to 5 minutes. Preheating helps the chicken go into a hot environment immediately, which is key for achieving a crispy crust from the start.
- Spray the air fryer basket generously with olive oil cooking spray to prevent sticking.
- Place the breaded chicken cutlets in the basket in a single layer, ensuring no pieces are overlapping or touching. If your air fryer is smaller, cook in two batches rather than overcrowding.
- Spray the tops of the breaded chicken lightly with olive oil cooking spray.
- Air fry at 400°F (200°C) for 8 to 10 minutes. At the halfway mark (around 4-5 minutes in), open the basket and use tongs to carefully flip each cutlet. Spray the newly exposed side lightly with cooking spray, then close the basket and continue cooking.
- Cook until the breading is golden brown and the internal temperature of the thickest part reads 155°F (68°C) on an instant-read thermometer. The chicken will carry over to the safe internal temperature of 165°F (74°C) after the sauce and cheese are added in the next step.
Step 5: Add the Marinara and Mozzarella
- Once the chicken has reached 155°F (68°C) and is golden, open the air fryer basket.
- Using a small spoon or ladle, place about 2 to 3 tablespoons of marinara sauce onto the center of each cutlet, spreading it gently to cover most of the surface without going all the way to the edges (leaving a small border keeps the breading around the edges crispy).
- Divide the 1 cup (115g) of shredded mozzarella evenly among the cutlets, mounding it on top of the marinara.
- Close the air fryer and cook for an additional 2 to 3 minutes at 400°F (200°C), until the mozzarella is fully melted, bubbly, and beginning to show light golden spots.
- Check the internal temperature again — it should now read at least 165°F (74°C) to confirm the chicken is fully and safely cooked through.
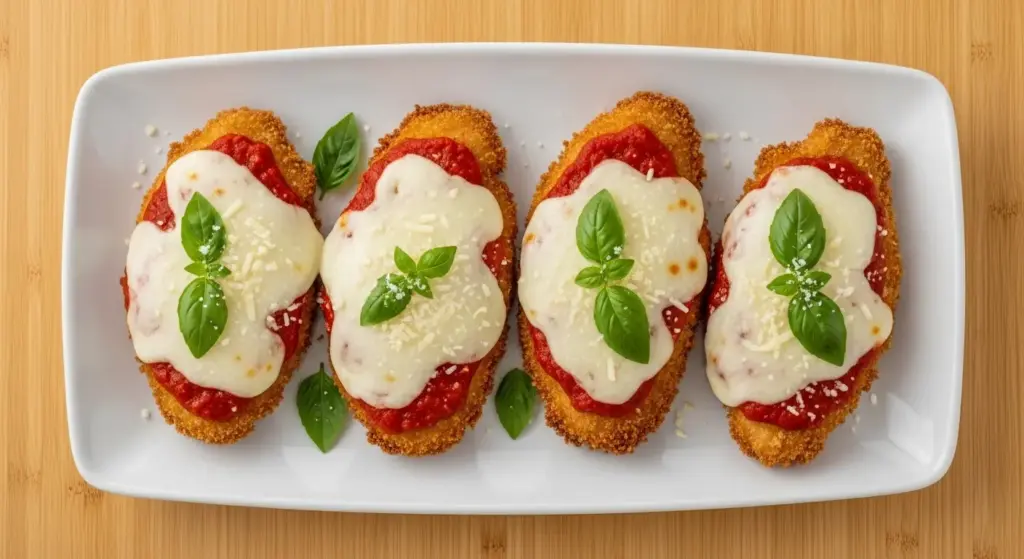
Step 6: Rest and Serve
- Using tongs, carefully remove each piece of chicken from the air fryer basket and transfer to a serving plate or a wire rack set over a baking sheet. Resting on a rack prevents the bottom of the chicken from steaming against a solid surface, helping it stay crisp.
- Allow the chicken to rest for 2 to 3 minutes before plating. This rest time lets the juices redistribute inside the meat for a more tender, juicy result.
- Garnish with freshly chopped basil leaves or flat-leaf parsley for a pop of color and fresh flavor.
- Serve immediately over pasta with extra marinara sauce on the side, or alongside your choice of vegetables.
Read Also: Air Fryer Chicken Drumsticks Recipe
Tips for Success
Getting the recipe right the first time comes down to a handful of details that make a big difference in the final result. These are the tips that consistently produce the crispiest, juiciest chicken parm every single time.
- Dry the chicken thoroughly. Patting the chicken dry with paper towels before breading is the single most important step for crispiness. Moisture is the enemy of a crunchy crust.
- Press the panko firmly. Don’t just toss the chicken in the breadcrumbs — press the coating firmly into the meat with your hands to make sure it sticks and stays intact through the cooking process.
- Don’t skip preheating the air fryer. Starting with a hot air fryer ensures the crust begins crisping immediately instead of slowly, which prevents sogginess.
- Cook in a single layer. Never stack or overlap chicken pieces. Overcrowding the basket traps steam and prevents crisping. Cook in batches if needed.
- Spray both sides with cooking oil. Lightly coating the breaded chicken with olive oil spray before and after flipping helps the panko brown deeply and evenly, mimicking the effect of frying.
- Use an instant-read thermometer. Chicken breasts can go from perfectly done to overcooked quickly. A thermometer takes all the guesswork out of it and ensures both food safety and juiciness.
- Add sauce sparingly and away from the edges. Too much marinara weighs the chicken down and makes the crust soggy. A moderate, centered amount keeps the edges of the breading golden and crisp.
For more crispy air fryer chicken inspiration, the Air Fryer Chicken Wings Recipe is another crowd-pleaser worth trying.
Serving Suggestions
Air Fryer Chicken Parmesan is incredibly versatile and pairs with a wide variety of sides and accompaniments that take dinner to the next level.
Pasta is the most classic serving choice — spaghetti or linguine tossed in warm marinara sauce creates the full traditional Italian-American experience that most people picture when they think of chicken parm.
A simple green salad dressed with Italian vinaigrette keeps things fresh and light, balancing the richness of the cheese and marinara beautifully.
- Over spaghetti or linguine with extra marinara sauce on the side
- With Creamy Mashed Potatoes for a comforting, hearty plate
- Alongside Roasted Broccoli for a simple, nutritious side
- Over a bed of zucchini noodles for a lower-carb option
- With Easy Garlic Bread for a restaurant-style meal at home
- Sliced and served in a hoagie roll for a chicken parm sandwich
- With a side of Broccoli Salad for something fresh and crunchy
Variations to Try
Once you’ve mastered the base recipe, it’s fun to experiment with small swaps that can take the dish in a slightly different direction. These variations all work beautifully with the air fryer method and the same basic breading technique.
- Provolone instead of mozzarella: Provolone melts just as well and adds a slightly sharper, more complex flavor that pairs wonderfully with the marinara.
- Spicy chicken parm: Add 1/2 teaspoon of crushed red pepper flakes to the panko mixture and use a spicy arrabbiata sauce instead of plain marinara for a kick of heat.
- Gluten-free version: Swap the all-purpose flour for a gluten-free flour blend and use gluten-free panko breadcrumbs. The texture is nearly identical to the original.
- Chicken thighs instead of breasts: Boneless, skinless chicken thighs are juicier and more forgiving to cook. Flatten them out with a mallet to an even thickness before breading.
- Extra cheesy: Add a layer of sliced fresh mozzarella or a sprinkle of freshly shaved Parmesan on top of the shredded mozzarella before the final air fry for maximum cheese pull and richness.
- Herbed crust: Add 1 teaspoon of dried basil and 1/2 teaspoon of dried oregano to the panko mixture for extra herby depth in the breading itself.
Another related recipe you might love: Air Fryer Chicken Thighs Recipe
Storage and Reheating
Chicken Parmesan is best eaten fresh right out of the air fryer, but leftovers store and reheat very well with the right technique. Here’s everything you need to know to make sure day-two chicken parm is still delicious.
- Refrigerator: Store leftover chicken in an airtight container for up to 3 to 4 days. If possible, store the chicken and any remaining pasta or sides separately to preserve the texture of the breading.
- Freezer: Fully cooked and cooled chicken parm pieces can be frozen in a single layer on a baking sheet first (about 1 hour), then transferred to a freezer-safe bag or container. Keeps well for up to 2 months.
- Reheating in the air fryer (best method): Preheat the air fryer to 360°F (182°C). Place the leftover chicken in the basket and heat for 4 to 5 minutes, or until the cheese is bubbly and the internal temperature reaches 165°F (74°C). The crust comes back surprisingly crispy.
- Reheating in the oven: Place chicken on a baking sheet and warm at 375°F (190°C) for 10 to 12 minutes until heated through. Cover loosely with foil for the first 8 minutes to prevent drying out, then uncover for the last few minutes to re-crisp.
- Avoid microwaving: The microwave will make the breading soft and rubbery. The air fryer or oven is always the better reheating choice for crispy breaded chicken.
Read Also: Air Fryer Bacon Wrapped Chicken Breast Recipe
Nutritional Facts
The following estimates are based on one serving (one chicken cutlet with sauce and cheese), assuming the recipe makes 4 servings. Actual values will vary depending on the specific brands and exact portion sizes used.
| Nutrient | Per Serving |
|---|---|
| Calories | ~420 kcal |
| Protein | ~42g |
| Total Fat | ~17g |
| Saturated Fat | ~7g |
| Carbohydrates | ~22g |
| Dietary Fiber | ~2g |
| Sugar | ~4g |
| Sodium | ~780mg |
| Cholesterol | ~155mg |
| Calcium | ~35% DV |
| Iron | ~12% DV |
Compared to a traditionally deep-fried restaurant version, air fryer chicken parm typically has significantly less total fat and fewer calories while delivering the same satisfying experience.
You might also enjoy: Air Fryer Chicken Nuggets Recipe
Health Benefits of Key Ingredients
This dish isn’t just delicious — it also brings some genuinely good nutrition to the table, thanks to a few key ingredients that are working hard behind the scenes.
The chicken breast is the star here from a nutritional standpoint. It’s one of the leanest protein sources available, providing a large amount of high-quality, complete protein with very little saturated fat, which supports muscle repair and keeps you feeling full and satisfied long after the meal.
- Chicken breast: An excellent source of complete protein, B vitamins (especially B6 and niacin), phosphorus, and selenium. Lean protein supports muscle maintenance, immune function, and sustained energy.
- Parmesan cheese: While it’s used in modest amounts, Parmesan is surprisingly nutrient-dense. It provides calcium, protein, and phosphorus, and its strong flavor means a little goes a very long way without needing a lot of added salt.
- Mozzarella cheese: A good source of calcium and protein, mozzarella also contains conjugated linoleic acid (CLA), a type of fat that has been studied for its potential role in supporting body composition.
- Marinara (tomato sauce): Tomatoes are rich in lycopene, a powerful antioxidant associated with reduced risk of certain chronic conditions. Cooked tomatoes actually have higher lycopene bioavailability than raw ones, making the sauce more nutritionally potent.
- Eggs: The egg in the dredging station contributes protein, vitamin D, choline, and B12 to the dish. Choline is particularly important for brain function and liver health.
- Garlic powder: Even in small amounts, garlic contains allicin, a sulfur compound studied for its antimicrobial and cardiovascular-supportive properties.
For another protein-packed air fryer dinner, the Air Fryer Salmon Recipe is a fantastic option loaded with omega-3 fatty acids.
Frequently Asked Questions
1. What temperature should I cook chicken parmesan in the air fryer?
Cook the chicken at 400°F (200°C) for the main cooking phase. This high temperature is what drives the crispy, golden crust without drying the chicken out. Once you add the sauce and mozzarella, continue at the same 400°F (200°C) for 2 to 3 more minutes to melt the cheese through.
2. How do I keep the breading from falling off in the air fryer?
The breading stays put when you follow the dredging order properly: flour first, then egg, then panko. The flour creates a dry surface the egg can cling to, and the egg acts as the glue that holds the panko. Pressing the panko firmly into the chicken with your hands (rather than just tossing) makes a significant difference. Also make sure the chicken is completely dry before dredging.
3. Can I use chicken thighs instead of chicken breasts?
Absolutely. Boneless, skinless chicken thighs are actually more forgiving because they have a higher fat content, which keeps them moist even if they cook slightly longer than intended. Flatten them to an even thickness with a mallet before breading, and add 2 to 3 extra minutes of cooking time since thighs are typically thicker than pounded chicken breasts.
4. Can I make this recipe ahead of time?
You can bread the chicken cutlets up to 24 hours in advance and store them (uncovered) on a wire rack in the refrigerator. The uncovered refrigeration actually helps the breading dry out slightly, which promotes better crisping during cooking. Do not add the sauce and cheese until right before air frying — adding them too early will make the crust soggy.
5. Do I need to flip the chicken in the air fryer?
Yes, flipping halfway through is important. Most air fryers heat from the top, which means the bottom of the chicken gets less direct heat. Flipping at the halfway mark ensures both sides get evenly golden and crispy. Use tongs and work gently to avoid knocking off the breading.
Read Also: Air Fryer Chicken Parmesan Recipe
Final Thoughts
This Air Fryer Chicken Parmesan Recipe delivers everything you love about the classic dish — the crunchy crust, the gooey cheese, the savory tomato sauce — in a fraction of the time and without any of the oil-frying mess.
Once you try it this way, it’s hard to go back to the stovetop version for a weeknight dinner.
The technique is simple enough for beginners and reliable enough for anyone who’s been cooking for years. It’s the kind of recipe that goes into the permanent rotation the first time you make it.
Give it a try tonight and see how quickly it becomes a household favorite. If you loved this recipe, drop a comment below to let us know how it turned out, and share it with anyone who could use a quick, satisfying chicken dinner idea!
Recommended:
- Air Fryer Chicken Wings Recipe
- Easy Fried Chicken Recipe
- Chicken Cacciatore Recipe
- Chicken Marsala Recipe
- Baked Ziti Recipe
- Marinara Sauce Recipe
- Easy Lasagna Recipe
- Stuffed Shells Recipe
- Italian Meatballs Recipe
- Air Fryer Zucchini Fries Recipe