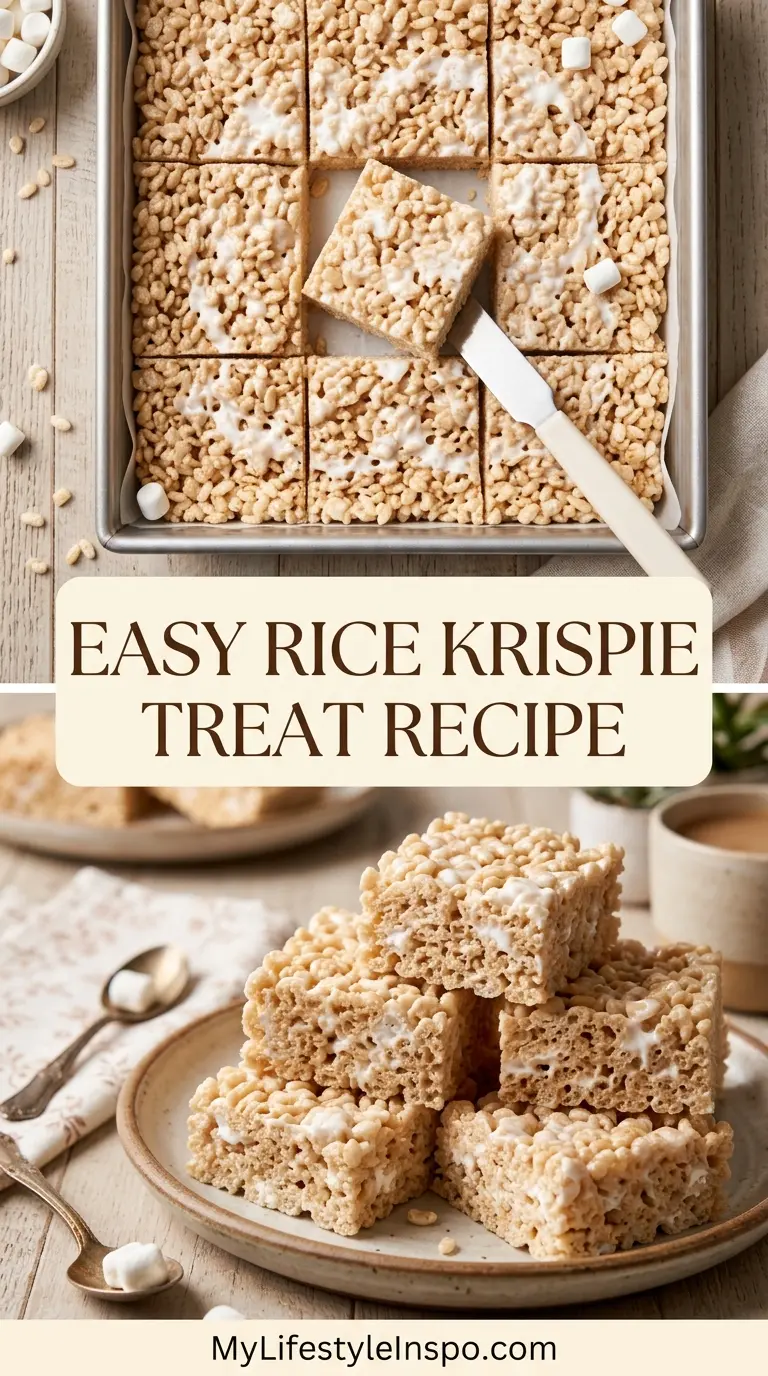
If you have been craving a nostalgic no-bake dessert that comes together in minutes, this easy rice krispie treat recipe is exactly what you need.
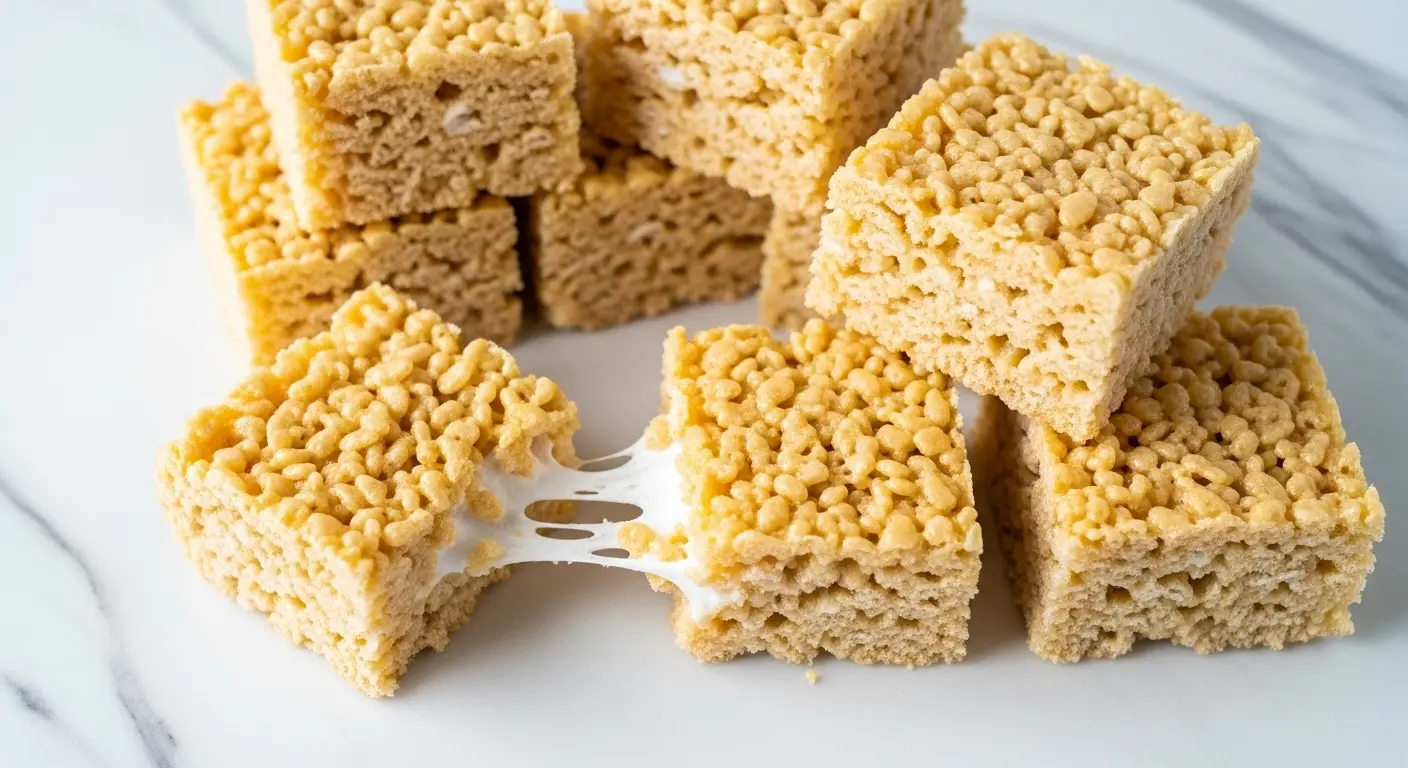
With just three pantry staples, butter, marshmallows, and Rice Krispies cereal, you can make a batch of perfectly gooey, chewy, and irresistible treats that disappear fast.
This is the kind of recipe that brings back warm childhood memories and still manages to impress at every bake sale, party, or weeknight dessert spread.
The secret to getting that ideal chewy, stretchy texture (instead of the hard, crumbly kind that so many people end up with) is all in a few simple technique tweaks: low heat, extra marshmallows, a touch more butter, and knowing exactly when to stop stirring.
Keep reading and you will learn everything you need to make the best batch of your life.
For another nostalgic classic, check out the Original Rice Krispie Treat Recipe for the time-honored version straight from the back of the cereal box.
Why You’ll Love This Easy Rice Krispie Treat Recipe
This recipe checks every single box for a quick, crowd-pleasing dessert.
It takes about 20 minutes from start to finish, and most of that time is just waiting for the treats to cool and set.
No oven is needed, no complicated technique is required, and the ingredient list is delightfully short.
These treats are endlessly customizable, too. You can dress them up with chocolate drizzle, mix in sprinkles, or keep them classic and plain.
They are also an excellent project to make with kids. The process is straightforward, safe (with adult supervision at the stovetop), and the results are something everyone gets excited about.
Whether you are making a quick after-school snack or preparing for a party, this recipe delivers every time.
- Ready in about 20 minutes from start to finish
- Only 3 main ingredients required
- No baking needed at all
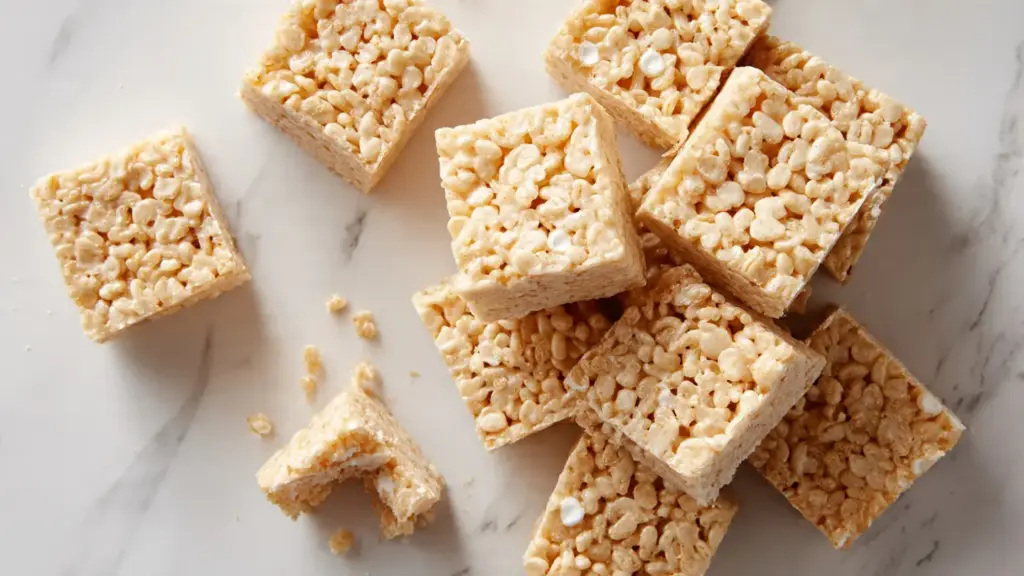
- Perfectly gooey and chewy, not hard or crumbly
- Easily customizable with mix-ins or toppings
- Kid-friendly and fun to make together
- Stays fresh for several days at room temperature
You might also enjoy the Gooey Rice Krispie Treat Recipe if you want an extra soft, over-the-top version packed with even more marshmallow.
Ingredients
The magic of this recipe lies in keeping things simple and using just a little more of the good stuff. Using an extra tablespoon or two of butter and a few extra marshmallows makes a noticeable difference in the final texture, giving you that soft, bakery-style chewiness rather than a stiff slab.
- 3 tablespoons (42g) unsalted butter, plus extra for greasing the pan
- 1 package (10 oz / 283g) mini marshmallows, divided (set aside about 1 cup / 50g for later)
- 6 cups (168g) Rice Krispies cereal
- 1/4 teaspoon vanilla extract (optional, but adds a lovely depth of flavor)
- 1/4 teaspoon fine salt (optional, balances the sweetness beautifully)
Read Also: Peanut Butter Rice Krispie Treat Recipe
Kitchen Equipment Needed
You do not need any fancy gadgets to make these treats. A large pot and a sturdy spatula are really all that stand between you and a perfect pan of chewy, golden-edged perfection.
- Large heavy-bottomed saucepan or pot (at least 4-quart / 3.8-liter capacity)
- Rubber spatula or wooden spoon (heat-resistant silicone is ideal)
- 9×13-inch baking pan (or 9×9-inch for thicker treats)
- Parchment paper or aluminum foil for lining the pan
- Measuring cups and spoons
- Butter knife or bench scraper for cutting
Read Also: Microwave Rice Krispie Treat Recipe
Recommended Products for This Recipe
These are products I genuinely recommend based on quality and the difference they can make in your finished treats.
1. KitchenAid Silicone Spatula Set
A heat-resistant silicone spatula is essential for folding sticky marshmallow mixture without tearing or leaving chunks behind. The KitchenAid set offers excellent flexibility and durability and makes cleanup much easier than using a wooden spoon. It is a versatile tool you will reach for constantly in the kitchen.
2. USA Pan Nonstick 9×13 Baking Pan
A quality nonstick baking pan ensures your treats release cleanly without sticking or tearing. The USA Pan version has a durable nonstick coating and reinforced edges that prevent warping over time. It produces even, flat treats every single time.
3. Jet-Puffed Mini Marshmallows (Party Size)
Mini marshmallows melt faster and more evenly than large ones, which means less risk of scorching and a smoother final texture. The Jet-Puffed brand is the gold standard for consistency and melt quality. Buying the larger party-size bag gives you plenty to work with and some left over for extra-gooey batches.
4. OXO Good Grips Bench Scraper
Cutting through a pan of set Rice Krispie treats cleanly is much easier with a bench scraper than a standard knife. The OXO version has a comfortable grip and a sharp, wide blade that cuts through the treats in one clean press. It also doubles as a pan cleaner and dough tool for other recipes.
For more fun no-bake treat inspiration, check out this No Bake Cookie Recipe that uses the same simple, stovetop approach.
Step-by-Step Instructions
Step 1: Prepare Your Pan
- Line your 9×13-inch (23x33cm) baking pan with parchment paper, leaving a few inches of overhang on the sides. This overhang acts as handles later, making it easy to lift the whole slab out for cutting.
- Lightly grease the parchment paper with softened butter or a quick spray of nonstick cooking spray.
- Set the prepared pan aside near your stovetop so it is ready the moment you need it. Having everything within arm’s reach is critical because once the marshmallows melt, you need to work quickly.
Step 2: Measure Out Your Cereal
- Measure 6 cups (168g) of Rice Krispies cereal and pour them into a very large bowl. Make sure the bowl is large enough to hold everything comfortably, because you will be folding the marshmallow mixture into this bowl.
- Set the bowl aside. Do not add anything else to it yet.
Step 3: Melt the Butter
- Place your large saucepan over low heat. Low heat is the single most important factor in this recipe. High heat scorches the butter and marshmallows, leading to a stiff, hard texture instead of a soft, chewy one.
- Add 3 tablespoons (42g) of butter to the pan.
- Let the butter melt slowly, stirring occasionally, until it is fully melted but not browned. This should take about 2 to 3 minutes on low heat.
- If the butter starts to turn golden or smell nutty, your heat is too high. Remove the pan from the burner for a moment and reduce the heat before continuing.
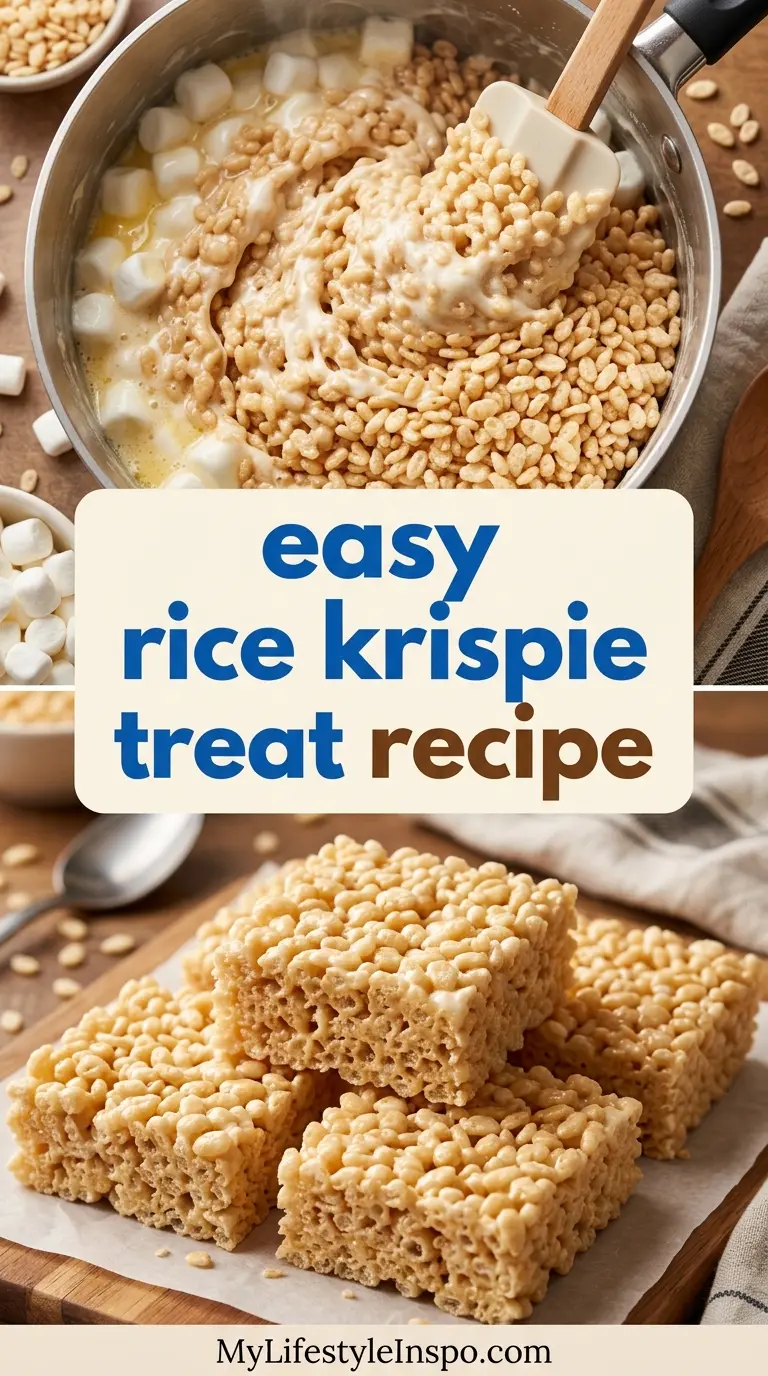
Step 4: Melt the Marshmallows
- Once the butter is melted, add most of the mini marshmallows to the pan. Reserve about 1 cup (50g) of marshmallows to stir in at the end. This trick of adding cold marshmallows at the end is what creates those beautiful pockets of soft, gooey marshmallow throughout the finished treats.
- Stir the marshmallows constantly with your silicone spatula, using slow, sweeping motions from the bottom of the pan.
- Keep the heat on low the entire time.
- Continue stirring until the marshmallows are almost completely melted, with just a few small lumps remaining. This takes about 3 to 5 minutes. Do not wait for them to be perfectly smooth before moving to the next step.
- If you are using vanilla extract, stir in 1/4 teaspoon now, right before removing from the heat.
- If you are using salt, add 1/4 teaspoon now as well. This small amount of salt enhances every other flavor in the treat without making it taste salty.
- Remove the pan from the heat immediately.
Step 5: Add the Reserved Marshmallows
- Pour the reserved 1 cup (50g) of cold mini marshmallows into the hot marshmallow mixture in the pan.
- Stir gently for just a few seconds. You do not want these to fully melt. They should stay slightly lumpy, creating those irresistible gooey pockets throughout the treats.
- Work quickly from this point forward, as the mixture will begin to stiffen as it cools.
Step 6: Add the Rice Krispies
- Pour the entire marshmallow mixture over the Rice Krispies cereal in your large bowl.
- Using your spatula, fold the cereal into the marshmallow mixture using gentle, scooping motions. Avoid pressing or compacting the mixture. The goal is to coat every piece of cereal with marshmallow without crushing the cereal or squishing the air out of the mixture.
- Keep folding until no dry cereal remains at the bottom of the bowl and the mixture looks evenly combined. This should take no more than about 60 to 90 seconds. Speed matters here; the longer you take, the stiffer the mixture becomes.
Step 7: Press Into the Pan
- Immediately transfer the mixture to your prepared baking pan.
- Using your lightly buttered hands or a buttered piece of parchment paper, gently press the mixture into an even layer. Pressing too hard compacts the treats and makes them dense and hard instead of light and chewy. Use a soft, even pressure, similar to patting a pillow flat rather than pressing with full force.
- Do not smooth the top completely flat; a slightly uneven, lumpy surface actually signals that the treats have not been over-compressed.
Step 8: Let Set and Cut
- Allow the treats to cool and set at room temperature for at least 30 minutes before cutting. Do not refrigerate them to speed up the process; cold temperatures make the marshmallow stiffen too much and lose that perfect chewy texture.
- Once fully set, use the parchment paper overhang to lift the slab out of the pan and onto a cutting board.
- Cut into squares using a bench scraper or sharp knife. For clean cuts, press straight down rather than dragging the blade. Lightly buttering the blade between cuts also helps prevent sticking.
This technique pairs beautifully with the approach used in the Rice Krispie Treat Recipe with Marshmallow Fluff for an even richer, stretchier result.
Tips for Success
A few simple adjustments separate average rice krispie treats from truly exceptional ones. Keep these pointers in mind every time you make a batch, and you will never go back to the old way.
- Always use low heat. This is the number one rule. High heat burns the butter and oversets the marshmallow, resulting in a hard, crumbly treat.
- Don’t skip the reserved marshmallows. Adding that extra cup of cold marshmallows at the end creates gooey pockets of softness that elevate the whole texture.
- Grease everything. Butter your hands, your spatula, and the parchment paper before pressing the mixture into the pan. This prevents sticking without adding flavor.
- Press gently, not firmly. Over-pressing is the most common mistake. It compacts the treats and removes all the airiness that makes them pleasantly chewy.
- Use fresh marshmallows. Old, slightly hardened marshmallows do not melt as smoothly and lead to a grainier texture. Always check that your bag is soft and fluffy before starting.
- Work fast. The mixture stiffens quickly once removed from the heat. Have everything pre-measured and your pan ready before you even turn on the stove.
For a fun twist on the classic, the Fruity Pebbles Rice Krispie Treat Recipe swaps the cereal for colorful fruity pebbles with spectacular results.
Serving Suggestions
These treats are wonderful on their own, but they also pair beautifully with other desserts and drinks for a festive spread.
- Serve alongside a warm cup of Hot Chocolate for the ultimate cozy combination.
- Arrange on a dessert platter with Peanut Butter Blossom Cookies and No Bake Cookies for a party-ready cookie table.
- Cut into small, bite-sized pieces and serve as a topping or side to a scoop of vanilla ice cream.
- Wrap individual squares in clear cellophane tied with ribbon for homemade party favors or bake sale packaging.
- Set them out at birthday parties or school events; they are always the first thing to disappear from the dessert table.
These treats work beautifully alongside a Dirt Pudding for a fun, no-bake dessert bar that kids absolutely love.
Variations to Try
Once you have mastered the classic, the fun really begins. These treats are an incredibly flexible base for all kinds of delicious twists.
- Chocolate drizzle: Melt semi-sweet chocolate chips and drizzle over the top of the cooled treats before cutting. Let the chocolate set at room temperature for about 15 minutes.
- Peanut butter swirl: Stir 1/4 cup (64g) of creamy peanut butter into the melted marshmallow mixture before adding the cereal. It adds a nutty, rich layer of flavor.
- Sprinkle edition: Fold a handful of rainbow sprinkles into the mixture right before pressing into the pan for a festive, colorful look.
- S’mores version: Add 1/2 cup (85g) of mini chocolate chips and a handful of crushed graham crackers to the cereal before folding in the marshmallow mixture.
- Brown butter version: Let the butter cook slightly past melted, just until it turns golden and smells nutty, before adding the marshmallows. It adds a rich, caramel-like depth that is incredible.
- Seasonal colors: Use colored marshmallows or tinted sprinkles to match any holiday or occasion.
For a completely plant-based version of these classic treats, the Vegan Rice Krispie Treat Recipe uses dairy-free butter and vegan marshmallows with equally delicious results.
Storage and Reheating
These treats stay fresh and chewy for longer than you might expect, provided they are stored properly. The key is keeping air out, which prevents them from drying out and becoming stiff.
- Store cut treats in an airtight container at room temperature for up to 3 days.
- Place a sheet of parchment or wax paper between layers to prevent them from sticking together.
- Do not refrigerate, as cold temperatures cause the marshmallow to harden and lose its chewiness.
- For longer storage, wrap individual squares tightly in plastic wrap and place in a zip-top freezer bag. Freeze for up to 6 weeks.
- To enjoy frozen treats, simply leave them at room temperature for 15 to 20 minutes. They thaw quickly and taste just as good as fresh.
- If a treat has hardened slightly, you can microwave it for 5 to 8 seconds to soften it back up. Be careful not to overheat, or the marshmallow will melt completely.
Read Also: Single Serve Rice Krispie Treat Recipe
Nutritional Facts
The following information is an estimate based on 1 treat, assuming the batch is cut into 16 equal squares from a 9×13-inch pan. Actual values may vary depending on the size of your cuts and any additional mix-ins or toppings used.
| Nutrient | Per Serving (1 treat) |
|---|---|
| Calories | ~130 kcal |
| Total Fat | 2.5g |
| Saturated Fat | 1.5g |
| Cholesterol | 6mg |
| Sodium | 95mg |
| Total Carbohydrates | 27g |
| Sugars | 14g |
| Protein | 1g |
These treats are naturally low in fat and protein, making them a sweet indulgence best enjoyed in moderation. The majority of the calories come from sugar in the marshmallows and carbohydrates in the cereal.
For another simple treat to add to your no-bake dessert rotation, try the Muddy Buddy Recipe for a chocolatey, powdered-sugar-coated snack that is just as easy to make.
Health Benefits of Key Ingredients
These are not exactly a health food, but a few of the core ingredients do offer some functional value worth noting.
Rice Krispies cereal is a fortified grain product, meaning it is enriched with vitamins and minerals during processing.
Each serving of the cereal typically provides meaningful amounts of B vitamins including niacin, thiamin, riboflavin, and folic acid, which support energy metabolism.
- Iron: The cereal is a source of iron, a mineral essential for healthy red blood cells and oxygen transport throughout the body.
- B Vitamins: Thiamin, riboflavin, niacin, and B6 are all present in the fortified cereal, supporting cellular energy production.
- Low Fat: With only about 2.5 grams of fat per treat, this dessert is relatively low in fat compared to most baked goods.
- Butter (in small amounts): Provides fat-soluble vitamins A, D, E, and K, which support immune function, bone health, and vision.
- Marshmallows: While primarily sugar, marshmallows are fat-free and contain small amounts of collagen-derived gelatin.
Another fun treat to make at home using simple pantry ingredients is the Bourbon Balls Recipe, a rich, fudgy no-bake confection perfect for adults.
Frequently Asked Questions
1. Why did my Rice Krispie treats turn out hard?
The most common culprit is too much heat. When butter and marshmallows are cooked over medium or high heat, the sugar in the marshmallows begins to break down and recrystallize, which creates a hard, stiff texture after cooling. Always use low heat and remove the pan from the burner the moment the marshmallows are melted. Over-pressing the treats into the pan is another frequent cause of hardness.
2. Can I use large marshmallows instead of mini marshmallows?
Yes, you can absolutely use large marshmallows. The ratio is generally 40 large marshmallows to replace one standard 10-ounce bag of mini marshmallows. Large marshmallows take a little longer to melt since they are denser, so keep the heat low and be patient. The Rice Krispie Treat Recipe with Large Marshmallows is a great resource if you want specific guidance for using that size.
3. Can I make these ahead of time?
Absolutely. Rice Krispie treats are an excellent make-ahead dessert. You can make them up to 2 days in advance and store them in an airtight container at room temperature. For best results, cut them the day you plan to serve them, or cut and wrap individual squares in plastic wrap to prevent them from drying out along the cut edges.
4. How do I keep the treats from sticking to my hands while pressing?
Lightly butter your hands before pressing the mixture into the pan. You can also lightly butter a sheet of parchment paper and use that as a barrier between your hands and the sticky mixture. Reapply butter as needed if things start sticking again. A lightly oiled spatula works well too, especially for spreading the mixture evenly along the edges of the pan.
5. Can I make these gluten-free?
Traditional Rice Krispies cereal contains malt flavoring derived from barley, which means it is not certified gluten-free. However, there are certified gluten-free puffed rice cereals available at most grocery stores and online that work perfectly as a substitute in this recipe. The texture and flavor are nearly identical. Check labels carefully to ensure both the cereal and marshmallows you use are certified gluten-free if you are baking for someone with celiac disease or a serious gluten sensitivity.
Read Also: Copycat Starbucks Rice Krispie Treat Recipe
Easy Rice Krispie Treats
Equipment
- Large heavy-bottomed saucepan or pot - at least 4-quart / 3.8-liter capacity
- Rubber spatula or wooden spoon - heat-resistant silicone is ideal
- 9×13 inch baking pan - or 9×9-inch for thicker treats
- Parchment paper - or aluminum foil for lining the pan
- Measuring cups and spoons
- Butter knife or bench scraper - for cutting
Ingredients
- 3 tablespoons unsalted butter - 42g, plus extra for greasing the pan
- 10 ounces mini marshmallows - 283g, divided; set aside about 1 cup (50g) for later
- 6 cups Rice Krispies cereal - 168g
- 1/4 teaspoon vanilla extract - optional, adds depth of flavor
- 1/4 teaspoon fine salt - optional, balances sweetness
Instructions
- Line a 9×13-inch baking pan with parchment paper, leaving overhang on the sides. Lightly grease the parchment with butter or nonstick spray and set near the stovetop.
- Measure 6 cups of Rice Krispies cereal into a very large bowl and set aside.
- Melt 3 tablespoons of butter in a large saucepan over low heat, stirring occasionally, until fully melted but not browned, about 2-3 minutes.
- Add most of the marshmallows to the pan, reserving about 1 cup for later. Stir constantly over low heat until almost completely melted, about 3-5 minutes. Stir in vanilla and salt if using, then remove from heat.
- Stir the reserved cold marshmallows into the hot mixture for just a few seconds, leaving them slightly lumpy for gooey pockets throughout the treats.
- Pour the marshmallow mixture over the cereal and fold gently with a spatula until no dry cereal remains, about 60-90 seconds. Avoid crushing the cereal.
- Transfer the mixture to the prepared pan. Using buttered hands or buttered parchment paper, gently press into an even layer without compacting too firmly.
- Let the treats set at room temperature for at least 30 minutes. Lift out using the parchment handles and cut into squares with a bench scraper or sharp knife.
Notes
- Always use low heat: High heat burns the butter and oversets the marshmallow, resulting in a hard, crumbly treat.
- Don’t skip the reserved marshmallows: Adding that extra cup of cold marshmallows at the end creates gooey pockets of softness that elevate the whole texture.
- Grease everything: Butter your hands, your spatula, and the parchment paper before pressing the mixture into the pan to prevent sticking.
- Press gently, not firmly: Over-pressing is the most common mistake. It compacts the treats and removes all the airiness that makes them pleasantly chewy.
- Use fresh marshmallows: Old, slightly hardened marshmallows do not melt as smoothly and lead to a grainier texture.
- Work fast: The mixture stiffens quickly once removed from the heat. Have everything pre-measured and your pan ready before you start.
- Storage: Store cut treats in an airtight container at room temperature for up to 3 days. Place parchment between layers to prevent sticking. Do not refrigerate.
- Freezing: Wrap individual squares tightly in plastic wrap and place in a zip-top freezer bag for up to 6 weeks. Thaw at room temperature for 15-20 minutes before serving.
- Reheating: If treats harden slightly, microwave for 5-8 seconds to soften. Be careful not to overheat or marshmallow will melt completely.
- Variations: Try chocolate drizzle, peanut butter swirl, rainbow sprinkles, s’mores version with graham crackers and chocolate chips, or brown butter for a rich caramel-like flavor.
Final Thoughts
This easy rice krispie treat recipe is proof that the simplest recipes are often the most beloved.
Three ingredients, one pot, and about 20 minutes are all it takes to create something that brings genuine joy to everyone who takes a bite.
The trick is in the details: low heat, a little extra butter, those reserved marshmallows stirred in at the end, and a light hand when pressing everything into the pan.
Once you nail those small but mighty techniques, you will make the best batch of your life every single time.
Give this recipe a try and let us know how it turned out in the comments below. Did you add any fun mix-ins or toppings? We would love to hear all about it!
Recommended:
- Original Rice Krispie Treat Recipe
- Peanut Butter Rice Krispie Treat Recipe
- Fruity Pebbles Rice Krispie Treat Recipe
- Gooey Rice Krispie Treat Recipe
- Microwave Rice Krispie Treat Recipe
- Rice Krispie Treat Recipe with Large Marshmallows
- Single Serve Rice Krispie Treat Recipe
- Muddy Buddy Recipe
- No Bake Cookie Recipe
- Monster Cookie Bars Recipe


