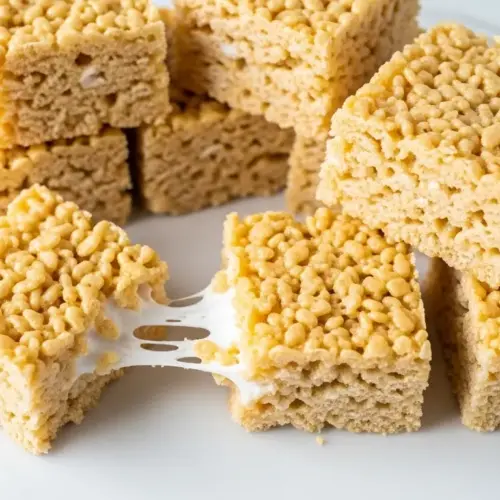
Easy Rice Krispie Treats

These classic no-bake treats come together in just 20 minutes with only three pantry staples. The secret to perfectly gooey, chewy squares every time is low heat, extra marshmallows, and a gentle hand when pressing them into the pan.
Equipment
- Large heavy-bottomed saucepan or pot - at least 4-quart / 3.8-liter capacity
- Rubber spatula or wooden spoon - heat-resistant silicone is ideal
- 9x13 inch baking pan - or 9x9-inch for thicker treats
- Parchment paper - or aluminum foil for lining the pan
- Measuring cups and spoons
- Butter knife or bench scraper - for cutting
Ingredients
- 3 tablespoons unsalted butter - 42g, plus extra for greasing the pan
- 10 ounces mini marshmallows - 283g, divided; set aside about 1 cup (50g) for later
- 6 cups Rice Krispies cereal - 168g
- 1/4 teaspoon vanilla extract - optional, adds depth of flavor
- 1/4 teaspoon fine salt - optional, balances sweetness
Instructions
- Line a 9x13-inch baking pan with parchment paper, leaving overhang on the sides. Lightly grease the parchment with butter or nonstick spray and set near the stovetop.
- Measure 6 cups of Rice Krispies cereal into a very large bowl and set aside.
- Melt 3 tablespoons of butter in a large saucepan over low heat, stirring occasionally, until fully melted but not browned, about 2-3 minutes.
- Add most of the marshmallows to the pan, reserving about 1 cup for later. Stir constantly over low heat until almost completely melted, about 3-5 minutes. Stir in vanilla and salt if using, then remove from heat.
- Stir the reserved cold marshmallows into the hot mixture for just a few seconds, leaving them slightly lumpy for gooey pockets throughout the treats.
- Pour the marshmallow mixture over the cereal and fold gently with a spatula until no dry cereal remains, about 60-90 seconds. Avoid crushing the cereal.
- Transfer the mixture to the prepared pan. Using buttered hands or buttered parchment paper, gently press into an even layer without compacting too firmly.
- Let the treats set at room temperature for at least 30 minutes. Lift out using the parchment handles and cut into squares with a bench scraper or sharp knife.
Notes
- Always use low heat: High heat burns the butter and oversets the marshmallow, resulting in a hard, crumbly treat.
- Don't skip the reserved marshmallows: Adding that extra cup of cold marshmallows at the end creates gooey pockets of softness that elevate the whole texture.
- Grease everything: Butter your hands, your spatula, and the parchment paper before pressing the mixture into the pan to prevent sticking.
- Press gently, not firmly: Over-pressing is the most common mistake. It compacts the treats and removes all the airiness that makes them pleasantly chewy.
- Use fresh marshmallows: Old, slightly hardened marshmallows do not melt as smoothly and lead to a grainier texture.
- Work fast: The mixture stiffens quickly once removed from the heat. Have everything pre-measured and your pan ready before you start.
- Storage: Store cut treats in an airtight container at room temperature for up to 3 days. Place parchment between layers to prevent sticking. Do not refrigerate.
- Freezing: Wrap individual squares tightly in plastic wrap and place in a zip-top freezer bag for up to 6 weeks. Thaw at room temperature for 15-20 minutes before serving.
- Reheating: If treats harden slightly, microwave for 5-8 seconds to soften. Be careful not to overheat or marshmallow will melt completely.
- Variations: Try chocolate drizzle, peanut butter swirl, rainbow sprinkles, s'mores version with graham crackers and chocolate chips, or brown butter for a rich caramel-like flavor.